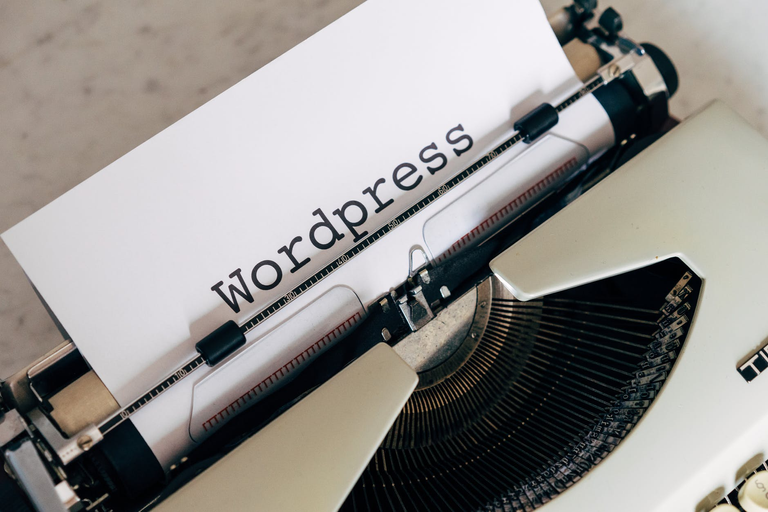
What is WordPress?
In essence, WordPress is the simplest and most popular way to create your own website or blog. In fact, WordPress has over 43.0% of all websites on the internet. Yes, WordPress will likely work with more than one in four websites you visit.
Kinsta hosting receives hundreds of five-star ratings. Every day.
Trustpilot logo
I love the level of expertise and support that Kinsta's live chat engineers provide. 24x7 support is a real game-changer for large sites, especially eCommerce.
Leland ZarembaLeland Zaremba
Find out why
On a slightly more technical level, WordPress is an open-source content management system licensed under the GPLv2, which means anyone can use or modify WordPress software for free. A content management system is basically a tool that makes it easy to manage important aspects of your website, such as content, without the need to know anything about programming.
The bottom line is that WordPress makes building a website accessible to anyone, even non-developers.
Register Domain For WordPress
We will do little if we do not have a domain, an address that users can type in their browser to visit us and browse our content. So the first thing is to decide which domain name to use, with what extension (.com, .es, .org…), and where we will register it. For positioning, it is advisable to use the .com, although we can choose some other variant. Do a preliminary study on the competition you have for according to which words and try to avoid hyphens and names that are difficult to memorize (the same thought of Google in its day, so don’t pay too much attention to me;)) If you are going to create a personal blog, you can use your name.
It is common to register domains with a company (Think Solutions, Plusdominios, OVH, etc.) and use another service provider for hosting. This allows you to centralize all your domains in one place and to be able to move your pages to different hosts without making domain transfers, which costs money. However, remember that you must wait 60 days to move it to another registrar since you register a domain.
Hosting WordPress
Once we have a domain for WordPress, we need hosting, a folder with a certain space hosted on a reliable server. That ensures 100% availability, that is that our website is always accessible. To install WordPress, it is essential that the hosting support us for PHP and MySQL databases. If your hosting cannot offer you this, I recommend changing now to install WordPress. In AulaCM, we have tried quite a few hostings; the conclusions drawn so far are quite obvious: good hosting is paid. The prices are not very high in any case, and you will save yourself problems. A few hosting companies specialize in WordPress, so any problem you have regarding a certain plugin, database, etc., can solve it for you more quickly. Highly recommended if you are starting in this and do not want complications. We recommend Webempresa.
As a general rule, new domain registration is usually included in the price when you hire a new hosting. However, it will compensate you for hiring everything from the same provider if you go for the complete package (domain + hosting). Once the purchase is performed, you will receive an email with your access data. Keep it well and have it well on hand because you will need to resort to it a lot in the first moment. Some relevant data that will come to you in it are:
Access data to your hosting control panel. Generally, you will find two types of control panels: cPanel and Parallels Plesk. They are similar, and it shouldn’t take you long to become familiar with the most common functions.
Mail servers. This email will provide you with the information to create your first email account and the data to configure desktop clients such as Outlook or Mail.
FTP data. The FTP access to your server allows you to see the folder directories that you create and the content of each one, and it is similar to a Windows explorer. You will need the server's name (during the first days, you will use an IP number, and shortly after, you will be able to use your domain for WordPress as a server name, it has to do with the propagation of DNS). This FTP user will have been created for you by default and the password. You can additionally access your folders over the control panel.
They will also specify the DNS of your new server to redirect other domains that you have registered outside of that hosting to it.
DNS: Configuring The Domain For WordPress
DNS responds to Domain Name Server, and it is how a domain, like mydomain.com, redirects me to the correct folder hosted on my server and containing my web page. It would be too hard.
Learn the address of a web page by the IP number that identifies that folder within a server, type XXX.XX.XXX.XXX. A roll.
They also allow me to point my domains to the folder that I choose. Therefore, if you already have your WordPress domain registered in another hosting, it is time to access the control panel of that domain and assign the DNS of my new server. Remember that they can take a while to propagate, that the browser has enough information to know how to take me from that domain name to the corresponding IP. It can take 24 hours, but in reality, a couple is usually enough.
Suppose you want to add the domain to your hosting, for example, a domain that you have in another registrar or to install another website from scratch in WordPress. In that case, you will have to attach the domain in the Additional Domain cPaneltu control panel. It is a simple process that you will find in the option “Domains> Additional domains (or addon domains).” Then, all that remains is to assign Ar the DNS from your server to your domain, wherever it is registered. Keep in mind that as a common rule, a hosting has the main domain installed in the root folder, and the other domains are considered additional, although they work in the same way as the main one, only that they each go in their folder.
Ftp Access: File Manager
When you install WordPress, you are going to have a good time uploading files to your server. And in the future, too, whether it be WordPress itself, a template that you have downloaded, or a plugin that cannot be installed most only. CPanel WordPress access
One of the two options you have for FTP access is through your control panel, your cPanel, your Plesk, or equivalent. There you will find a section referring to files and the “File Manager” button. Through it, we can connect to the folders that we want to control. Once in them, you can upload files, move them, delete them, and more. The option of uploading files in .zip and extracting them once they have been uploaded is useful.
Ftp Access: Ftp Client Or Manager
The other option to move between the desktop of your computer and the folder of your server is through FTP programs, clients, managers. It is the option that I usually use because I manage better than through the File Manager of the control panel. The most common is FileZilla, although there are quite a few, and they are similar.
The access configuration steps will be common to all:
First, please create a new site or new connection and enter the data provided by our hosting provider (the FTP access data).
Do not connect as an anonymous user.
Use the normal option. If everything is accurate, you should be able to connect to your root folder.
Later we will review the content of your hosting when we install WordPress.
WORDPRESS INSTALLATION
Downloading WordPress.org
Well, recapping, we have a registered domain pointing to a DNS that our hosting provider has given us. We have also contracted a hosting service. We have received an email with all the necessary information to operate by FTP, connect to the control panel, create email accounts, and more … Perfect. We have seen how to connect by FTP, and the connection works.
It is time to visit WordPress.org and download the file that contains the system, the software that we will install on the server. It’s about 6 megabytes, so it should be fast. My recommendation is to download the English version, even if you see a link that suggests you download it in Spanish. They are probably my thing, but after some installations, I have always decided to install the original language, English, and then change only the files necessary to display the control panel in the desired language. While the first is downloading, you can download the second in Spanish, something like «es_ES« included in the file name.
Once the .zip (English) is downloaded, we extract the content and upload everything (EVERYTHING contained in the “WordPress” folder) to the public folder of our server. Be careful, do not upload the .zip unless you do it through the file explorer of the control panel. If you do it through an FTP manager, upload only the content of the «WordPress» folder. What is the public folder where I have to upload the files? Well, you will recognize it easily, even though each server may have a different name, they always respond to one of these: «public_html, «http_docs, «httpdocs, «www_public« … In any case, this information is usually provided to you in that email that we talked about before, the one that the hosting service provider sends us when hiring it. We will see a phrase like this:
Enter your domain by FTP, and once the session is started, you will access the root folder, where you will see a folder named: httpdocs. Click twice on the httpdocs folder, which is where you MUST UPLOAD THE WEB.
If we have doubts, it is best to send an email to the hosting, and they will surely respond shortly.
Creating The Database In WordPress And The User
While those thousand-odd files that make up our basic WordPress installation are being uploaded, we can advance a couple of things in our server control panel. Specifically, we are going to create the database and its corresponding user. This step is essential for our Worpdress to start working, and it must be done well. Don’t worry, and it’s easy. I recommend that you write down the data that we will use now on a piece of paper; in a while, we will need it, and with so many accounts and passwords, it is not difficult to get involved.
As soon as you look at it, you will see a section referring to MySQL databases in your control panel. That is where we will create a new one. The first thing is to give it a name, make sure that it identifies in some way with the domain for which we are creating it, just so that you are clear which one is one if you have several and want to export one to make backup copies and others. As a general rule, the name of the database Creates MySQL database in WordPress will have the following form: “mydomain_bexample.” The first part of the name is created automatically on most WordPress servers. We press the button to create a database, and we have the first part completed. As we said before, the second part is to create a user for that database in WordPress. In that same window, you have a section to create users, write a name and a password (remember that the name is also identified somehow with the domain, just so that you have it clear), and create the user. We only need to assign this user the control of the database that we created first; utilizing the option «add user to the database, «we select the fields and assign. It will ask you what permissions we want to give the user, and we will always select “all permissions.” Done! To something else.
Installing WordPress Through The Browser
Database created with user and all assigned permissions, WordPress files uploaded to the public folder of our server. Yes? We will install WordPress, which is to tell those files where the database is, what it is called, and who will use it. Try typing your domain in a browser, and you should see a screen with the WordPress logo and some boxes where you must complete the information in the database. If you can’t get to the installation home screen by typing in the domain, likely, DNS has not propagated yet. Try typing:
http://mydomain.com/wp-admin/install.php
Once in the installation screen, you will see the following:
Install WordPress
Database name (database name). Remember the prefix with the “_,” style “mydomain_dbeexample.”
Database user name. Take a look at the paper where you wrote this down, and if you didn’t, check-in your panel in the MySql databases section.
Database password.
Database Host. Refers to the location of the database. As a general rule, the default “localhost” will work for us. However, for certain (few) hostings, it is necessary to change them. For example, I have seen it in 1and1. You will find this information again in your control panel, in the database that you have created. In the 1and1 example, it is usually something like this dbxxxxxxxxx.db.1and1.com. I repeat that the normal thing is that you do not have to touch it; localhost works on most servers for WordPress.
Table Prefix
We leave this option by default with the prefix wp_. Although, for more complicated installations, this data can be modified, which refers to the header of the name of the tables in our WordPress database, at the moment, it does not matter to us.
Once this data has been added, the connection between our WordPress and the database should be established without problems. If it doesn’t work for some reason, the first thing to do would be to check that we have entered the values correctly, carefully rewriting the database name, username, and password. We should also make sure if the localhost value is correct, ask your hosting. At this point, what we are doing is modifying a file within our WordPress, specifically the «wp-config-sample.php, «which you will find at the top level of your public folder. If you open that file with a text editor (I recommend Textwrangler, only for Mac, or NoteTab for Win, the Light version is free), you will see that there are some spaces to complete this data that we were filling in:
Database-settings-WordPress-mini
// ** MySQL settings — You can get this info from your web host ** //
/ ** The name of the database for WordPress * /
define (‘DB_NAME’, ‘mydomain_exampledb’);
/ ** MySQL database username * /
define (‘DB_USER’, ‘myuser_domain’);
/ ** MySQL database password * /
define (‘DB_PASSWORD’, ‘password’);
/ ** MySQL hostname * /
define (‘DB_HOST’, ‘localhost’);
If you have problems, you can try to fill them in by hand with the text editor, save the file as “wp-config.php,” upload it to your public folder, and that’s it.
If everything has gone well up here, and we are going to finish the installation. We click on next or submit and go to the screen. You’ve done almost everything. It only remains for us to complete the basic information of our site: the title, the user, change that of “admin” that you will have set by default and give it your username style “N0m3redeU7uaRi0” or some complicated combination that you can think of and be able to Remember, take the security of your new WordPress seriously, so do something similar with the password. Access your email, which will be used only for administrative purposes, basically to receive notifications
You are on your site and click, or not, on the box to allow your site to be indexed by search engines. If you’re still shaping it and creating content, you might want to wait a bit to activate this feature later.
Done, your WordPress admin panel should display smoothly in English, and your live site will be seen with the default template.
Now... That's an extensive guide! Well done!
Aw, Thank you so much!