In this tutorial, you will learn how to set up a custom domain for your social shop on Waivio.
When creating your social shop on Waivio, you have two choices: you can create a subdomain with social.gifts (for example, camping.social.gifts or fitness.social.gifts). This is the easiest way to create your social shop, and we’ve covered this option in previous tutorials (check out Launching Your Social Shopping Website). Alternatively, if you prefer to use a unique domain for a more personalized touch, here are the steps to set it up.
Summary:
Part 1. Choosing Domain Name
Part 2. Registering a Dedicated Email
Part 3. Purchasing a Domain on Cloudflare
Part 4. Setting A DNS Record to Point to Waivio
Part 5. Launching Your Social Shop on Waivio
Part 6. Setting HTTPS
Part 7. www Site Redirect
Part 1. Choosing Domain Name
Let’s begin by searching for an available domain name that aligns with your brand. You can check domain availability on a site such as GoDaddy (but we will not be buying the domain yet). If you already own a domain with a registrar, please check out the article on how to set it up.
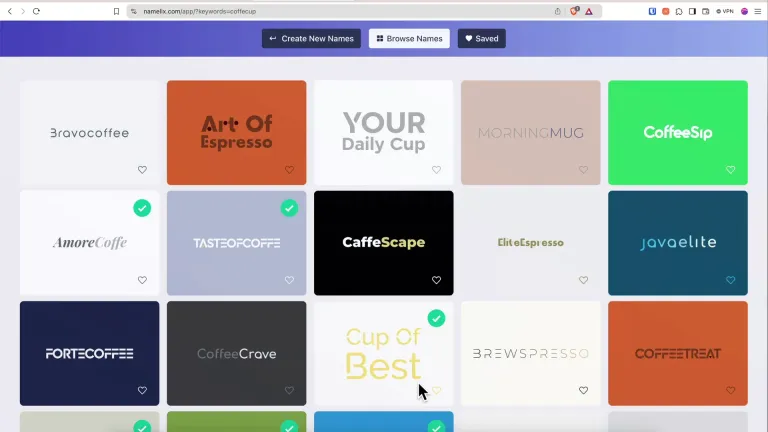
• In GoDaddy, enter your desired domain name in the search bar and review the available options. GoDaddy provides good recommendations for domain names. For example, if your shop focuses on coffee, you might try ourcoffeecup.com or similar variations. You can also use ChatGPT or brand generators such as Namelix.com to brainstorm names.
• Once you find an available domain that aligns with your brand, note it down.
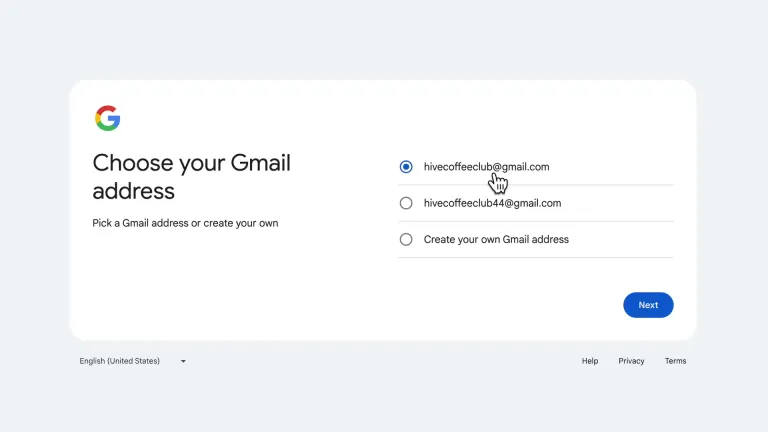
Part 2. Registering a Dedicated Email
Now, let’s create a new Google email address with a name matching your desired domain. We will need this during the registration process of the domain. It’s a good practice to create a dedicated email to manage a website. This email can be used for domain registration and integration with tools like Google Analytics.
Additionally, if you decide to sell your project in the future, having all domain services registered to the same email address allows you to transfer the entire project to the new owner much faster and easier. You would just transfer the email and password, which the new owner can easily change to gain full control over the project.

Part 3. Purchasing a Domain on Cloudflare
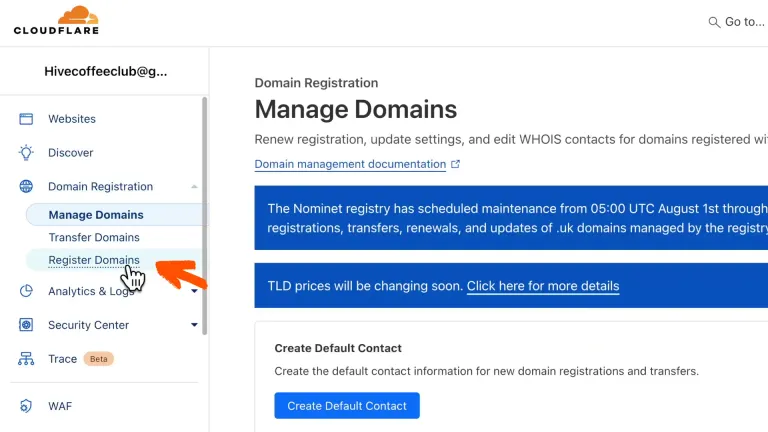
With your domain name selected and your dedicated email address ready, it’s time to register your domain. While there are many domain registrars, here I'm showing the registration process with Cloudflare. Cloudflare offers no-markup pricing for domains and provides free protection from DDoS attacks, which is a requirement for Waivio. Registering a new domain on Cloudflare also simplifies the configuration process.
• Go to Cloudflare. Sign up with the email you’ve just created. Choose a Free Plan if prompted.
• Click “Add a website or application”. Navigate to “Domain Registration” -> “Register Domain,” and search for your domain.
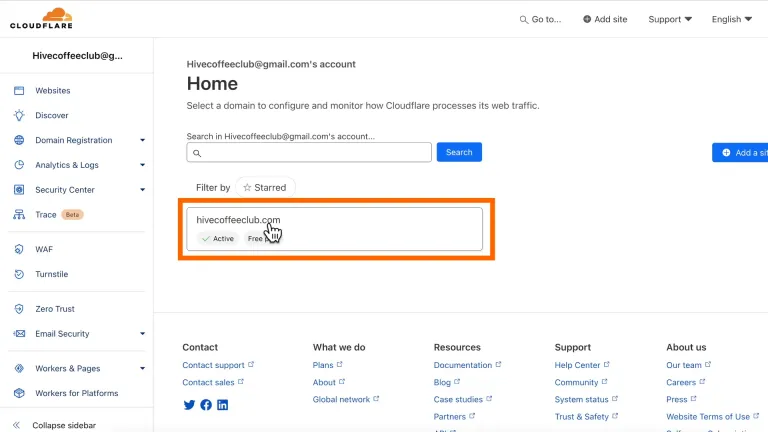
You can purchase the domain for the desired duration (such as one year, two years, and so on). You will need to fill out some personal information before registering it.
Part 4. Setting A DNS Record to Point to Waivio
Now that you have a domain registered on Cloudflare, the next step is to connect your domain to your Waivio social shop. This is done by setting up DNS records.
• From the Cloudflare home dashboard, click on your domain.
• In the side menu, click on “DNS” -> “Records”
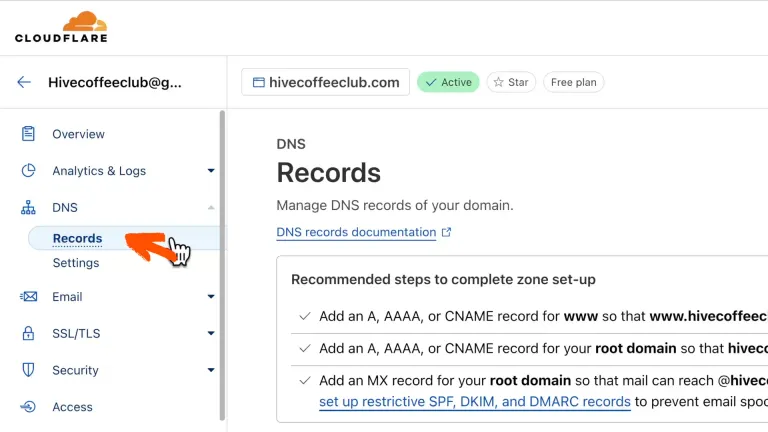
• Look for the record type labeled “A”. For a new domain, the A record is usually missing and needs to be created. Click “Add record”.
• For the name, put the symbol @ (this represents the root domain), and for the IPv4 address, enter 206.189.200.117
• Click “Save”

Part 5. Launching Your Social Shop on Waivio
After configuring the DNS record, go to your Waivio account -> Tools -> Navigate to Create (under Websites) -> Choose “Custom Domain”, select the website template (social.gifts, for example), and enter your domain.
Click “Create new website”. If the DNS record is set up correctly, your social shop will be created.
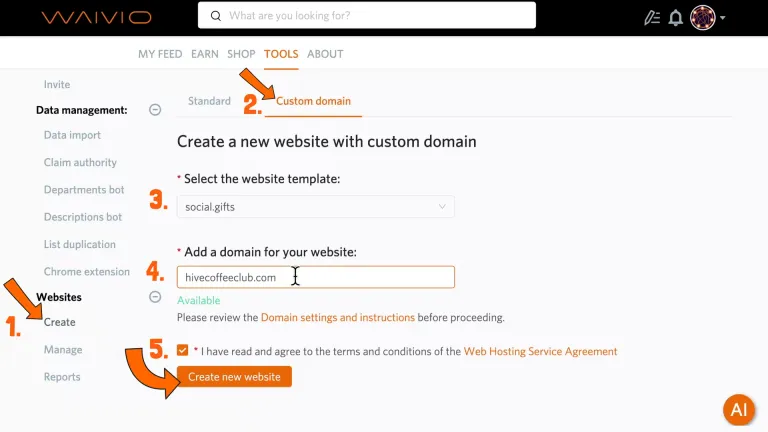
If you get an error message, double-check the spelling of the domain you’ve entered on Waivio and confirm that your DNS records are correctly set up on Cloudflare.
Once your social shop is live, you can personalize it. Check out our series of Social.Gifts tutorials to learn how.
Now, let’s configure more advanced settings to ensure your site is secure and visitors are correctly redirected to your site.
Part 6. Setting HTTPS
To enhance security, in Cloudflare’s domain dashboard:
Click on “SSL/TLS,” then “Edge Certificates”
Scroll down to the “Always Use HTTPS” section. Toggle to activate.
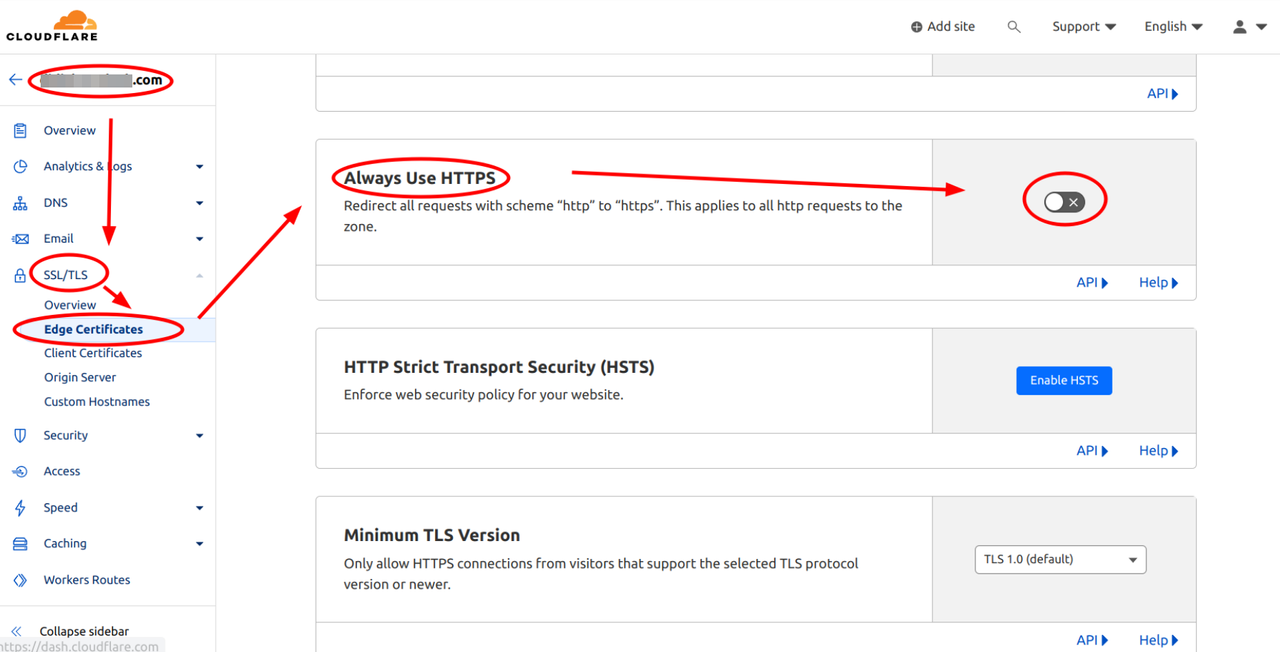
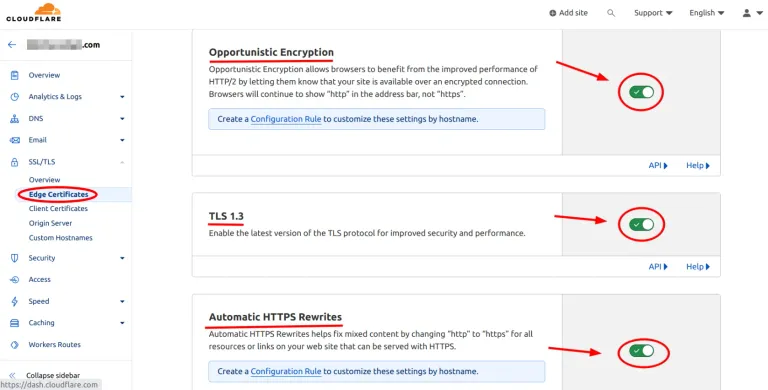
- Also, verify that the toggles are active for “Opportunistic Encryption,” “TLS 1.3,” and “Automatic HTTPS Rewrites”
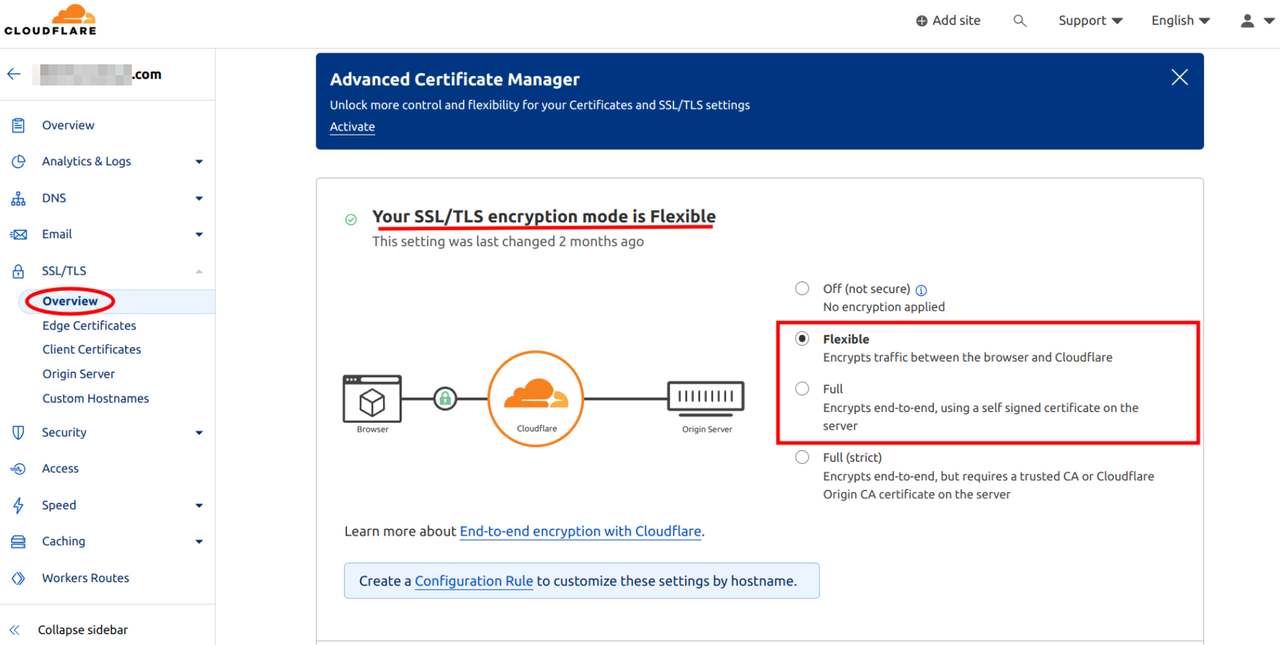
6.1 Encryption Mode
• Next, in the “SSL/TLS” section, navigate to the “Overview”
• Ensure that your SSL/TLS encryption mode is set to either “Flexible” or “Full”
Part 7. www Site Redirect
Now let’s configure the settings so that if users enter “www” before your site, they will be redirected to your site.
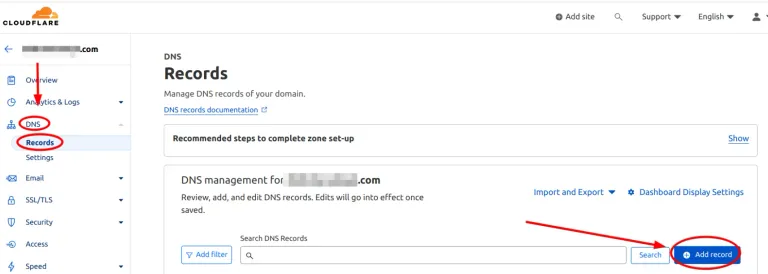
7.1 Setting DNS
In Cloudflare’s domain dashboard, navigate to the “DNS” and then “Records”.
Click “Add record”
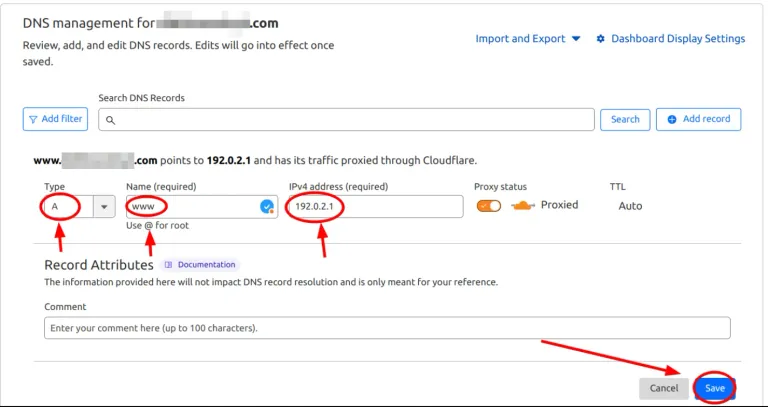
Set the name to “www”
For type, choose “A” and in the “IPv4 address” field, enter “192.0.2.1”
Alternatively, you can choose “AAAA” and in the “IPv6 address” field enter “100::”
You can use either IPv4 or IPv6. Both options will work, so choose based on your preference and needs.
- Click “Save”
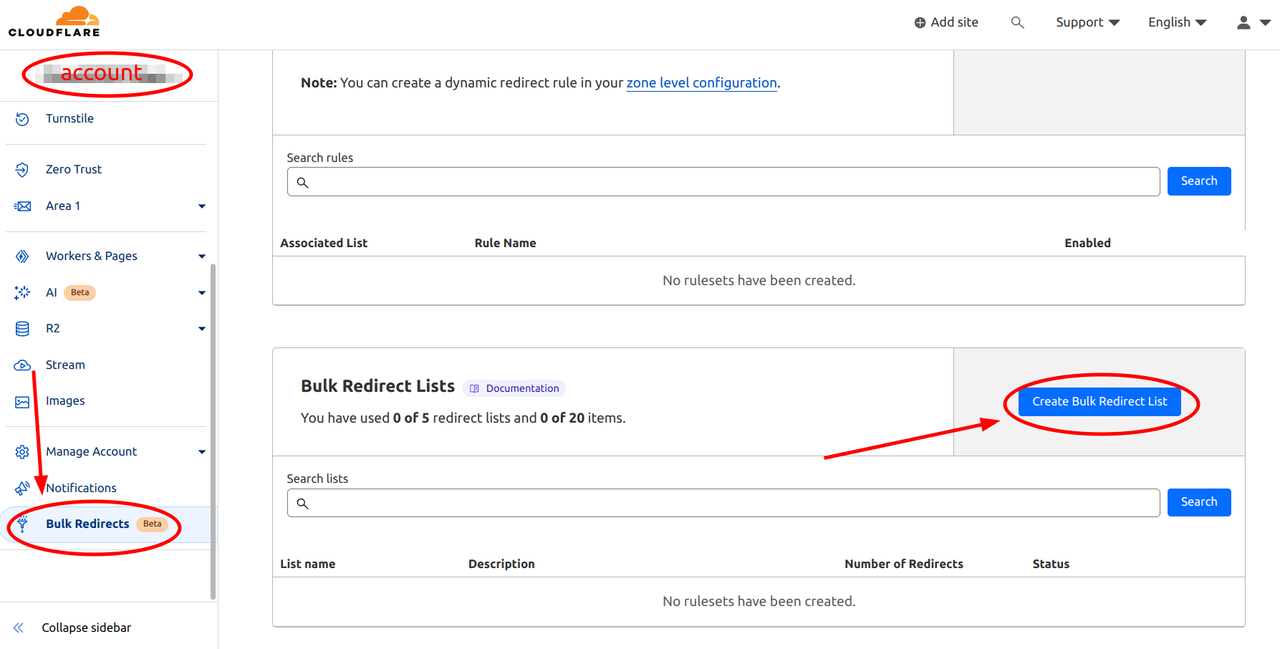
7.2 Configuring Redirection Using Bulk Redirects
Exit the domain configuration and in Cloudflare’s main dashboard, scroll down to “Bulk Redirects”
Click on “Create Bulk Redirects List”
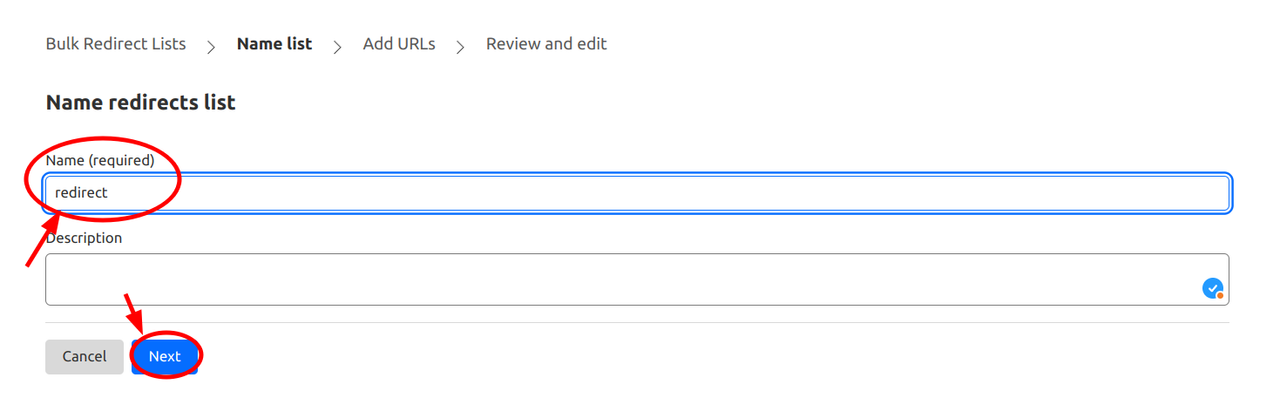
- Provide a name for the list (such as “redirect”) and click “Next.”
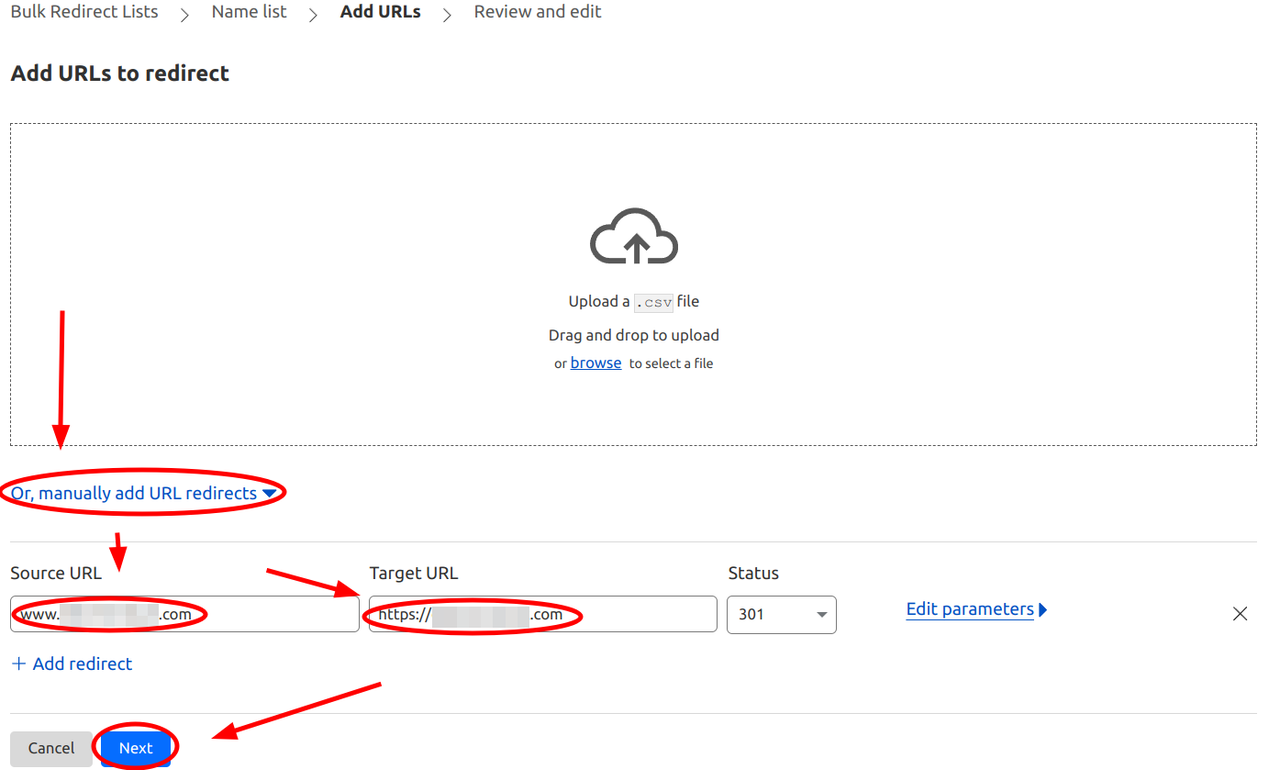
Select “Or, manually add URL redirects”
For the Source URL, enter your full domain with the “www” (e.g., www.example.com).
For the Target URL, input the original domain, including “https://” and without “www” (e.g., https://example.com).
Click “Next”
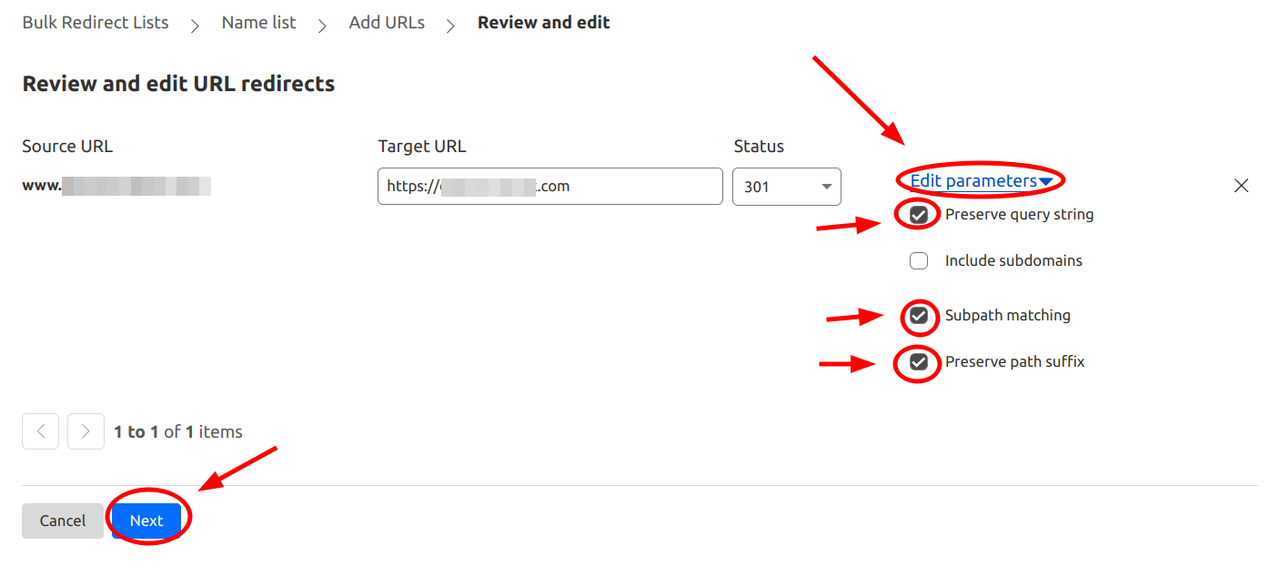
Choose “Edit parameters”
Activate the following checkboxes:
Preserve query string
Subpath matching
Preserve path suffix
- Click “Next”
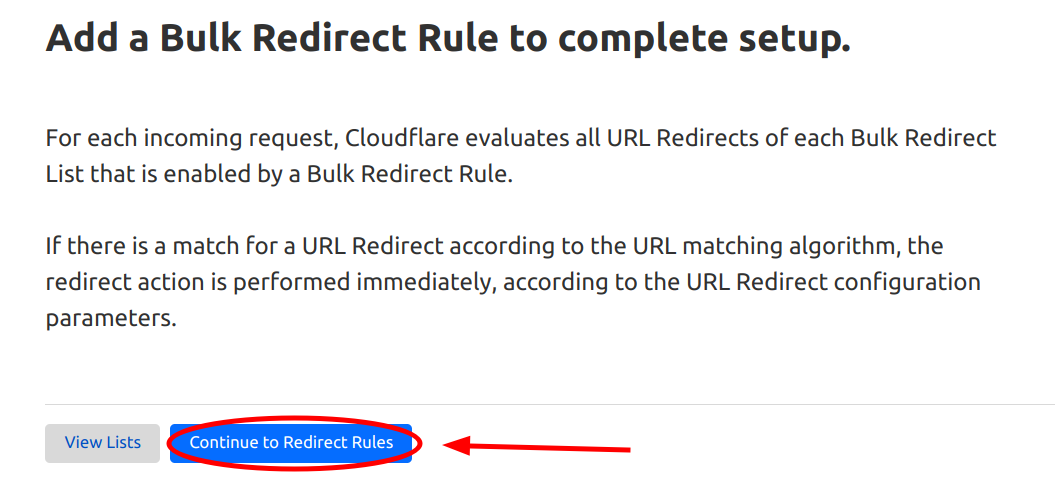
- Click on “Continue to Redirect Rules”
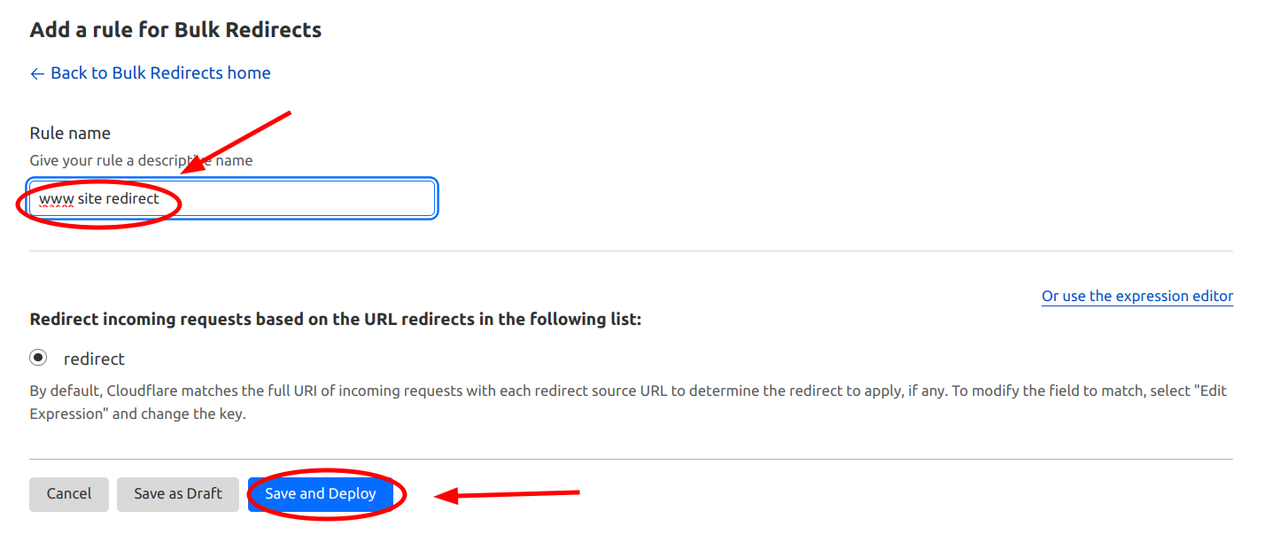
Provide a rule name (such as “www site redirect”)
Click “Save and Deploy”
Now, when you enter your domain with “www,” it should redirect to your main site.
For more detailed information and potential troubleshooting, you can always refer to the original documentation from Cloudflare.
Well done! You have successfully launched your social shop with a custom domain. For more tips on customizing your shop and maximizing its potential, explore additional tutorials and resources on Waivio.
#waivio #waiv #hive #hiveblockchain #shop #hivetutorial #business #commerce #amazon #shop #ecommerce #hiveblockchain #crypto #cryptocurrency #hivefeatures #product #brand #marketing #entrepreneur #hobby #leo #peakd #leofinance #items #shopping #affiliatelinks
Wow! Very detailed tutorial. Nicely done. Cheers!
Thank you! This one is quite technical, so I did my best to make it as interactive as possible :)
Congratulations @cryptodive! You have completed the following achievement on the Hive blockchain And have been rewarded with New badge(s)
Your next target is to reach 29000 upvotes.
You can view your badges on your board and compare yourself to others in the Ranking
If you no longer want to receive notifications, reply to this comment with the word
STOPCheck out our last posts: