The modern means of communication have slimmed down the stress taken to pass information between two parties. Understanding how some of these communication process work is really amazing. I will like to start today's project review by asking a few questions to anyone reading this.
- Have you ever gotten a notification from a website via your browser even when you are not on the website?
If yes, then,
- Have you ever been bothered to know the type of technology behind that communication process?
if you haven't, well, I'm here today to enlighten you on how it works. The questions were running through my head ever since I first received a notification from a website via my browser. I was shocked to realize that the website was able to send an instant message which displays on my browser's interface even when the website wasn't opened. While I researched to answer those questions by myself, I learned that "Web push" is the name of the technology that made it possible to send messages from a website to its users even when they aren't on the webpage. For anyone looking for the best place to read more on this topic, I will recommend them to read Connecto's blog; one of the best blogs that explained this topic to the dept. Below is a detailed explanation of what a Web Push service is.
After understanding what this topic is all about, I have to conclude that a Web Push service is a tool for business owners, or anyone willing to reach their audience at an instant time without any stress. The list below are the advantages of using a web Push Service.
- The messages are instant
- No application is required
- No personal information like email or phone number is required
- It is easy to set up
Notify.run
There are a lot of websites that offer companies, brand, or project owners the opportunity to use the Web Push service technology to reach out to their audience. But Notify.run is one of the best among them. Simply because it's an open-source project, which means contributions are always welcomed, and it is free to use. The awesome developer that is behind this project is Paulgb. He defined Notify.run as "A project to programmatically send notifications to your own phone or desktop. It is provided as a free web service that can be used without installation (on both the sending and receiving end)."
Notify.run have the same function as its competitors but with a different process of operation. While I used Notify.run as a project owner, it required me to run some set of codes on my command prompt, or on an emulator on my Android phone.
Before I share my experience with this project, I will like to review the website interface first.
Notify.run's Landing Page
Notify.run have a type of landing page that will definitely educate any user that needs to understand how the project can be used to speed up the rate of communication.
I made that statement simply because I was overwhelmed by how its interface is filled up with details about the project. it was a different case with its competitor's interface. The screenshots below are the interfaces displaying Notify.run's and PushPad's landing page.
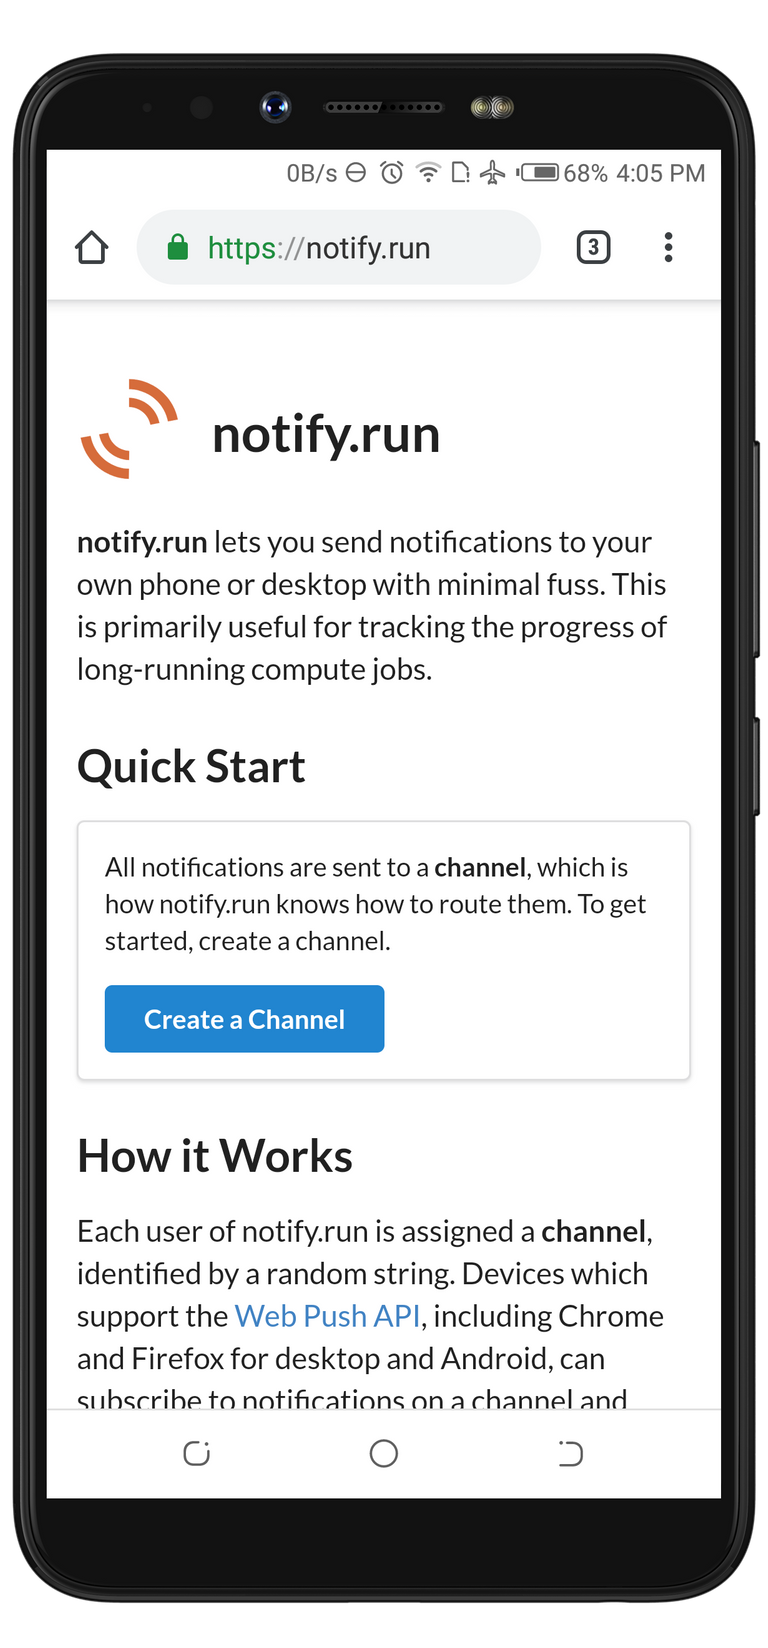
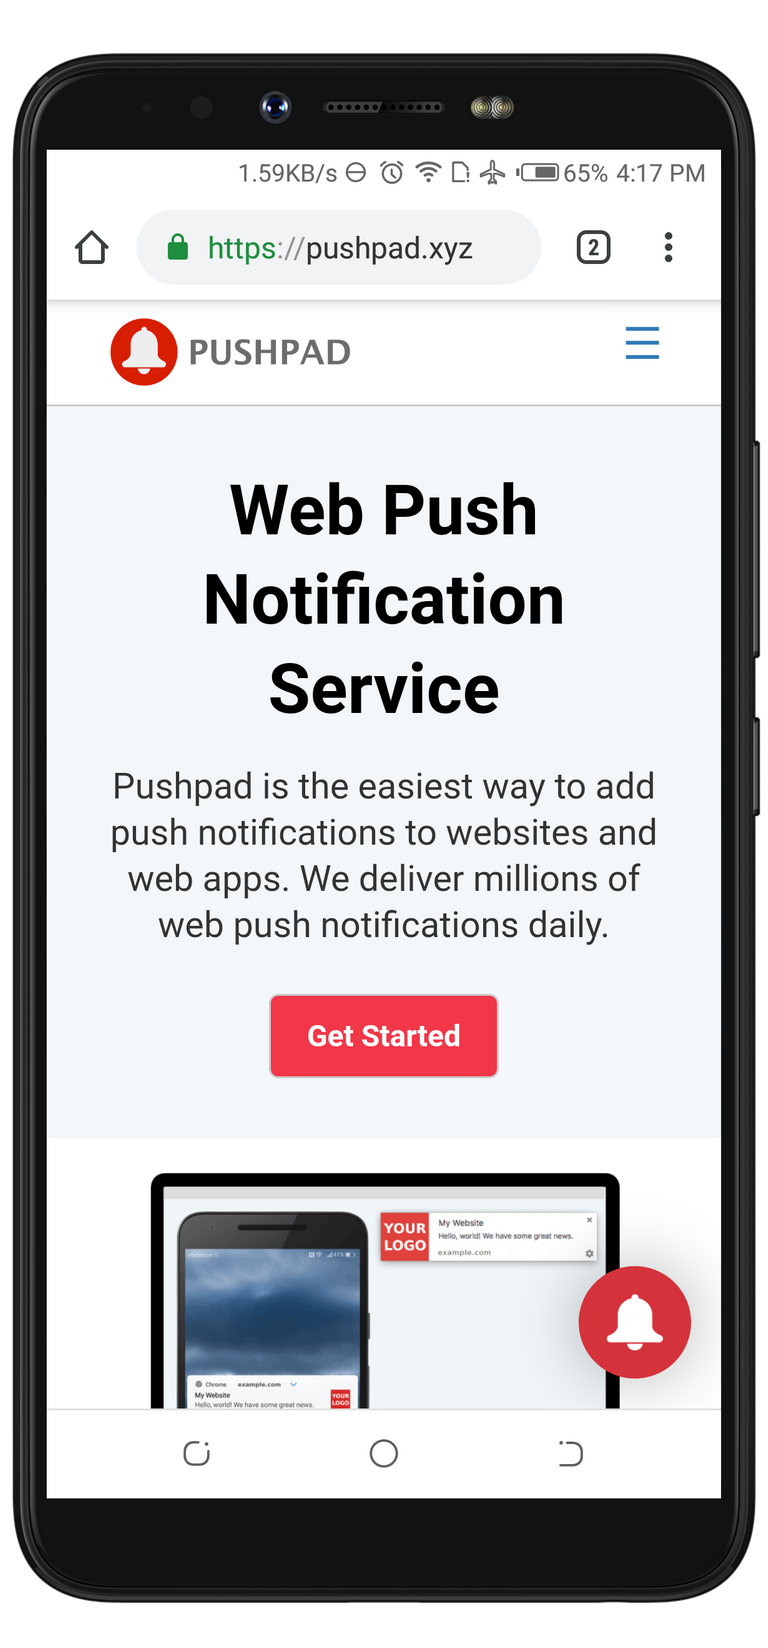
Both interfaces are nice but I prefer PushPad's interface simply because it's more beautiful and well organized. Notify.run's landing page isn't bad. But I don't know if I got attracted by the red colors on PushPad's interface. Nevertheless, I'm sure there are users who might prefer Notify.run's interface to PushPad's own. It's a thing of choice.
Using Web Push Service As A Project Or Brand Owner
At the beginning of this article, I said that a Web Push Service is a type of technology that allows project owners to reach to their audience without needing their phone or email details. This is amazing but the big question in this paragraph is;
Does this fact apply to project owners too? I mean, Do the Web push service providers request brands, or project owners for their contact information before they're able to use a Web Push service? The answer is simply Yes and No as it depends on the Web Push service provider you wish to use.
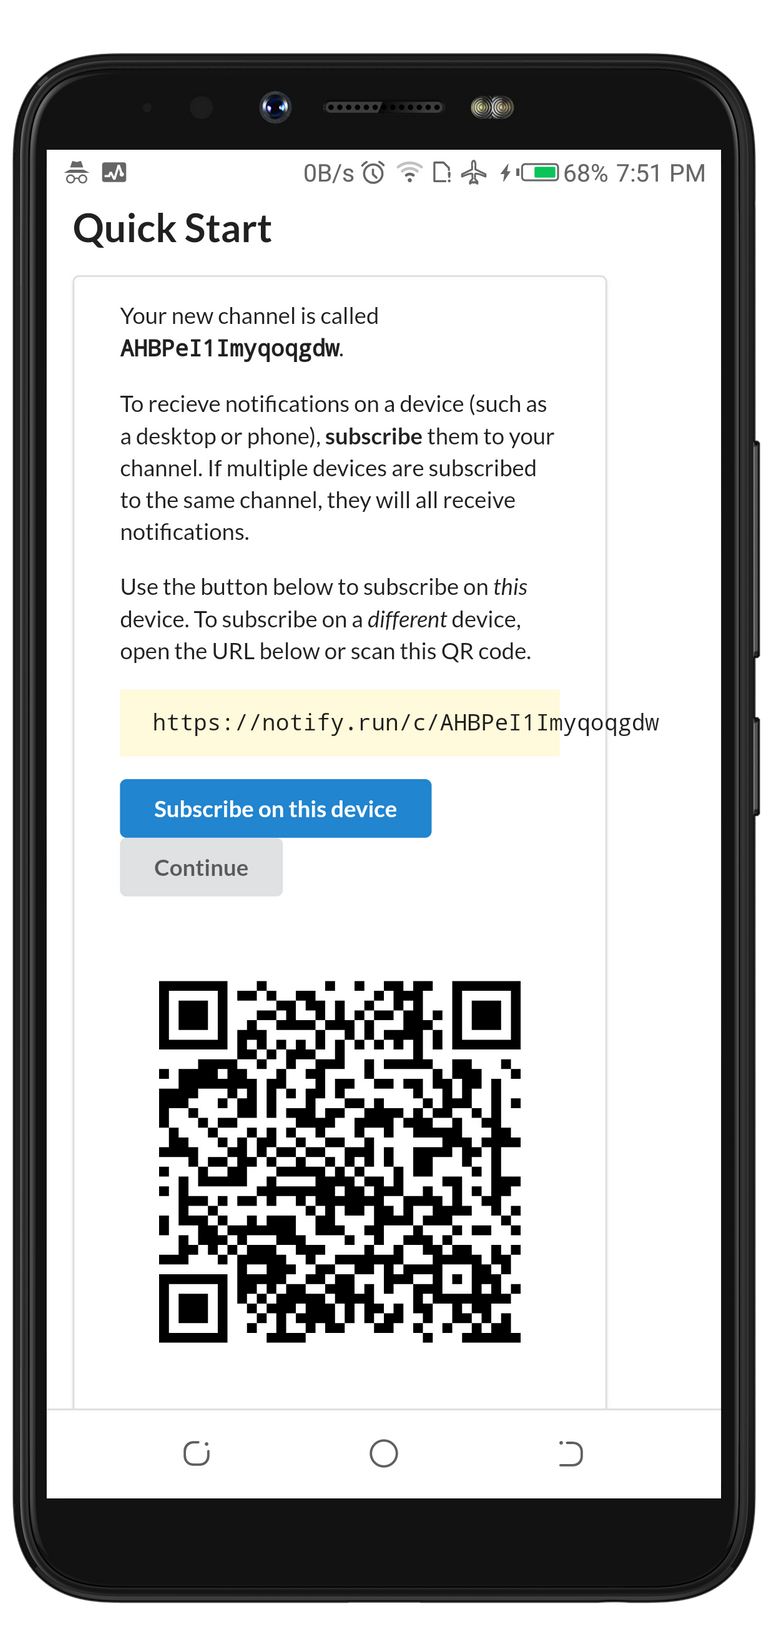
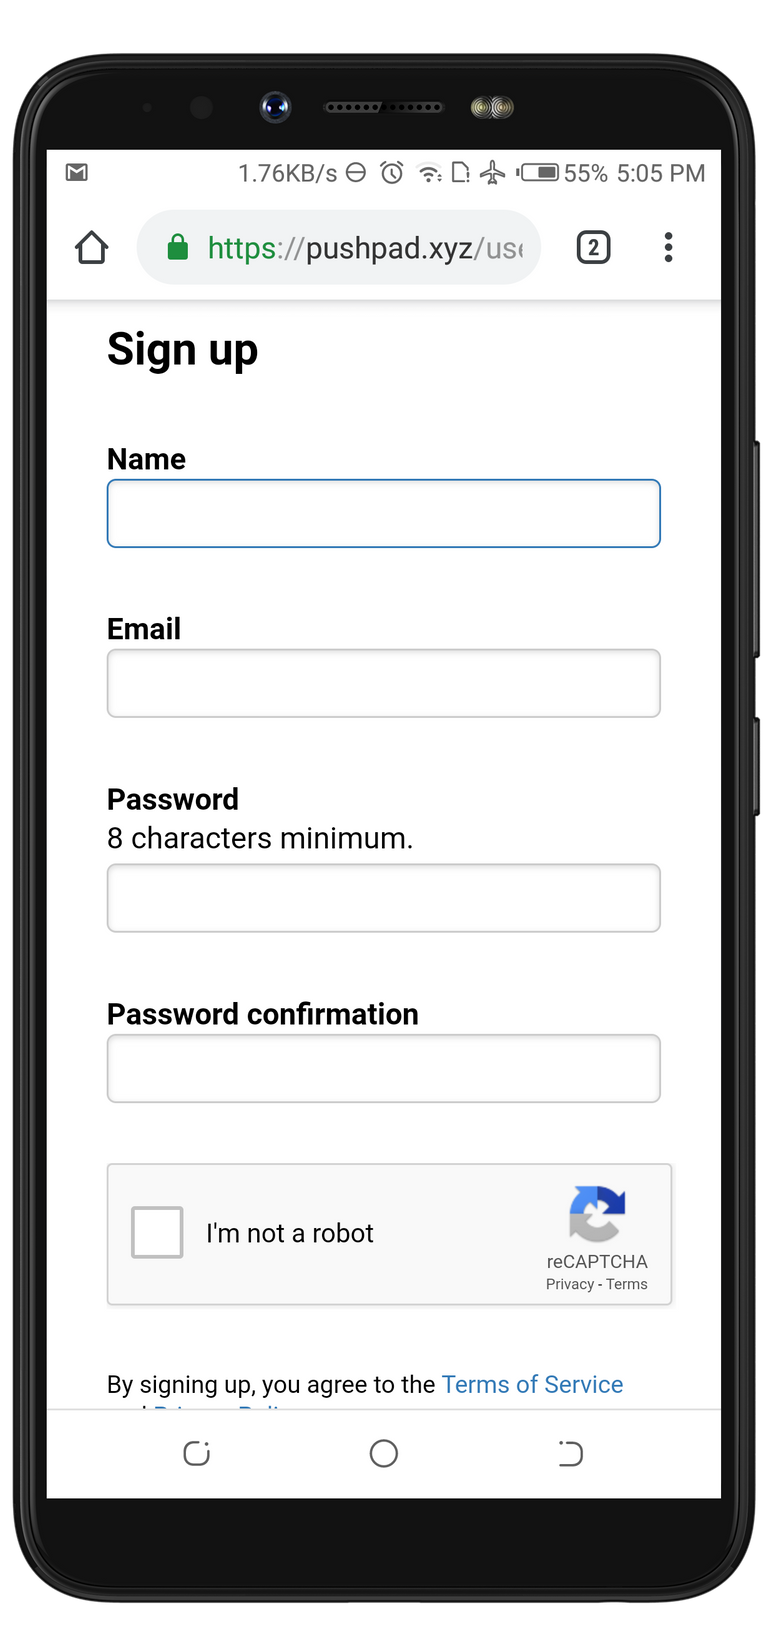
In this review, I have mentioned two different web service providers and they are; Notify.run and PushPad. The two providers have a different requirement before you can use their services. As for me, I prefer to use a Web Push service provider that doesn't require for the project owner's details which is why I have chosen to use Notify.run. I noticed the different requirements for these providers when I tried to create a channel for my subscribers. The screenshots below are the interfaces that displayed when I try to create a channel with them. As you can see from the images below, the first interface is for Notify.run which didn't request any of my personal detail to get started, while the second interface displays a registration page requested by Pushpad.
Creating A Channel For My Audience
The only requirement to successfully create a web push account with Notify.run is to click on the Create channel button. As seen in the previous image, it displayed the name of the channel as AHBPeI1Imyqoqgdw, provided https://notify.run/AHBPeI1Imyqoqgdw as the link to access the channel, buttons to subscribe or to continue to the channel's dashboard, and a QR image for the channel which is displayed below.

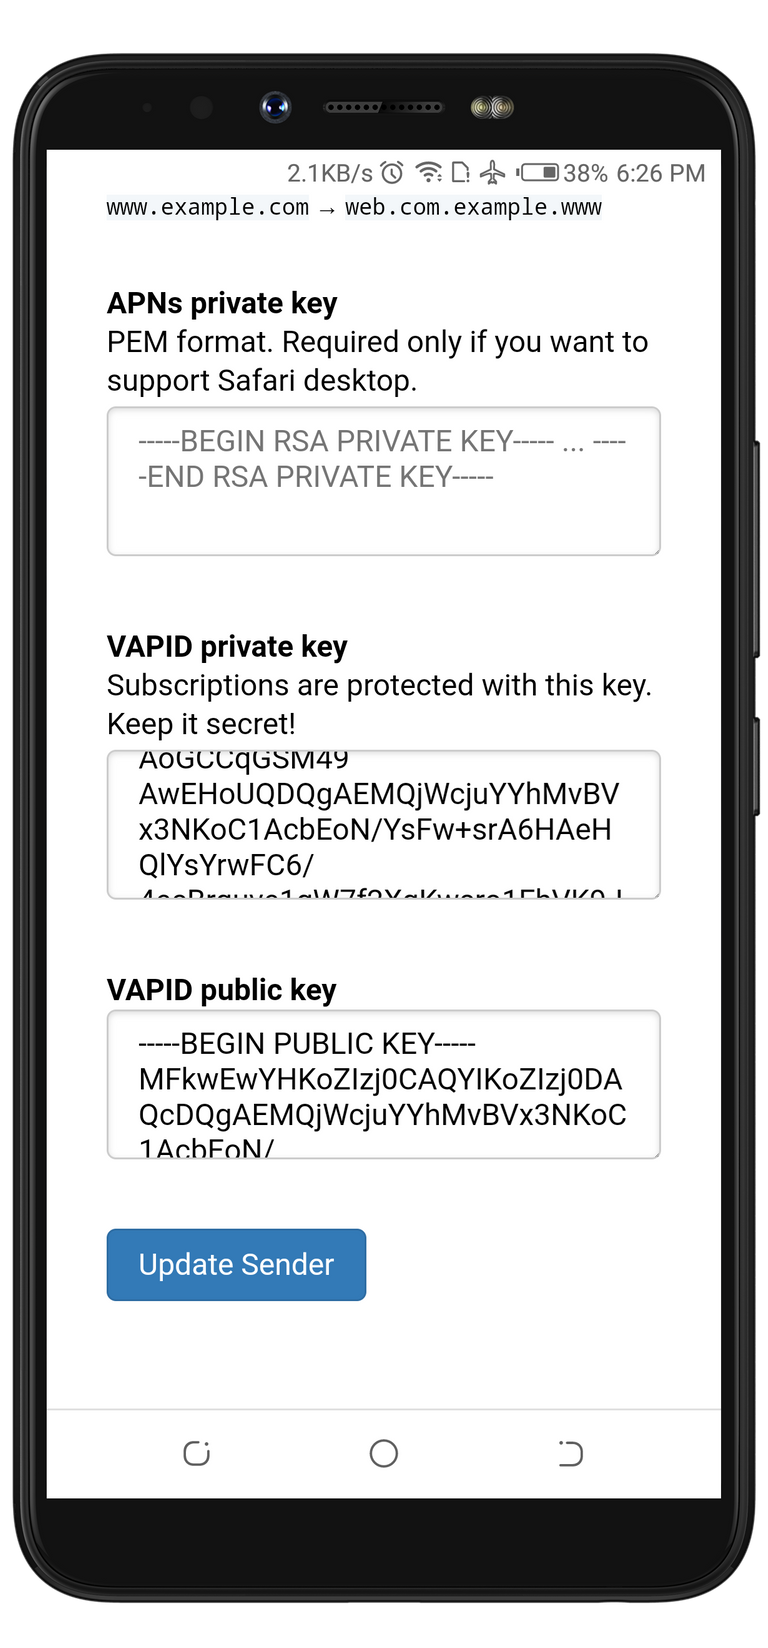
On its competitor's page, the channel is known as Sender. The sender is known as the owner of a group of subscriptions which is similar to channels in the case of Notify.run After I created a sender, it didn't give me a link or QR image to access the Sender. Instead, it displayed a public and private key as shown in the image below.
I love how Notify.run provided me with the different ways to let my subscribers subscribe to my channel. While I was setting up the channel, I also noticed that a channel owner is also provided with a subscribe button. This means that a channel owner can also send a channel message to his/herself.
Your Channel Is Ready To Be Used!
After successfully creating a channel, the interface that displayed next was an instruction page of how to broadcast a message to my subscribers. The screenshot below is an interface showing how it looks.
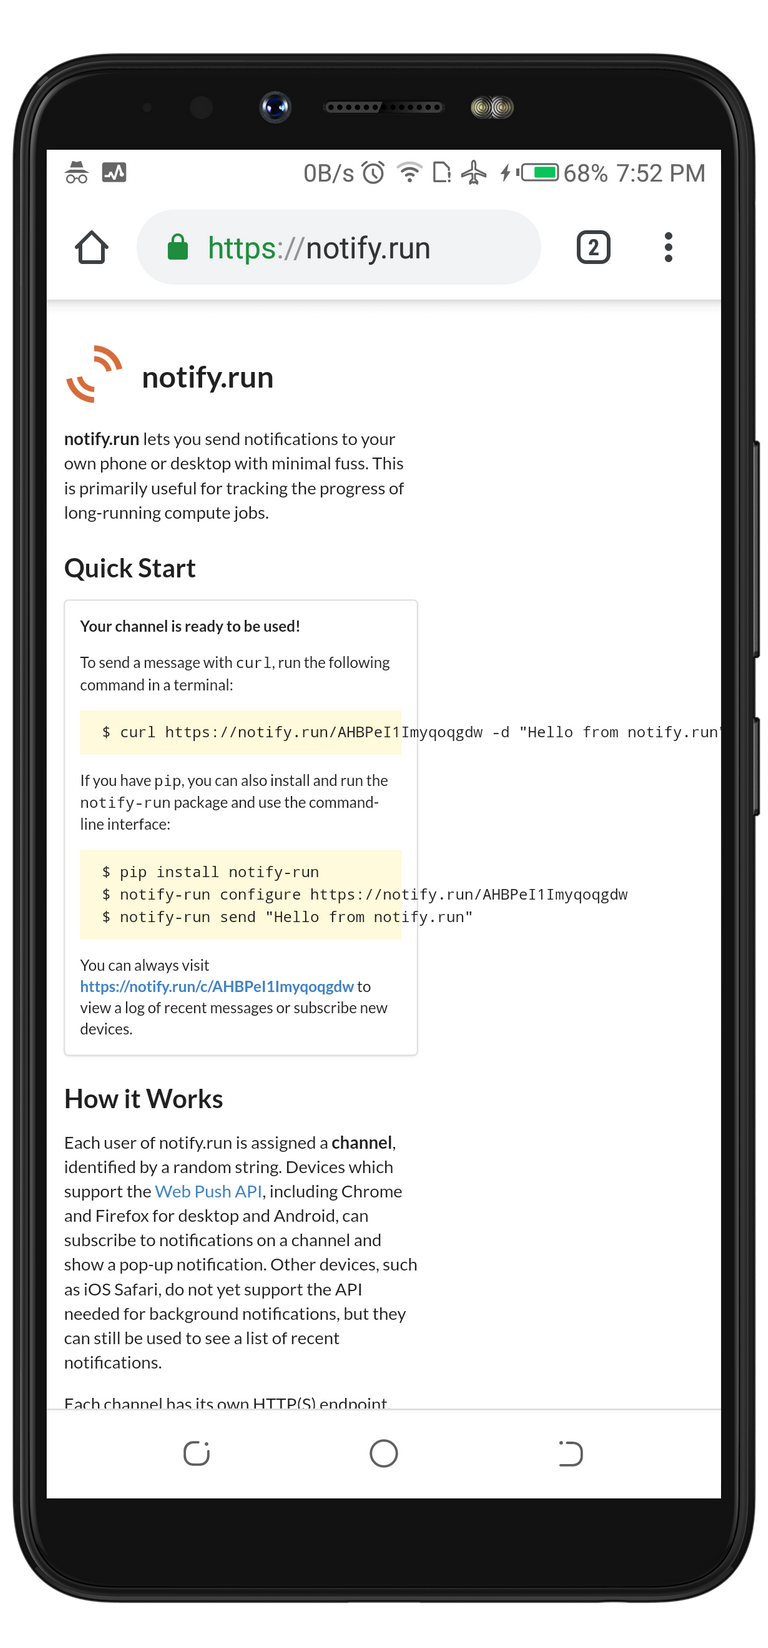
At the beginning of this review, I stated that the prerequisite needed for a successful web push message with Notify.run is either a command prompt for your PC or a terminal for your Android device. In my case, I installed Termux;
From Notify.run official website, it is stated that Notify.run need to be integrated via the terminal or command prompt on a PC. And below is the line of code given to install it.
$ pip install notify-runAfter I ran this code on Termux, Termux rejected it because pip isn't the command to install a package. I had to change it to pkg before it worked. The line of code below was the exact code I used to integrate Notify.run successfully.
$ pkg install notify-runTo successfully push a message to my subscribers via Termux, I have to run this code $ curl https://notify.run/AHBPeI1Imyqoqgdw -d "Hello from notify.run"on my Termux workspace.
- Curl is a package that pushes the message to the subscribers
- https://notify.run/AHBPeI1Imyqoqgdw is my channel link
- "Hello from notify.run" is the message to be pushed (It's customizable.
After I ran the code, I was asked to install Curl into my Termux. I used this code pkg install curl to successfully integrate it. At this point, everything is set, and I can now push a message from my Termux workspace to my subscribers.
Broadcasting A Message
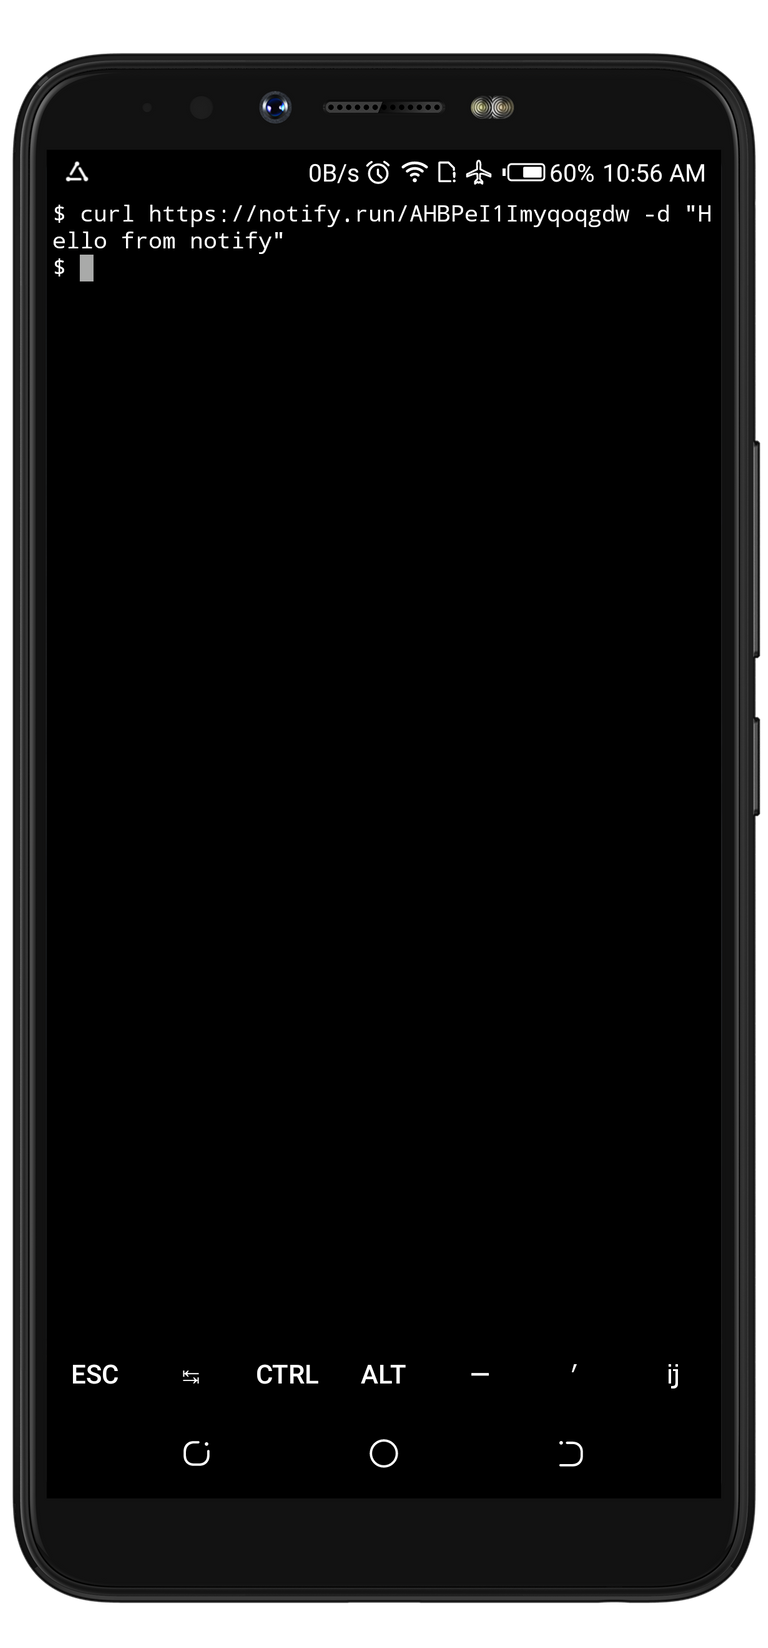
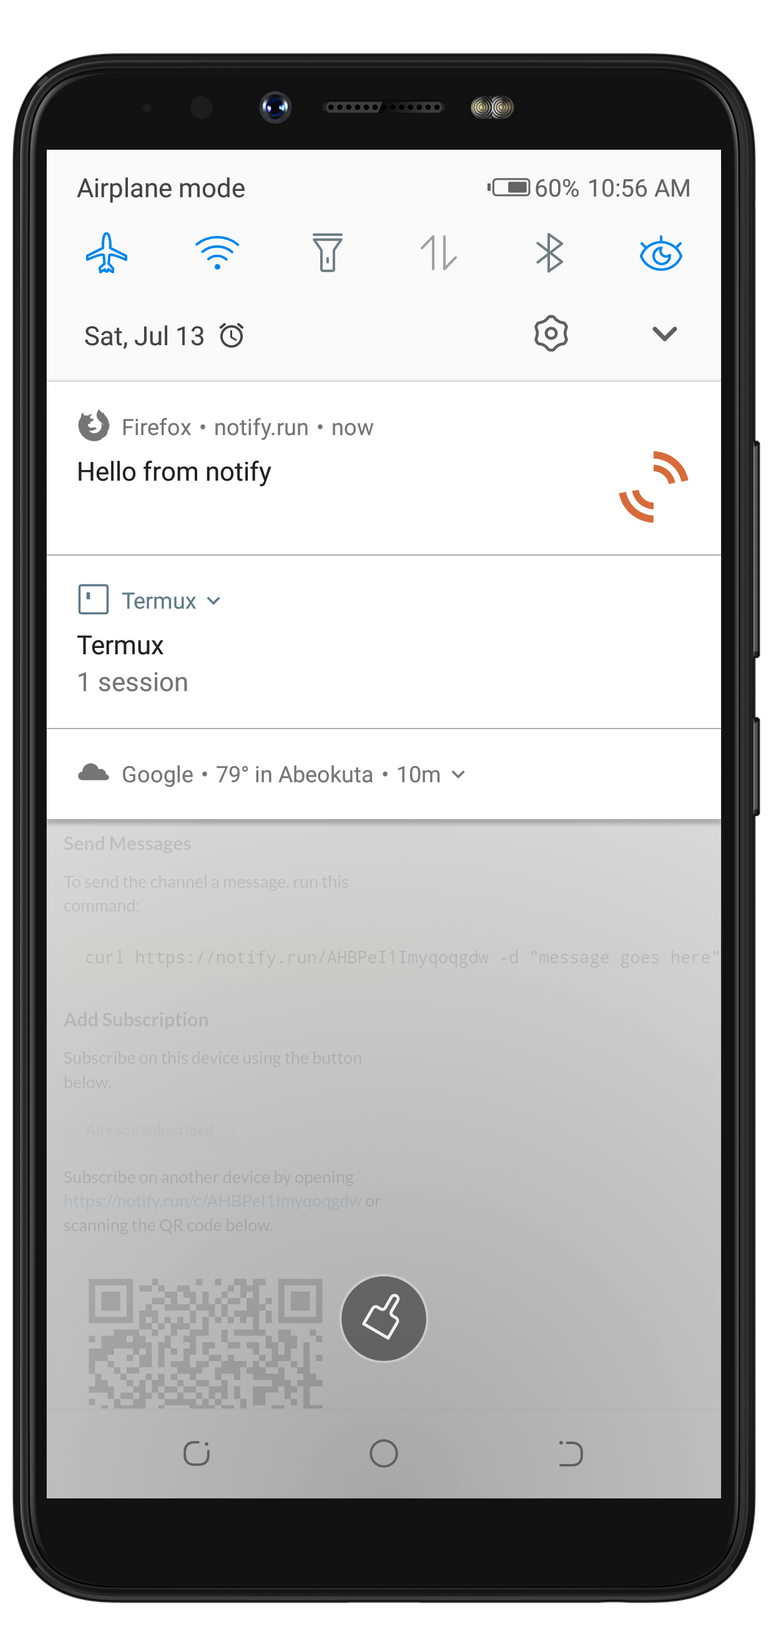
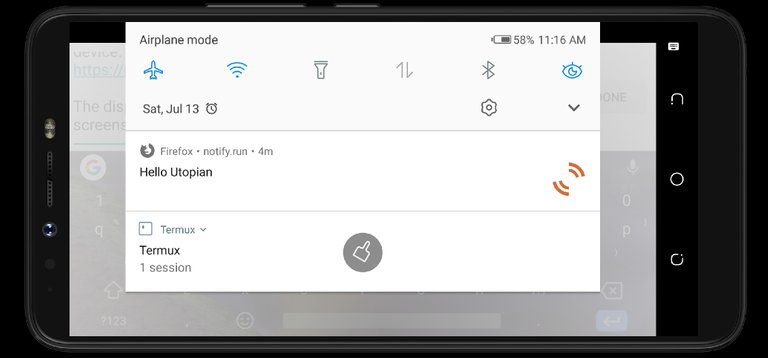
The very first thing to do so as to receive the broadcast message as a Web Push Message via your browsers is to subscribe at least one device to the channel by accessing the channel link. Now, it's time to run this code$ curl https://notify.run/AHBPeI1Imyqoqgdw -d "Hello from notify" on Termux. The first screenshot below is an interface that displayed after I ran it, while the second screenshot is an interface that shows how I received the broadcast message via my browser.
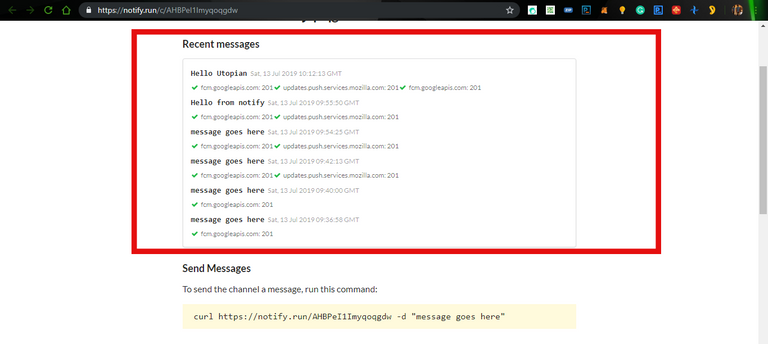
Sending a custom a message Isn't difficult. All that is needed to be done is to delete this statement Hello from notify.run from this code $ curl https://notify.run/AHBPeI1Imyqoqgdw -d "Hello from notify.run", then, replace it with any other string. For example, the next broadcast I sent displayed Hello Utopian. This simply means I ran this code $ curl https://notify.run/AHBPeI1Imyqoqgdw -d "Hello Utopian"
It displayed really well on both mobile and on PC. The screenshots below are displaying the customized message.
.png)
Observation
Every channel has a dashboard that displays the list of broadcasted messages. On my dashboard, I was able to notice that it refreshes automatically without needing me to use the refresh button. I love this future and I appreciate the developer for implementing it.
.png)
Project Update
The last update by the project owner was when he improved the handling of channel pages. He stated that when GET request is sent to the endpoint, it should redirect to the channel page. For this feature to be possible, he started to;
- Change the URL for this GET endpoint: https://github.com/paulgb/notify.run/blob/master/server/notify_run_server/app.py#L100
- Add a redirect endpoint.
- Change api.ts to hit the newly renamed endpoint https://github.com/paulgb/notify.run/blob/master/site/src/api.ts#L35
Conclusion
Notify.run is one of the best Web Push service provider out there on the net. It's free to use, it doesn't request personal details to set up a channel. Another interesting feature of Notify.run is that it gives a Channel owner the opportunity to host their channel link(s).
Thank y'all for reading my review. Bye.
Hello, @rufans. What a pleasant review of the Notifyrun project. Although I am very much aware of the web push tech, I did not really try to use any of the services. I am excited to learn about it from this review and I will make sure to implement it on a new side project I am working on.
Your contribution has been evaluated according to Utopian policies and guidelines, as well as a predefined set of questions pertaining to the category.
To view those questions and the relevant answers related to your post, click here.
Need help? Chat with us on Discord.
[utopian-moderator]
Thank you for your review, @knowledges! Keep up the good work!
Hi @rufans!
Your post was upvoted by @steem-ua, new Steem dApp, using UserAuthority for algorithmic post curation!
Your post is eligible for our upvote, thanks to our collaboration with @utopian-io!
Feel free to join our @steem-ua Discord server
Hi, @rufans!
You just got a 4.34% upvote from SteemPlus!
To get higher upvotes, earn more SteemPlus Points (SPP). On your Steemit wallet, check your SPP balance and click on "How to earn SPP?" to find out all the ways to earn.
If you're not using SteemPlus yet, please check our last posts in here to see the many ways in which SteemPlus can improve your Steem experience on Steemit and Busy.
Hey, @rufans!
Thanks for contributing on Utopian.
We’re already looking forward to your next contribution!
Get higher incentives and support Utopian.io!
Simply set @utopian.pay as a 5% (or higher) payout beneficiary on your contribution post (via SteemPlus or Steeditor).
Want to chat? Join us on Discord https://discord.gg/h52nFrV.
Vote for Utopian Witness!