
After getting a lot of response for his post on Why I bought my brother STEEM for Christmas, @fredrikaa thought to do something more. He planned to create a service using which one can gift Steem GiftCard to one’s family and friends and may also create a new Steemit account for them with some preloaded Steem. He reached to @howo and me (@nitesh9) with the concept. The concept was awesome and the time was right (of course Christmas time). @howo undertook the technical part (coding and stuff) as he is a software engineer. And I took the responsibility to design the graphics (vectors) of the Steem GiftCard, one with a Christmas theme. :)
However, the vision of @fredrikaa and hardwork of @howo and me, steemgifts.com, is now up and you can know more about it here: Introducing STEEM Gift Cards – A fun way to give someone STEEM for the holidays!.
In this post, I’ll discuss how I created the design for SteemGifts. Although, I am a noob in designing and using Photoshop and Illustrator, yet I created this one. As said, “Necessity is the mother of invention”, when I developed my own QuarkOS™ ROM for Android Devices, it was necessary to create designs for the same which pushed me towards learning this graphics designing and motion graphics. Still I am not an expert in these things. I just love learning while working on new and new projects. And yeah, I learnt a lot many things while working for SteemGifts.
So let’s begin with graphics designing!
Creating the Background
As we had planned to create a Steem GiftCard with a Christmas theme. And as we know that Steem logo includes two colors White and Blue, so I planned to theme the card near to these two colors. And yeah, found something much similar to what I thought: snow = white and sky = blue. And this was the output:

Although the theme was giving the feel of Christmas, yet it required some text with “Merry Christmas”. So, included a stylish text wishing “Merry Christmas”:
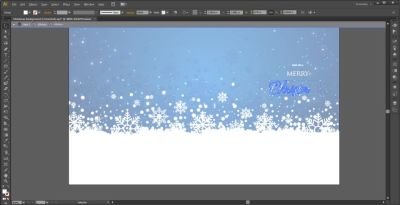
Finally, it was completed. Then I moved on with the vector to Photoshop (as I am more comfortable with it).
Creating a Basic Design
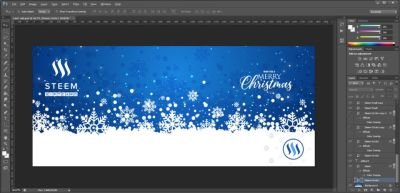
Then in the Photoshop I created a basic design. First I had to work on a snowy white Steem Logo with “GIFTCARD” text to show what exactly is the card for. And also an original Steem logo at the bottom corner of the card. This is how it exactly looked first:
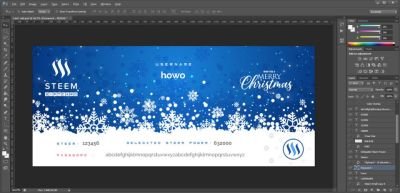
Then we had to add Password, Steem and Delegated Steem Power. Yes, in previous design we thought to include “Delegated Steem Power” support to SteemGifts.com. This was the resultant basic design:
Adding a Christmas Bell to the Card
I showed the design to @howo to give some suggestions for improvement. He gave an idea to add a Christmas Bell in the center of the giftcard hanging below the username where the gifted Steem and Delegated Steem Power will be displayed. So, for that I headed on towards Illustrator again:
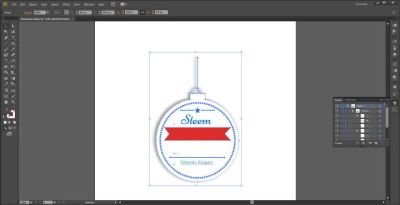
After doing that, I had to add the vector to the GiftCard Photoshop project I was working on. And had to remove all the previous text of “Steem” and “Delegated Steem Power” from the basic design. After adding the bell, it looked similar to this:
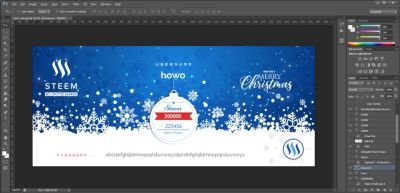
Later on we decided to make the card simpler. So, we decided to remove the Steem Power part. So, I had to remove the Steem Power text from the bell. As I had used whole vector of bell with text, so it was not editable in photoshop. So, to save time, I just place a white overlay over the Steem Power part of the bell. Then it looked similar to this:
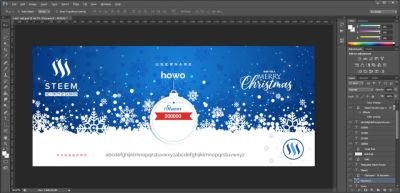
After doing this, the blank space in Christmas didn’t look promising. So I decided to add something there.
Adding Christmas Tree to the Bell
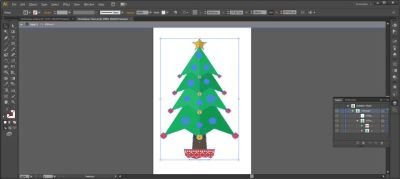
I had to fill the blank space in the bell. So was thinking to add something vital to Christmas there. We had Gift, Snow and wishing text in the card. Something that was missing was a Christmas tree. So, I worked on a simple yet elegant Christmas tree vector on Illustrator:
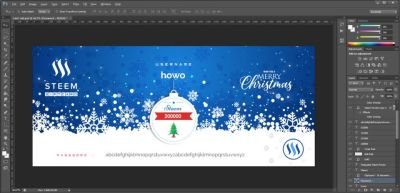
And then added it to the card I created in Photoshop. Then it was looking quite promising. Have a look:
Adding QR Code
As we had some blank space left in the bottom corner @howo asked if we could add some space for placing QR Code. As the password text was little long, I had to change the font of it. And then added a square box of size 150 x 150 pixels, where we’ll place the QR Code. The result was this:
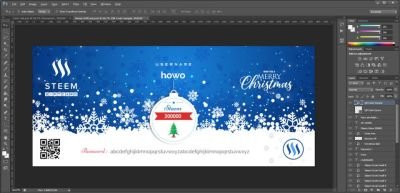
This was basically the final design required for the project, where the values for steem and password can be filled through a program, thanks to @howo for coding that. His program was coded to edit the image of the card with bitmap font. So I had to provide the bitmap version of TTF fonts used in the giftcard image. Here is the final image used in the project:

Final Design
Creating a Foldable Double Sided Card
@howo requested to create a version of the giftcard which users can fold and get a double-sided version. Something like this:
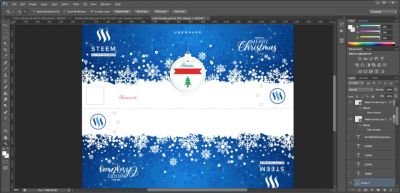
And thus the project was finally completed, however, the coding part was left which was done by @howo. It took more than five hours to complete the graphics designing of the Steem GiftCard, but it was worth. I was really satisfied with final output and @fredrikaa and @howo also loved it. :)
Some Extra Information About the Card
Official Steem Logo was used in the card.
For “USERNAME” text font used was: Inversionz Unboxed (Regular) [Size: 40pt]
For “GIFTCARD” text font used was: Inversionz (Regular) [Size: 42pt]
For “Password” text font used was: Niconne (Regular) [Size: 44pt]
For username input font used was: Raleway (Bold) [Size: 60pt]
For password input font used was: Raleway (Medium) [Size: 32pt]
For steem value input font used was: Century Gothic (Bold) [Size: 32pt]
Source Code of the project (steemgifts.com): https://github.com/drov0/steemgifts
PSD (Photoshop) and AI (Adobe Illustrator) files for the graphics designed:
AI
- Background: https://drive.google.com/open?id=1HlwzGg6Pk__CLc5MD_3eWeTZ_pz_wreL
- Christmas Bell: https://drive.google.com/open?id=1GPkHrAkTtjIJeX3EXnEFRnifCidM_dJF
- Christmas Tree: https://drive.google.com/open?id=18QLBeJSbKgsRF08vIWOZCKhTYIpAoa-j
PSD
- SteemGiftCard: https://drive.google.com/open?id=13gYv0wEBoO_uRYdSRDbBHtgOg9YrOaNY
- SteemGiftCard (double-sided): https://drive.google.com/open?id=1KkE748Nx5s7B00BVgw195TkLVdGF0lbs
Full Directory containing all the related files: https://drive.google.com/open?id=1AUZ-_DqiVjIdb_RrXKABdO_nYywswJHS
Credits
Special thanks to Steem devs for the Steem Logo.
Heartily thanks to @fredrikaa for giving me the opportunity.
Heartily thanks to @howo for suggestions while designing.
This project was a way to say Merry Christmas to all. :)
I hope this post helped some graphics design learners to get a basic idea about how this Steem GiftCard was designed. Thanks. :)
Posted on Utopian.io - Rewarding Open Source Contributors
I hope it's not coming late. But I like your photoshop and illustrator work. I hope you wouldn't mind I ask for some tutorial. I really like it and want to learn. Any recommendations? Sir @nitesh9
Yeah, you can use the files and modify it to make something new out of it. I can help you in photoshop. Illustrator, hmm....little tough for me also. :p
However, you can learn after trials and errors (I did the same :D). Also many tutorials are available in Youtube for the same. ;)
Okay i'd like that. If you can recommend the once you feel helped you alot
Awesome Gift Card...and the best part is the making of the Gift Card...Impressive hardwork.
Thanks bro. :)
nice bro
Thanks. :)
Goo
Verry good
Thansk you verry mach
Thank you for the contribution. It has been approved.
You can contact us on Discord.
[utopian-moderator]
Thank you so much for a quick approval. :)
Hey @nitesh9 I am @utopian-io. I have just upvoted you!
Achievements
Community-Driven Witness!
I am the first and only Steem Community-Driven Witness. Participate on Discord. Lets GROW TOGETHER!
Up-vote this comment to grow my power and help Open Source contributions like this one. Want to chat? Join me on Discord https://discord.gg/Pc8HG9x