Repository
https://github.com/nawab69/mcbot
You will learn:
- You will learn How to make a Discord BOT
- You will learn How to make API Request in Discord BOT
- You will learn about discord.js
- You will learn how to create a bot application in discord developer
- You will learn how to deploy your Discord BOT to your computer
- You will learn how to deploy your Discord BOT to your Android
- You will learn How to deploy your Discord BOT directly GitHub to HEROKU server
- You will learn How to make a Bot which will give you, your steemit posts statistics.
Requirements
- nodeJS server
- Heroku account
- STEEMTOOLS API
- Request Module
- discord.js module
- A mobile / Computer
Difficulty
- Advanced
Tutorial Contents
Introduction
In my previous tutorial, I have taught you about " How to make a REST API and get data using that API in a PHP website." Today I am going to teach you about " How to make a discord BOT using that API ".
This is a very easy formula. You need a computer or a mobile to write some JavaScript code. Then deploy it by using your computer/mobile/ Heroku server.
Node Modules
Node modules are the JavaScript library. You need some nodejs modules to make a discord bot.
discord.jsis a node module. It is very important for making a discord bot. All the discord bot functions are stored in this bot.requestis also a node module. If you want to request an API to get data, You will require this module.
Install NodeJS in your computer
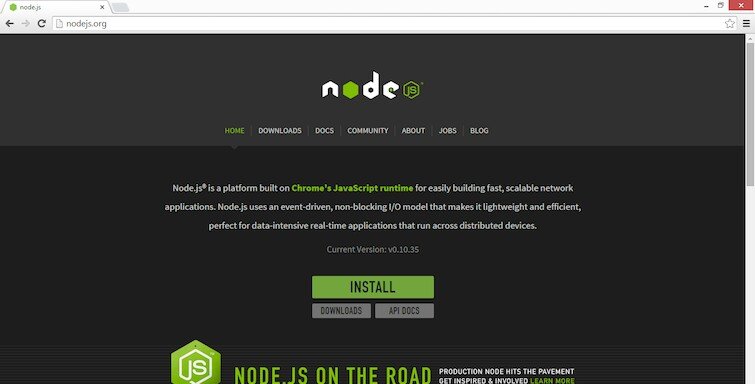
At first, you need nodejs on your computer. Installing Node.js® and NPM is pretty straightforward using the installer package available from the Node.js web site.
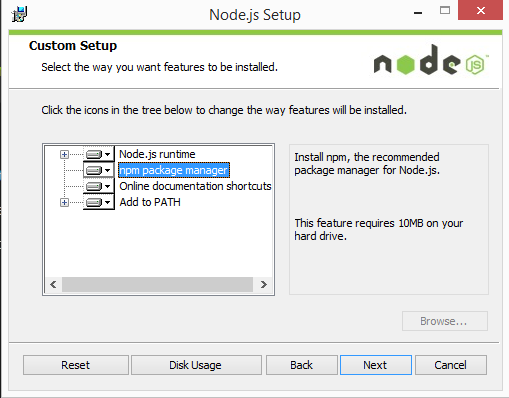
- Download the Windows installer from nodejs website
- Run the installer.
- Follow the prompts in the installer.
- Restart your computer.
Install NodeJs in your Android
Installing NodeJs in android is difficult than computer.
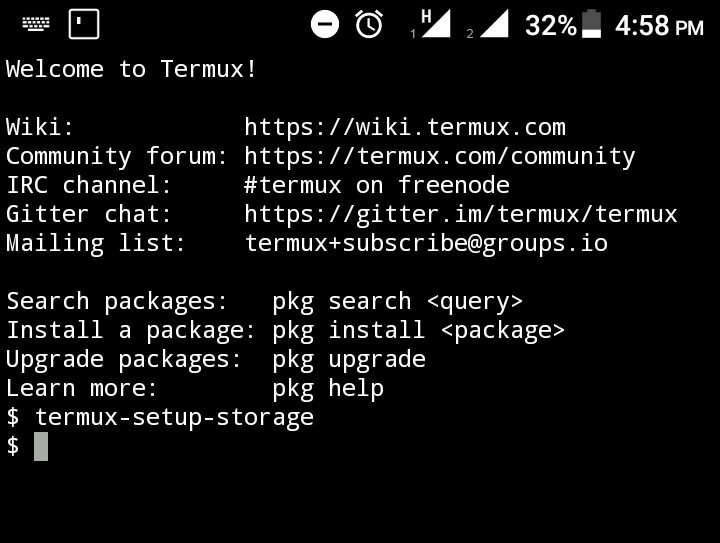
- Install termux from Play Store
- Run Termux
- Grant storage permission by this command(System will ask to grant the permission after giving the command)
termux-storage-setup - Now update and upgrade all packages by this command
apt update && apt upgrade - Now install nodejs by this command
apt install nodejs
Install node module
- Open Terminal (pc) or Termux (android).
- For Android users First, change your directory to your internal storage by this command.
cd storage/shared
Pc user's default directory is document. You can change your directory. - create a directory.
mkdir FOLDER_NAMEgive a folder name atFOLDER_NAME
eg.mkdir mcbot - Change the directory to your created folder.
cd FOLDER_NAME
eg.cd mcbot - First, install default node modules.
npm install nodejs --save
Then install the discord.js module.
npm install discord.js --save
Then install the request module.
npm install request --save
Coding Your bot
Create a file on that directory by the File manager. and named it app.js. Then open the file using a text editor.
- First add the modules
const Discord = require('discord.js');              // require disord.js node module
const Request = require("request");                 // require request node module
Then write the line bellow
const client = new Discord.Client();
Then write this code
client.on("message", message => {
When user input something in Discord Bot, The code into the {} will run.
Create a function, if the client input a message which starts with https://steemit.com, then the code between the second bracket will run.
if(message.content.startsWith("https://steemit.com")){
Then create a constant/variable which will store the input message.
const msg = message.content;
Then generate Your steemtools API.
const url = "http://api.steemtools.cf/get_blog_count?url=";
const api = url.concat(msg);
Then write a code which will make a HTTP request to steemtools API and get data
Request.get(api, (error, response, body) => { if(error) { return console.dir(error);
// Get data in JSON from API by HTTP request
  }
Then convert The JSON to JavaScript object.
const result = JSON.parse(body);
In steemtools API if user input invalid URL, The result of total_words value will be 0. So write this code.
if(result.total_words !== 0){
If the total_words is not equal zero than the function into the second bracket will run.
Now create a function, which will reply to a message in embed.
message.channel.send({embed:{
    author: {
      name: client.user.username,
      icon_url: client.user.avatarURL
    },
    title: message.content,
    url: message.content,
    fields: [{
        name: "Total Words",
        value: result.total_words
      },
      {
        name: "Total Characters",
        value: result.total_char
      },
      {
        name: "Total Votes",
        value: result.net_votes
      }
    ],
    footer: {
      text: "This BOT is developed by © Nawab69"
    }
  }
});      // send embed message
Then close all second brackets.
}
  });
  };
  // Here you can add more command
});
Now at the very end of your app.js file write this line,
client.login("BOT TOKEN"); // insert bot token here.
Or if you want to use Heroku server use this code
client.login(process.env.BOT_TOKEN); //BOT_TOKEN is bot token.Only for the Heroku server.
write a line. It will send a message to your console.
console.log('mcbot connected successfully');
Now save the file.
Use the command on your terminal.
npm init
Then fill all the information. It will create a package.json file.
You can get all code source here
Create Oauth 2 Bot application.
Go to discord developer portal. Then Login with your discord id.
Then click on a new application. Give the name of your bot.
You will get a client id and a client secret.
- Client id: When you invite your bot to your discord channel, you need client id.
- Client secret: It will need if you want to make your bot private.
Go to bot from navigation menu. Then create a bot. Copy the BOT TOKEN from there.
If you want to use your mobile/ computer as a server, paste the bot token to your app.js file's last line's client.login() function.
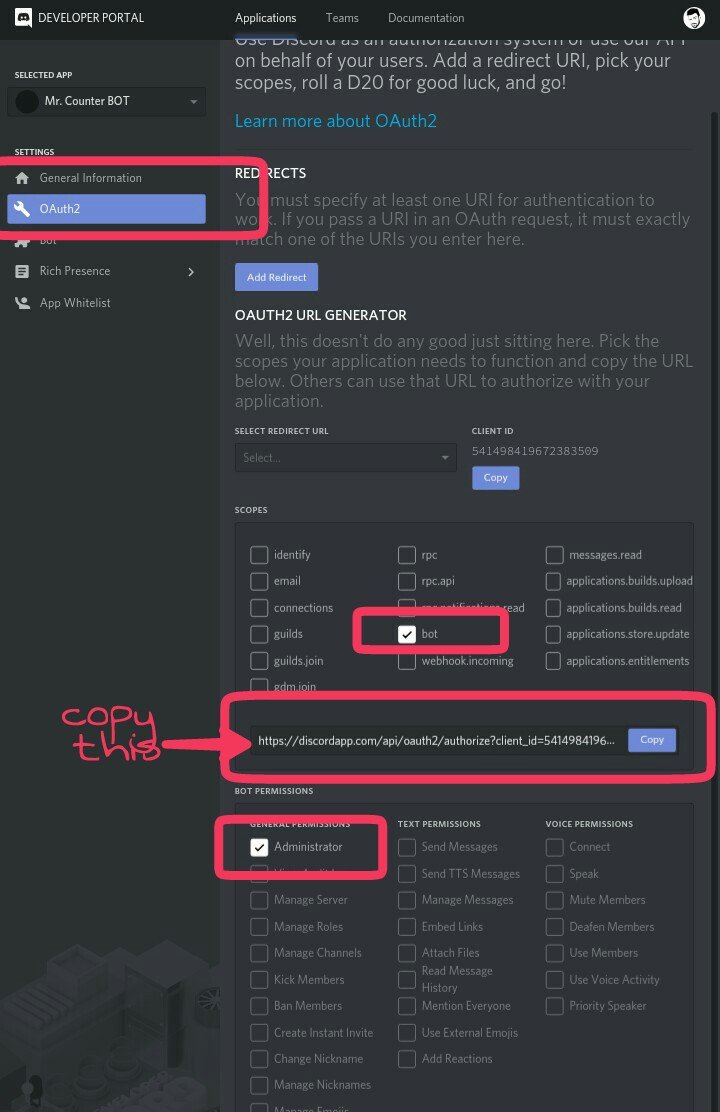
Invite Your BOT to your Discord Chanel.
Go to Oauth2 from the navigation menu. Select BOT from the list and Set permission. Then copy the link.
Browse the link with your browser and then select your Chanel. Then submit.
Your Bot will join to your discord channel. But it will remain offline.
Deploy your Discord BOT
- Open terminal / CMD or TERMUX
- Go to the bot directory.
cd storage/shared/mcbot[For mobile users] - Then use this command.
node app.js
If everything is ok, you will get a messagemcbot connected successfully
Deploy in Heroku server
- Upload The app.js and package.json to your GitHub account.
- Login to your Heroku account.
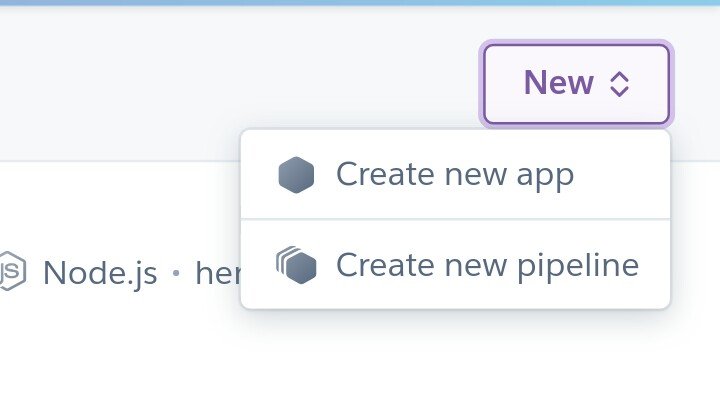
- Then select
new→ Create a new application.
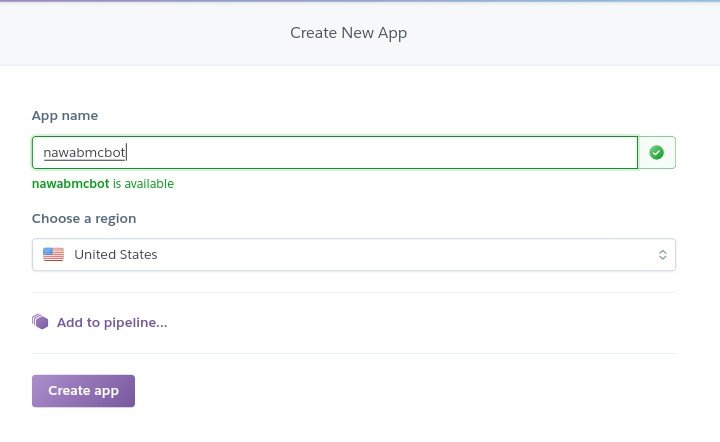
- Give a name. Then press create.
- Then select
From Github. Log in with your GitHub account. - Then select the repository. and press connect.
- Then go to your GitHub repository and create a file named "Profile".
Write this line and save it.
Worker: node app.js
Then go to the resource tab and disable the default dyno. And enable the worker dyno.
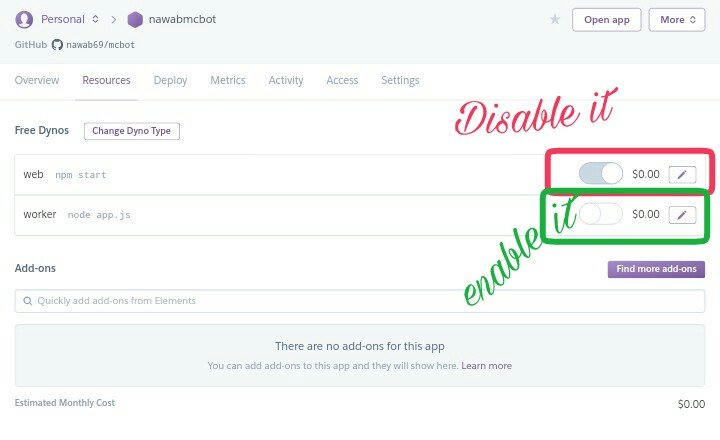
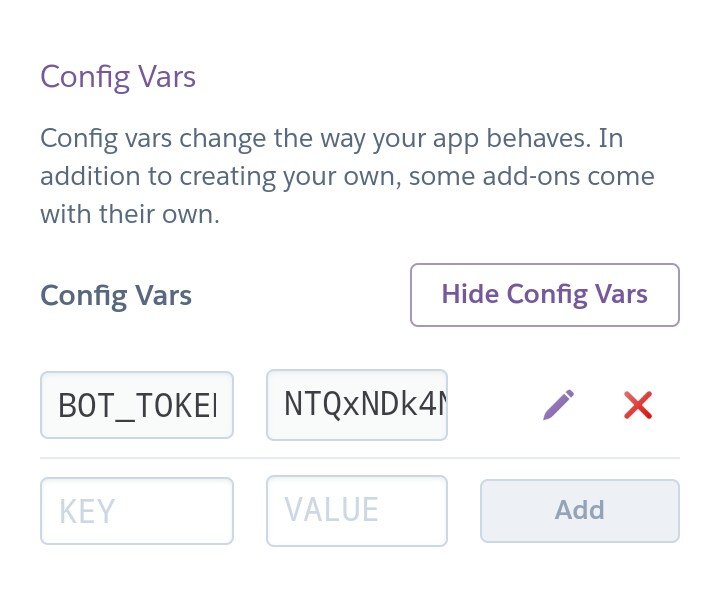
Go to settings and then config vars. Write
BOT_TOKENin the key.your tokento value.
Finally, press "Enable automatic Deploy"
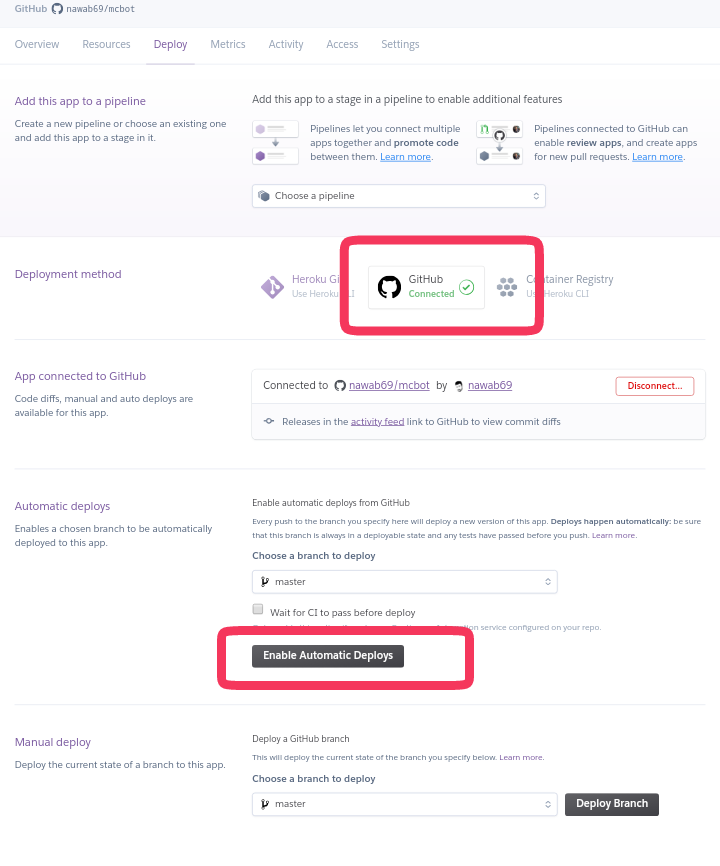
The BOT will deploy successfully if there is no problem.
Test the BOT
Now go to your Chanel and write any steemit blog post link. The bot will reply in a millisecond.
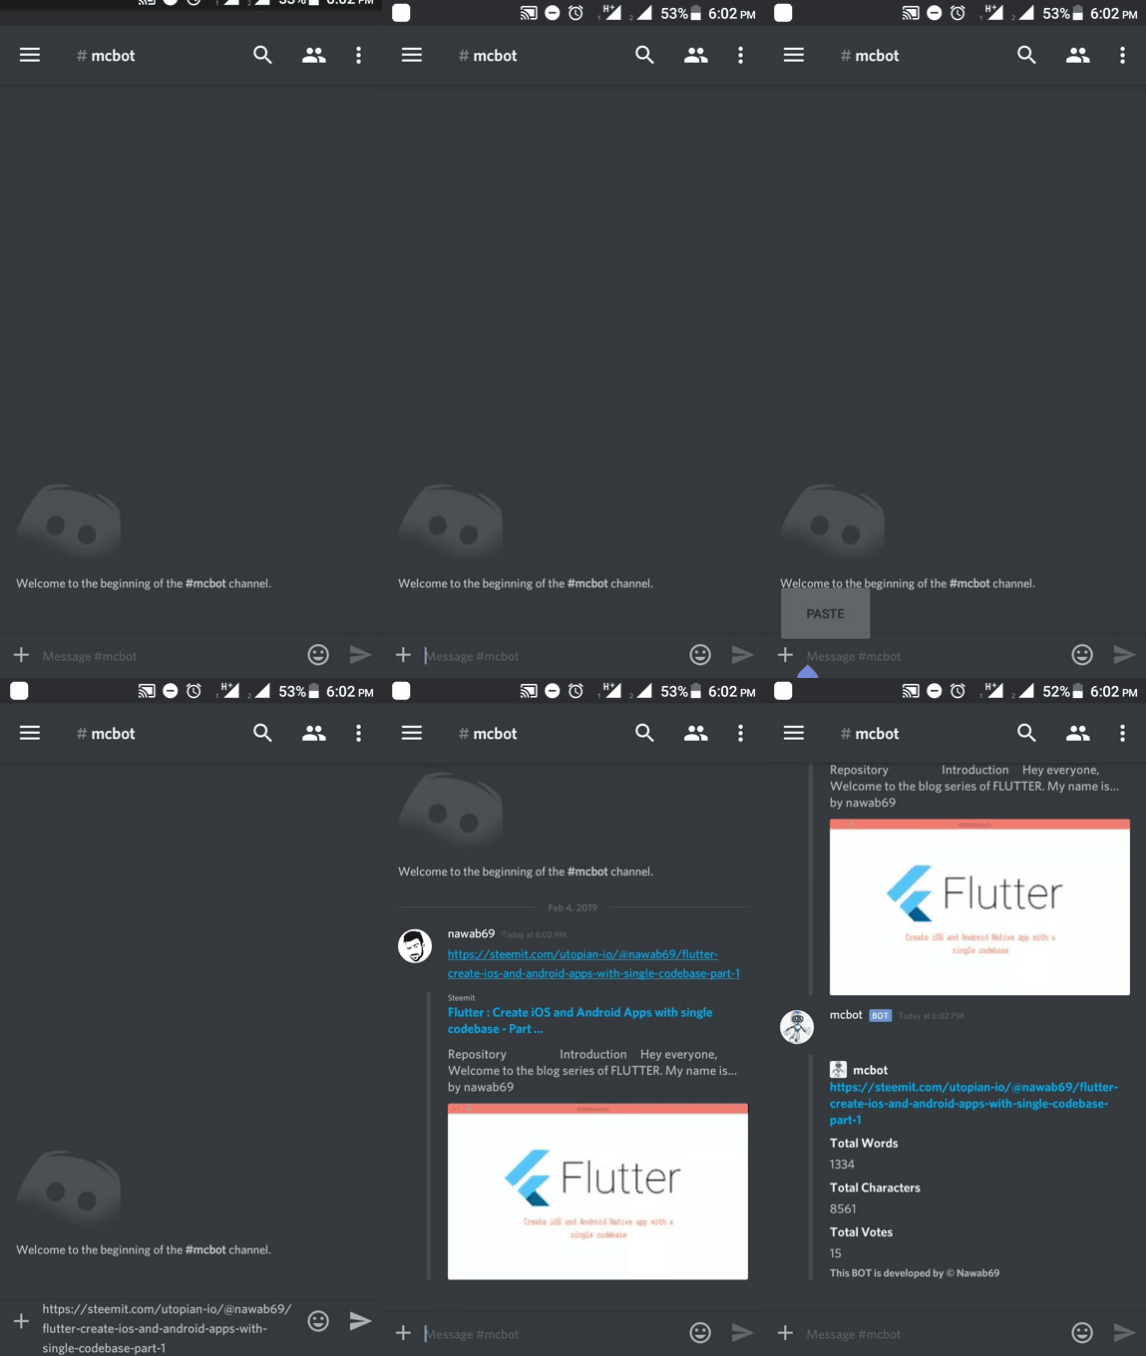
Curriculum
- Check Withdraw Route - PART 1
- Change Withdraw Route- PART 2
- Remove Wiyhdraw Route - PART 3
- Api create tutorial - Part 4
Prove of work done
https://github.com/nawab69/mcbot/blob/master/app.js
https://discordapp.com/api/oauth2/authorize?client_id=541498419672383509&permissions=8&scope=bot
After analyzing your tutorial we suggest the following points listed below:Thank you for your contribution @nawab69.
Avoid installation steps which are already well documented.
We suggest you add more comments to your code sections. It is very important in the comments to have a brief explanation.
Improve the structure of your tutorial, it seems it got a bit disorganized.
Finally, in your next contribution detail more your tutorial. It is important for the tutorial to have practical concepts, but it is also very important to have theoretical concepts to understand well what is being done in practice.
Your contribution has been evaluated according to Utopian policies and guidelines, as well as a predefined set of questions pertaining to the category.
To view those questions and the relevant answers related to your post, click here.
Need help? Chat with us on Discord.
[utopian-moderator]
Thank you for your review, @portugalcoin! Keep up the good work!
Congratulations @nawab69! You have completed the following achievement on the Steem blockchain and have been rewarded with new badge(s) :
Click here to view your Board
If you no longer want to receive notifications, reply to this comment with the word
STOPTo support your work, I also upvoted your post!
Hi @nawab69!
Feel free to join our @steem-ua Discord serverYour post was upvoted by @steem-ua, new Steem dApp, using UserAuthority for algorithmic post curation! Your post is eligible for our upvote, thanks to our collaboration with @utopian-io!
Hey, @nawab69!
Thanks for contributing on Utopian.
We’re already looking forward to your next contribution!
Get higher incentives and support Utopian.io!
SteemPlus or Steeditor). Simply set @utopian.pay as a 5% (or higher) payout beneficiary on your contribution post (via
Want to chat? Join us on Discord https://discord.gg/h52nFrV.
Vote for Utopian Witness!
great tutorial, I think having educational content on steem like this is such good value. I am resteeming for extra visibility