Lesson Objectives
A. Exploring Server State Management Options
B. Exploring Based State Management Options
C. Using Session State
Needs are;
A.Asp.NET
B. Visual Studio
C. C#
The difficulty level of commands we use is middle.
Server Based State Management
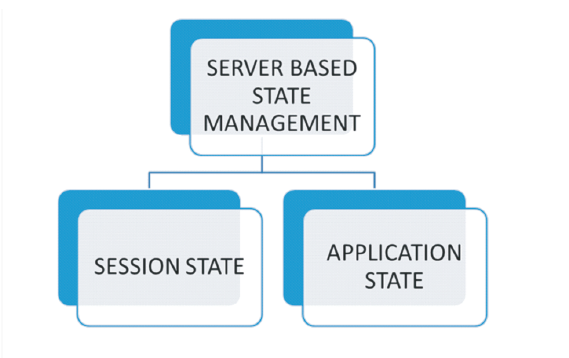
Server-Based State Management allows state information to be stored on the server and provides high security. The network traffic can be reduced as the user information is stored on the server, and need not be sent to the client. The mechanisms of storing the Server-Based State Information are Session State and Application State as shown below.
Server Based State Management in ASP.NET
Session State
Session is the duration for which a user interacts with the web application.Session State maintains the information about a single user. Session is generally created as soon as the user logs in and destroyed when the user logs out. A session object exists on the server for each user.The user's session is identified by the server with the help of the Session ID. The session object is destroyed when the web application is shut down.
The information in the session object can be accessed by all pages which the particular user has visited. Values can be read or written to the session. Session object stores information in the form of Name-Value pairs. The session ID is stored in a cookie on the client and is sent to the server for each request. The session state is an object of the class "HttpSessionState".Session State can be stored in various modes which are discussed below:
I. The "inproc" Mode :
The "inproc" mode is the default mode configured to store the Session State. The state information is stored in the memory of the application server in this mode. It is suitable for storing small amounts of information and provides a high degree of performance as the information is stored in the memory of the application server. It is easy to configure the "inproc" mode. However when the information to be stored is large it impacts the performance of the server, by imposing heavy loads. Information in the session will be lost if the server is restarted.
II. The State Server Mode
The "StateServer" mode uses a windows service named "aspnet_state.exe". The stateinformation is stored as a separate process. The information is available even after the application server is restarted. The "StateServer" mode is slower when compared to the "inproc" mode because; the "StateServer" mode the information is stored on a separate process. Inter-process communication takes place between the application server and the State Server. The state information has to be serialized and stored on to the State Server.
III. The SQLServer Mode
The "SqlServer" mode allows the State information to be stored on Microsoft SQL Server instance. The advantage of SqlServer mode is that it can store large amounts of session information. The session information is available when the application server is restarted as the SQLServer runs as a different process. The state information has to be serialized and stored on to the Microsoft SQL Server.
IV. The Custom Mode
The "Custom" mode can be used to create a session as per the needs of the application. It allows the programmer to create Session ID. It allows the storage of session data in the table of the programmer's choice. The data in the Custom session mode is available even after the application server is restarted. It can be implemented by creating custom state providers. It is slow when compared to the performance of the "inproc" mode.
Demonstration: Using Session State
Let us consider a scenario in which a user enters his login and password. The login and password can be stored in the session object and displayed in all the other pages he visits in the web application.
Steps to create the Demo:
1 ) Create a New Web Project named “SessionDemo”.
2 ) Add a new Web Form named as “Login.aspx”.
3 ) Design the form as below:
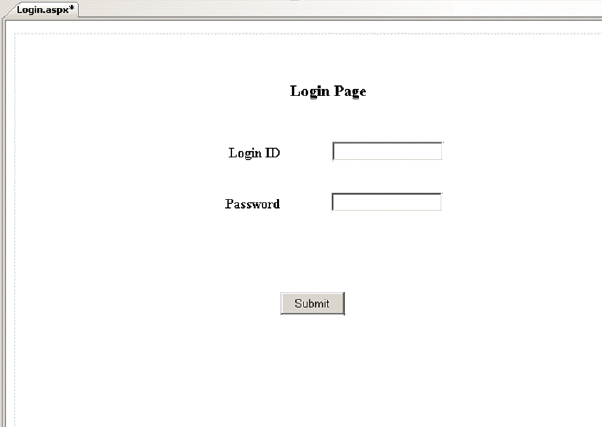
The code for the source view is given below:
<%@PageLanguage="C#"AutoEventWireup="true"CodeFile="Login.aspx.cs"Inherits="L
ogin"%>
<!DOCTYPEhtmlPUBLIC"-//W3C//DTD XHTML 1.0
Transitional//EN""http://www.w3.org/TR/xhtml1/DTD/xhtml1-transitional.dtd">
<htmlxmlns="http://www.w3.org/1999/xhtml">
<headid="Head1"runat="server">
<title></title>
</head>
<body>
<formid="form1"runat="server">
<divstyle="height: 505px">
<asp:LabelID="lblTitle"runat="server"Font-Bold="True"Font-Size="Large"
style="z-index: 1; left: 329px; position: absolute; height: 28px; width: 287px; top: 71px;
font-weight: 700”
Text="Login Page"></asp:Label>
<asp:ButtonID="btnSubmit"runat="server"
style="z-index: 1; top: 314px; position: absolute; left: 318px; width: 74px;"
Text="Submit"onclick="btnSubmit_Click"/>
<asp:LabelID="lblLogin"runat="server"
style="z-index: 1; left: 258px; top: 143px; position: absolute; height: 20px; font-weight:
700"
Text="Login ID"></asp:Label>
<asp:LabelID="lblPassword"runat="server"
style="z-index: 1; left: 254px; top: 202px; position: absolute; height: 23px; font-weight:
700"
Text="Password"></asp:Label>
<asp:TextBoxID="txtLogin"runat="server"
style="z-index: 1; left: 378px; top: 140px; position: absolute"></asp:TextBox>
<asp:TextBoxID="txtPassword"runat="server"
style="z-index: 1; left: 377px; top: 199px; position: absolute"
TextMode="Password"></asp:TextBox>
</div>
</form>
</body>
</html>
4 ) Enter the code below in the code behind file:
protectedvoid btnSubmit_Click(object sender, EventArgs e)
{
Session["login"] = txtLogin.Text;
Session["password"] = txtPassword;
Response.Redirect("Welcome.aspx");
}
5 ) Add a new Web Form named as “Welcome.aspx”. Design the form as below:
6 ) Design the form as below:
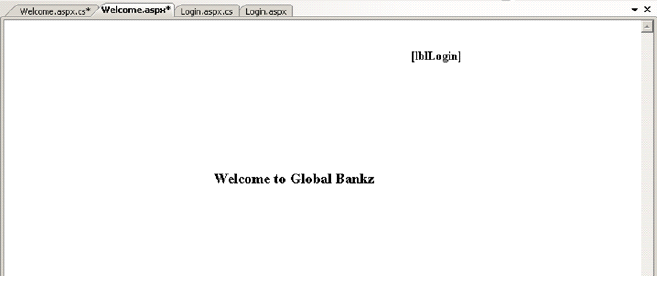
The code for the source view is given below:
<%@PageLanguage="C#"AutoEventWireup="true"CodeFile="Welcome.aspx.cs"Inherits=
"Welcome"%>
<!DOCTYPEhtmlPUBLIC"-//W3C//DTD XHTML 1.0
Transitional//EN""http://www.w3.org/TR/xhtml1/DTD/xhtml1-transitional.dtd">
<htmlxmlns="http://www.w3.org/1999/xhtml">
<headrunat="server">
<title></title>
</head>
<body>
<formid="form1"runat="server">
<div>
<asp:LabelID="lblTitle"runat="server"Font-Bold="True"Font-Size="Large"Style="zindex:
1;
left: 269px; position: absolute; height: 28px; width: 287px; top: 192px; font-weight: 700"
Text="Welcome to Global Bankz"></asp:Label>
<asp:LabelID="lblLogin"runat="server"Style="z-index: 1; left: 521px; top: 36px;
position: absolute; height: 24px; font-weight: 700; width: 271px;"Text=""></asp:Label>
</div>
</form>
</body>
</html>
7 ) Enter the code below in the code behind file “Welcome.aspx.cs” : protectedvoid Page_Load ( object sender, EventArgs e )
{
lblLogin.Text = Session["login"].ToString() + " logged in.";
}
8 ) Right-Click the “Login.aspx” file and select “Set as Start Page” and execute the project.
9 ) View the Output 1 below :
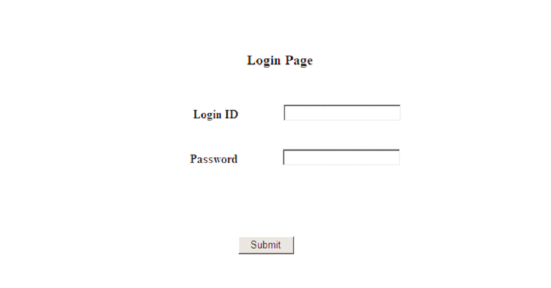
10 ) Enter a Login ID and Password as shown below:
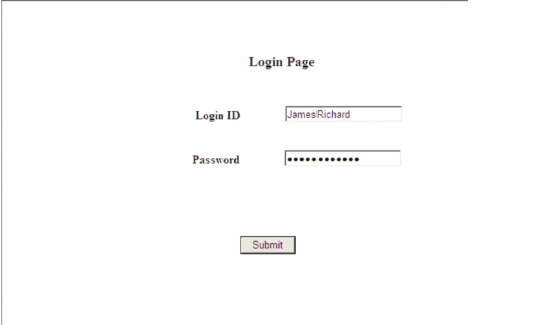
11 ) Click the Submit button and view the Output 2 below: Application

Application State
Application State allows storing of information on the Application Server. It stores information in the form of key-value pairs. It is secure as it is maintained on the server side.The application state is an object of the class "HttpApplicationState". Application State is created when the web application is started and is destroyed when the application is shut down. All the web pages in the web application, can access the application object. The application object is independent of the users.
Posted on Utopian.io - Rewarding Open Source Contributors
I enjoyed reading your tutorial. Although, I think it'll be nice if you learn MVC. Classic ASP.NET is a bit old. Using code behinds makes the code base a bit too jam packed; .NET Core is the new kid in the block. Its really super fast. I know you will like it!
Between, your explanation was really detailed!
Thank you for the contribution. It has been approved.
You can contact us on Discord.
[utopian-moderator]
Your contribution cannot be approved because it does not follow the Utopian Rules.
You have re-written a post I had rejected 8 days ago via another account. The other account is @mrsmalue and the relevant deleted post is https://utopian.io/utopian-io/@mrsmalue/exploring-server-based-state-management-and-using-session-state-asp-net-tutorial
This is cause for ban on utopian, and your account will be banned.
You can contact us on Discord.
[utopian-moderator]