What Will I Learn?
In this tutorial I'm going to start a new curriculum to build a shopping list app with Electron framework. that will allow to build a simple shopping list with only javascript,html,css also I'm going to deal with multiple functions and I will explain everything clearly and step by step.
- Install Node.js
- Creating New Project
- First Code
- Create an HTML file for our Window
Requirements
- Any Modern OS (Windows - Mac - Linux)
- Text Editor (VSCode eg.)
- Node.js (8.9.4) or above
Difficulty
- Intermediate
Getting Started
Install Node.js
Go to https://nodejs.org/en/
Then download Node.js 8.9.4 or above (LTS is recommended)


Animated GIF for installing Node.js
Creating New Project
Create a new folder for your project for example:
C:\Projects\ShoppingList
Open your editor and create a new file inside your ShoppingList folder
for example
Index.js
Then open command prompt or terminal
Then type npm init
Hit Enter.
Then type your project name shoppinglist (lowercase only)

Then Hit Enter.
Then answer the rest of question to skip any option value just hit enter.
The following is just an example:
package name: shoppinglist
version: (1.0.0)
description: a shopping list tutorial
entry point: (index.js)
test command:
git repository:
keywords:
author: jinzo
license: (MIT)
That will create a new package.json file
Content
{
  "name": "shoppinglist",
  "version": "1.0.0",
  "description": "",
  "main": "index.js",
  "scripts": {
    "start": "electron ."
  },
  "author": "jinzo",
  "license": "MIT"
}
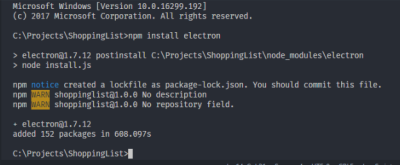
Now open command prompt or terminal then type npm install electron --save
Then Hit Enter.

Note:
Electron package size is about 140MB and it may take some time.
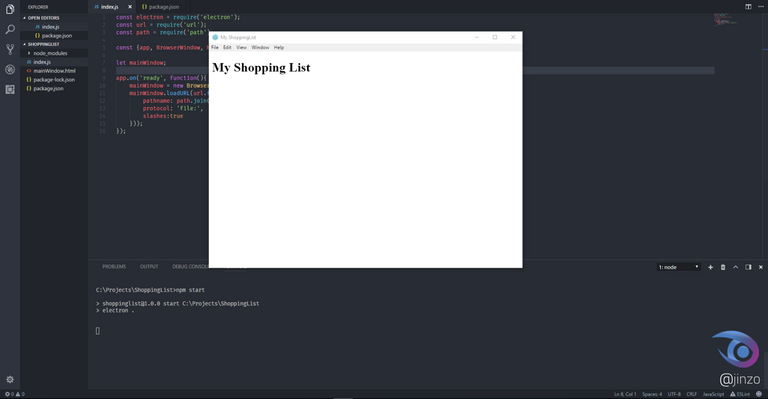
The final result

Then open index.js that we have already created before.
Type const electron = require('electron'); to add electron framework to our workspace.
then add url & path as well like the following:
const electron = require('electron');
const url = require('url');
const path = require('path');
Then define app, window for electron as objects
const {app, BrowserWindow, Menu} = electron;
Then you've to create a variable to represent our main window for shopping list
let mainWindow;
Then now you have to make a listen for the app to be ready. and once the app is ready we gonna run a function we will call it mainWindow then set it to a new browser window then added an empty object. because there is no configuration options we need right now for this.
app.on('ready', function(){
  mainWindow = new BrowserWindow({});
}));
Now create a new HTML file then call it mainWindow.html
<!DOCTYPE html>
<html>
<head>
  <title>ShoppingList</title>
</head>
<body>
<h1>My Shopping List</h1>
</body>
</html>
Then we gonna have to load an HTML file to the window using protocol file.
app.on('ready', function(){
  mainWindow = new BrowserWindow({});
  mainWindow.loadURL(url.format({
    pathname: path.join(__dirname, 'mainWindow.html'),
    protocol: 'file:',
    slashes:true
    }));
});
so our final result for index.js will be like the following:
const electron = require('electron');
const url = require('url');
const path = require('path');

const {app, BrowserWindow, Menu} = electron;

let mainWindow;

app.on('ready', function(){
    mainWindow = new BrowserWindow({});
    mainWindow.loadURL(url.format({
        pathname: path.join(__dirname, 'mainWindow.html'),
        protocol: 'file:',
        slashes:true
    }));
});
Then open command prompt and type:
npm start

What's Next?
Next tutorial I will added an interactive functions to get the best results for our electron app as well as we gonna remove the default menu items and customize it for our shopping list and so on.
All Images/GIF has been created by @jinzo for an open source project.
Posted on Utopian.io - Rewarding Open Source Contributors
Thank you for the contribution. It has been approved.
Suggestions:
You can contact us on Discord.
[utopian-moderator]
Well, Your suggestions will be considered.
Thank you
@jinzo, Contribution to open source project, I like you and upvote.
Sorry, I didn't get your point :)
It's just good. I like it. Especially electron. Look forward to seeing more.
Happy to hear this : )
Ya electron my favorite framework.
Your previous comment seems to be automated ahahaha.
Maybe it is, maybe it isn't. I am really excited about events, notifications, and message routing. Electron's ability to deliver notifications through taskbar applications is really interesting to me. Something I always wanted to do, but never got around to
Okay, I will keep that in mind in next tutorials.
Thank you.
Hey @jinzo I am @utopian-io. I have just upvoted you!
Achievements
Suggestions
Get Noticed!
Community-Driven Witness!
I am the first and only Steem Community-Driven Witness. Participate on Discord. Lets GROW TOGETHER!
Up-vote this comment to grow my power and help Open Source contributions like this one. Want to chat? Join me on Discord https://discord.gg/Pc8HG9x