1. System upgrade
The first thing I do after installing new system is upgrade procedure. Linux distro images (ISO files) are released every few months and probably many of the packages were updated by their maintainers since the last ISO file was released. To keep your system up to date you need to perform regular upgrades.
I prefer apt-get tool for this,
# apt-get update
# apt-get dist-upgrade -y
hint: remember to reboot your system if the kernel package was upgraded
2. Set default text editor
I use only one text editor Vim... Vim has many advantages and one of them is that it is available out of the box in almost all Linux distros. To configure Vim as default system text editor I use update-alternatives tool,
$ update-alternatives --config editor
There are 4 choices for the alternative editor (providing /usr/bin/editor).
Selection    Path                Priority   Status
------------------------------------------------------------
* 0            /bin/nano            40        auto mode
  1            /bin/ed             -100       manual mode
  2            /bin/nano            40        manual mode
  3            /usr/bin/vim.basic   30        manual mode
  4            /usr/bin/vim.tiny    10        manual mode
Press <enter> to keep the current choice[*], or type selection number:
Chose option **3** and confirm. From now the tools like visudo, crontab will run Vim to edit config files.
3. SSH security - AllowUsers
If the server is used by the limited number of users, it's worth to disable login option for all but trusted users. It is quite simple when you use OpenSSH (the most popular SSH server),
# vi /etc/ssh/sshd_config
add new line,
AllowUsers jamzed
and restart sshd service,
# sshd -t
this will check the configuration file systax, if no errors you can execute
# service sshd restart
After sshd restart only the jamzed user will be able to login.
hint: you can safely restart sshd service and your SSH session won't be disconnected
4. SSH security - PubkeyAuthentication
Passwords, passwords, passwords... I don't like to type my password every time I login to my server. Fortunatelly we have the ability to log in to the servers using public and private keys. Every modern Linux distro has enabled PubkeyAuthentication (in /etc/ssh/sshd_config) option by default, so all what we need to do is just to generate a pair of keys and copy the public key to the server.
$ ssh-keygen -b 4096 -C my_key
Generating public/private rsa key pair.
Enter file in which to save the key (/root/.ssh/id_rsa):
Created directory '/root/.ssh'.
Enter passphrase (empty for no passphrase):
Enter same passphrase again:
Your identification has been saved in /root/.ssh/id_rsa.
Your public key has been saved in /root/.ssh/id_rsa.pub.
The key fingerprint is:
SHA256:iWpy+YnHAaQd98yfVMO45k2y0GZfouugBArd5K8RiHg my_key
The key's randomart image is:
+---[RSA 4096]----+
|           o     |
|    o .   . +    |
|   +.o + . o .   |
|.o.=o  .=.O o .  |
|+ E =.. SO O o   |
| o . *.   * o    |
|  o *.o..  .     |
|   + *oo ..      |
|    o.+  ..      |
+----[SHA256]-----+
Passhphrase is password to the private key, I highly recommend to set some and use ssh-agent. ssh-agent is like a keychain, you can import private key (the passphrase will be required once) and use it many times.
ssh-keygen command generates a pair of keys, private and public, remember that the private key (~/.ssh/id_rsa) should be secured as high as possible, it is only for you, you can only share the public key (~/.ssh/id_rsa.pub).
When your keys are generated, you can copy the public key to the server. You can use script ssh-copy-id or just copy/paste the content of the id_rsa.pub.
- ssh-copy-id login@server.tld
- copy/paste the content to login@server.tld:.ssh/authorized_keys
I will use ssh-copy-id,
# ssh-copy-id 192.168.1.1
/usr/bin/ssh-copy-id: INFO: Source of key(s) to be installed: "/root/.ssh/id_rsa.pub"
The authenticity of host '192.168.1.1 (192.168.1.1)' can't be established.
ECDSA key fingerprint is SHA256:lkBZQlRAuh7RE56QK5hSst9TvqxOxGS6A0hMe3nVJfQ.
Are you sure you want to continue connecting (yes/no)? yes
/usr/bin/ssh-copy-id: INFO: attempting to log in with the new key(s), to filter out any that are already installed
/usr/bin/ssh-copy-id: INFO: 1 key(s) remain to be installed -- if you are prompted now it is to install the new keys
root@192.168.1.1's password:
Number of key(s) added: 1
Now try logging into the machine, with:   "ssh '192.168.1.1'"
and check to make sure that only the key(s) you wanted were added.
Our public key has been uploaded and we can ssh using key authentication method. ;-)
5. SSH - PasswordAuthentication
When the public key is uploaded and we are able to login without password, it's time to disable password authentication method.
# vi /etc/ssh/sshd_config
and add the line,
PasswordAuthentication no
If this line already exist but is set to yes you can change it to no and reload ssh daemon.
6. fail2ban
fail2ban scans log files and bans IPs that show the malicious signs. The perfect usage is tracking invalid SSH logins and block IP addresses which try to brute force users password. The default setting is 5 attempts and the IP will be blocked for an hour :) This is perfect mechanism to block any robots and automatics network scans.
# apt-get install fail2ban
And this is all what you need to install it, the good practice is to whitelist your home IP, to avoid any issues.
# vi /etc/fail2ban/jail.conf
and update ignoreip setting,
ignoreip = 127.0.0.1/8 your.ip.addre.ss
7. Firewall (iptables)
When it comes to firewalls I confess only one rule, block everything and allow only what is necessary. The simplest set of my rules is,
# iptables -A INPUT -m conntrack --ctstate RELATED,ESTABLISHED -j ACCEPT
# iptables -A INPUT -i lo -j ACCEPT
# iptables -A INPUT -m conntrack --ctstate INVALID -j DROP
# iptables -A INPUT -p tcp -m tcp --dport 22 -j ACCEPT
# iptables -A INPUT -p icmp -j ACCEPT
# iptables -P INPUT DROP
which is equivalent to,
- enable stateful firewall (conntrack)
- allow incoming traffic to loopback interface
- block invalid packets (invalid headers or checksums, invalid TCP flags, invalid ICMP messages)
- allow SSH connections (port TCP/22)
- allow PING requests
- drop everything else
In Ubuntu Linux, if you want to save and load firewall policy at system startup, you need to install one extra package, iptables-persistent
# apt-get install iptables-persistent
During installation you will be asked if you want to save the current set of the rules, if you already made any changes in firewall configuration you can chose 'YES'.
To save iptables configuration you need to run,
# /etc/init.d/netfilter-persistent save
hint: iptables configuration files are in location: /etc/iptables/rules.v4 for IPv4 and /etc/iptables/rules.v6 for IPv6
8. System stats and monitoring
I like to know what is happening with my servers and have possibility to check the current load, cpu, disk or memory usage. I use many tools for that, also external monitoring system, but for quick local troubleshooting I use:
- sysstat
- vnstat
- iotop
- iftop
- bwm-ng
- htop
- munin
To install all of them you can run,
# apt-get install sysstat vnstat iotop iftop bwm-ng htop munin
- sysstat - collection of tools for system monitoring, (disk, cpu, memory), sysstat let you collect some metrics and use historical data

- vnstat - network statistics, you can see what is your traffic, daily/weekly/monthly/etc...

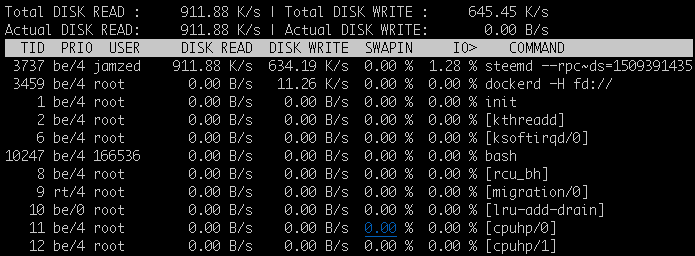
- iotop - tool for I/O monitoring, you can easily check which process generate high disk usage

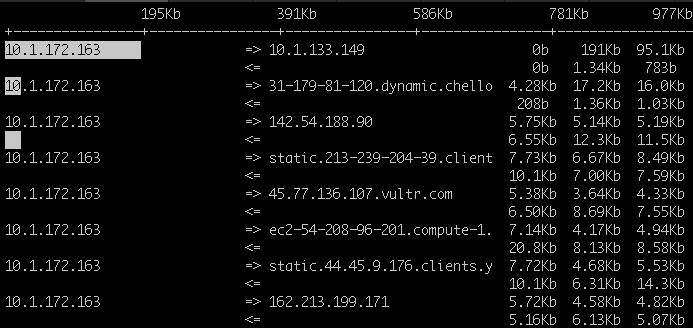
- iftop - network usage monitor

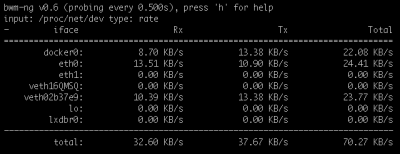
- bwm-ng - bandwidth monitor

- htop - top on steroids ;-)

- munin - system statistics/graphs, it has a lot of plugins ready to use (disk, memory, cpu, uptime, apache traffic, nginx traffic, memcached, mysql), if something is missing you can write your own script and monitor whatever you need.

9. sudo
sudo is a tool that allows users to run programs with the security privileges of another user, by default the root. When you install Ubuntu the installer creates unprivileged user account and add it to the sudo group, this trick lets you manage the system without direct access to root account.
Behind the UI installer execute command like this:
# adduser username sudo
Users in sudo group can execute all commands with root privileges without knowing root password, only their own password will be required,
# sudo /bin/command
If you want to grant sudo permission to user (testuser) to run specific command (/sbin/reboot) without asking for password you can use Visual Sudo Editor visudo (it will open /etc/sudoers file) and add below line:
testuser ALL=(ALL) NOPASSWD: /sbin/reboot
hint: if you want to switch user to root you can run: sudo su - root
Posted on Utopian.io - Rewarding Open Source Contributors
Useful post. Thanks. I am just stepping into Linux world myself
Great to hear that, if you need any help you can ping me on steemit.chat. ;-)
Great post! The SSH security is always vital :D
Hey @jamzed I am @utopian-io. I have just upvoted you at 6% Power!
Achievements
Suggestions
Did you know?
Up-vote this comment to grow my power and help Open Source contributions like this one. Want to chat? Join me on Discord https://discord.gg/Pc8HG9x
Hi, you should remove the part "vote for a witness".
[utopian-moderator]
Thanks, it's done.
Approved.
Linux is the only way to go!
Forget Windows and Bill Gates junk OS!