Scrollout F1 Tutorial || Make AntiVirus and Spam Protection
What Will I Learn?
We will learn how to do AntiVirus and Spam Protection with Scrollout F1 Software
Requirements
Minimum Requirements
1 GB of RAM
30 GB storage drive
1 Processor x86/AMD64
1 Ethernet x 1 IPv4 address
UDP ports: 53 123 4500 6277 24441
TCP ports: 25 80 443 2703
Difficulty
- Advanced
Tutorial Contents
The Scrollout F1, an e-mail software designed for Linux and Windows, was created to ensure the safety of users.
It offers features like free anti spam, antivirus and email security wall
Github=https://github.com/steelburn/scrolloutf1-repair
Debian Download=https://www.debian.org/distrib/
Scrollout F1 Setup
1 We complete the current version of Debian with the standard installation and login to the Debian terminal console with the user and his password. Use a "root" account for Debian.
2 Run the following commands in order.
KOD:
apt-get install sudo -y
sudo –i
cd /tmp
tar -xvf scrolloutf1.tar
chmod 755 /tmp/scrolloutf1/www/bin/*
/tmp/scrolloutf1/www/bin/install.sh wget http://sourceforge.net/projects/scrollout/files/update/scrolloutf1.tar/download -O scrolloutf1.tar
3 You can pass all the questions asked during the installation steps by saying enter. With this enter operation we will have chosen the default options.
4 After the installation is complete, Scrollout F1 will display the user interface and access information output.
User: Admin (default)
Password: 123456 (default)URL: https://192.168.1.1/
Note: If you want to remove Scrollout F1, you can run /var/www/bin/uninstall.sh.
Scrollout F1 Ports Used
You need to activate the corresponding ports via your FW. If there is no FW in front of Scrollout F1, debian will be turned on in the default installation.
KOD:
out 53 UDP - DNS queries, RBL
out 80 TCP - HTTP updates
in 80 TCP - Web management interface
in 443 TCP - TLS / SSL access to the web management interface (recommended and default session type)
25/587 TCP - Incoming SMTP traffic (+ if there are different personalized local ports)
out 25 TCP - Outbound SMTP Traffic (+ if different remote ports)
out 6277 UDP - DCC service
out 2703 TCP - Razor2 service
out 24441 UDP - Pyzor service
out 123 UDP - NTP time update
in / out 4500 UDP - IPSec NAT Traversal
After this, Scrollout F1 becomes available. After this process, we continue with the configuration step.
Scrollout F1 Configuration
We open the Scrollout F1 server IP address (https://192.168.1.1/) in the browser and log in by entering the desired default access information (User: Admin Password 123456).
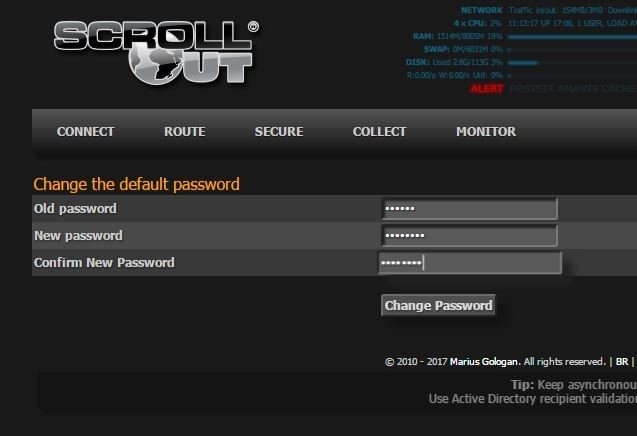
The first screen shows that the default password needs to be changed. We change the password and sign in again.
General Configuration
Connect
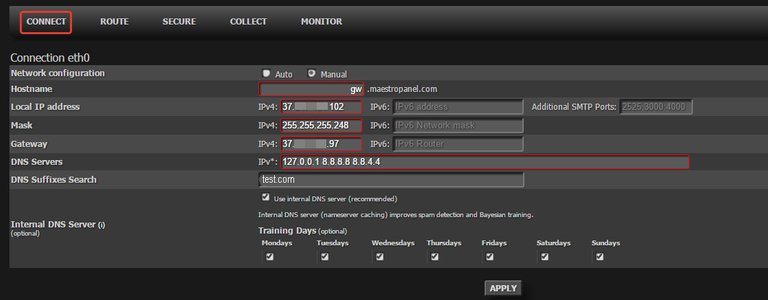
In the Connect tab, we set the Scrollout F1 network settings. Make sure that the information provided here is correct. It will be healthy if the hostname is compatible with suffix.
Ex: gw.test.com GWA recording Scrollout needs to view F1 server.
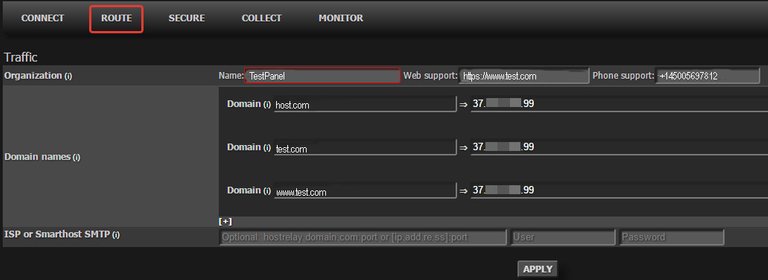
Route
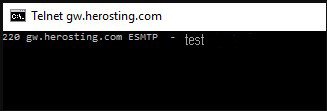
We provide information about the organization on the route table. This information is contained in the banner description and appears to the user in a telnet request (helo).
In the Domain names field, we specify the domains to be passed from Scrollout AntiSpam and the IP address of the Mail Server to be routed.
AntiSpam and AntiVirus Protection with Scrollout F1
AntiSpam and AntiVirus Protection with / Email / Linux / Security / Scrollout F1
There are many solutions for mail spam , which is the problem of most institutions / service providers . In addition to these, there are free alternatives that work well. As a result of our tests, we found the Scrollout F1 to be successful and we will install and demo for the institution / service providers.
Here you can compare Virus Bulletin Spam results from Scrollout F1.
Scrollout F1 VBSpam
Requirements
Debian Download
Scrollout F1 (we will use wget on Debian )
- Alternative: Instead of obtaining Debian and Scrollout F1,you can download andsave theISOthickness directly from the Scrollout F1 Download page.
If you use this alternative, Debian will have to perform the standard installation and update the packages afterwards.
Note: In Debian installations, make sure that the network connection is configured correctly and that the internet access is healthy.
Note2: Scrollout F1 is not running on OpenVZ due to network incompatibility.
Default Scrollout information: User: Admin Password: 123456
Scrollout F1 Setup
We complete the current version of Debian with the standard installation and login to the Debian terminal console with the user and his password. Use a "root" account for Debian.
Run the following commands in order.
apt-get install sudo -y
sudo -i
cd / tmp
tar -xvf scrolloutf1.tar
chmod 755 / tmp / scrolloutf1 / www / bin / *
/tmp/scrolloutf1/www/bin/install.sh
wget http://sourceforge.net/projects/scrollout/files/update/scrolloutf1.tar/download -O scrolloutf1.tar
You can pass all the questions asked during the installation steps by saying enter. With this enter operation we will have chosen the default options.
After the installation is complete, Scrollout F1 will display the user interface and access information output.
User: Admin (default)
Password: 123456 (default)URL: https://192.168.1.1/
Note: If you want to remove Scrollout F1, you can run /var/www/bin/uninstall.sh.
Scrollout F1 Ports Used
You need to activate the corresponding ports via your FW. If there is no FW in front of Scrollout F1, debian will be turned on in the default installation.
out 53 UDP - DNS queries, RBL
out 80 TCP - HTTP updates
in 80 TCP - Web management interface
in 443 TCP - TLS / SSL access to the web management interface (recommended and default session type)
25/587 TCP - Incoming SMTP traffic (+ if there are different personalized local ports)
out 25 TCP - Outbound SMTP Traffic (+ if different remote ports)
out 6277 UDP - DCC service
out 2703 TCP - Razor2 service
out 24441 UDP - Pyzor service
out 123 UDP - NTP time update
in / out 4500 UDP - IPSec NAT Traversal
After this, Scrollout F1 becomes available. After this process, we continue with the configuration step.
Scrollout F1 Configuration
We open the Scrollout F1 server IP address (https://192.168.1.1/) in the browser and log in by entering the desired default access information (User: Admin Password 123456).
The first screen shows that the default password needs to be changed. We change the password and sign in again.
Scrollout Password
General Configuration
Connect
In the Connect tab, we set the Scrollout F1 network settings. Make sure that the information provided here is correct. It will be healthy if the hostname is compatible with suffix.
Ex: gw.test.com GWA recording Scrollout needs to view F1 server.
Scrollout Network Settings
Route
We provide information about the organization on the route table. This information is contained in the banner description and appears to the user in a telnet request (helo).
Scrollout F1 heloname
In the Domain names field, we specify the domains to be passed from Scrollout AntiSpam and the IP address of the Mail Server to be routed.
Scrollout Domain Settings 2
Advanced Configuration
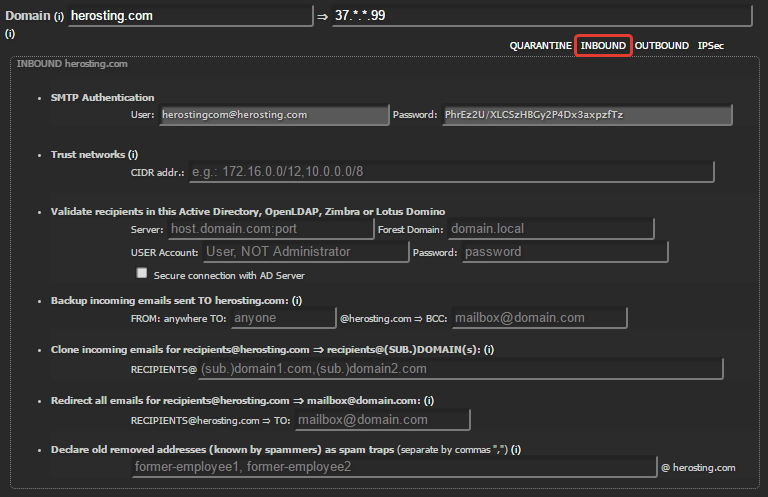
Let's examine the inbound tab. The processes performed in the review can be performed separately for each domain.
Trust networks: You can specify "Trust networks" in the Inbound drop-down window. If you want to add trust network you need to add in CIDR format.
Ex: 192.168.1.0/24. It is recommended that you fill in this field.Validate recipients ..: AD, OpenLDAP, Zimbra or Domino can be used for recipient validation. If you do not have the information, leave it blank.
Backup incoming email .. : @ HeroSting.com mail future mail can be stored in the mailbox you specify. It can be used like Archiving.
Clone incoming email ..: @ herosting.com mail can be sent a clone to the mailbox you specified. Eg, when Mail Server migration is performed, new mail may need to be dropped on both servers.
Redirect all email ..: All future mailings to @ herosting.com mail can be forwarded to your specified mailbox.
Declare old removed addresses ..: Every mail sent to the specified mailboxes is marked as spam and is not delivered to the mailbox.
Secure
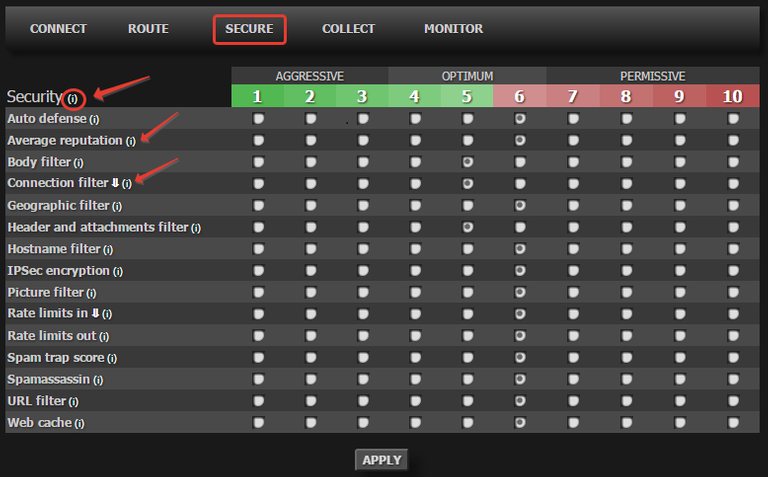
The area where security tightening is configured.
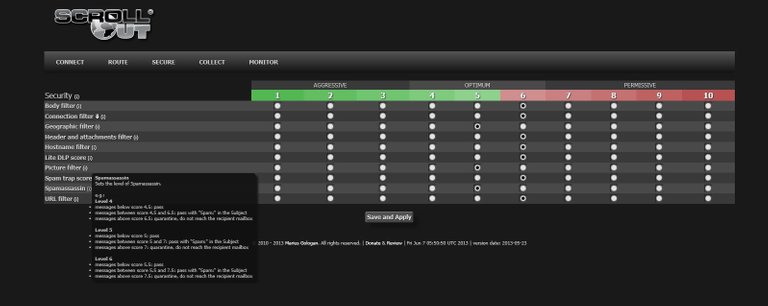
Levels, Security
Spam security can be improved compared to mail and mail. You can think of it as a green aggressive, red permissive grade.
You can see what each parameter means (i) by coming to its icon. Excessive aggressive values can cause spam to fall in non-spam mails. You can apply the scores we use.
Countries
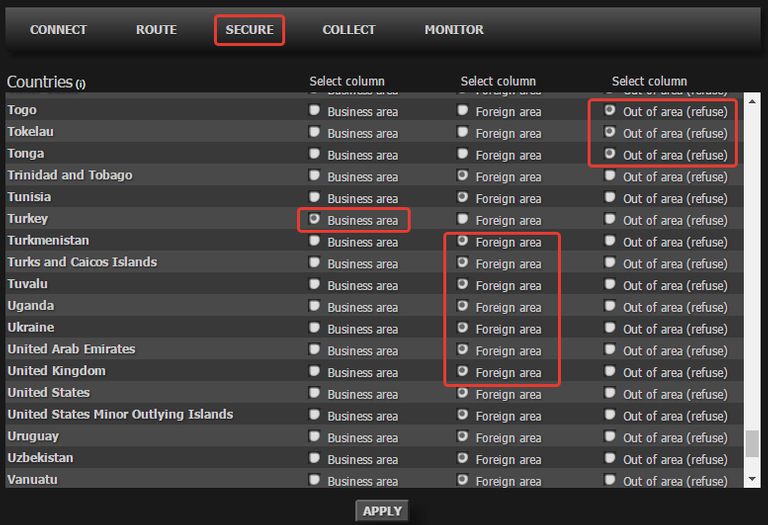
The score is applied according to the geographical position.
Business area: Geographical score is not applied.
Foreign area: Depending on the level of security, a score score is applied based on the location of the shipment, the location of the relay, and the location of the links in the body.
Out of area: Attempts to block the message using two Geo method methods (one at the link level, the second is the message scoring process).
If you do not have any information, you can leave it as the default (Business area).
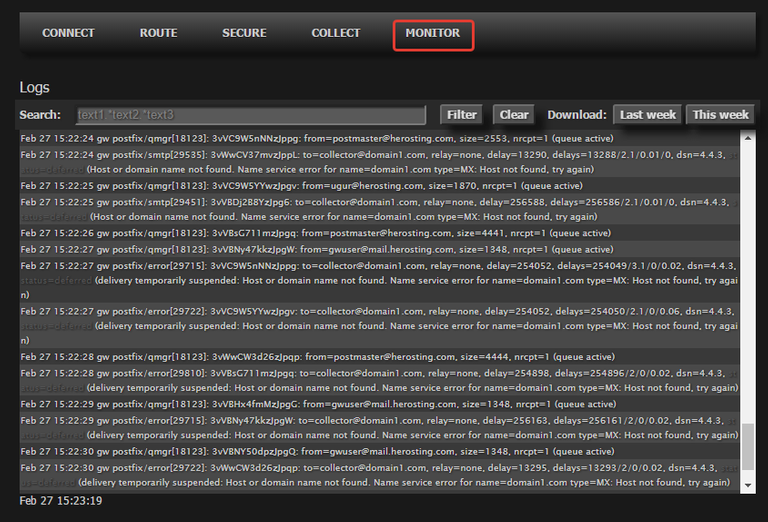
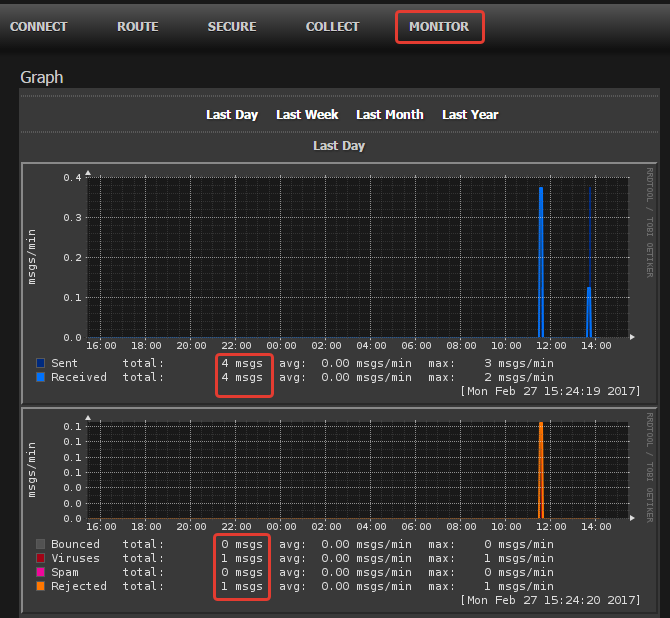
Monitor
The area that provides all traffic tracking.
Logs
The area in which you can examine logs as live.
Stats
The area where you can get detailed statistical data.
Posted on Utopian.io - Rewarding Open Source Contributors
Your contribution cannot be approved because it does not follow the Utopian Rules.
You can contact us on Discord.
[utopian-moderator]