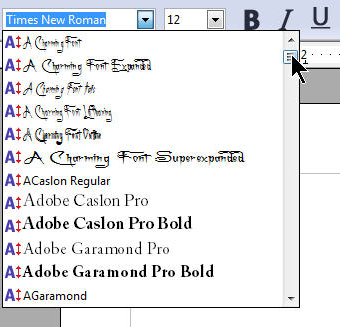
The OpenOffice default font is over-used and often poorly received. Changing it on each new document can be annoying. Changing the default template is a quick solution.
OpenOffice.org is a powerful, free office suite with a large variety of functions, but its choice of default font, the over-used Times New Roman, will often not be suitable to the task at hand. Changing this font at the start of every project is a possibility but when this is the first step in every project, a better solution can be found.

Creating a New Template
The first step in changing the font is to create a new template. Templates in OpenOffice are simply blank documents saved to a specific folder, where they can be found by the software and used to clone new documents as and when required.
Create a new document either by opening OpenOffice and selecting the “New Text Document” option, or by going to File -> New Text Document. This will open a new blank document using the existing default template.
Selecting the New Default Font
Unless the layout has been customised, there will be a button to the left of the “Apply Style” box, on the second line of the icon bar above the blank page. At present, this box should read “Default” and be to the left of the currently selected font; which is likely Times New Roman. Select this icon or press Ctrl+F11 to access the Styles and Formatting pop-up menu.
This menu lists all the styles set up in the current document. Select right click on the “Default” option and select “Modify”. This will open a new pop-up menu where a new font face and size can be selected. Select the font and font size required. If more than one dictionary has been installed, the default dictionary to use can also be selected from the "Language" box in this menu. Click on the Okay button when everything has been set up as required.
Saving the New Template
Once the desired font and dictionary, if required, have been selected, click on File -> Templates -> Save... to bring up the Templates save window. This is a special option for saving templates and it will have already located the folder where OpenOffice looks for templates. Enter the name for this new template in the long box at the top of the window and click on Okay. The template will now have been saved.
Setting the New Default Template
Once the new template has been saved, close all open documents but not OpenOffice itself. This is important as some installations of OpenOffice cannot change the default template while documents are open; although some can.
When all documents are closed, click on File -> Templates -> Organize... to bring up the Template Management window. Double-click on the “My Templates” icon in the left panel of this new window to reveal the template created above, and right-click on it. Select “Set as Default Template” to make this new template the default, then click on the Close button.
The new template will now be the default and all text documents created from now on will use its font and dictionary as standard.
Posted on Utopian.io - Rewarding Open Source Contributors
This post has received gratitude of 1.00 % from @jout
An excellent and useful article dorodor. Thanks very much!
Very useful. Thank you.
Your contribution cannot be approved because it is not as informative as other contributions. See the Utopian Rules. Contributions need to be informative and descriptive in order to help readers and developers understand them.
You can contact us on Discord.
[utopian-moderator]