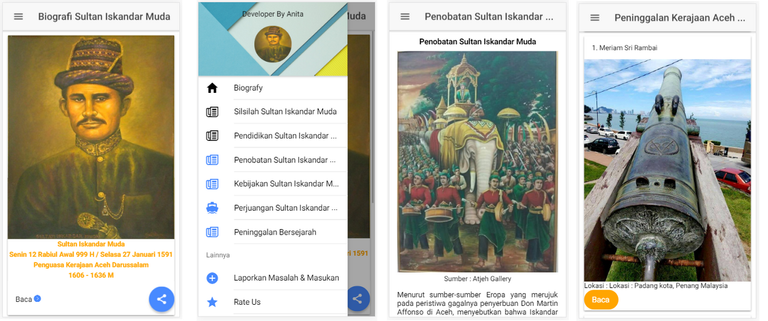
Repository
[Ionic Repository](https://github.com/ionic-team/ionic)
What Will I Learn?
- You will learn How to add & style image avatar
- You will learn How To Add Entry List to Side Menu
- You will learn How To Use The Navigation NavParams Ionic
Requirements
- NodeJS [Download](https://nodejs.org/en ) & [How To Install](https://www.npmjs.com/get-npm)
- Ionic Framework
- Code Editor (Sublime or other)
- Browser (Firefox Mozilla or Chrome or Other)
Difficulty
- Intermediate
Tutorial Contents
Today, I will show how to learn components & make a biographical application of an important figure using the Ionic Framework.
To follow this tutorial you also have to follow the previous tutorial [Part 1](https://steemit.com/utopian-io/@anitatmj/build-the-biografy-of-sultan-iskandar-muda-mobile-application-with-ionic-framework-part-1)
#Step by Step :
1. Open your project beforehand and get ready to add some components to our mobile application.
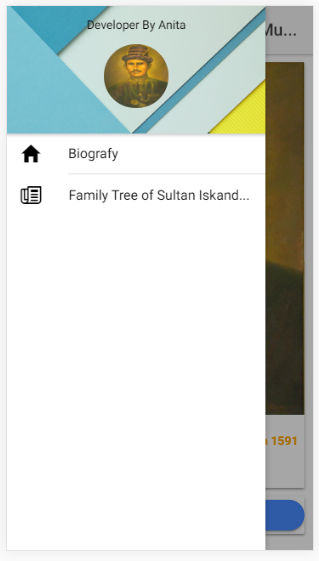
2. Today I will add an avatar image to the header of the side menu page.
3. open code editor and then open app.html (from directory src/app)

4. add this code for app.html
```<ion-menu [content]="mainContent">
<ion-header class="headsidemenu">
<p class="p_header">Developer By Anita</p>
//dont forget to put your image to this path assets/img/yourimage
<img class="i" src="assets/img/avatar.jpg">
</ion-header>
<ion-content>
<ion-list >
<ion-item color="positive" menuClose="" on-click="goToHome()">
<ion-icon name="md-home" item-left></ion-icon>
Biografy
</ion-item>
<ion-item color="family" menuClose="" on-click="goToFamilytreePage()">
Family Tree of Sultan Iskandar Muda
<ion-icon name="md-paper" item-left></ion-icon>
</ion-item>
</ion-list >
</ion-content>
```
for app.css
```
.i{
"width: 25%;
height: 50%;
align-content: center;
display:block; margin:auto;"
}
```
result :

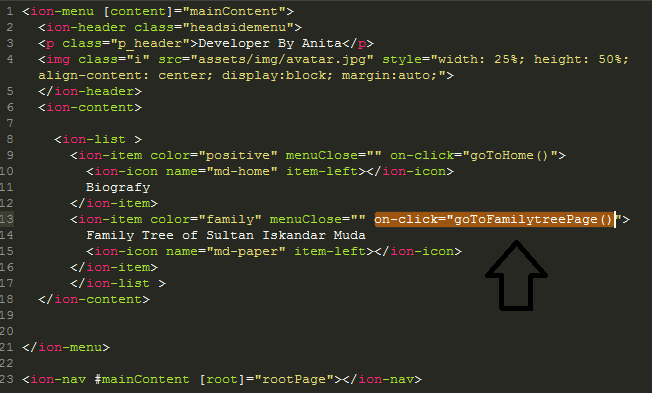
Next I will show you how to use NavParams to navigate between pages. First, make on-click fungction first so you can move to another page.

this code to app.html
```<ion-item color="family" menuClose="" on-click="goToFamilytreePage()">
Family Tree of Sultan Iskandar Muda
<ion-icon name="md-paper" item-left></ion-icon>
</ion-item>
```
Now import Nav controller to app.component.ts and put Navparams to fungction. This complete code :
```
import { Component, ViewChild } from '@angular/core';
import { Platform, Nav } from 'ionic-angular';
import { StatusBar } from '@ionic-native/status-bar';
import { SplashScreen } from '@ionic-native/splash-screen';
import { HomePage } from '../pages/home/home';
import { FamilytreePage } from '../pages/familytree/familytree';
templateUrl: 'app.html'
})
export class MyApp {
@ViewChild(Nav) navCtrl: Nav;
rootPage:any = HomePage;
constructor(platform: Platform,statusBar: StatusBar, splashScreen: SplashScreen) {
platform.ready().then(() => {
statusBar.styleDefault();
splashScreen.hide();
});
}
goToHome(params){
if (!params) params = {};
this.navCtrl.setRoot(HomePage);
}
goToFamilytreePage(params){
if (!params) params = {};
this.navCtrl.setRoot(FamilytreePage);
}
}
```
Result Video :
Curriculum
You can read and follow this tutorial about Ionic Framework
[Build The Biografy of Sultan Iskandar Muda Mobile Application with Ionic Framework [Part 1]](https://steemit.com/utopian-io/@anitatmj/build-the-biografy-of-sultan-iskandar-muda-mobile-application-with-ionic-framework-part-1)
[Build A Simple CV Mobile Application with Ionic Framework (Part 1 of 3)](https://steemit.com/utopian-io/@anitatmj/build-a-simple-curriculum-vitae-mobile-application-with-ionic-framework-in-3-days-part-1-of-3)
[Build A Moile Application with Ionic Creator](https://steemit.com/utopian-io/@anitatmj/make-a-mobile-application-with-ionic-creator-fast-and-easy)
Proof of Work Done
You can get this Project on my github : [app_biografy_sultan_iskandar_muda](https://github.com/anitatmj/biografy_app)
Thank you to Following my tutorial about ionic framework if you have a problem about following this tutorial please contact me or comment here.

Repository
[Ionic Repository](https://github.com/ionic-team/ionic)
What Will I Learn?
You will learn How to add & style image avatar
You will learn How To Add Entry List to Side Menu
You will learn How To Use The Navigation NavParams Ionic
Requirements
NodeJS [Download](https://nodejs.org/en ) & [How To Install](https://www.npmjs.com/get-npm)
Ionic Framework
Code Editor (Sublime or other)
Browser (Firefox Mozilla or Chrome or Other)
Difficulty
- Intermediate
Tutorial Contents
Today, I will show how to learn components & make a biographical application of an important figure using the Ionic Framework.
To follow this tutorial you also have to follow the previous tutorial [Part 1](https://steemit.com/utopian-io/@anitatmj/build-the-biografy-of-sultan-iskandar-muda-mobile-application-with-ionic-framework-part-1)
#Step by Step :
1. Open your project beforehand and get ready to add some components to our mobile application.
2. Today I will add an avatar image to the header of the side menu page.
3. open code editor and then open app.html (from directory src/app)

4. add this code for app.html
```<ion-menu [content]="mainContent">
<ion-header class="headsidemenu">
<p class="p_header">Developer By Anita</p>
//dont forget to put your image to this path assets/img/yourimage
<img class="i" src="assets/img/avatar.jpg">
</ion-header>
<ion-content>
<ion-list >
<ion-item color="positive" menuClose="" on-click="goToHome()">
<ion-icon name="md-home" item-left></ion-icon>
Biografy
</ion-item>
<ion-item color="family" menuClose="" on-click="goToFamilytreePage()">
Family Tree of Sultan Iskandar Muda
<ion-icon name="md-paper" item-left></ion-icon>
</ion-item>
</ion-list >
</ion-content>
```
for app.css
```
.i{
"width: 25%;
height: 50%;
align-content: center;
display:block; margin:auto;"
}
```
result :

Next I will show you how to use NavParams to navigate between pages. First, make on-click fungction first so you can move to another page.

this code to app.html
```<ion-item color="family" menuClose="" on-click="goToFamilytreePage()">
Family Tree of Sultan Iskandar Muda
<ion-icon name="md-paper" item-left></ion-icon>
</ion-item>
```
Now import Nav controller to app.component.ts and put Navparams to fungction. This complete code :
```
import { Component, ViewChild } from '@angular/core';
import { Platform, Nav } from 'ionic-angular';
import { StatusBar } from '@ionic-native/status-bar';
import { SplashScreen } from '@ionic-native/splash-screen';
import { HomePage } from '../pages/home/home';
import { FamilytreePage } from '../pages/familytree/familytree';
templateUrl: 'app.html'
})
export class MyApp {
@ViewChild(Nav) navCtrl: Nav;
rootPage:any = HomePage;
constructor(platform: Platform,statusBar: StatusBar, splashScreen: SplashScreen) {
platform.ready().then(() => {
statusBar.styleDefault();
splashScreen.hide();
});
}
goToHome(params){
if (!params) params = {};
this.navCtrl.setRoot(HomePage);
}
goToFamilytreePage(params){
if (!params) params = {};
this.navCtrl.setRoot(FamilytreePage);
}
}
```
Result Video :
Curriculum
You can read and follow this tutorial about Ionic Framework
[Build The Biografy of Sultan Iskandar Muda Mobile Application with Ionic Framework [Part 1]](https://steemit.com/utopian-io/@anitatmj/build-the-biografy-of-sultan-iskandar-muda-mobile-application-with-ionic-framework-part-1)
[Build A Simple CV Mobile Application with Ionic Framework (Part 1 of 3)](https://steemit.com/utopian-io/@anitatmj/build-a-simple-curriculum-vitae-mobile-application-with-ionic-framework-in-3-days-part-1-of-3)
[Build A Moile Application with Ionic Creator](https://steemit.com/utopian-io/@anitatmj/make-a-mobile-application-with-ionic-creator-fast-and-easy)
Proof of Work Done
You can get this Project on my github : [app_biografy_sultan_iskandar_muda](https://github.com/anitatmj/biografy_app)
Thank you to Following my tutorial about ionic framework if you have a problem about following this tutorial please contact me or comment here.
Thank you for your contribution @anitatmj.
After reviewing your tutorial we suggest the following points for improvements to your next tutorial:
Code sections are better displayed using the code markup, see this link
We suggest that you improve the structure of your tutorial, it is quite difficult to read your contribution from the way you structured.
It's application is very basic and there are already several tutorials on the internet with this subject.
In the next tutorial bring something more innovative to the open source community.
Your contribution has been evaluated according to Utopian policies and guidelines, as well as a predefined set of questions pertaining to the category.
To view those questions and the relevant answers related to your post, click here.
Need help? Chat with us on Discord.
[utopian-moderator]
Thank you for your review, @portugalcoin! Keep up the good work!