This tutorial will use the open source cryptocurrency miner located in this repository. The miner code is also available on their website
DISCLAIMER: This tutorial will use "NOT AUTO-PLAYING" miner. Visitors and critics find it unethical to use the auto-playing miner. The miner will not start to mine until the visitor click the "Play" button on the miner's interface. Auto-playing miner are being flagged by antiviruses as malware.
Requirements:
- Website or Blog - this is required since we are going to embed the miner on your website. If you don’t have a website or blog you can create one using blogger.com. Blogger is a subsidiary of Google. You need a gmail account to create a website/blog on blogger.
- Coinhive account – visit Coinhive official website to create an account.
- Monero address – you can create one with these providers Mymonero and Cryptonator
Step 1
Login to your Coinhive account and go to SETTINGS.

Step 2
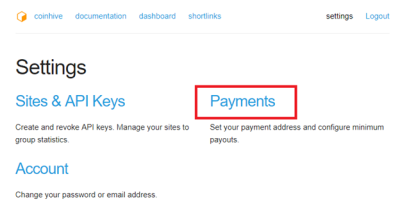
Under Settings click "Payments"
Step 3
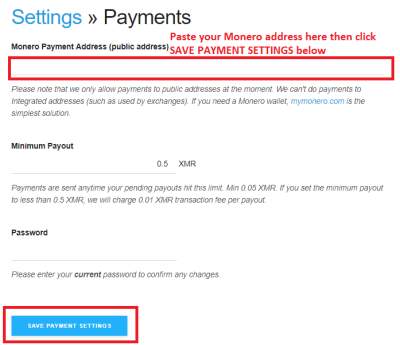
Under Payments copy and paste your Monero address under "Monero Payment Address (public address)" then click "SAVE PAYMENT SETTINGS". See screenshot below.
Step 4
Click "Settings" again

Step 5
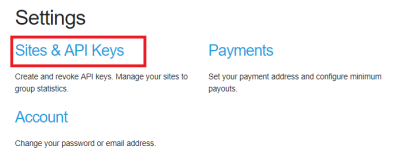
Click "Sites & API Keys"
Step 6
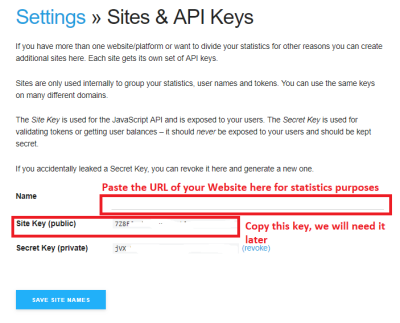
Paste the URL of your website in "Name", also copy your "Site Key (public) because we will need it later .
It's time to embed the miner into your website.
Step 7
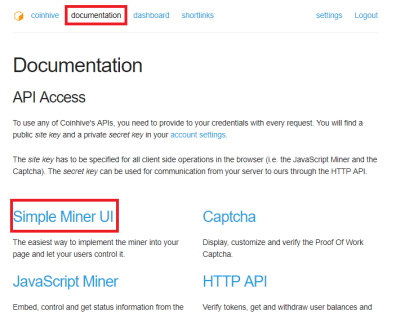
Click "Documentation" then click "Simple Miner UI". We will use the Simple Miner UI so that we can actually see that it is working.
Step 8
After clicking "Simple Miner UI" look at the "EMBEDDING" portion
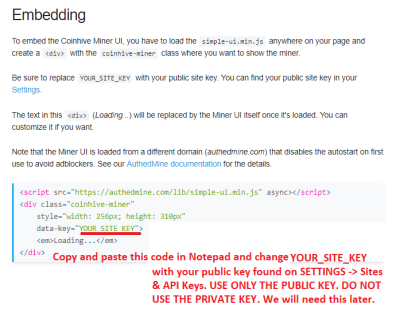
EMBEDDING IN WEBSITE/BLOG (BLOGGER.COM)
Step 9
Login to your blogger.com and click "Design"

Step 10
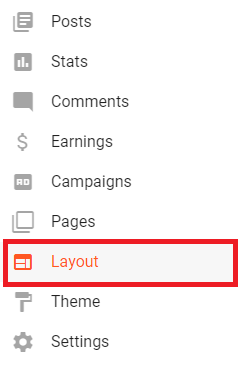
Click "Layout"
Step 11
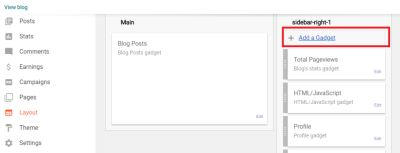
Click "Add a Gadget"
Step 12
Look and choose "HMTL/JavaScrip"
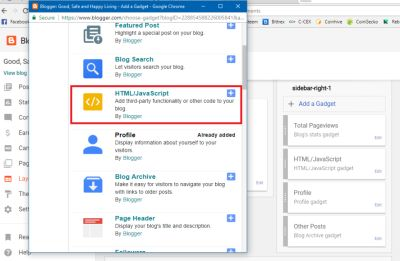
Step 13
Let's name it Miner, paste the the miner code that you copied in Notepad in Step 8. Do not click save yet.
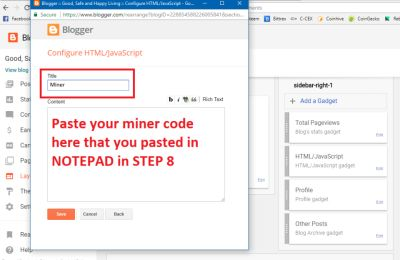
Step 14
It should look like this now after pasting your miner code at you copied in Notepad in Step 8. after pasting your miner code, click "Save"
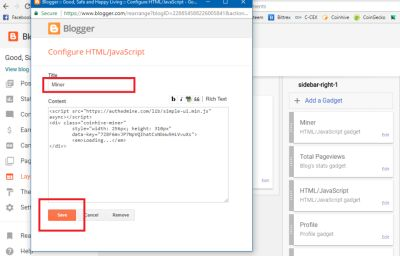
Step 15
You should see it at the right side at this time after clicking save in save in step 14.
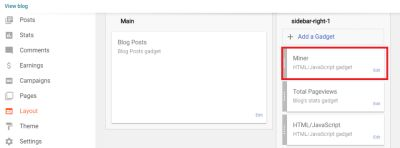
Step 16
Click "Save arrangement" then click "View blog" at the left to see the miner in action.

Step 17
Click "START MINING" to start the miner.
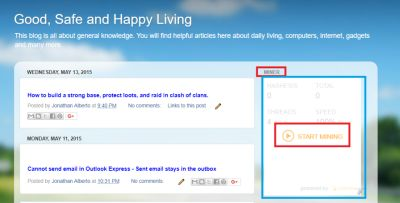
Step 18
MINER IN ACTION! THAT'S IT, IT'S DONE! ENJOY.
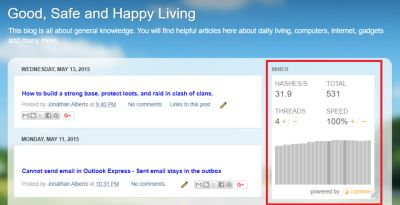
Here's the blog/website where I embedded the miner for you too see. There's two miner in it. The one named Miner is the one we made in this tutorial.
Posted on Utopian.io - Rewarding Open Source Contributors
Thank you for the contribution. It has been approved.
You can contact us on Discord.
[utopian-moderator]
Thank you very much sir @manishmike10. Have a nice day. Take care. God bless.
Nice
Thanks.
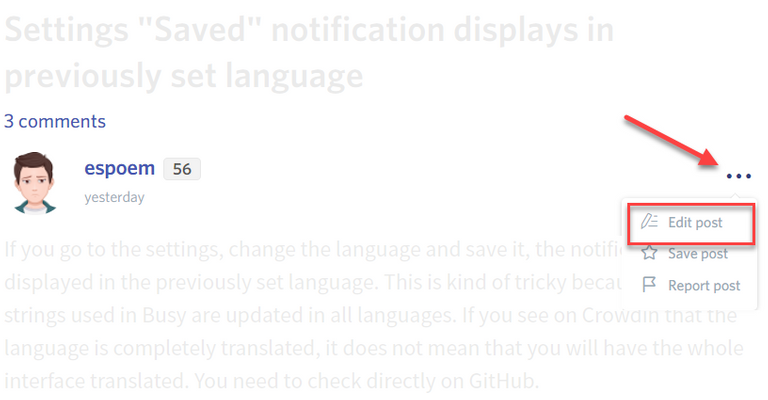
Your contribution cannot be approved yet because it is attached to the wrong repository. Please edit your contribution and fix the repository to
https://github.com/x25/coinhive-stratum-mining-proxyto reapply for approval.You may edit your post here, as shown below:
You can contact us on Discord.
[utopian-moderator]
sir @manishmike10, as you suggested I have changed the repository to https://github.com/x25/coinhive-stratum-mining-proxy (x25/coinhive-stratum-mining-proxy) Please check it again. Thank you very much.
Hey @afterglow I am @utopian-io. I have just upvoted you!
Achievements
Suggestions
Get Noticed!
Community-Driven Witness!
I am the first and only Steem Community-Driven Witness. Participate on Discord. Lets GROW TOGETHER!
Up-vote this comment to grow my power and help Open Source contributions like this one. Want to chat? Join me on Discord https://discord.gg/Pc8HG9x
Thank you very much.