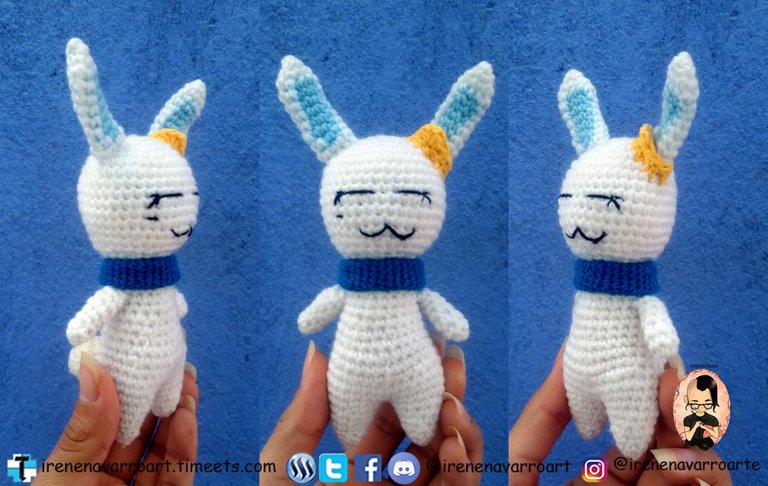
Regards! this time I share a tutorial to make a amigurumi shaped like Momo, a new character of the anime Sakura CardCaptors, Momo always accompanies Akiho the new friend of Sakura wherever he goes, since he carries it in his bag.
Spanish version
Materials
- Stamen: White, blue.
- candlewick: Yelow, black.
- crochet SYNTHETIC thread: blue
- Crochet needle No. 4 y No. 0
- Synthetic filling, can be silicone nappa, cotton or fibers of recycling yarn.
- Scissors
- big eyelet needle
Abbreviations
Ch: Chain stitch


St(s): stitch(s)
s.c.: single crochet
d.c.: double crochet
Dec: decrease (2 single crochet together)
Inc: increase (2 single crochet in next single crochet)
rnd: round
s.s.: slit stitch

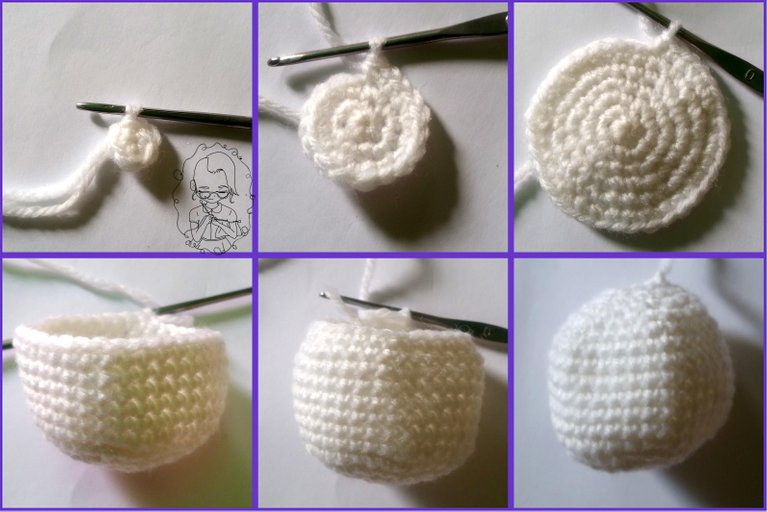
Head
with white stamen and Crochet needle No. 0: 6 s.c. in a ring
1 rnd: 6 Inc. Stitch total (12)
2 rnd: 1 s.c., 1 Inc, repeat until the end of the round. Stitch total (18)
3 rnd: 2 s.c., 1 Inc, repeat until the end of the round. Stitch total (24)
4 rnd: 3 s.c., 1 Inc, repeat until the end of the round. Stitch total (30)
5 rnd: 4 s.c., 1 Inc, repeat until the end of the round. Stitch total (36)
6-12 rnd: 24 s.c. in the seven rnds.
13 rnd: 4 s.c., 1 Dec, repeat until the end of the round. Stitch total (30)
14 rnd: 3 s.c., 1 Dec, repeat until the end of the round. Stitch total (24)
15 rnd: 2 s.c., 1 Dec, repeat until the end of the round. Stitch total (18)
16 rnd: 1 s.c., 1 Dec, repeat until the end of the round. Stitch total (12). Close with s.s., and leave a long thread to sew.


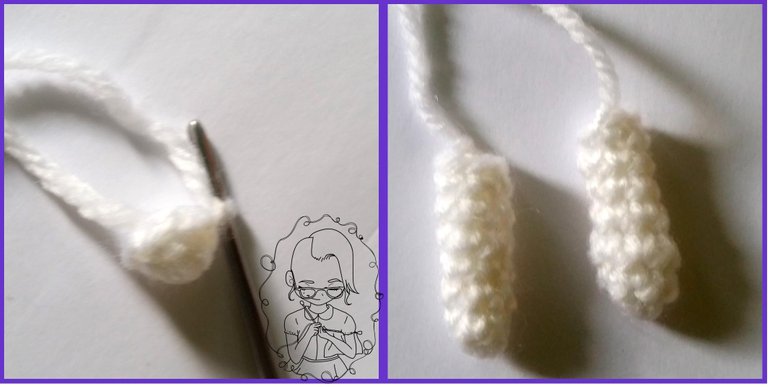
Legs
with white stamen and Crochet needle No. 0: 4 s.c. in a ring
1 rnd: 1 s.c., 1 Inc, repeat until the end of the round. Stitch total (6)
2 rnd: 2 s.c., 1 Inc, repeat until the end of the round. Stitch total (8)
3 rnd: 3 s.c., 1 Inc, repeat until the end of the round. Stitch total (10)
4 rnd: 4 s.c., 1 Inc, repeat until the end of the round. Stitch total (12)
5 rnd: 5 s.c., 1 Inc, repeat until the end of the round. Stitch total (14)
6 rnd: 6 s.c., 1 Inc, repeat until the end of the round. Stitch total (16). Close with s.s. Make Two.


Body
To make the body we must knit by joining the two legs, with white stamen and needle Nº0.
1 rnd: 32s.c. (16 of each leg).





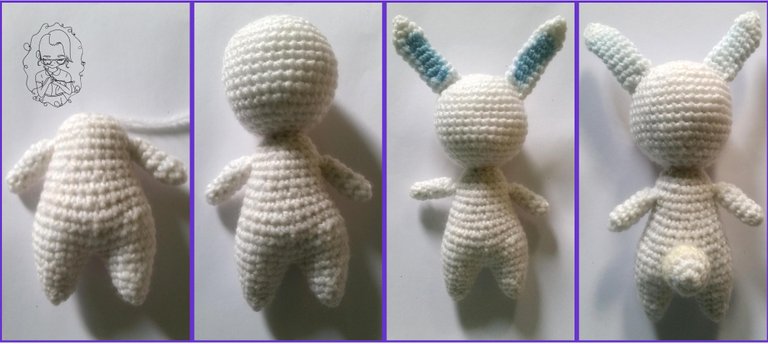

2-3 rnd: 24 s.c. in the two rnds.
4 rnd: 8 s.c. , 1Dec, 14 s.c., 1Dec, 6s.c. Stitch total (30)
5 rnd: 13s.c., 1Dec, repeat until the end of the round. Stitch total (28)
6 rnd: 7s.c., 1Dec, 12s.c., 1Dec, 5s.c. Stitch total (26)
7 rnd: 11s.c., 1Dec, repeat until the end of the round.Stitch total (24)
8 rnd: 6s.c., 1Dec, 10s.c., 1Dec, 4s.c.. Stitch total (22)
9 rnd: 9s.c., 1Dec, repeat until the end of the round. Stitch total (20)
10-11 rnd: 20s.c. in the seven rnds.
12 rnd: 8s.c., 1Dec, repeat until the end of the round. Stitch total (18)
13 rnd: 18s.c.
14 rnd: 1s.c., 1Dec, repeat until the end of the round. Stitch total (12). Close with s.s., and leave a long thread to sew.


Arms
with white stamen and Crochet needle No. 0: 6 s.c. in a ring . 6 rnds of s.c. Close with s.s., and leave a long thread to sew.


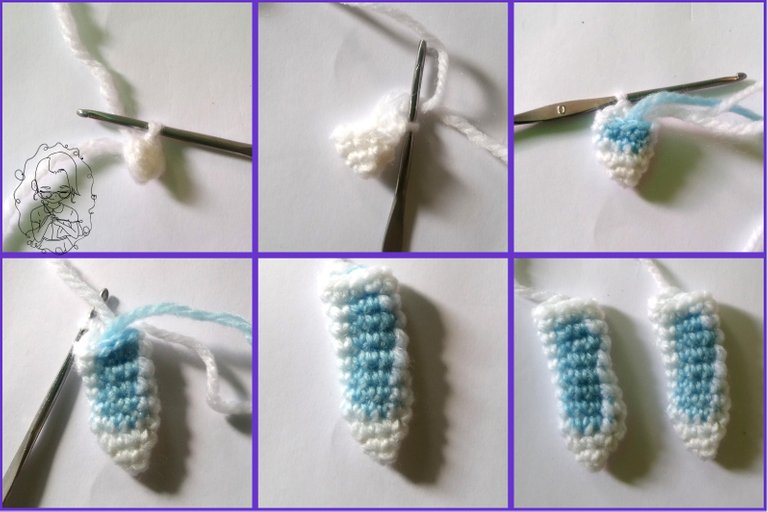
Ears
with white stamen and Crochet needle No. 0: 6 s.c. in a ring .
1 rnd: 1s.c., 1 Inc, repeat until the end of the round. Stitch total (6)
2 rnd: 1s.c., 1 Inc, repeat until the end of the round. Stitch total (9)
3 rnd: 7s.c. White stamen, 2s.c. blue stamen.
4-8 rnd: 6s.c. White stamen, 3s.c. blue stamen, in the five rnds.
9 rnd: 7s.c. White stamen, 2s.c. blue stamen.
10 rnd: 9s.c. White stamen. Close with s.s., and leave a long thread to sew. Make two.


Tail
with white stamen and Crochet needle No. 0: 6 s.c. in a ring .
1 rnd: 6 Inc. Stitch total (12)
2-3 rnd: 12s.c. in the two rnds.
4 rnd: 6Dec. Close with s.s., and leave a long thread to sew.


Scarf
with blue crochet SYNTHETIC thread and Crochet needle No. 4: Knit 9 chains and close them with s.s. to form a ring. Knit 29 rnds of s.c. Close with s.s., and leave a long thread to sew.


Assembly
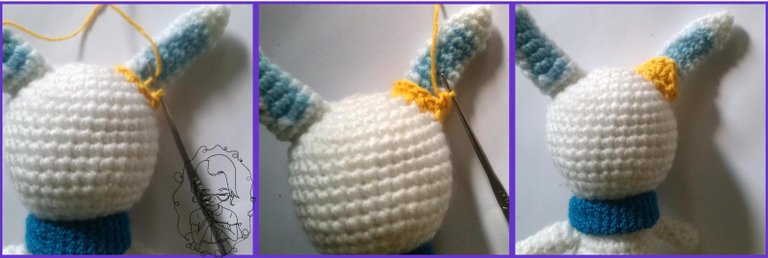
Fill the parts except the ears. Sew the arms and head to the body, finally sew the ears and tail. For the crown with yelow candlewick and Crochet needle No. 4, lift a circle of s.c. around the left ear, make a round and do a double increase of double crochet at the center point. Close with s.s., and hide the thread inside the tissue. Embroider the details of the face with black thread. Sew the scarf without filling around the neck.


Result
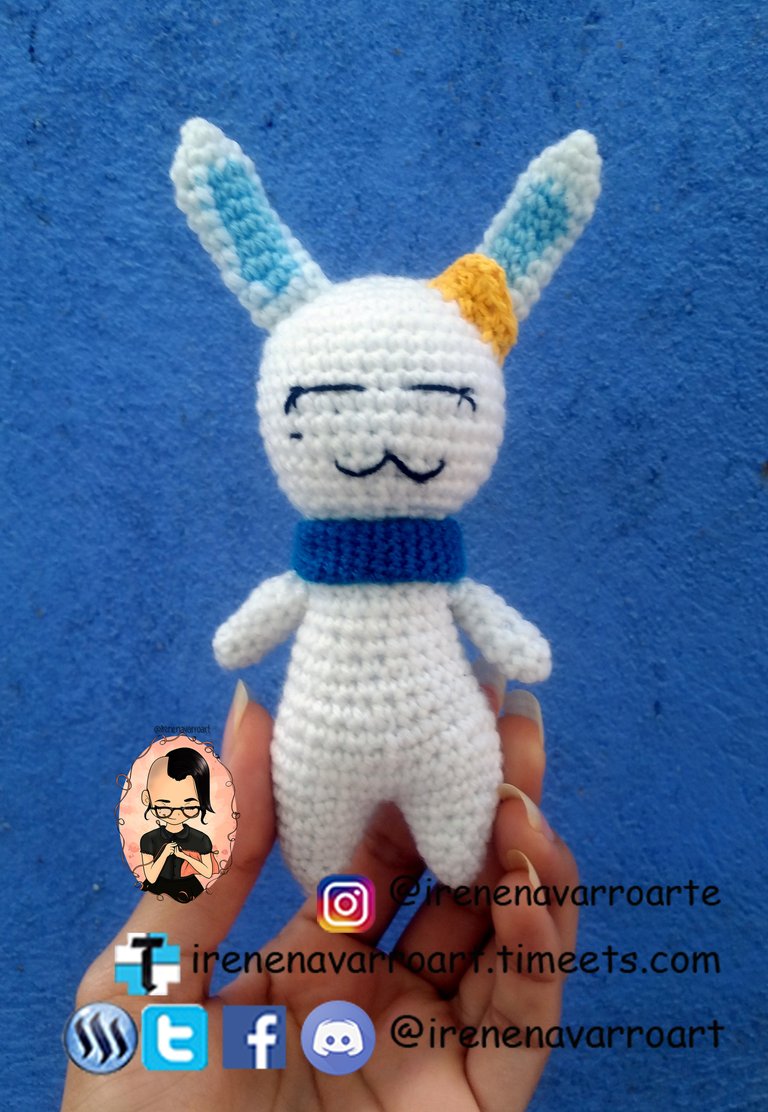
Image adjustments: Adobe Photoshop CS6
Collages created in: Microsoft Office Publisher
Great tutorial @irenenavarroart 🌸 I really want to try some amigurumi work and your tutorial is truly helpful by making it look fun! Thank you for sharing such a kawaii character 😁
Thank you, I hope it will be useful <3
This is sooo cute! Thank you for providing this tutorial with very clear instructions. My husband and children love watching anime’s so I’m sure they know who this character is. 😊
Well done!
Thank you! It's a bit difficult for me to translate the instructions but I try it :)
Thank you so much for doing so. I just really want the community to be able to connect with you so you too can be supported in your efforts. Thank you for sharing with us ~ 😊
So neatly made and so so cute @ireneavarroart !
I love how simply and clearly you present the whole process :DDD
Thank you! <3
Congratulations @irenenavarroart! Your post has been placed in the spotlight for this week's @NeedleWorkMonday Featured Posts! Thank you for your quality post and for being a part of the needlework community!
thanks for the support <3
This post was shared in the Curation Collective Discord community for curators, and upvoted and resteemed by the @c-squared community account after manual review.
@c-squared runs a community witness. Please consider using one of your witness votes on us here
Thank you!
Oh so sweet. I love crocheting and I definitely will do it.
Posted using Partiko iOS
Thank you! <3
This post is sponsored and featured by @Appreciator in collaboration with @c-squared. Just keep up the good work.
Thank you so much!
I think Amigurumi are becoming really famous and probably Steem Is a good place where people with the same hobby can talk about them.
Congratulations for you tutorial☺️👍
When did you start to make them?
How much time have you needed to learn the techniques?
Thank you! I really learned to do them eleven years ago. The technique does not need much time, it is easy to learn :D
They are amazing and do not need so much time: something that should be learned immediatly!!!
😉👍
Posted using Partiko Android
Hello @irenenavarroart, thank you for sharing this creative work! We just stopped by to say that you've been upvoted by the @creativecrypto magazine. The Creative Crypto is all about art on the blockchain and learning from creatives like you. Looking forward to crossing paths again soon. Steem on!
All good, so long as it’s not THAT Momo D: