This time I will show you how you can utilize 3D printing for casting purposes. The plan is to make a stainless-steel Steemit logo with an embossed text. I will show you every step of the project with pictures and explanations. The project is a long process and requires many steps and a lot of manual work.
Step 1. Cast design
I am going to use ProE to design the sign. ProE is a relatively old 3D CAD program, but it is still very handy and flexible to use. At first, I have to decide upon the dimensions of the sign. I want that the sign fits the printer and the text is possible to cast. The dimensions I am going to use are 160x70x10mm and the thickness of the text is going to be 2mm. The extrusion height of the text will be 5mm.
Picture 1 presents the sketch of the Steemit logo and picture 2 the extruding step. First, I made the logo and then I made the plate. I did it in this order because I was using free dimensions with the logo and it’s much easier to aim the plate into right position when the logo is already designed.
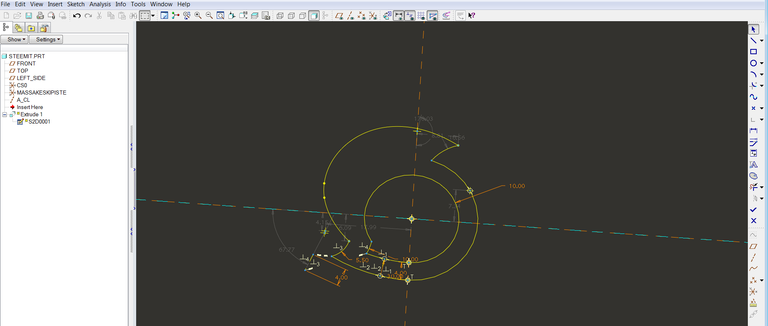
Picture 1
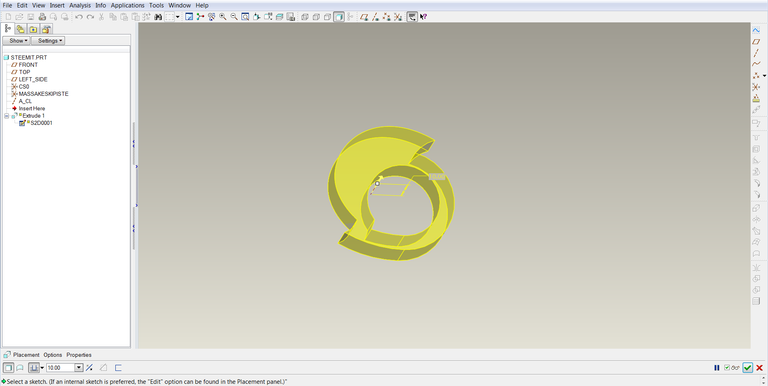
Picture 2
After doing the logo and the plate, I have to do the text and the frame on it. The text is pretty handy to design because we can use a text-maker inside extruding tools. In the picture 3, the text is extruded and in the picture 4 the plate is framed.
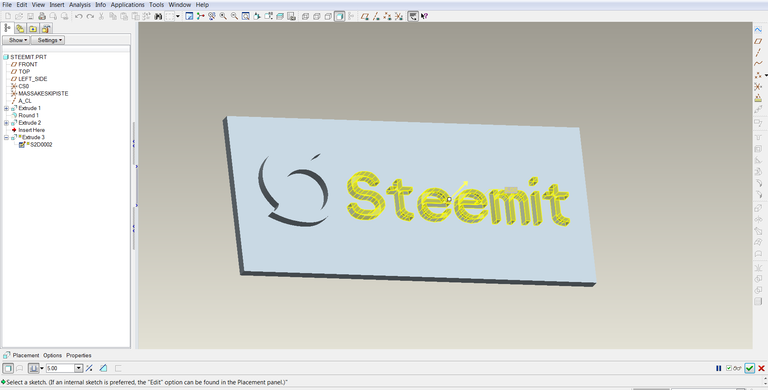
Picture 3

Picture 4
Now the sign is almost ready. Because our goal is to cast the sign, I need to add positive angles of 5 degrees to every strait wall otherwise, I cannot remove the sign from the sand and it will be impossible to make the mould. In picture 5 you see the added angles. Normally I would have to add some shrinkage percentages, to make the part a little bit larger, but for this project, the dimensions are not too critical. However if you need precision, steel is shrinking during the solidification process and when cooling. The rule is to add 2% more in every dimension in order to balance the shrinking.
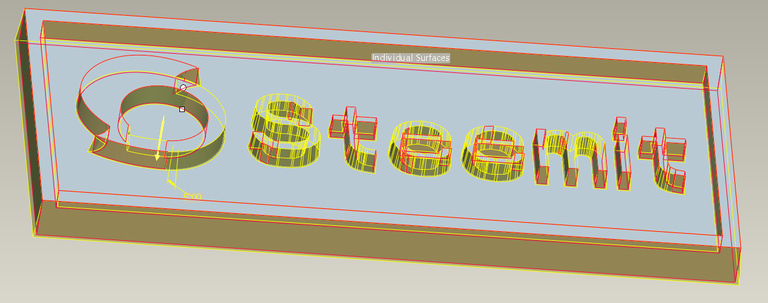
Picture 5
Step 2. Printing the pattern
Now I’m not even thinking about creating the pattern in the traditional way which would be CNC machining. Machining is a very slow and expensive process. I’m going to print it using Ultimaker 2+ and a PLA (polylactide) material. PLA is easy to print, non-toxic and strong enough. The next step is to save the sign as an STL-file and send it to Cura. In picture 6, the file is send to Cura.
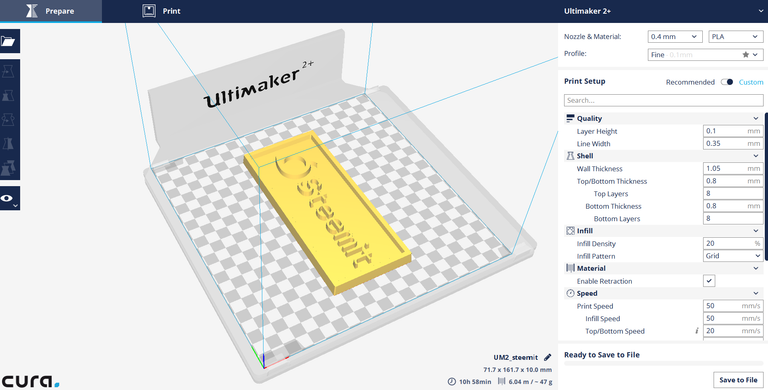
Picture 6
I am using the default parameters to print the pattern. After printing the Steemit pattern, I slightly changed my originals plans. I decided to print a few more plates because in future steps it doesn’t add too much extra work. In picture 7 you can see the extra signs that are already printed.
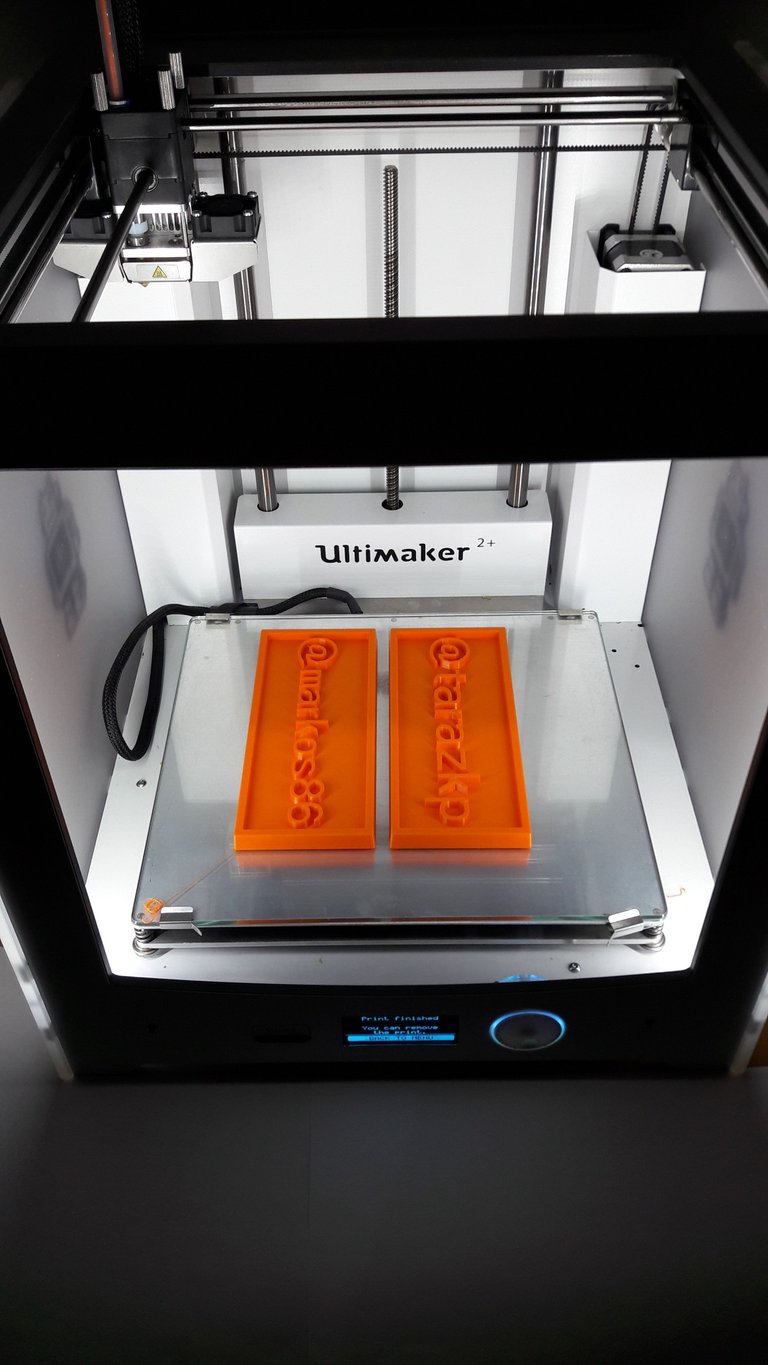
Picture 7
Step 3. Making the cast inlets and channels
In the 3rd step, we have to integrate all three patterns to the right places and build inlets and casting channels. We are going to build other parts using wood. Picture 8 is presenting the pattern which is ready to be moulded. The pattern is painted and waxed to make sure the mould is removable from the pattern. As you can imagine, for casting, there is a lot of manual steps required.
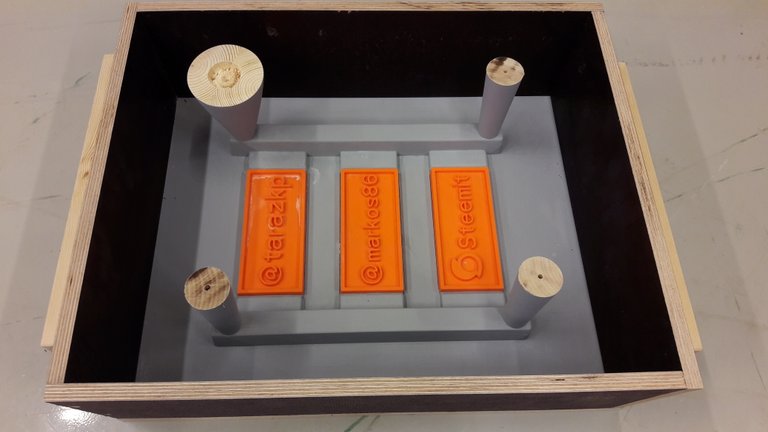
Picture 8
Step 4. Making and casting the moulds
My cast design plan was to make three layers of moulds and cast them at the same time. This way, we will get better results because melt metal pressure is higher and filling turbulence is lower. I also wanted the text to be downward because in that way the metal is filling narrow cavities better.
It might be difficult to understand my plan at this point because the text is upwards when looking at the printed patterns. In the mould, the text is a negative copy and the text is positioned facing downwards. In picture 9 the first mould is curing and in picture 10 the mould is already removed from the pattern. I-m using cold resin sand which is curing itself. Curing needs to be done once and heat is not required. A suitable curing time is 1.5h.
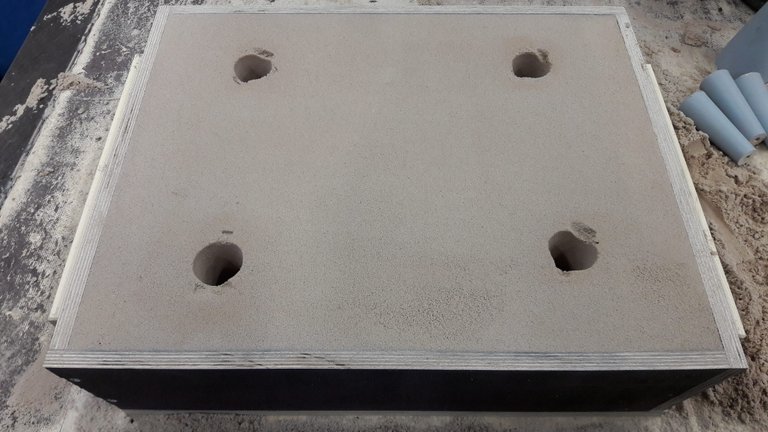 />
/>Picture 9

Picture 10
The cold resin sand has a pretty good heat resistance but we still have to make a thin coating layer on it. Temperatures of the steel castings are roughly 1700 Celsius degrees and without coating, the surface could appear rough and sintered. In picture 11, the mould is coated using water-based zirconium coating. I used a brush and spray during the coating process.

Picture 11
After making the number of moulds I wanted, I will stack the moulds and squeeze them very tightly together. Now the moulds are ready for casting. See picture 12. After casting the moulds in picture 13, we must wait for several hours until we can break the mould. The cooling time is very exciting because you can’t know for sure whether your plan is going to work or not and what the results will be.
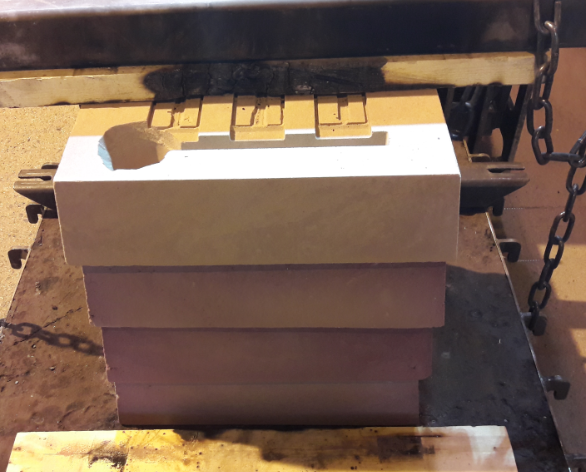
Picture 12
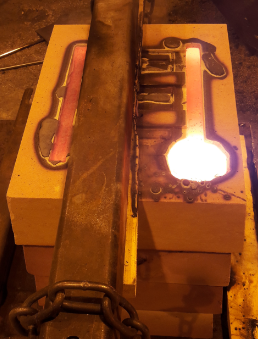
Picture 13
Unfortunately, I can’t show to you the oven or the pouring of the melt because I did this job in the foundry and it’s not allowed to take any photo or video where you see our factory line or products as it is a heavily restricted zone for the public.
This time you will have to wait overnight to see the final results of the project. I hope that you are as excited as I am!
- markos86
▶️ DTube
▶️ IPFS
This is something so cool and interesting! Thank you @markos86 for sharing with us this high-tech detailed material! :)
Very interesting and magnification.............3D........ art. Great Engineering :)
Thanks for sharing us :)
Great idea!
Extraordinary markos86
Good
I've not really gotten the hang of this Dube. What is it?
It is a decentralised video platform, similar to YouTube.
Good job, @markos86!
that's 10 seconds of vid - I see comments indicating content exceeding 10 seconds - something happened?