Hi ...
Before starting to configure Debian Linux, I hope you have the basic knowledge for CLI (Command Line Interfaces) commands. In this post I'm not talking about basic commands, either for Windows or Linux commands. You can find and learn basic commands for Windows or Linux in the Internet, there is too many websites will gives you knowledge to learning Computer basic commands. Commands used by Windows and Linux has a lot of differences as well as similarities.
I will try to explain every commands that I use by linking to other websites.
Please read my previous post about [Installing Linux Debian 7.8 as Server] if you not installed yet.
In my previous post, I am using Virtual Box as Virtual Engine, but now I have to change to Virtual Machine, because VBox on my Computer has some failed registry. Both of it is same as virtual PC. only has a slight difference in settings
SO, WHAT IS DNS SERVER???
Definition of Domain name system:
- DNS is a distributed database system that is used to search for computer names on a network that uses TCP / IP. DNS has an unlimited database size overload and also has good performance.
- It is a service application on the internet to translate domain name to IP address and IP address to Domain.
- It is a connected Computer and has the responsibility of providing your domain name information domain, changing the domain name to IP address and also has responsibility for email distribution on mail server that concerns with domain name.
- Applications that mapping host names of a computer to IP addresses in applications connected to the Internet such as web browsers or e-mail.
If you have installed and understood about DNS and Web Server, lets start to configure.
Before configure DNS and Web Server, make sure you have installed Debian Linux Server (I am using Debian 7.8 in this configuration).
Scanning Repository
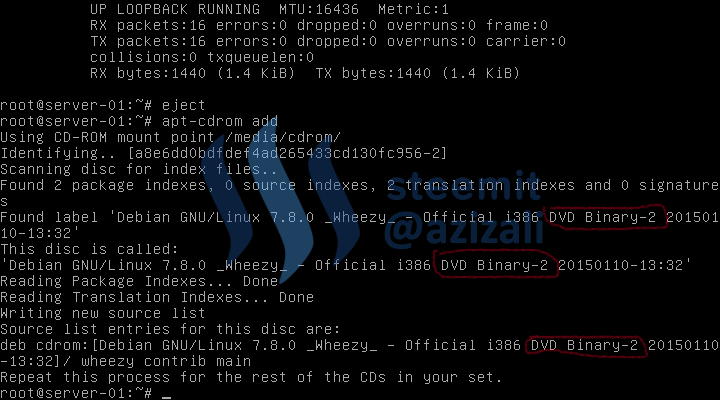
For the first steps, let scan all discs of Debian 7.8 to list all of available repositories. The 1st disk didn't need to scan anymore, it has been listed when installing Debian Operating System.
- Write : eject
- Mount disc 2
- Write : apt-cdrom add (read about command)
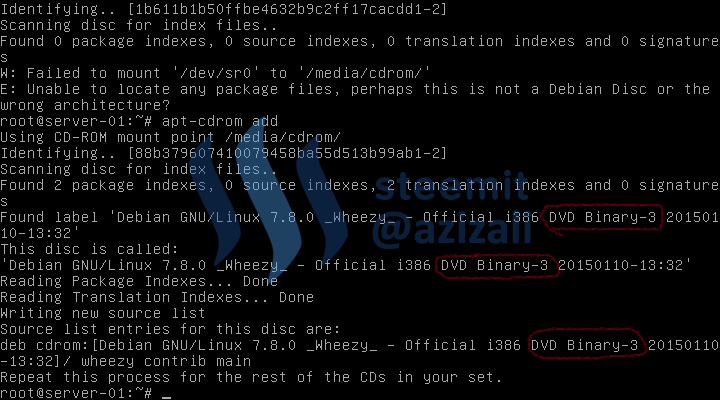
- Repeat the commands for disk 3
DNS Server Installation and Configuration
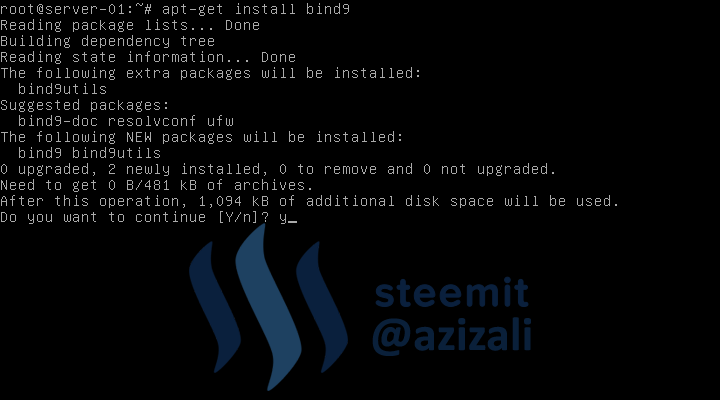
- Install bind9 application for DNS server,
the command is apt-get install bind9

2. Confirm your answer : "y" then press enter
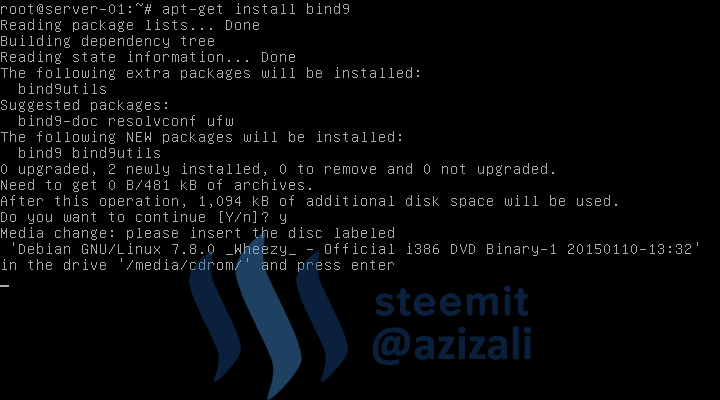
3. It will request for disk 1, because bind9 is placed in disk 1 of Debian 7.8.
Mount disk 1 (iso file) and then press enter
4. Installation progress may take a few seconds. The completed installation will display a green [ OK ] Starting domain name service... : bind9
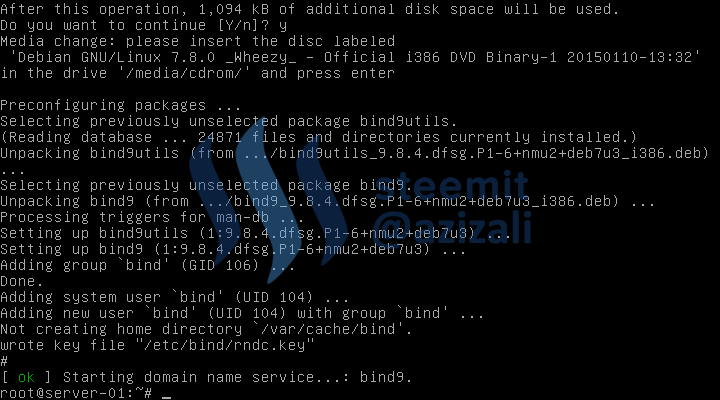
5. If we have completed the DNS installation without any trouble, now we can configure it.
-- cd /etc/bind -> change directory to /etc/bind
-- ls -> show files or folders in current directory
-- There is 2 files we need to copy before configure, db.local and db.127.
-- cp db.local db.web -> copy file db.local and paste in same directory with name db.web
-- cp db.127 db.ip -> copy file db.127 and paste in same directory with name db.ip
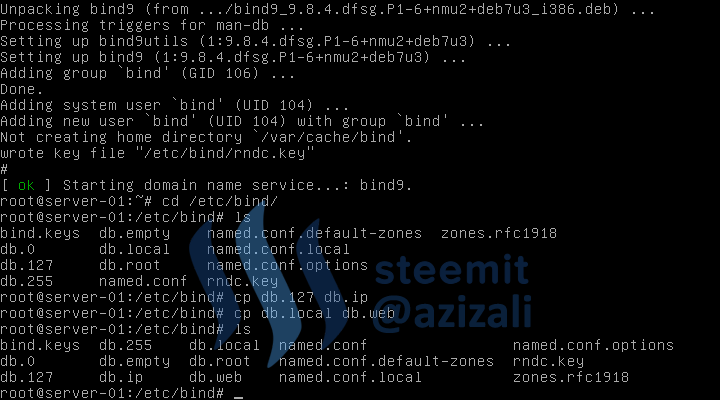
6. #nano named.conf.local -> nano is text editor to open file named.conf.local [read more about nano functions]
Read about named.conf function and how it works.
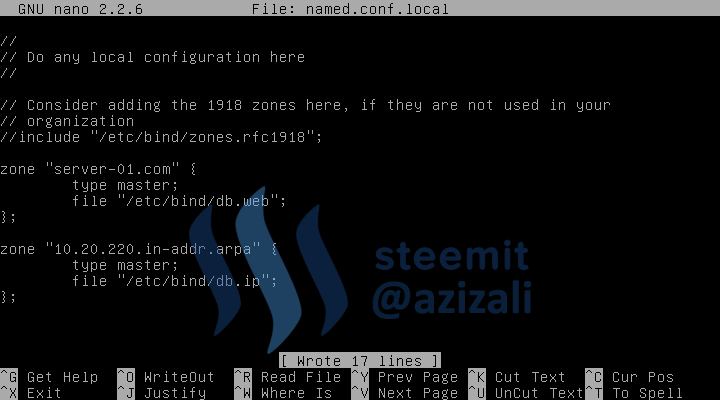
Save your work on nano editor by pressing [CTRl + O] then enter
Exit nano editor by pressing [CTRL + X]
7. Now edit the copied file, db.web
nano db.web
Replace all localhost texts to our domain name server-01.com, its depend to you, what name you will create.
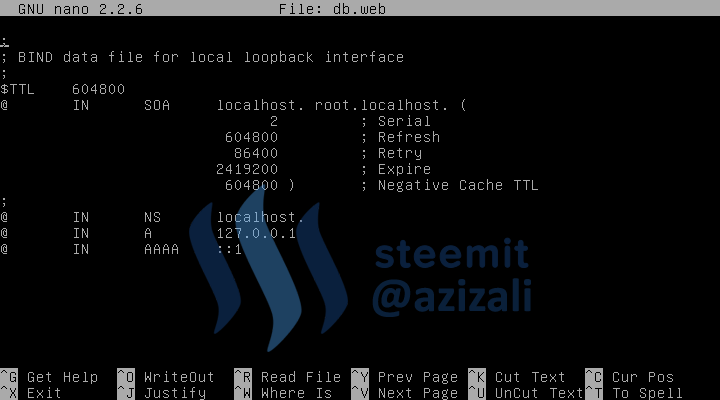 !
!
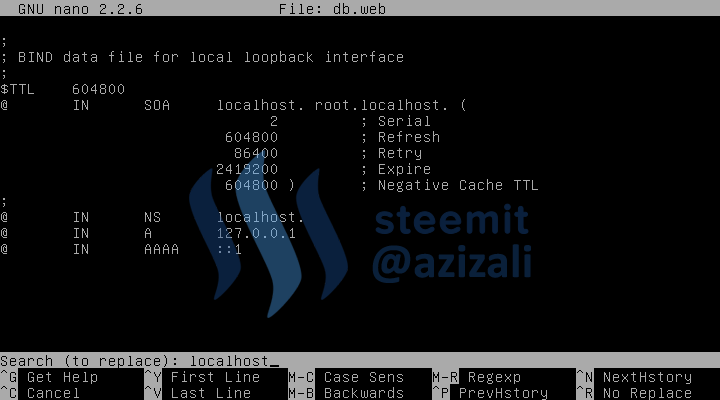
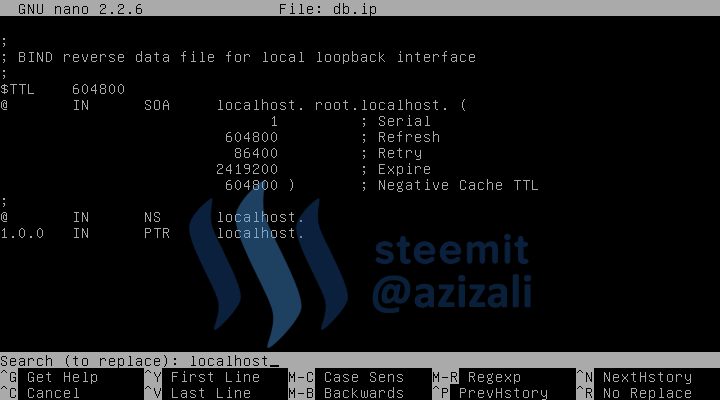
8. For fast and save writing use nano search and replace functions.
[CTRL + W] to search and combine it with [CTRL + R] to replace, then type "localhost" (search text) - press enter
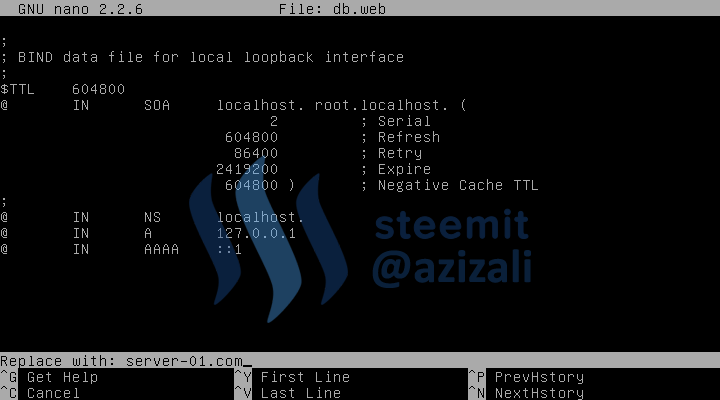
Type "server-01.com" (replace text) - press enter
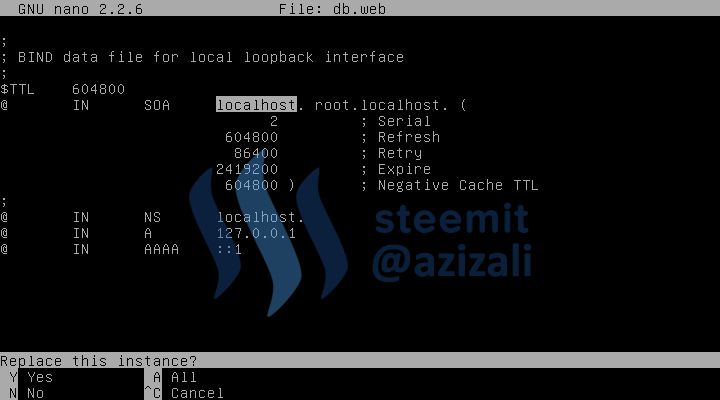
Then press "A" (it will replace all matched text)
After complete replace localhost -> server-01.com, we can add more sub-domain. Just what ever sub-domain you need.
Save and Exit (see instruction step number 7)
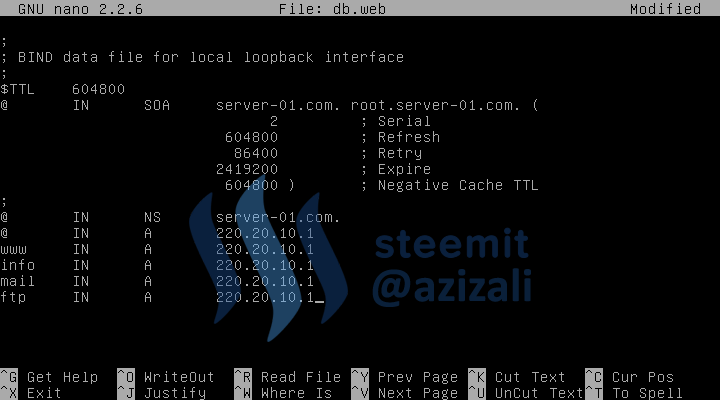
9. Edit db.ip file
nano db.ip
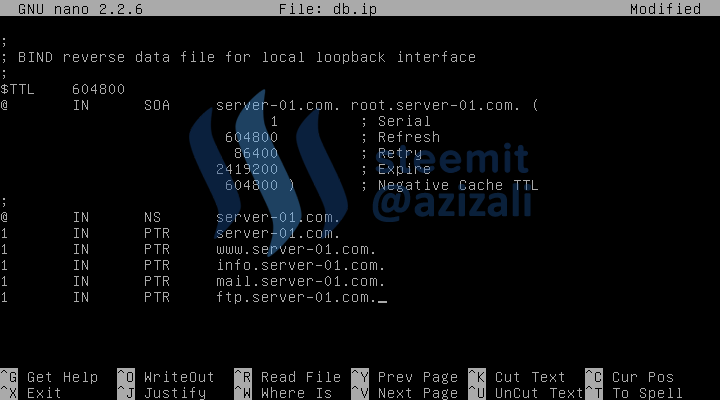
Then repeat search and replace like step before (step number 8).
Add sub-domain like what you added in db.web, please see the writing mode.
Save and Exit
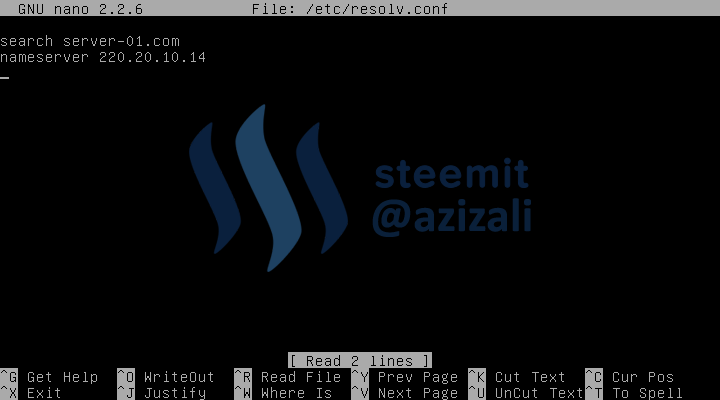
10. Add DNS server to resolv.conf file. -> Read more about resolv.conf .
Note : If your created server will connected to the internet you have to addpublic DNS here, it can be much IP, just add like Google DNS (8.8.8.8), Open DNS (208.67.222.222 and 208.67.220.220), or other DNS.
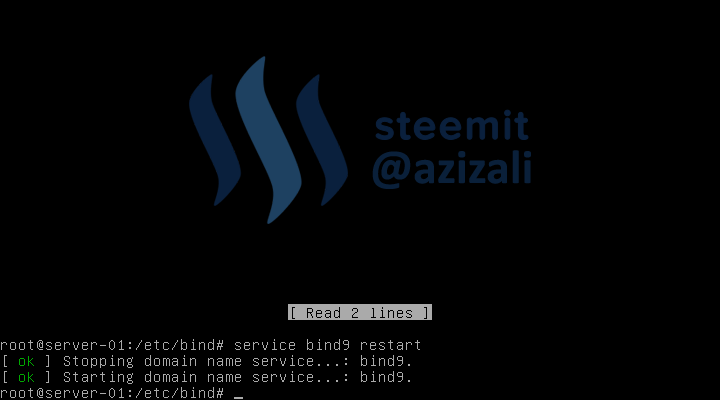
11. Finally, restart service of bind9.
service bind9 restart.
Restart result should not error or failed.
If you got Error or Failed, you need to check for configuration step number 1 ~ 10.
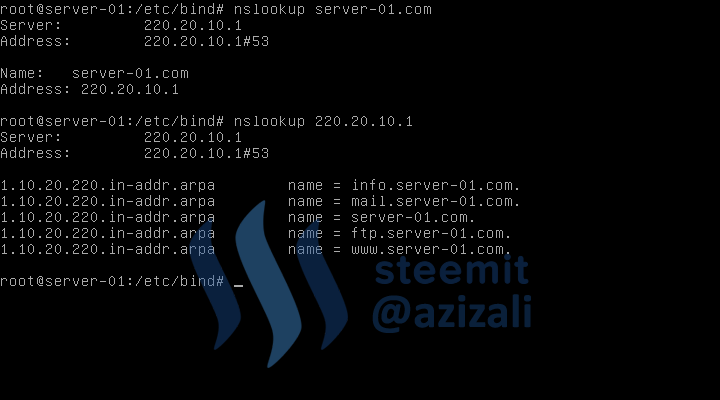
12. Now, let's do a test of the DNS that we have configured.
First test -->> nslookup server-01.com
Second test-->> nslookup 220.20.10.1
The DNS test results are as in the following picture.
Configuring and connecting client to Server.
I am using Windows 10 as my Computer operating system, and VMWare as virtual PC application. My computer will connected as client.
- Setting Virtual server for LAN Connection, right click on LAN icon VMware,
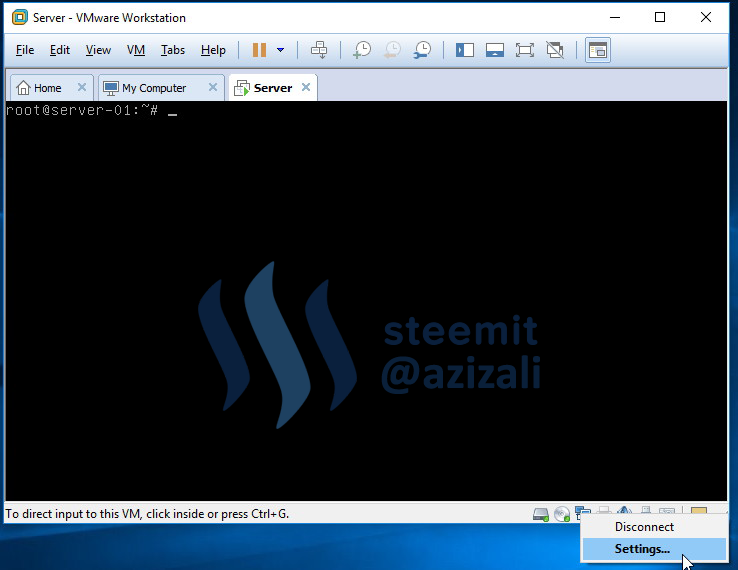
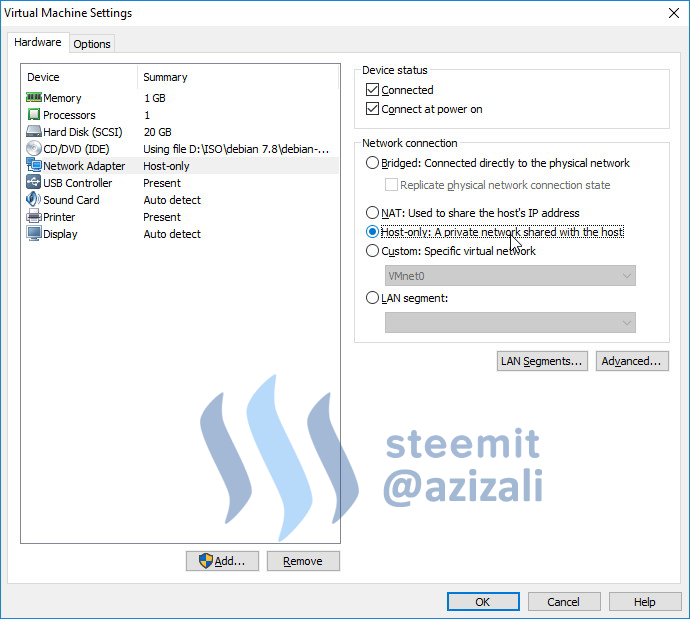
Select device Network and change connection to Host only, its mean the virtual PC will communicating with Windows System.
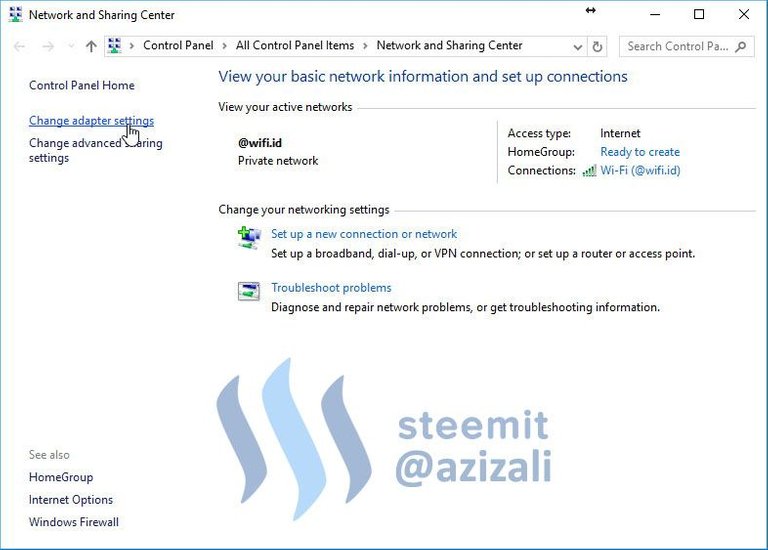
2. On Windows Computer, Open Network and Sharing Center
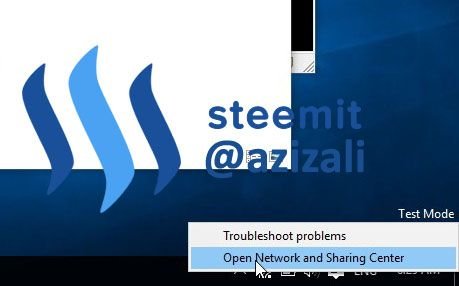
On the left sides, click Change adapter settings
3. Select and right-click on VMWare Network adapter NMNet1 notVMWare Network adapter NMNet8
VMWare Network adapter NMNet1 is adapter connected to the hosts,
VMWare Network adapter NMNet8is adapter connected the NAT (Network Address Translation).
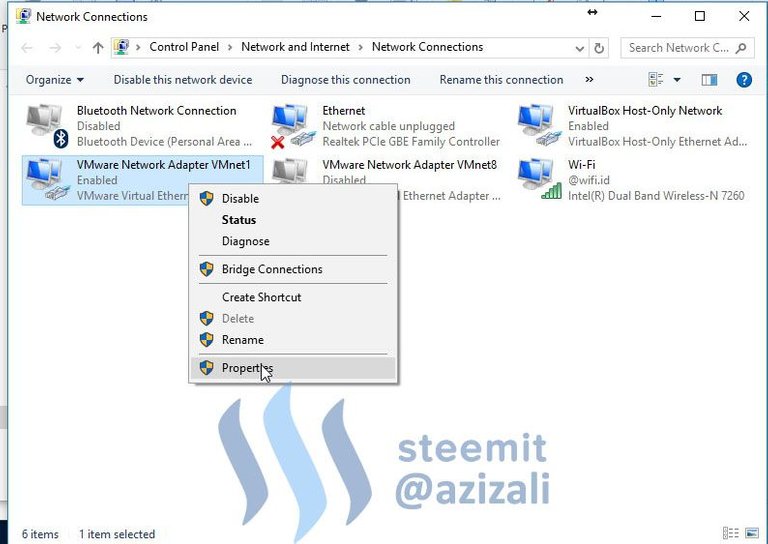
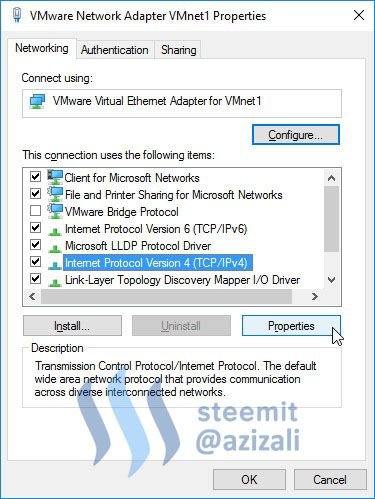
4. Double cliks on selected IPV4 or click Properties.
5. Set IP address for client,
Client IP address must be in same subnet with Server IP address and including Netmask.
Gateway is Server IP address.
DNS is Server IP address -->>This is important, wrong DNS will cause client error to communicating with Domain
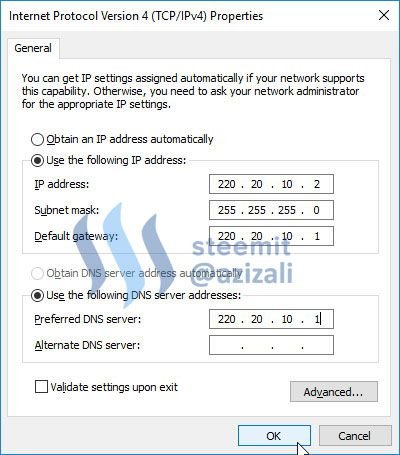
If anything fill in good, click OK to save your change.
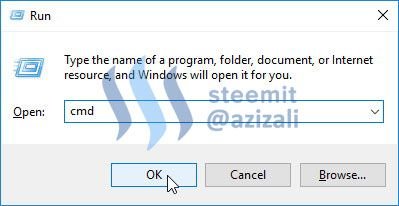
6. Open Command promt by press [WINDOWS + R] then type "cmd" then hit enter.
7. Ping testing.
First ping to IP 220.20.100.1 -> ping 220.20.10.1
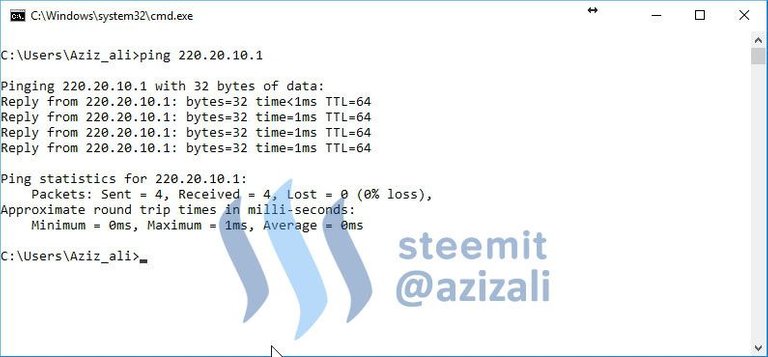
Reply successful
Second ping to domain name -> ping server-01.com
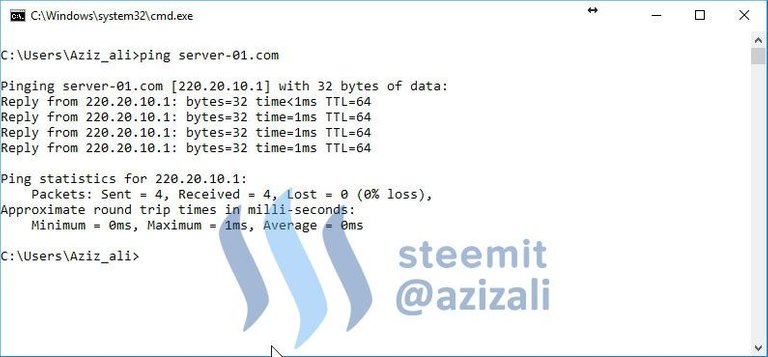
Reply successful
Its mean your host has been connected to server.
8. DNS lookup
First test lookup for domain name --> nslookup server-01.com
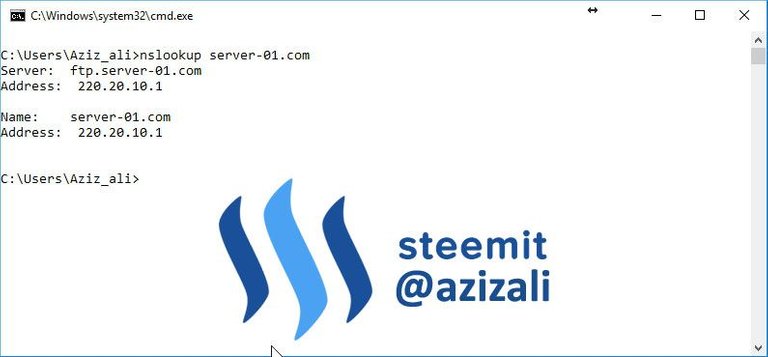
Second test lookup for DNS of IP --> nslookup 220.20.10.1
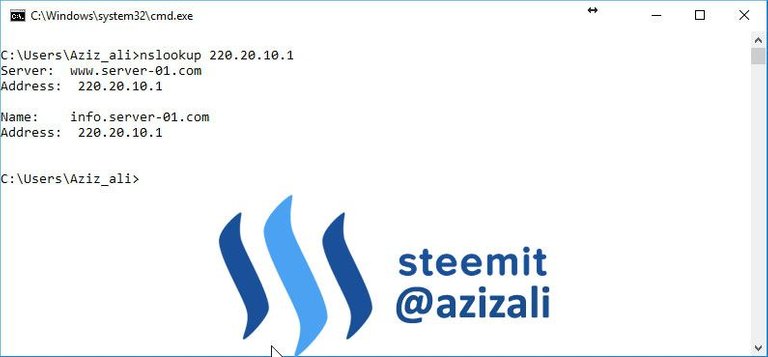
Its mean translation of IP and domain name is running good.
Troubleshoot
- If restart of bind9 (for DNS service) is failed, you need to check all configuration of IP address on server and DNS Server. Check it out in writing!
- If restart going success but nslookup test is failed, there is two possible;
First, if nslookup to IP is failed, check db.ip and named.conf.local files, pay your attention to check out writing.
Second, if nslookup to domain is failed, check db.web and named.conf.local files, pay your attention to check out writing. - On client, make sure you have to disconnect all other network adapter, like Wi-fi adapter, LAN adapter or anything connected adapter.
