Would you like to learn how to show your last Steemit blog posts on your website or WordPress blog using Steemit Widgets because this looks even better than using a RSS feed?

Yesterday, I showed you how to display a profile widget on your website or WordPress blog and you might be interested to read this post first: How to Add a Steemit Profile Widget on your Website?
Today, we are going to use the same website to generate code that will display a nice feed from our Steemit blog, and I like it very much, I think it looks far better than using an RSS feed.
How to Show your Steemit Posts on your Website?
First, go to the website where you can get the code from, which is Steemit Widgets.
It was created by @mkt.

You can click the "Demo" button to see all the widgets that you can make for your website, or click the "Generator" button to follow this tutorial.
This is a direct link to the generator: https://mktcode.github.io/steemit-widgets/generator.html
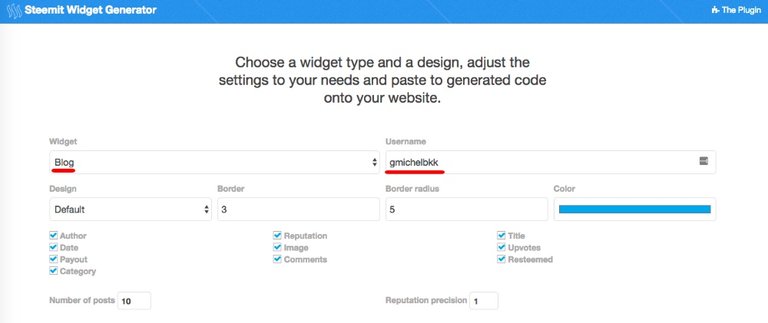
What you have to do is select "Blog" for the widget, enter your Steemit username, and change the color if you wish. Then you can unselect the options that you don't want or change the values for the border and border radius. You can select the number of posts you want as well.
Just below the form is a preview where you can see how this will look like on your website.

Note that the height of the image is a bit too short and I will show you how to make it perfect.
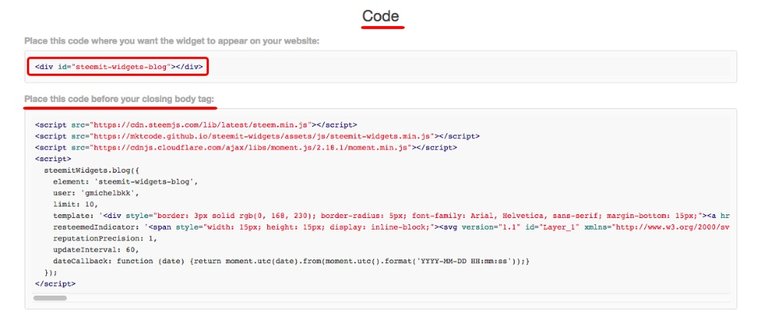
The code you have to use is shown just after.
The first little piece of code has to be placed where you want to show the widget, a post or a page.
<div id="steemit-widgets-blog"></div>
The second longer code is what is calling the data from Steemit and the cosmetic of the widget.
It has to be placed just before the </body> tag on the HTML page where you place the widget.
If your website is in HTML, you may want to ask your web developer to add the code for you.
This is how I did it on my WordPress blog.
I created a new page with some text at the beginning using the "Visual" editor.
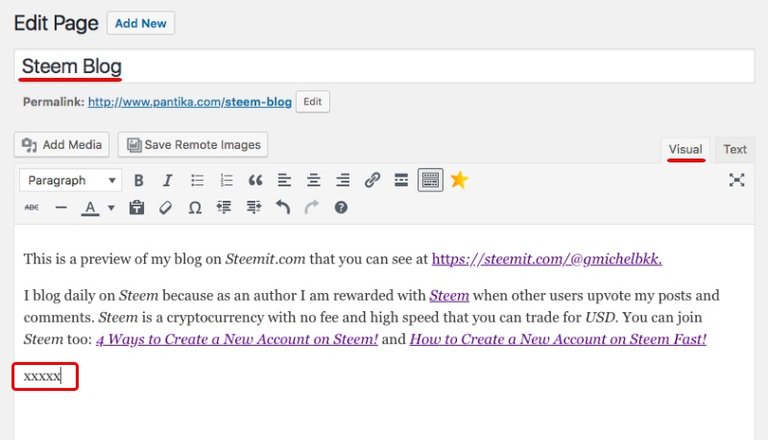
Then, I clicked the "Text" tab to replace these xxxx by the actual code.
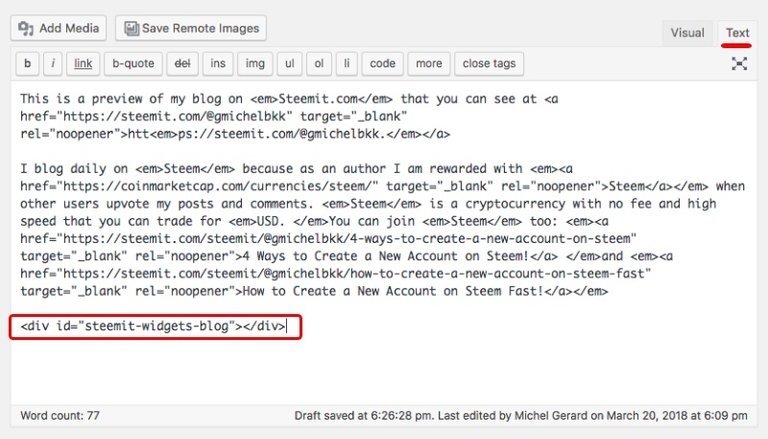
This code.
<div id="steemit-widgets-blog"></div>
It's where the widget will show.
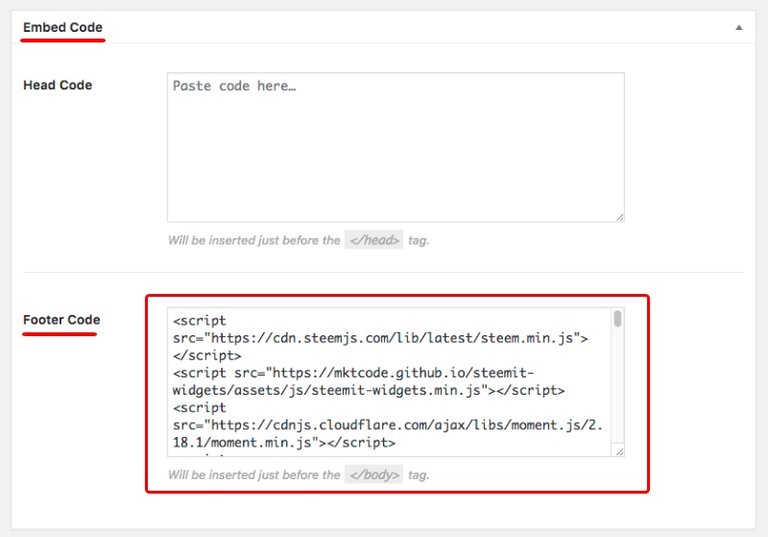
Then, you need to use a WordPress plugin that will allow you to add a head and footer code. I am using "Embed Code" and it is showing below the page editor.
It's where you enter the long code that the widget generator gives you.
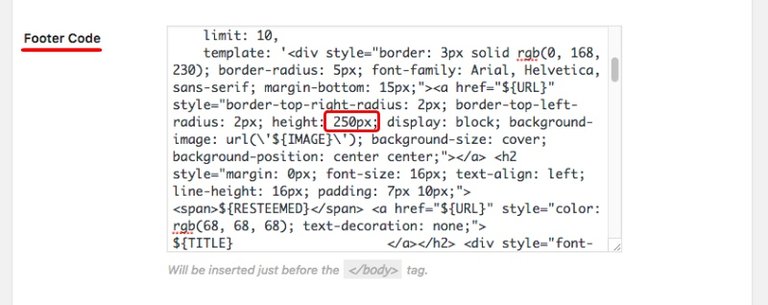
Now, the height of the image is set at "250px" by default.
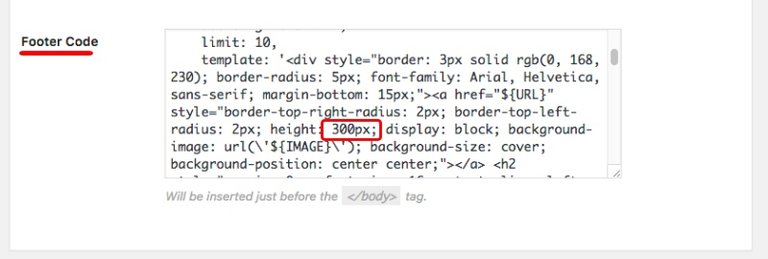
Replace this number by "300px" and the image will show perfectly.
This is the result of the newly created page on my WordPress blog.

You can see this page here: http://www.pantika.com/steem-blog
I used a different blog for this tutorial because I didn't want to have the profile widget already installed. I believe there will be some tweaking to do when using the profile widget and the blog widget together on the same page. If it is the case, I will do another tutorial.
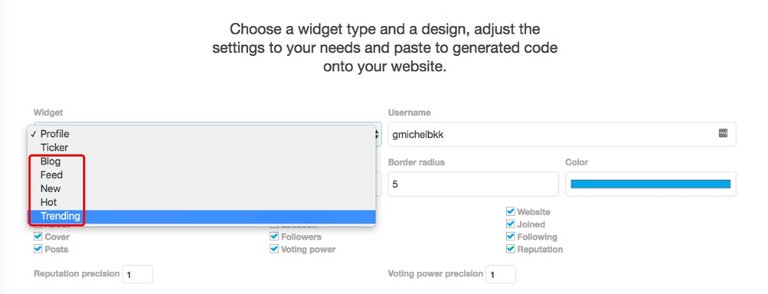
Using the same process, you can also show your Steemit feed, the New, Hot and Trending feeds.
I hope that this post is useful for you.
Would you upvote this post about Steem tools and follow me for more because this will encourage me to write more posts like this one?
Would you please help @jerrybanfield become a top 20 witness because you can help funding projects to build Steem as explained here? Vote for jerrybanfield as a witness or set jerrybanfield as a proxy to handle all witness votes at https://steemit.com/~witnesses. Read the 5 reasons why I'm voting for Jerry Banfield as a witness and how to vote in my post.
Michel Gerard
You got a 20.19% upvote from @allaz courtesy of @gmichelbkk!
Steem Upvote Bot Tracker
introduceyourself. He is going to hold interesting contests with cash prizes and promises to tell a lot of interesting stories!Thanks for using Bid Voting Bot @allaz service and I want to introduce you to my new friend @monsterbit in order to give additional thanks! Do you know who is @monsterbit is? My friend, you can miss a lot. I highly recommend checking him with
Thank you for this useful tutorial and the tools you provided! I tried it on my blog and everything works fine!
I'm glad that my post helped you successfuly use the widget on your site. Fell free go share your URL here so others can see another example.
This is my Italian blogSteemit profile widget on the sidebar.. The main page is showing the last posts I wrote on @ageeksdiary. I also managed to add a
It looks great, thank you for sharing.
This is great info, I am just wondering how to make it work with the built in program that godaddy uses
I jsut pout in a random title then pasted the generated code I tried it two ways one with the widget code and the content code, . I have almost no grasp of html,, every try this with godaddy it always says this in the same screenshot " You can use this to inject HTML, CSS, & JavaScript into your site between the <Body tags."
Thank you for commenting. Outside WordPress, I'm not sure how it can work. Maybe you will have a better answer from the developer.
Awesome stuff. I do presume this is for blogs made in wordpress.org, not .com. Is that correct?
Yes self-hosted blogs. Not sure if this can be done on the .com.
Nice blog new information,new learning for me...
I am glad it is useful for you @tanveerali.
thanks for this report,sir
My pleasure @rahmanmdriad.
Really helpful and very informative.thanks for always bringing value to steemit. After reading this, I think I need to get a website for myself.
Thank you for your kind comment @t-flames.
Looks pretty cool! Just checked out your site.
Thank you so much @gmichelbkk for showing practically how to show steemit post on website!
I am glad that you like it @rezoanulvibes.
THIS IS JUST A NEW METHOD FOR ME AND I HAVE LEARNED FROM YOU THANKS BRO FOR SHARING A INFORMATIVE POST LIKE THIS
I am glad it is useful for you @usamamsd.
That's definitely a handy way to do it through Wordpress and I quite like the design of those Steemit widgets. Although they could do with a little bit more padding around the post IMO.
Thank you for your feedback @daan, and I belive you can add rhis oadding in the code if you know how.
I don't have other blog website because I don't know how to earn in those but this is also helpful so thanks for this too!
Thank you for your comment @emdesan.
This post has received a 7.22 % upvote from @booster thanks to: @gmichelbkk.