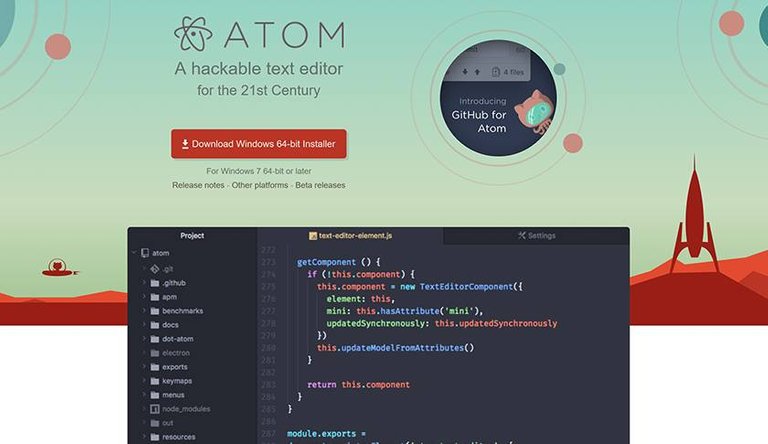
Have you ever wished you could streamline your post creation process? There are fantastic tools out there which can help you with that. In this post I will present the free open source editor called Atom.









 @flauwy


Why you should use an external Editor
Highlights
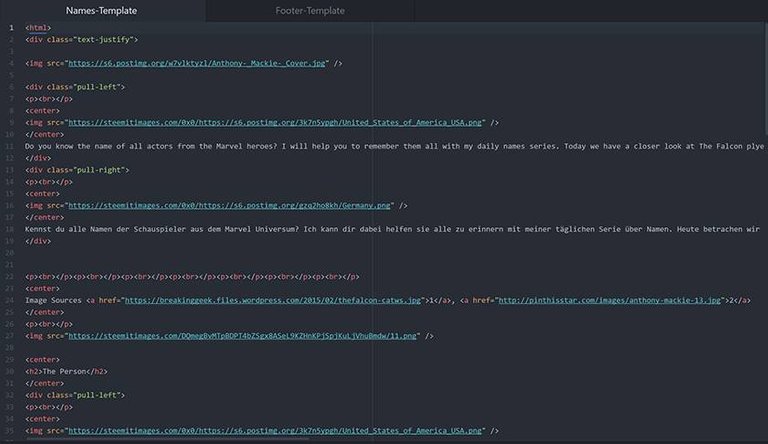
The first reason is because you can highlight your Markdown or html in colors and seperate them from the rest of your text. This will give a fantastic overview of your styling and also shows right away where you made a syntax error.
Autocomplete
Autocomplete functions will allow you to safe some time with closing tags for example. You can even create your own functions which will drop any content you want which just a shortcode.
Backup
Steemit is saving your content in the editor automatically which is great. But sometimes this can fail and you loose your work. Also, we never know what will happen with Steemit in the long run (it hopefully grows exponentially). In order to backup all your valuable articles you can prepare them in the editor and save them before you insert them into Steemit.
Preview
This is the reason why I got Atom: It offers you a preview window for both Markdown and html. You can see how your post will look on Steemit before it is even there. That will help you to manage the design of your post and make it look stunning right out of the editor.
Templates
Before I used Atom I used text tools for saving my templates. Templates can be anything from useful links you often use to Footer and Welcome sections up until entire article series where you use the same design again and again.
Getting Started with Atom


Stylesheet
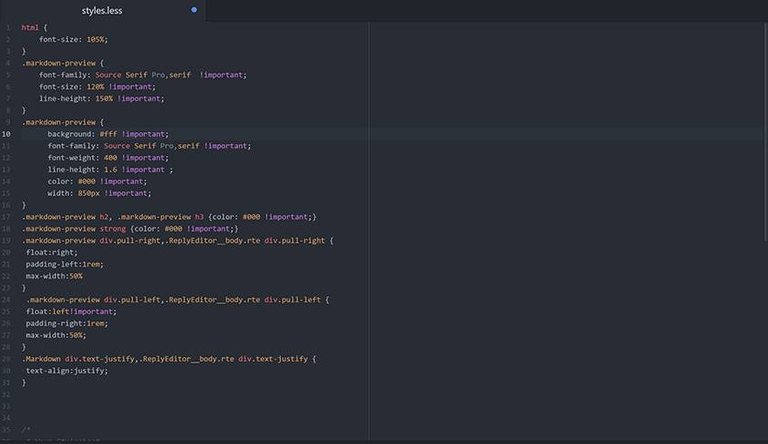
Go to File > Steylsheet and a new window with the Atom Stylesheet opens up. Don't worry you don't need to understand CSS. Just copy the code below either on the top or the bottom of the stylesheet. These are the most important Steemit styles. It probably is missing something so don't panic if not 100% of your styles appear as they should. They will on Steemit when you insert it there. So far it worked for me:
html {
    font-size: 105%;
}
.markdown-preview {
    font-family: Source Serif Pro,serif  !important;
    font-size: 120% !important;
    line-height: 150% !important;
}
.markdown-preview {
      background: #fff !important;
      font-family: Source Serif Pro,serif !important;
      font-weight: 400 !important;
      line-height: 1.6 !important ;
      color: #000 !important;
      width: 850px !important;
}
.markdown-preview h2, .markdown-preview h3 {color: #000 !important;}
.markdown-preview strong {color: #000 !important;}
.markdown-preview div.pull-right,.ReplyEditor__body.rte div.pull-right {
 float:right;
 padding-left:1rem;
 max-width:50%
}
 .markdown-preview div.pull-left,.ReplyEditor__body.rte div.pull-left {
 float:left!important;
 padding-right:1rem;
 max-width:50%;
}
.Markdown div.text-justify,.ReplyEditor__body.rte div.text-justify {
 text-align:justify;
}

Project Folder
Now click on File > Add Project Folder... and select any folder on your computer as your new Steemit folder. Here you can gather all your material for your posts, like graphics, your posts and templates, source files and so on. You can open and close it by hovering your mouse on the center left border of the editor. An icon appears which will pop out the folder view.

Create a new Template
Click on File > New File and a new window opens up with an empty file. Save that file right away in your project folder under File > Save. You can now start editing your post/template.

Open the Preview Window
For each template you open, you have to manually open its preview window. You can do that by either pressing CTRL+Shift+M (or Command+Shift+M) or you click View > Toggle Command Palette and enter "preview". The first suggestion is what you need which also shows you the shortkey I mentioned. You might want to zoom in or out a little bit because with my Steemit styling the preview width is fixed on 850px. Just like in your browser press CTRL+PLUS or CTRL+Minus.

Optimze your Template View
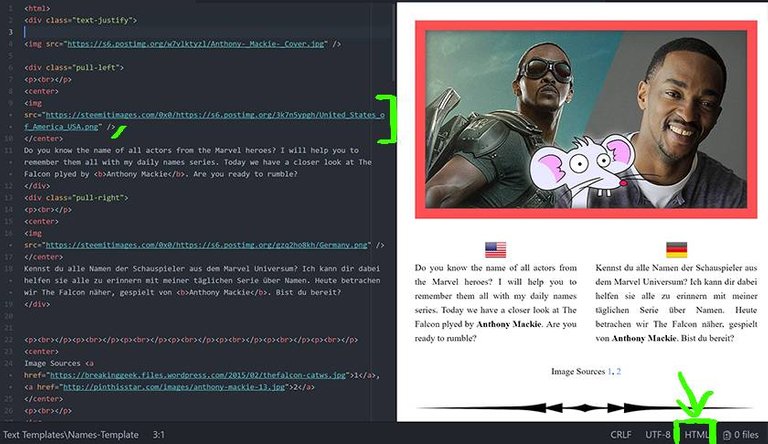
By default the editor will not wrap text at the end of its window but continues each line as long as it is. That will put some of your code behind the preview window. For a better overview you want to activate the soft wrapping. Click in your template window, then click on View > Toggle Soft Wrap. Now the text is not hiding behind the preview anymore.
Activate Syntax Highlighting
To see the colors for your Markdown or html you need to activate it for each template. Select your template window and look at the bottom right corner, below your preview windows (if activated and on the left side, otherwise below your template window). You will see the words "Plain Text". Click on them and type into the search field either Markdown or html. You cannot highlight both. Now you will see them being highlighted in proper colors. On the image below you see Soft Wrap in action as well as the Syntax options marked in green.

Many More Functions
This editor has tons of more functions and is entirely configurable to your needs. I haven't touched any of that because I just want to streamline my writing. If you have good ideas for a better workflow with Atom, please let me know. That's bascially it. Make sure to safe your templates and posts properly and just copy/paste them into Steemit when you are done. How do you like this tool? Can it help your work flow? Or do you have something else you work with?


How to Remember Names Series


The Ultimate Guide for Steemit Beginners
Money, Posts, Design, Topics, Bots, Behaviour, Community and Apps @flauwy
Cool. Can I assume it's for Windows?
Windows, OSX and Linux.
Great post! This was a very thorough explanation on how Atom works and I think it would benefit a lot of people. Thanks for sharing :)
Thank you. So far it doesn't look like anyone is even reading this. ;)
This post has received a 19.43 % upvote from @booster thanks to: @flauwy.
I personally prefer sublime text and I handle the formatting at the end when I paste in steemit. Your process looks a bit cleaner though.
Nice guide!
Thanks! Does Sublime has a preview mode?
If it doesn't preview directly in sublime, at the very least you can use a plugin that makes it very easy to preview in the browser.
I don't know if Atom has the fuzzy search bar that sublime does. I love that thing, never have to touch the mouse..
New to this awesome platform and I'm really digging it. Hey thanks for unpacking this aspect of it. It's simplistic and extremely helpful. Following and Re-steeming it for sure.
Awesome, thank you so much!
Hi, you have nice blog.
Thank you, I put a lot of effort into it. :)
Yes, i think you will be rewarded sooner or later. You deserve more upvotes.
How'd ya get that cool Steemit logo. I once did it by accident in my title but i have never been able to do it again.
Which one do you mean? On this page I use it in my page deviders and in the promo shot from my big tutorial. Both I took from a source online and put edited it with Photoshop.
after your page dividers a small logo
This post received a 2.5% upvote from @randowhale thanks to @flauwy! For more information, click here!