As this has been requested by many friends of mine, I finally compiled some pictures to be able to walk you through step by step how to set up your very on mining rig. I am known amongst my friends as a person to come to on this topic so I figured If I at least put a small guide out here it would answer some questions that some may think of messaging me to ask.
The first thing you want to ask yourself… “ Is this really for me?”
I say this because I have helped countless people set up their rigs and after a few weeks or months they decide it isn’t for them. They would rather trade, or they don’t know enough about computers to troubleshoot it when it has issues, or it's not as profitable as they had hoped.
All of these concerns and wants are valid, so I advise really doing your research before making the jump into purchasing your equipment. Mining isn’t fast money, and in the end you technically could lose money, but for me... it is more than money.
I enjoy being part of the network; it is like being a part of making history. Many miners feel the same, and of course, profits are always a plus.
I you decide that you want to go forward and begin building your mining rig than continue reading as I will detail for you what needs to be done to get your baby set up!
The Fist Thing you need to do is decide what types of currencies you want to mine and what cards are going to perform the best for that algorithm.
For me personally, I believe in z-cash and the coins that have forked from it so wanted to mine on the equihash algorithm rather than the more popular etherhash algorithm, which ethereum runs on.
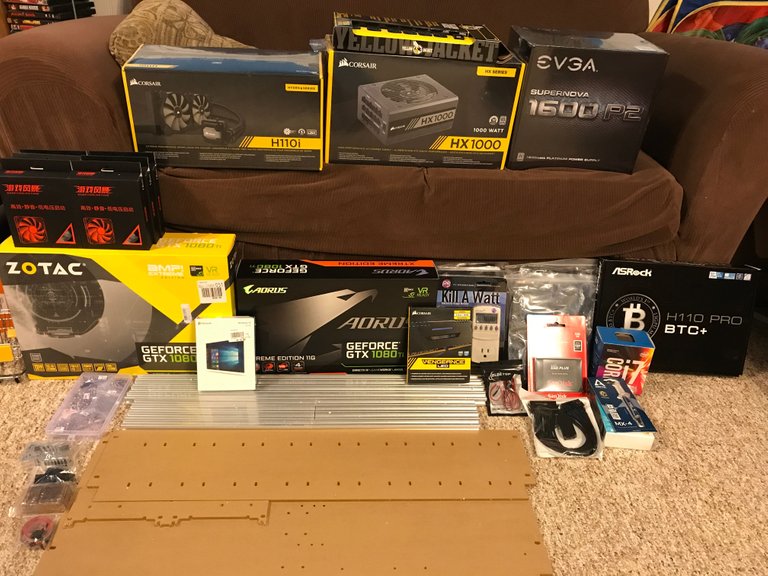
After you have decided on that you will need to get a shopping list together.
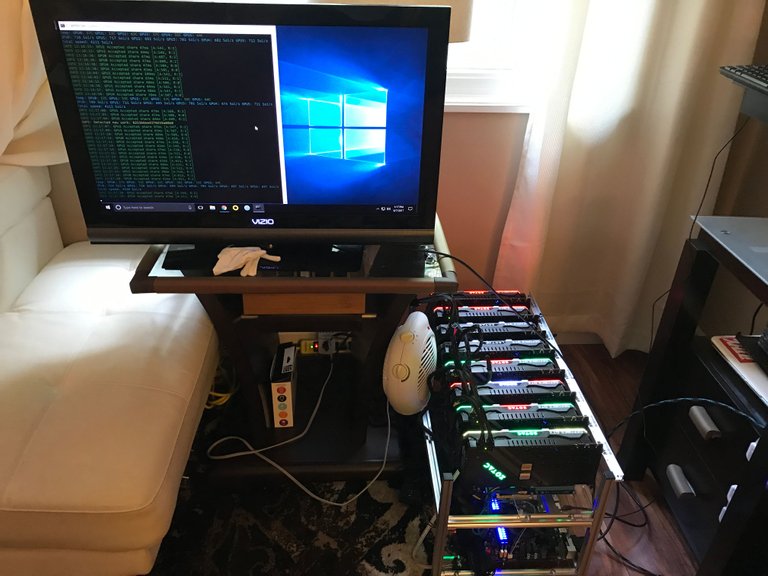
(don't mind that fan, it was not used for the rig lol)
-Build or buy a rig frame to hold your components and gpu’s
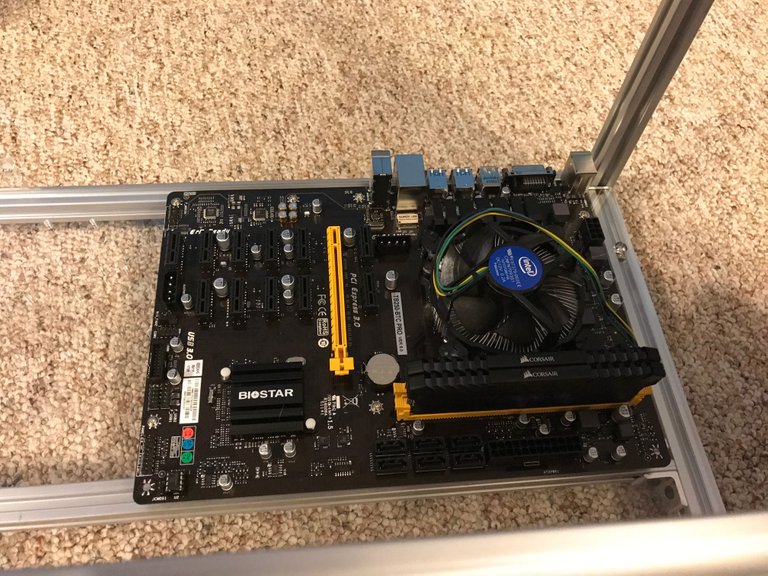
- Motherboard (started with an Asrock H110 & Switched to the BIOSTAR TB-250)
- cpu (I used an i7 but that’s not necessary)
- RAM (16 GB) (ensure compatibility with MOBO)
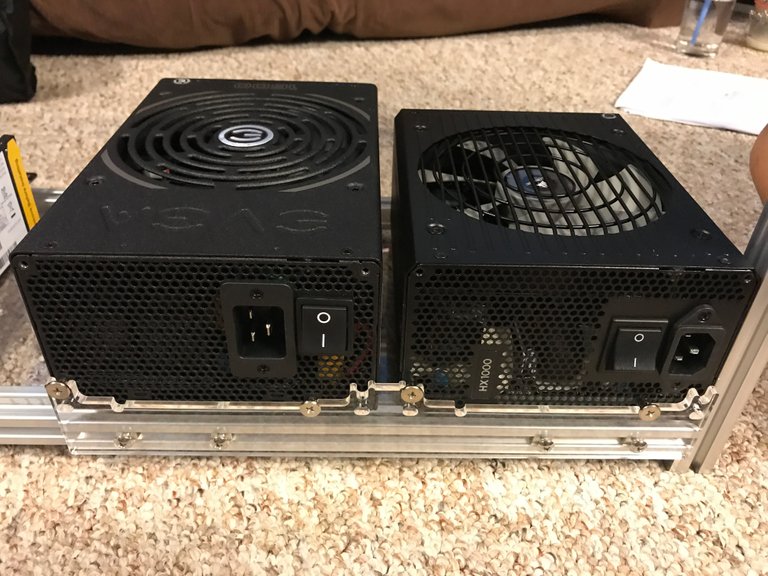
- 2 PSU’s (I used a 1600W & a 1000W)
- Dual PSU connector cable
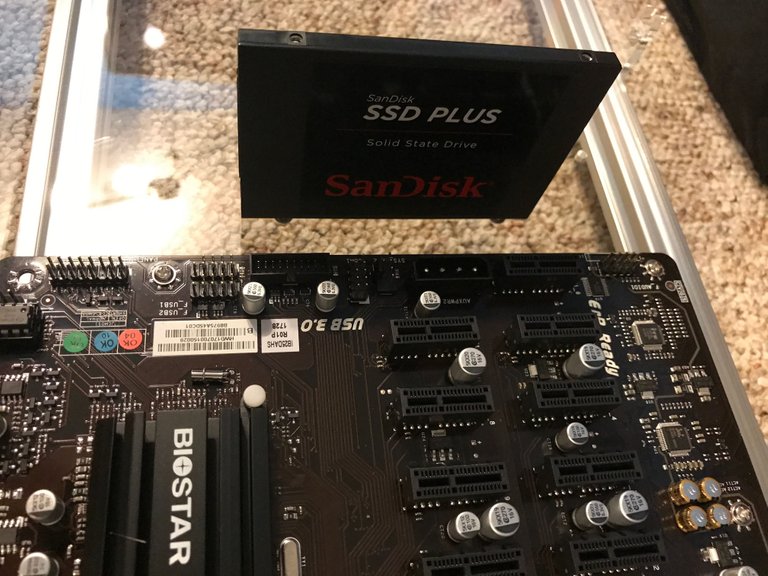
-SSD (120 GB) - Windows 10 (unless using linux)
- Heat sink compound or paste
- Kill-A-Watt power monitor(s)
- 4 dual 8pin to 8pin adapters (this will be needed to power only GPU’s with dual 8 pin power input)
- Fans (for the rig)
- Fan/RGB controller (for fans to all connect)
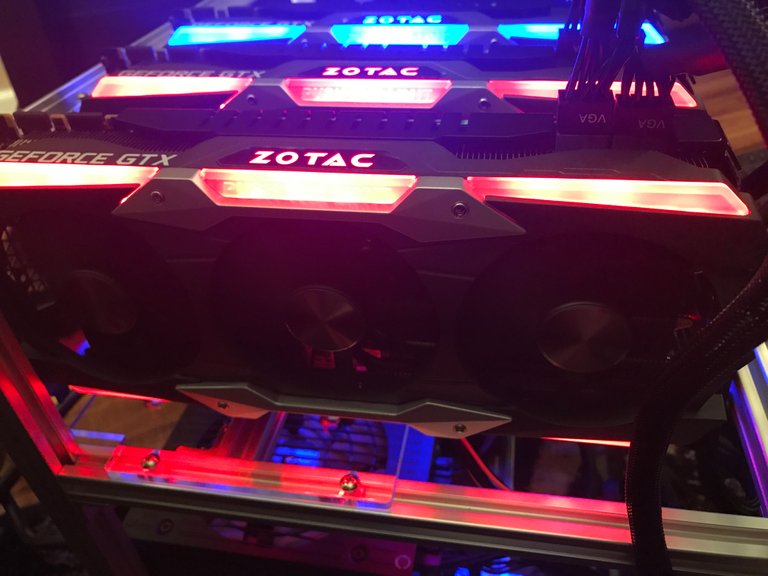
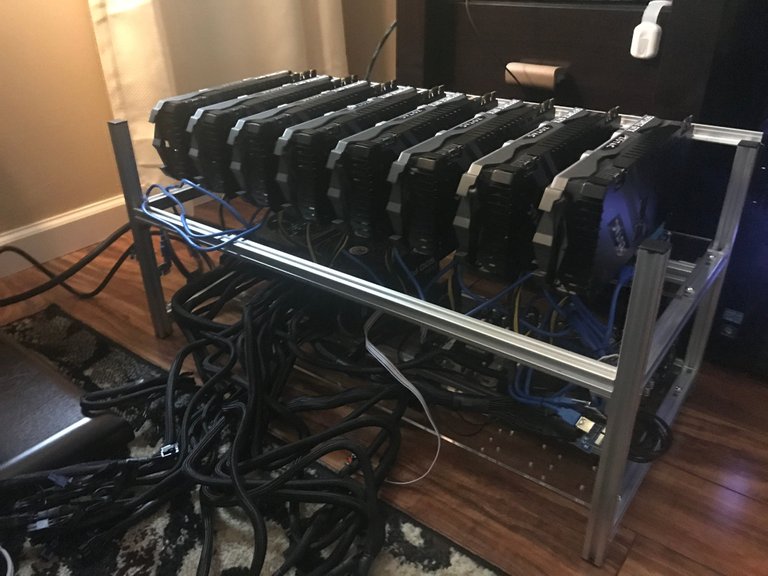
- 8 GPU (I chose 8 11GB Zotac AMP Extreme Editions) ( I returned the Aorus)
- 16x – 1x risers (7th generation with USB/sata NOT molex)
- Power switch (unless your MOBO has an on and off button)
- DEDICATED 20AMP CIRCUIT (THIS IS NECESSARY)
After you have gotten your list together you will need to place a very large NewEgg/Amazon order…
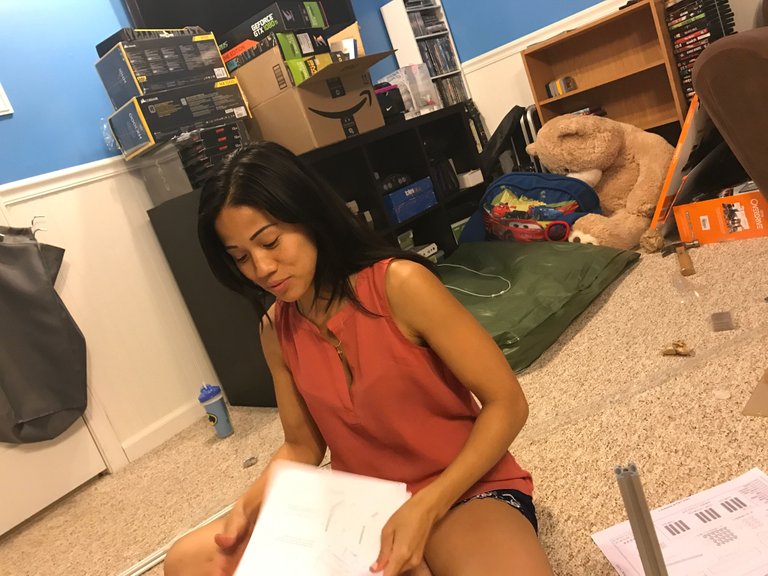
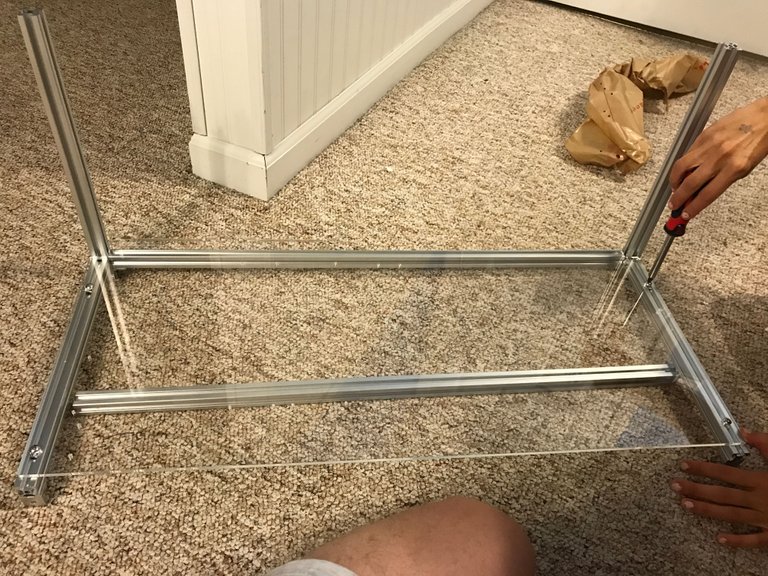
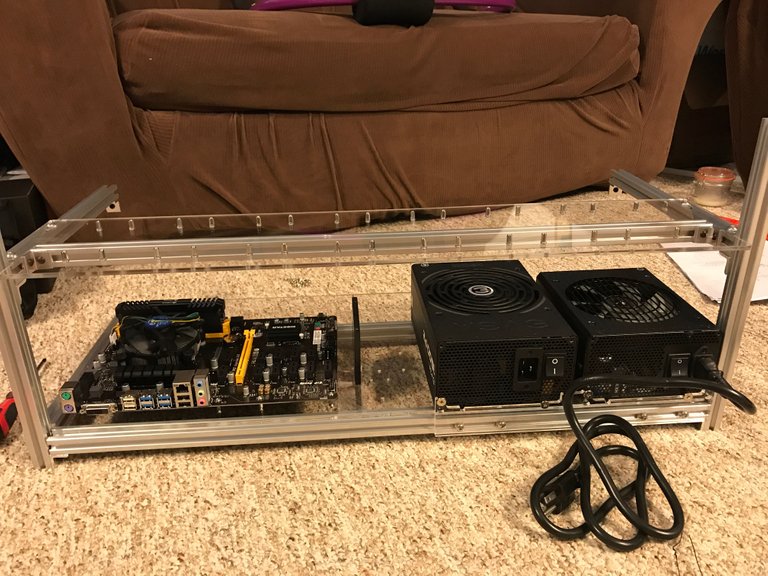
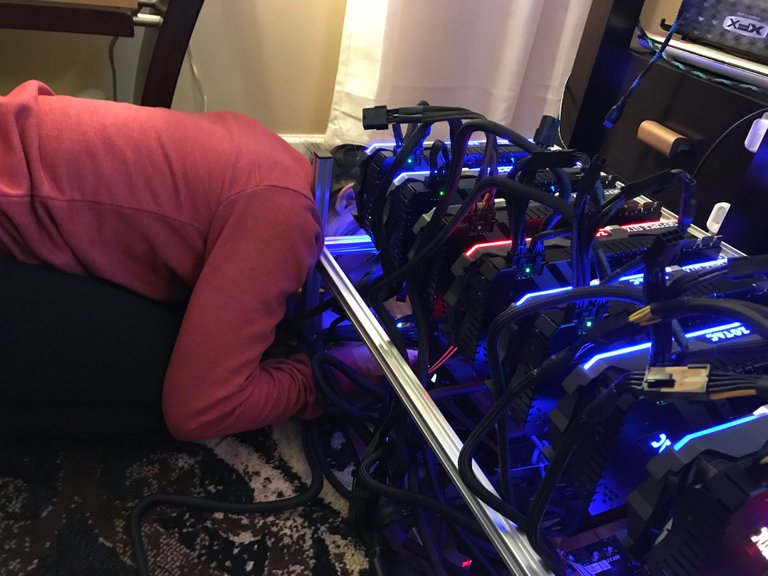
Then begin with building the base of your rig frame. I do not put on the top shelf until after a few steps. (Be sure to have a lovely assistant as well).
Next you will want to start with putting together the heart of your rig… the actual computer.
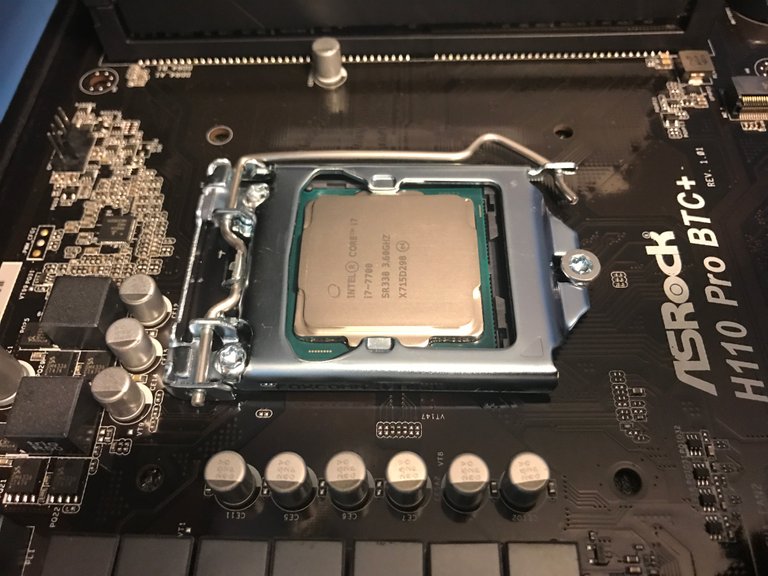
You will want to unbox your CPU and place it where the CPU is to be set. Close and lock it, but make sure it has been placed in correctly and secure.
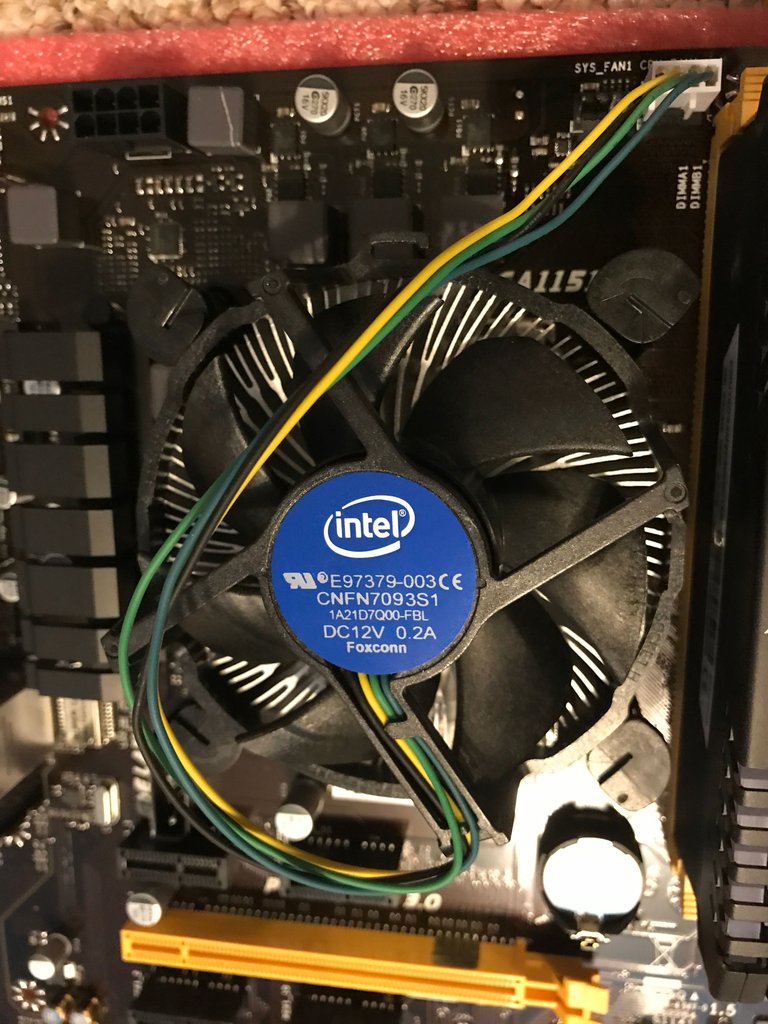
Then you will want to put the thermal paste over the cpu and place your cpu fan on top of the cpu. Press the 4 posts into place in the 4 holes aroud the cpu. Plug your CPU fan power wire into the 4 prongs labeled CPU fan.
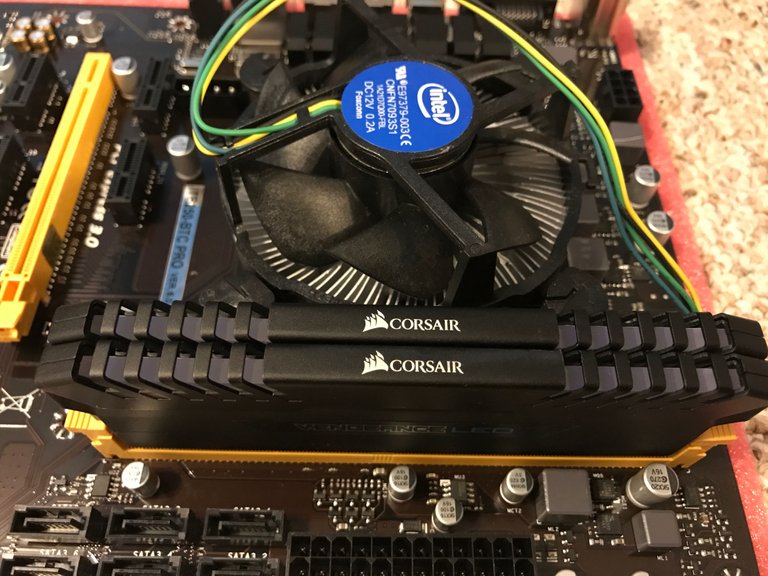
Then you will want to insert your RAM sticks in to the RAM slots.
Now you will set your motherboard on to the base of the rig frame and screw in your SSD if you choose to.
Now Take your power supplies and set them on the rig frame as well. I personally wait to add all of the PSU cords till after a few steps because all of them included are not needed, but you can plug all of them in now if you choose so.
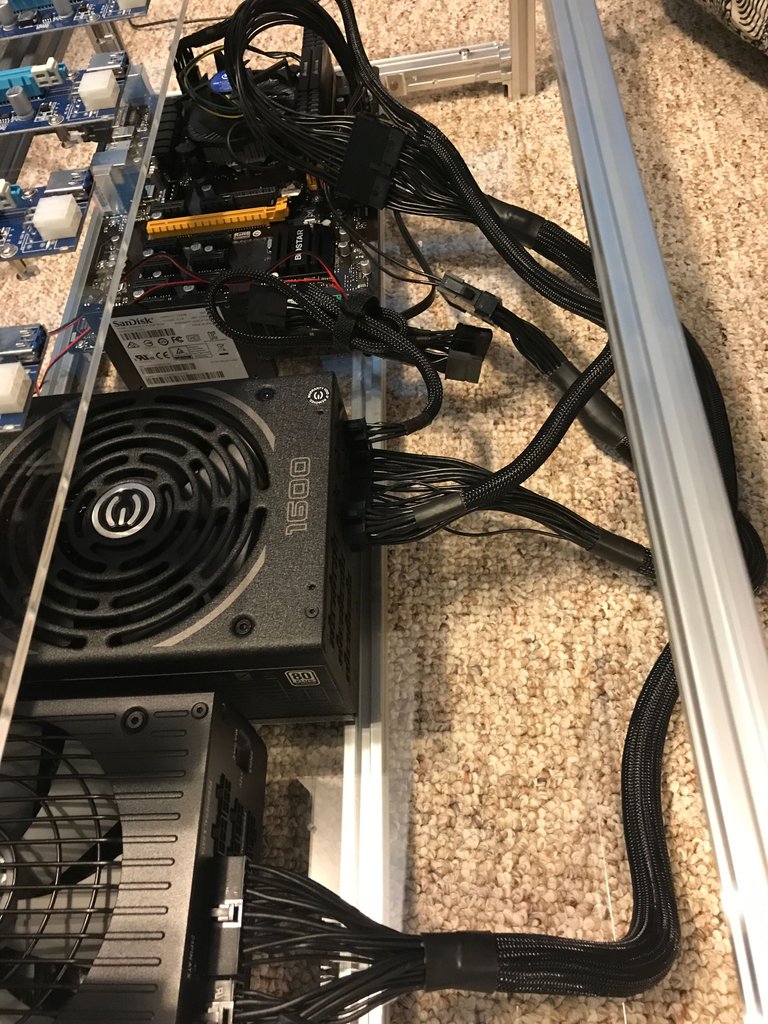
After you have put your PSU’s on the frame you can test out your CPU to make sure the heart works properly. First connect your SSD to the PSU and motherboard via SATA connection. You will want to connect your power supplies together using your dual PSU adapter, plug that into your motherboard. Make sure that your 8 Pin CPU power cable is plugged in to the motherboard and the SAME PSU as your SSD and Motherboard (this is yuuuuge).
Connect to a monitor and if it loads in to the bios then you are good and you can unplug and power down.
Now back to the rig...
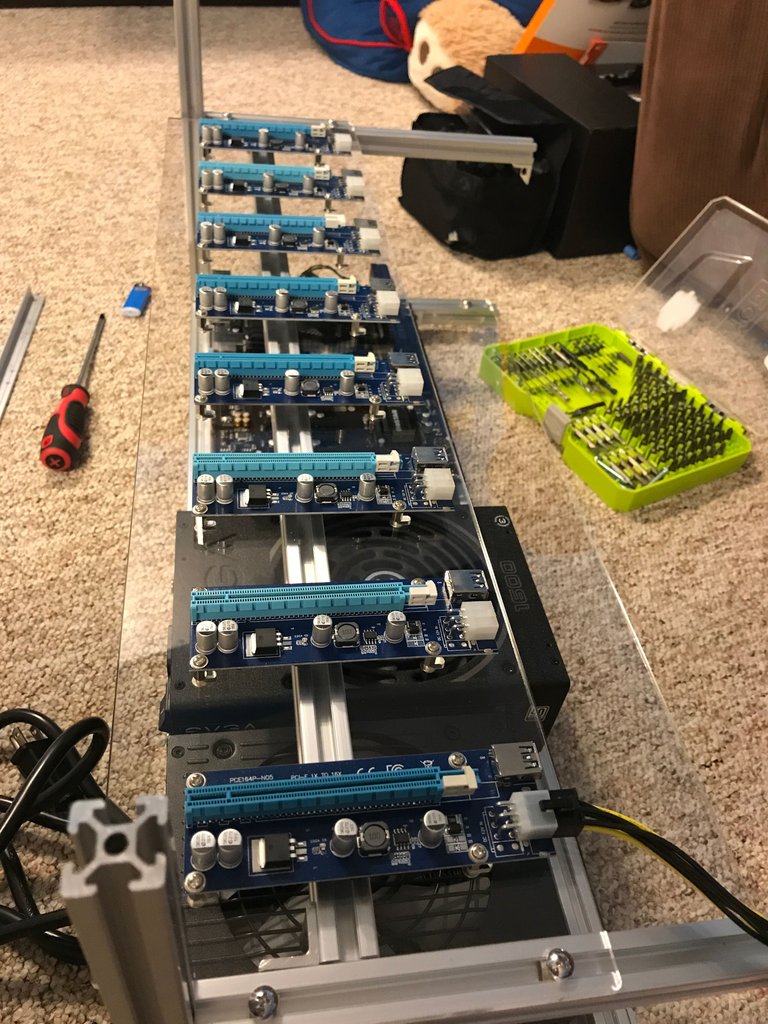
You will now want to attach your top shelf and posts to set your risers on. I prefer to have a minimum of 2 inches between each GPU for optimal heat dissipation.
(
Now place your risers on the top shelf and attach them firmly.
I now attach all of the USBs to the pci-e adapters and attach your 6pin to sata power to the risers. Do not actually plug anything in yet, just attach them and move them out of your way.
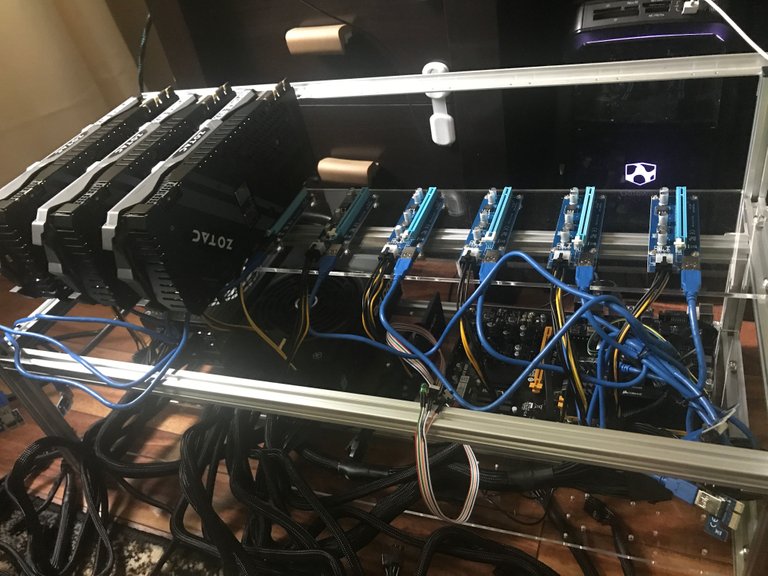
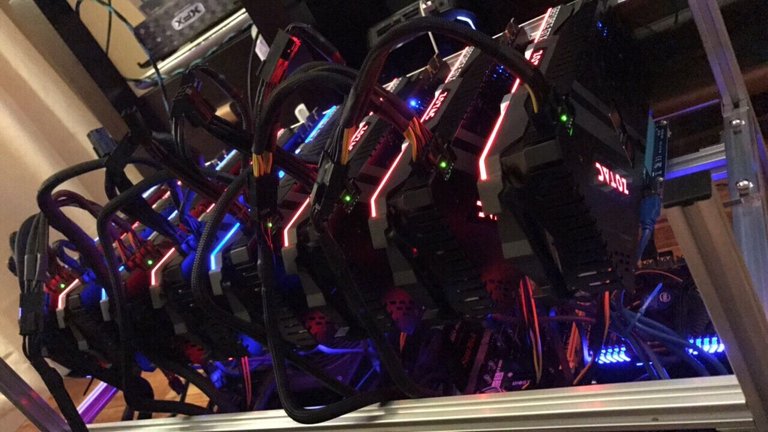
You will now begin to slot you GPU’s. I always slot them from left to right as it is easier to lock them on to the riser from the right side of the GPU. Screw them on securely.
I plug 2 risers and 3 gpu’s into the 1000W PSU and the other 6 risers and 5 GPU’s into the 1600W PSU. (With less power hungry cards this set up is not necessary) Use the bottom plugs first on your PSU, it makes it much easier.
Make sure that your PSU's are plugged in to different outlets running on different circuits as sometimes you will reach close to 20A (this only applies to a rig set up like this, 8 x 1080ti's can push out over 300kw each). Use the "Kill-A-Watt' to monitor your AMP or kw/h usage.
Plug all of your SATA power cables from the risers into the SATA connectors coming from your PSU. Do not yet connect the 8 pin power cords to your GPU.
Turn on the motherboard and make the necessary bios adjustments for your motherboard to be best compatible with your GPU load. Now save your settings, and power down.
Now load Linux or Windows.
I have better luck when I load windows fresh with no GPU’s attached, fully update, and then turn it off, plug in the PCI-E adapters into their slots on the motherboard, and power the GPU’s.
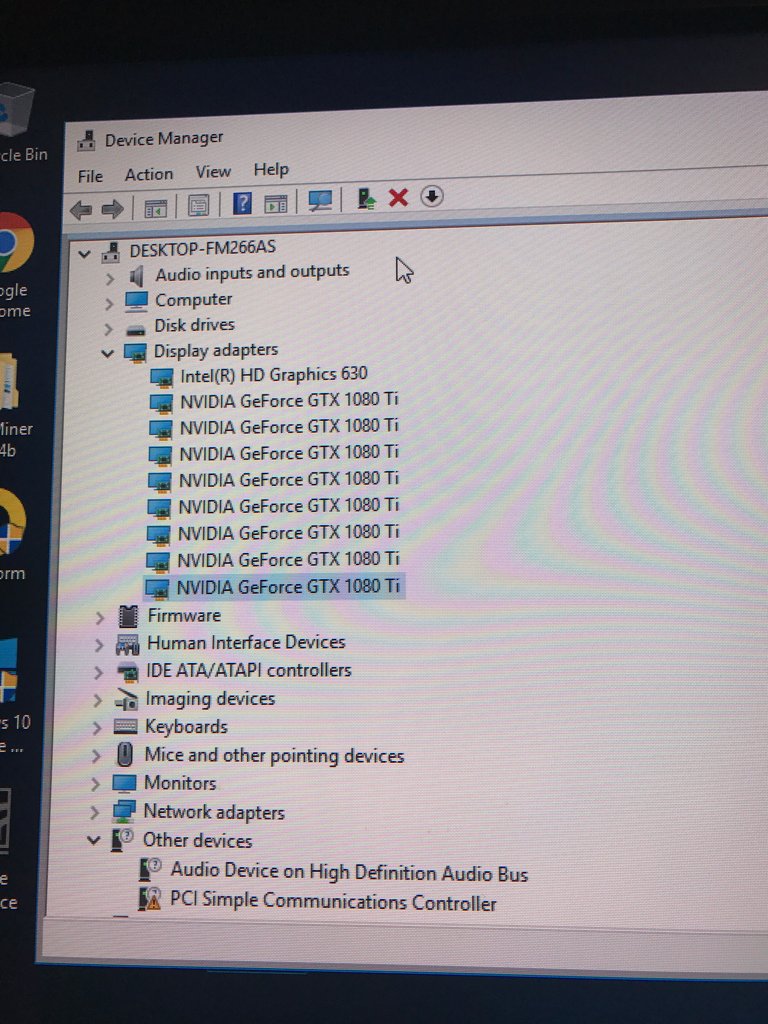
Now go to Nvidia or AMD’s website and download the necessary drivers for your cards or insert your driver disk and load your drivers. After this is done loading you will want to reset your computer one final time. When it kicks back on you will now check device manager and ensure that all of you GPU’s show up. If they do you are almost good to go… if not you will need to do some troubleshooting.
Add your fans...
Last steps are to download a wallet for the currency of your choice and download your mining software. After this has been done you will configure your miner to the pool you choose and the wallet you have acquired. (You will want to modify your .bat file by adding your wallet address, server, pool, and password if set).
Save the file, and start up your .bat file!
There is always overclocking, undervolting, and fan curving, but you can ask about that after you have gotten everything all set up and ready to rock!
Video Below:
I have helped SO many people get these up and running so if you do decide you want to start on your own mining adventure please don’t hesitate to reach out with questions about any of the components, parts, or process. I try to help as much as I can whenever I am available.
Thank you for reading/watching and all of your support!
Support your local yunk dealer @clevercreator: https://notshakespearesschool.com/collections/steemitverse

Vote For @Yunkzilla & @Drakos @ https://steemit.com/~witnesses
This blog would be nothing without all of you.
.gif)
That was one of the most detailed mining rig instructions I have ever seen. I love the fact that you started of honest and said the most important thing many forget when they get into "get rich" quick crypto's; we are changing history, that's the really important fact.
Thank you and I look forward to more from you as things change.
Thanks! I've been telling people in chat since the beginning of July I would post a "how to" but each time I started my next project I'd forget to take pictures.
So this last one I finished about a week ago I went into with the intentions of showing the process. I wish I would have taken pictures of how and which plugs I used for which cards because you have to get a little creative sometimes lol.
This gem of a post was discovered by the OCD Team!
Reply to this comment if you accept, and are willing to let us share your gem of a post! By accepting this, you have a chance to receive extra rewards and one of your photos in this article may be used in our compilation post!
You can follow @ocd – learn more about the project and see other Gems! We strive for transparency.
Of course I accept! Thank you!
Thanks for sharing your experience in depth. Which coins are you mining currently?
I have 2 of those on ZEC & 1 on ZEN... come November all 3 will be pointed at BitcoinGold though.
interesting!
Yes, quite interesting it is!
At the moment these rigs are very hard to pay off, but the hobby is fun and like you said you feel like part of history. But I would caution anyone trying to get into mining to really think about if they can afford it and do their research.
EDIT: if anyone is trying to build a rig or has questions ill answer best i can
Yes you are right to some extent. They aren't "hard" to pay off in my opinion. They just aren't something that is paid off quickly. If you were to build one designed to mine ether currently, then yes it would be hard to pay off.
As my introduction to the topic before givIng any steps said, "you need to ask yourself, is this really for me?" And I also stated.., "you could lose money".
I agree with you to that extent and believe Everyone should do their research and see if the money invested into their machines is worth it to them.
This is an amazing guide, I will build my first rig today and will follow a lot of the points and suggestions you mentioned. Hope I will not have too many problems with it :)
If you run into any issues send me a message on chat and I'll give you my number to contact me.
Thank you a lot! At the end everything went smooth, had a problem with the drivers as I was installing all drivers together but you need to install one card per time.
Except for that I ended up using hashrate because having a proper Zcash mining option was not working... Any chance you can set a tutorial for the software as well?
I posted the new one about how to properly run the software @cryptomarketer . Let me know if it helps. https://steemit.com/technology/@crypto2day/how-to-correctly-set-up-your-mining-software-and-properly-route-it-to-bring-all-the-boys-to-the-yard
Just finished to read it. It is awesome, thank you so much for it! I ended up using hashrate but I think I will try with the origianl mining software. My mistake was at the end to click instead to the new .bat file to 'miner' file. Is that a possible solution as well?
Also since yesterday my hashrate mining closed down already twice, how is possible to have the mine running 24/7?
No you want to modify the ".bat file" for whichever pool you are going to use, add wallet,change the server if necessary, and then save and open it.
If it keeps shutting down it could be a few things.
Possibly... I wouldn't think so but it is possible. Try moving a power cord for a riser from your power supply that your MOBO is plugged into to the other PSU.
Mh... I'm using 6 1080Ti with 2 PSU 1200W each.... 1 for 3 cards, and 1 for 3 cards plus MB... do you think the setting is the problem?
I'm literally about to post it in an hour lol
I have been working on that all day during my spare time for you guys 😉.
Ya some people have said they needed to do one card at a time, but when I've used all Nvidia cards it works best for me when I do none while I load and update windows, then power down, plug them all in, and then power back on.
This post was very informative thank you for sharing
you have my upvote
Keep smiling, reading, writing and voting!!!
@mannyfig1956
Thanks Manny, I'm happy you enjoyed reading it. I appreciate the upvote and your kind words.
Thank you for that post, very informative, since I also consider building my own rig. I was wondering: how much does it mine a day and when do you think will you reach the break even point?
It mines approx. .14 ZEC per day and my ROI is about 7 months at the current price and difficulty.
Hmm 7 month sounds quite okay. Did you already include electricity cost in this calculation?
Yes that's with electricity factored in. I advise anyone using the types of cards I have to contact your power supplier and try to get a commercial or if you are lucky and industrial rate... you will save a lot.
Great job...Thanks for this. Good looking rig!
Thank you, and not a problem. I had been meaning to get around to posting this for the last month or so.
One of the best and most detailed articles I have seen on setting up the hardware for mining. Good job!
And I agree, one needs to properly study ROI before indulging in such activity. I've been pretty hesitant on jumping into such activity myself, even though I much enjoy networking and recently crypto. Hopefully soon I might give it a shot.
Thanks again, i'll keep an eye on your news
Thank you! I had been asked a few times in the past if I could make a tutorial and always forgot to take pictures so with this last one I made it a point to document the whole process.
If you check out one of my more recent posts I explain how to install the software correctly as well.
Thanks for taking the time to read and comment!
Pleasure. And yes I did, it is excellent as well!
Thanks! I appreciate th support.
Boy that beats my shoe rack and milk crate. Any luck with cheap chinese port multipliers? i put one in last night because one of my mobo had only 5 ports...the fans all spun up but couldn't get it to recognize anything connected to it.
Ports? You mean the pci-e expanders? Like a 4-1 pci-e connector?
Which GPU's are you having the issue with?
yeah, i got one of these
https://www.aliexpress.com/item/NEW-blue-PCIe-1-to-3-PCI-express-1X-slots-Riser-Card-Mini-ITX-to-external/32813563093.html?spm=a2g0s.9042311.0.0.meOoLv
I had 4 GTX 1060s and a RX580 on a ubuntu machine. then i wanted to add another 580 using the adaptor as i only had 5 pci-e slots. they would spin and light up but could only see the ones connected directly to the board. i'll just use a new board and windows for the 580s instead.
You may just need more power to your motherboard. Try attaching the ATX power adapter from your power supply to the motherboard as well first.
Thank you, she is pretty 😉.
They are Graphics cards/GPU's and to me personally each machine is definitely worth what they had cost me to build. They each do pretty well on the currencies they are pointed to at the moment.