Hi again!
If you are thinking about making your own steemit bot, for instance an application that will play a notification each time someone gives you and upvote then this is the guide for you!
This will be a very newbie friendly tutorial that will show you how to create your very own, simple application that interacts with the steemit blockchain.
In this first part we are going to create our virtual machine. This will be a safe environment to experiment and test our steemit apps. If your concerned you will mess up your computer or Windows fear not. Since we are creating a virtual machine, even if something goes wrong it will not affect your PC in any way.

Virtual Machine
If you like to keep your operating system, for example Windows, fast and clean - you probably don't want to install to many additional applications and libraries and other this sort of stuff needed to code programs. That's why the best option to do it is to create a new, virtual system. You launch it just like any other application so you don't have to reboot your PC.Think about your main OS as your clean, tidy house - and virtual system as this one room where you keep all the unneeded stuff. It can be messy but it's not a problem because it's sealed off from the rest of the house so even if it's infested with bugs - your home is safe. That's pretty much why we're gonna use virtual system :)We'll use Ubuntu distribution of Linux - it has desktop, it has icons so don't worry, it's not some hackers-only system where you can't do anything unless you spent last 20 years in your basement hacking Pentagon. Let's go!
Installing Linux as Virtual System
1. Go to: https://www.vmware.com/products/player/playerpro-evaluation.html and download the VMmare Player.
Here's the latest version direct download link:
https://www.vmware.com/go/tryplayerpro-win-64
This is the "player" for virtual system - we will use it to launch the virtual Linux.Install the downloaded VMmare Player.
2. Go to https://www.ubuntu.com/download/desktop and download Ubuntu Iso.
Here's the latest version direct download link:
http://releases.ubuntu.com/16.04.3/ubuntu-16.04.3-desktop-amd64.isoSave the iso file in a folder where you can find it later.
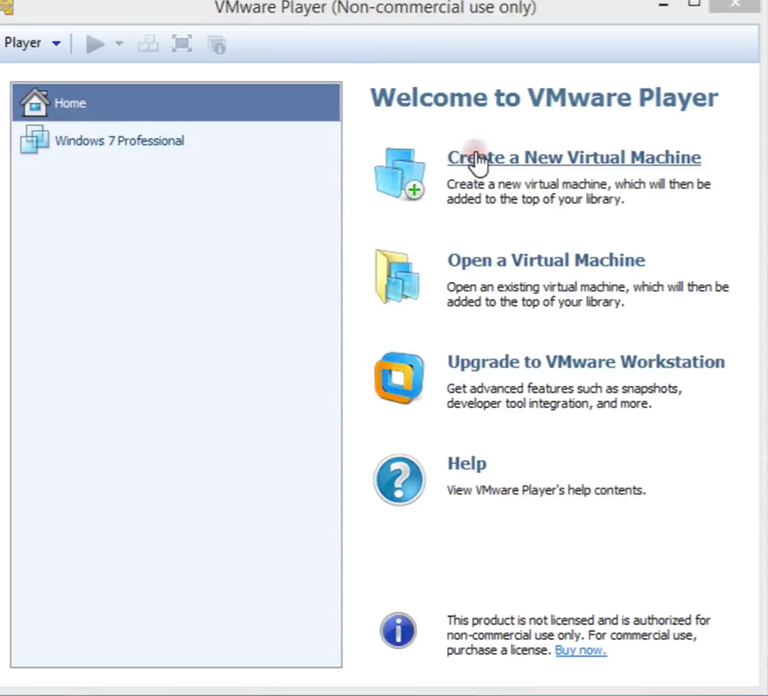
3. Start VMmare Player and click Create a New Virtual Machine (on the right menu).

4. Select "Installer disc image file (iso)" and click "Browse".

5. Go to the folder where you have saved the Ubuntu iso file and select it.

This is how it should look like:

6. Click next and enter the User name and Password. Click Next.

7. Enter Virtual Machine name and choose in which folder it will be saved. Try to avoid spaces in Machine name.

8. Set the virtual disk size (anything above 10 GB will do the job) and click Next.

9. Here you select how many CPU cores and RAM you will give to the virtual machine.
We won't be doing any complicated computations so basic values will do the job. You can change those later on so don't be afraid to experiment :) Click Finish

10. Now the Installation process will take place. Be patient (or buy SSD drive ;)

After the installation is complete, you should be able to log in - use the password entered in step 7.

11. It's alive!
Click on the firefox icon on the left and check if the internet is working. If yes - congratulations! You have successfully installed virtual machine and by this completed this tutorial :)
Tip: remember that you can resize the Virtual Machine window to make it bigger.

In the next part of this series we will setup our connection with steemit blockchain and see how the blocks look inside. Enjoy!
Resteem as bookmark first. Let see how the next series work.