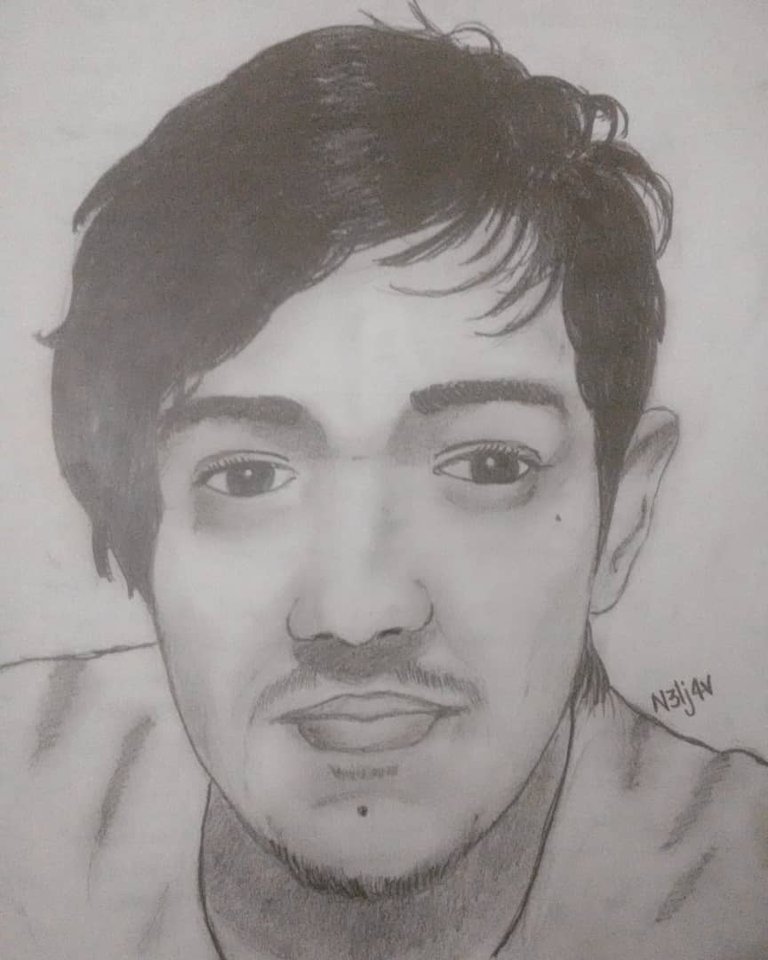
Hola Amigos, el día de hoy les traigo la elaboración de un rostro en la técnica de claroscuro con lapices de dibujo. La técnica del claroscuro consiste en el contraste marcado entre luces y sombras valiéndonos para ello de degradaciones de tonos, para resaltar un objeto, en este caso, un rostro humano.
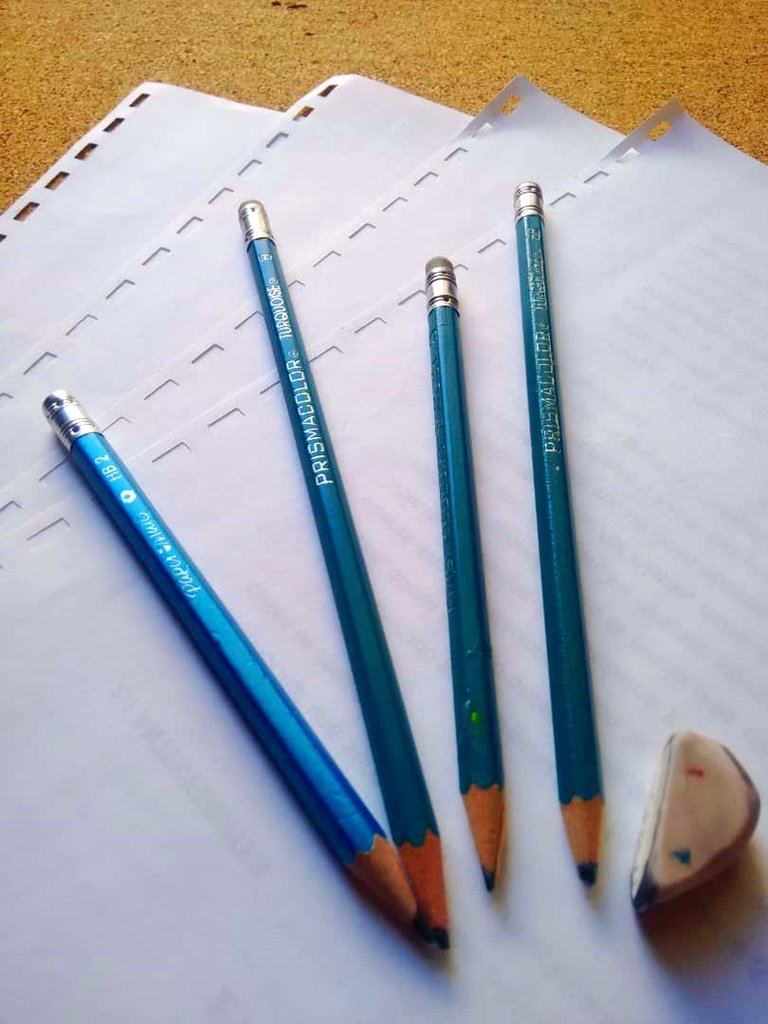
Los materiales utilizados son realmente sencillos, nada elaborados, entre los que mencionamos:
- Hojas de papel bond blanco reutilizables
- Borrador blando
- lapices de dibujo números HB, B, 2B y 6B.

Los pasos para la elaboración del diseño son los siguientes:
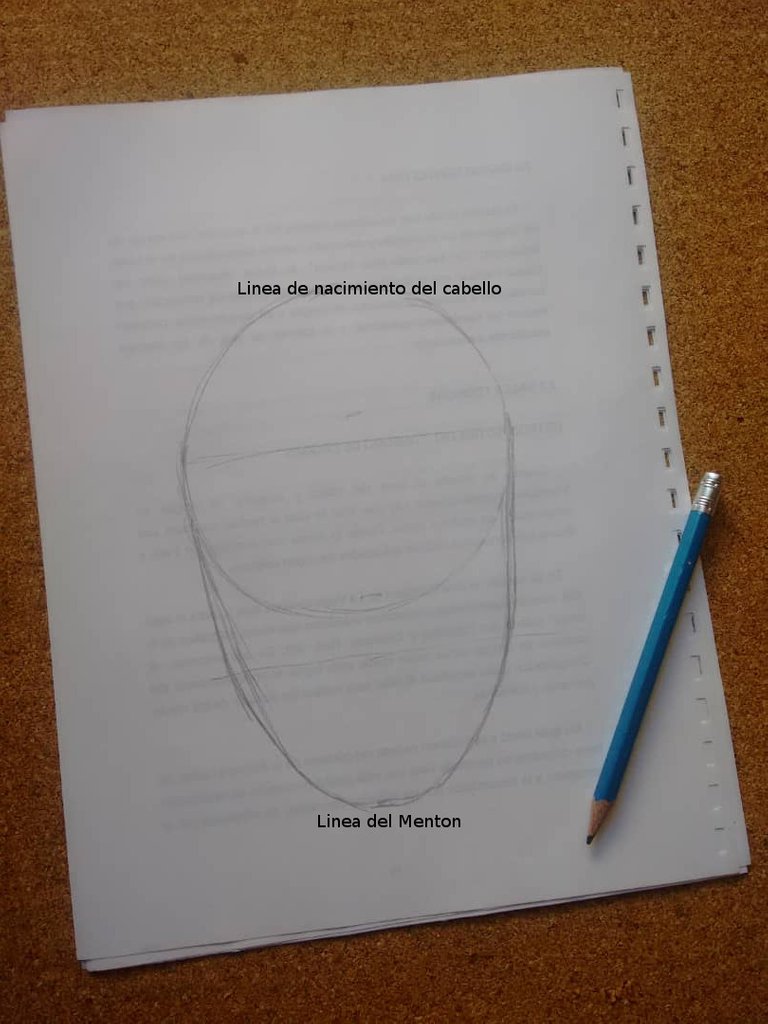
1.- Realizar un esbozo del área del rostro a dibujar, tratando de semejar su forma, tomando como referencia desde la linea de nacimiento del cabello hasta el borde del mentón.
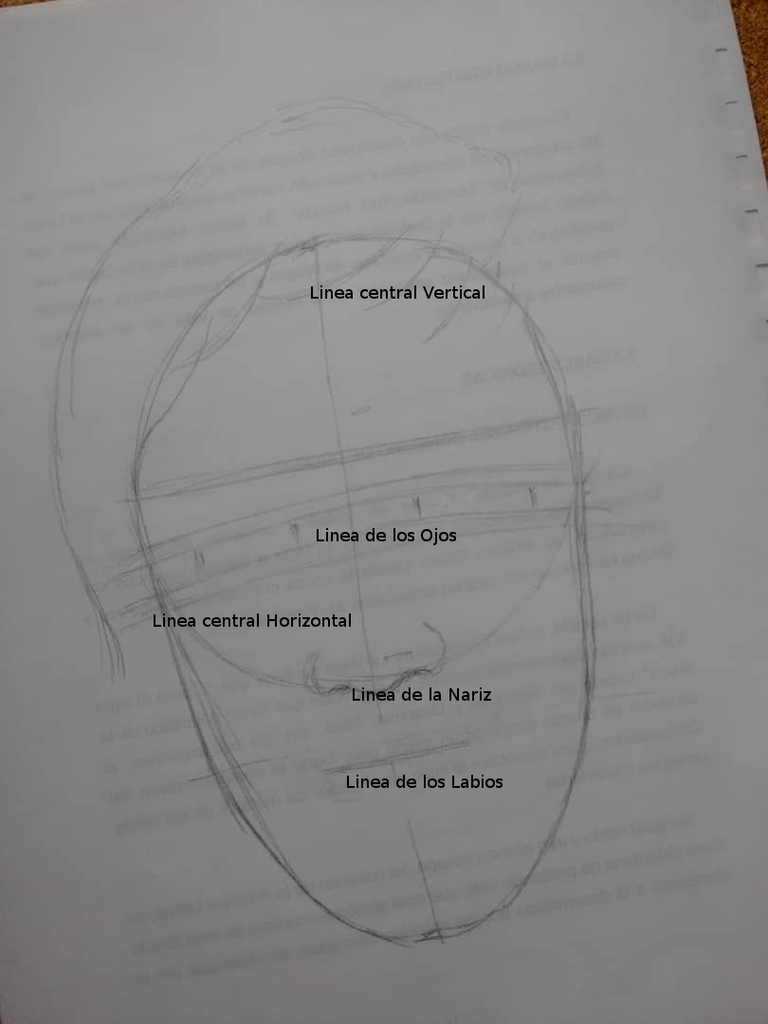
2.- Ubicar en el esbozo anterior y trazar las lineas que subdividen el rostro: linea centrales horizontales y verticales. A partir de ellas se realiza el boceto de ubicación de las partes del mismo: linea de los labios, ubicación del área de la nariz y de los ojos, y finalmente el área exterior del rostro (cabello).
3.- Se da inicio al definido de la forma de la nariz, los labios, las cejas, las orejas, la ubicación de los ojos con respecto al rostro y el cabello, así como el área del perfil del rostro.
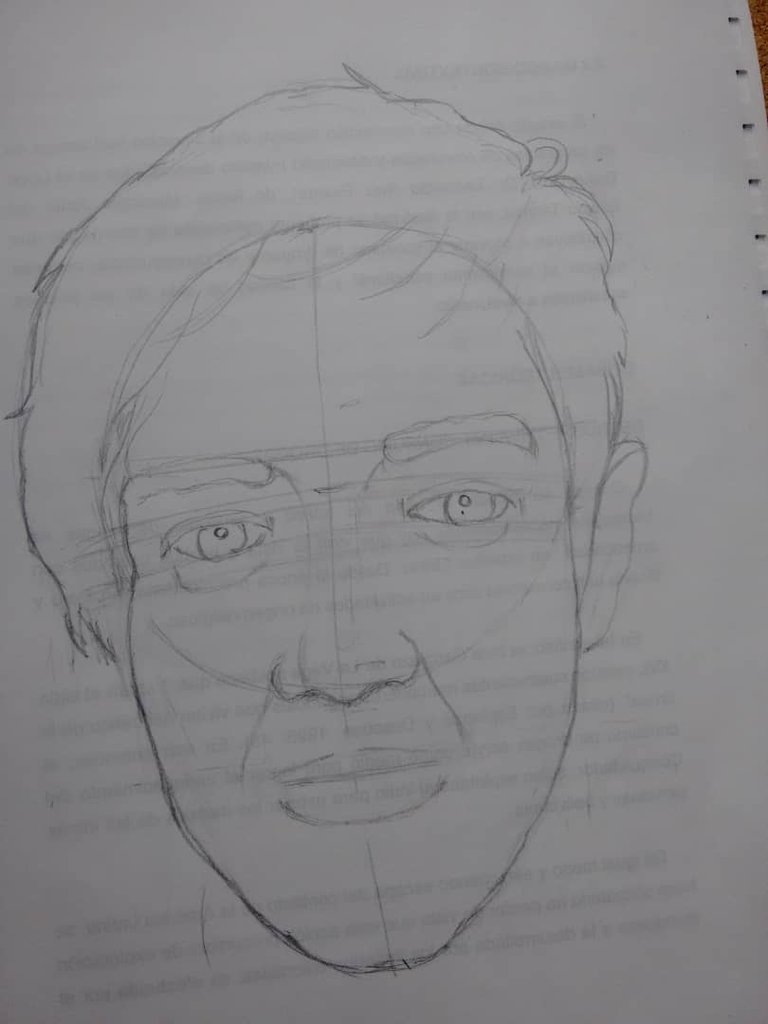
4.- Procedemos a eliminar las lineas de referencia hechas a partir del boceto. Para ello utilizaremos el borrador para lápiz o borrador blando, procurando no dejar residuos de los trazos de referencia hechos inicialmente.
5.- Iniciamos los primeros trazos a lápiz. Particularmente inicio siempre a partir de los ojos y de allí hacia afuera. Los primeros trazos se hacen de manera suave a manera de ir corrigiendo errores y mejorar el diseño elaborado paso a paso.

6.- Ya demarcadas las áreas mas resaltantes del rostro se va aumentando la intensidad de la tonalidad en aquellas áreas que las amerite, dejando para último la zona del cabello, que generalmente es la mas externa y mas oscura.

7.- Luego los detalles complementarios: diseño del cuello, y complementos del rostro. Tratando de realizar el sombreado desde un tono mas suave (HB) a un tono mas oscuro (6B), seg{un lo requiera el diseño.
En este momento inciamos la difuminación de los tonos, consistente en ir desvaneciendo el contraste marcado entre ellos para darle mas suavidad y naturalidad al diseño. Personalmente lo realizo con la yema de los dedos, aunque también podemos utilizar para ello algodón o un difumino. El difumino es un utensilio de dibujo a manera y forma de lápiz con un centro de papel enrollado que se usa para suavizar los tonos o colores de las figuras y mejorar su acabado

8.- Por último, se mejorar los detalles, se eliminan los ruidos o manchas del lápiz con ayuda de un borrador y listo….hemos terminado nuestro diseño.

Si te gustó no dudes en hacer tus comentarios y recomendaciones. Puedes seguirme en Instagram por @n3lj4v_art.
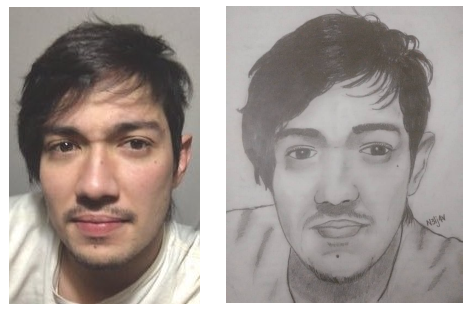
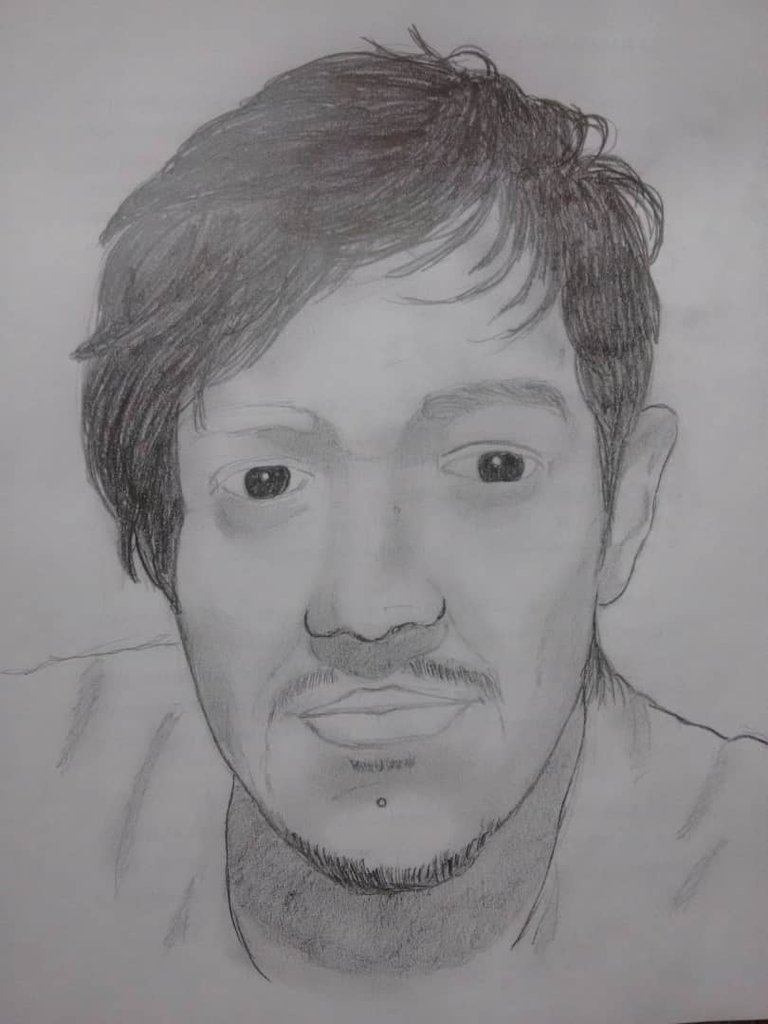
Foto de referencia
HASTA LA PRÓXIMA

Hello Friends, today I bring you the elaboration of a face in the chiaroscuro technique with drawing pencils. The chiaroscuro technique consists of the marked contrast between lights and shadows, making use of tone degradations to highlight an object, in this case, a human face.
The materials used are really simple, nothing elaborate, among which we mention: reusable sheets of white bond paper, a soft eraser and drawing pencils numbers HB, B, 2B and 6B.
The steps for the elaboration of the design are the following:
1.- Make an outline of the face area to draw, trying to resemble its shape, taking as a reference from the hairline to the edge of the chin.
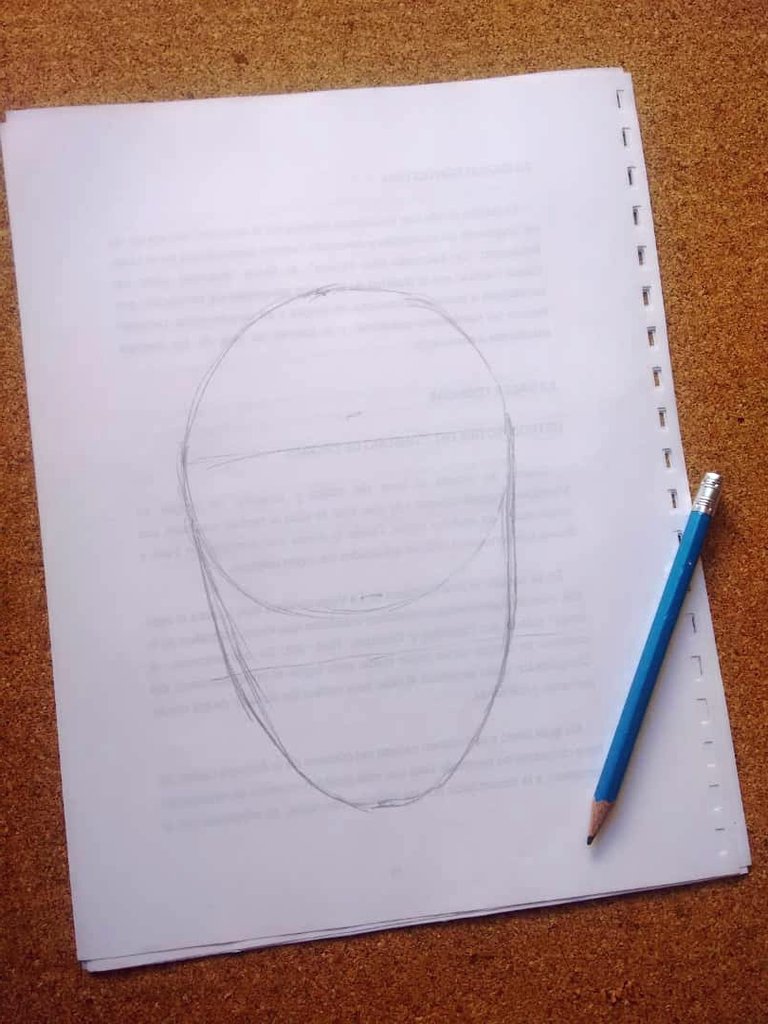
2.- The lines that subdivide the face are drawn: horizontal and vertical central lines and from them the location of the parts of the face is made: lip line, location of the nose and eyes area, and outer area of the face (hair).

3.- The definition of the shape of the nose, lips, eyebrows, ears, location of the eyes and hair, as well as the profile of the face begins.

4.- Proceed to eliminate the reference lines made from the sketch.
5.- The first pencil strokes begin. Particularly, I always start from the eyes and from there outwards. The first strokes are made in a smooth way to correct mistakes and improve the design made step by step.
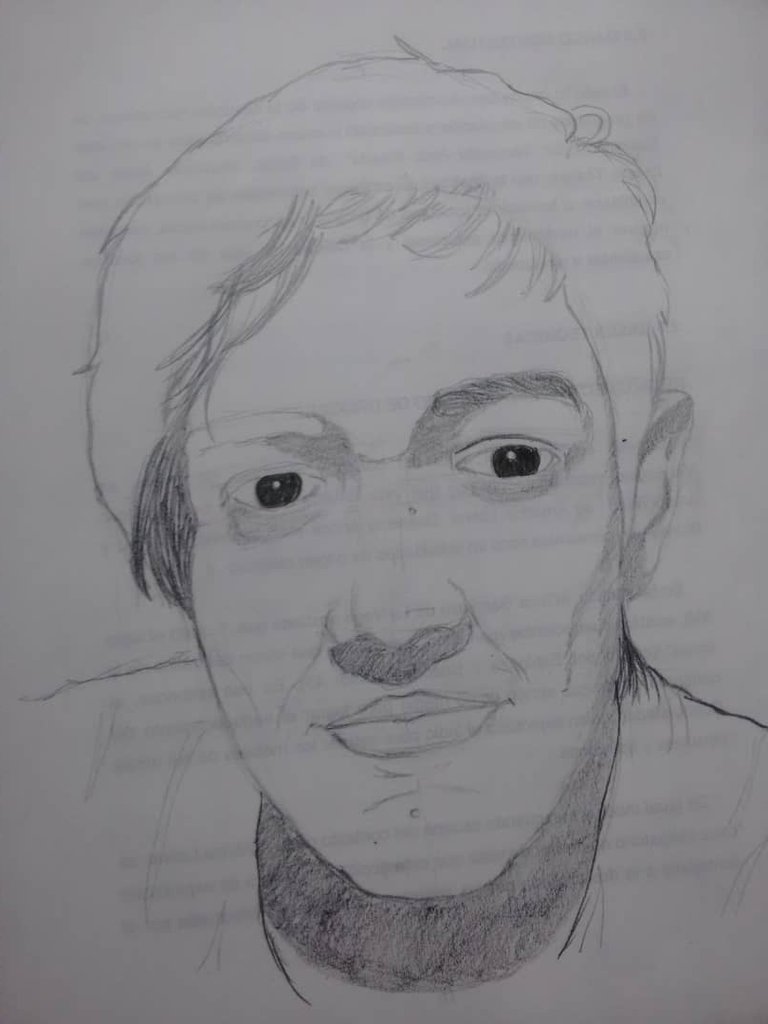
6.- Once the most prominent areas of the face are demarcated, the intensity of the tonality is increased in those areas that merit them, leaving the hair area last, which is generally the most external and darkest.
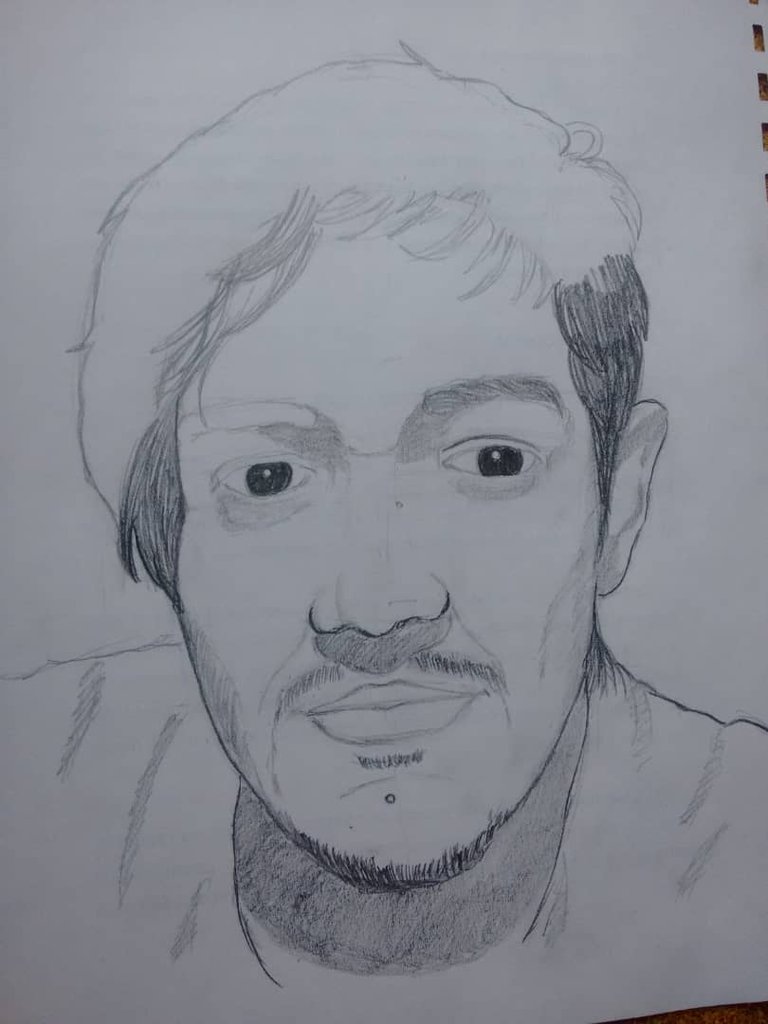
7.- Then the complementary details: neck design, and accessories for the face. Trying to make the shading from a softer shade (HB) to a darker shade (6B). At this time we start the blurring of the tones, consisting of fading the marked contrast between them to give more softness and naturalness to the design. Personally I do it with the fingertips, although we can also use a blur for it. The blur is a pencil-shaped drawing utensil with a rolled paper center that is used to soften the tones or colors of the figures and improve their finish
8.- Finally, the details will be improved, the noise or stains of the pencil will be eliminated with the help of an eraser and voila… we have finished our design.
If you liked it, do not hesitate to make your comments and recommendations. You can follow me on Instagram by @ n3lj4v_art.
Reference Picture
SEE YOU SOON….