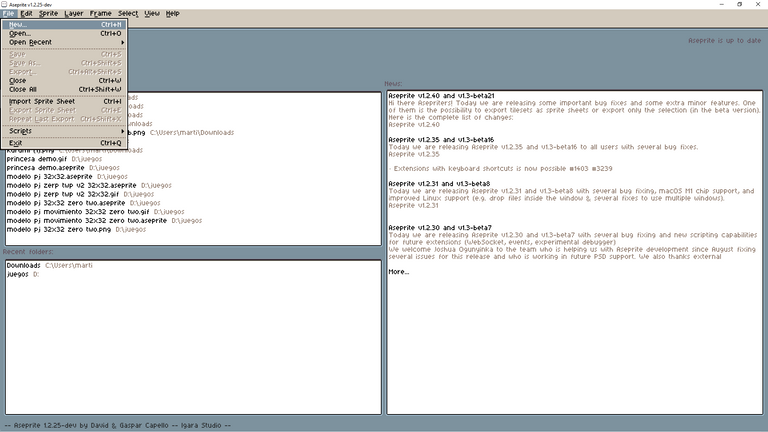
1- lo primero que tenemos que hacer abrir el programa y le dan a new
2-elegimos el tamaño de la imagen del personaje ..acá lo que tenemos que poner en el caso de creación de personaje es 32 x 32

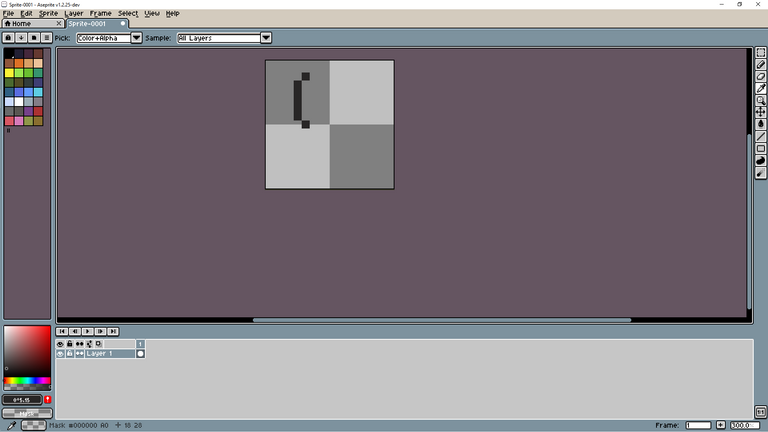
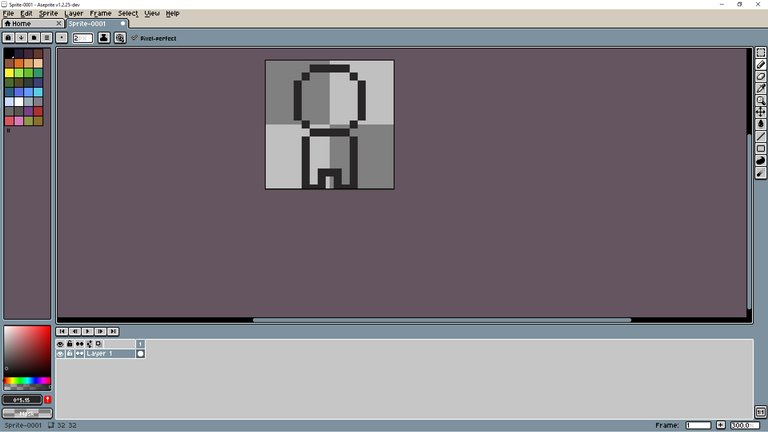
3- comenzamos con la creación de la cabeza ,para crear la cabeza primero elegimos un color negro
y empezamos a armarla así como en la imagen
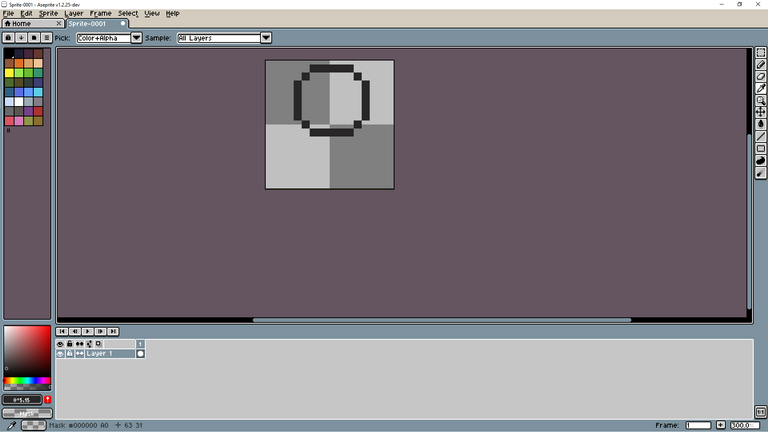
y así para ambas partes de la cabeza ,una vez que terminan de formar la cabeza tienen que quedarles algo así
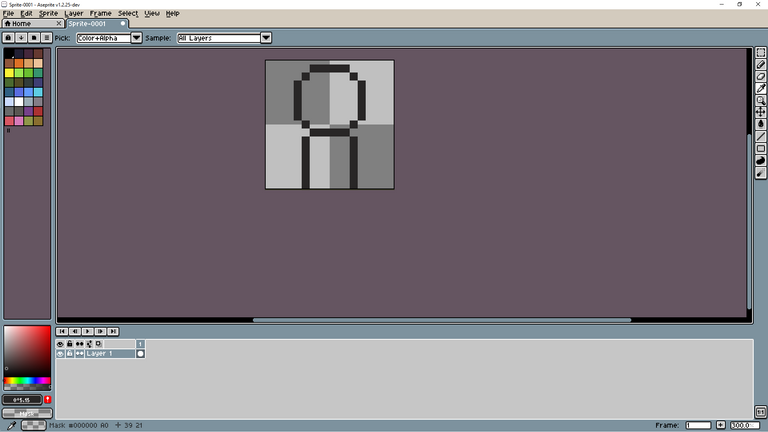
4- en este paso tenemos que armar el cuerpo ,ustedes se preguntaran que medida tiene que tener el cuerpo? o como calculo la medida ?
bueno la medida se calcula con la cabeza del personaje ...tiene que quedarles algo así
5- tenemos que crearle las manos y piernas ,en mi caso voy a ponerle alas si ustedes gustan también
pueden intentarlo
Para crear las piernas es así como en la imagen.
ahora vamos por las manos ,para crear las manos tienen que ponerlas como en la siguiente imagen
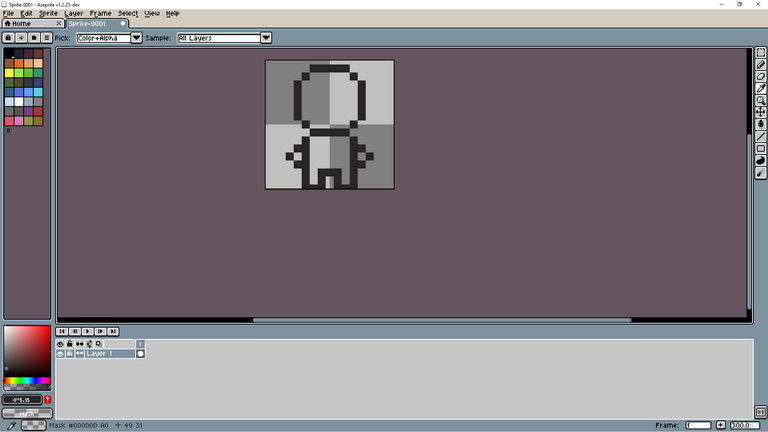
listo ahí ya tenemos piernas y manos ,ahora lo siguiente es pintar el cuerpo
para pintar usamos un color piel ,acá les dejo el código del color piel : efd1d1
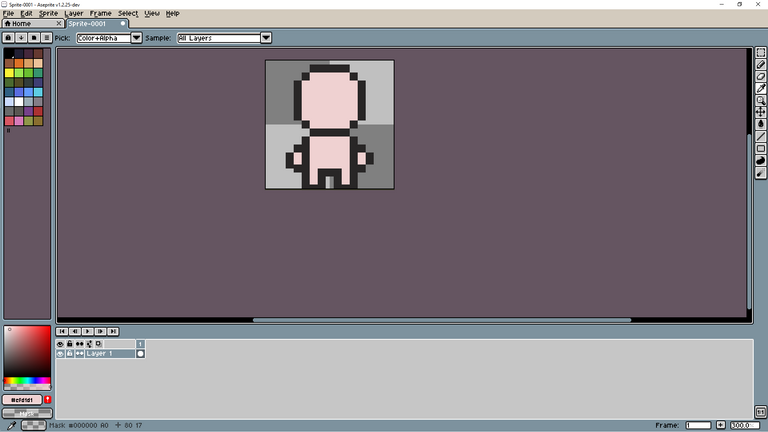
6-empezamos con el pintado del personaje ,iniciando desde la cabeza a los pies
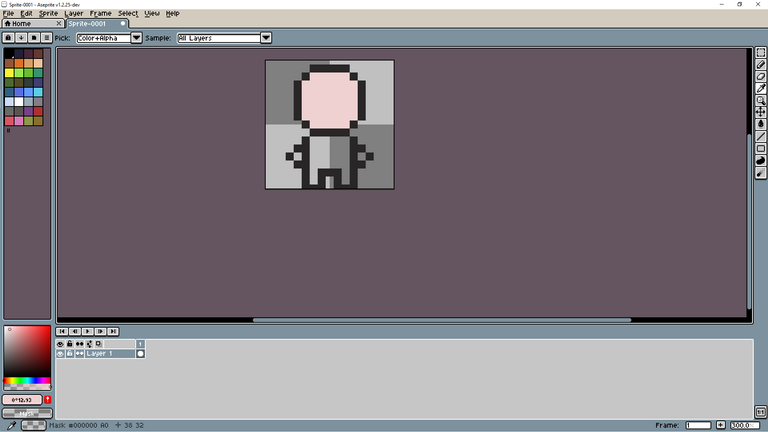
y ya el ya con el modelo completamente pitado tendría que quedarles así
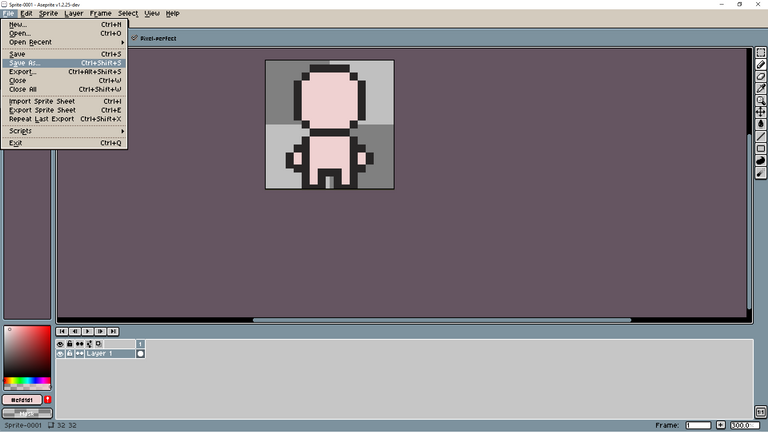
Ahora guardan el modelo ...por que con el mismo modelo pueden crear muchos personajes
para guardar el modelo vamos a file y a save as..
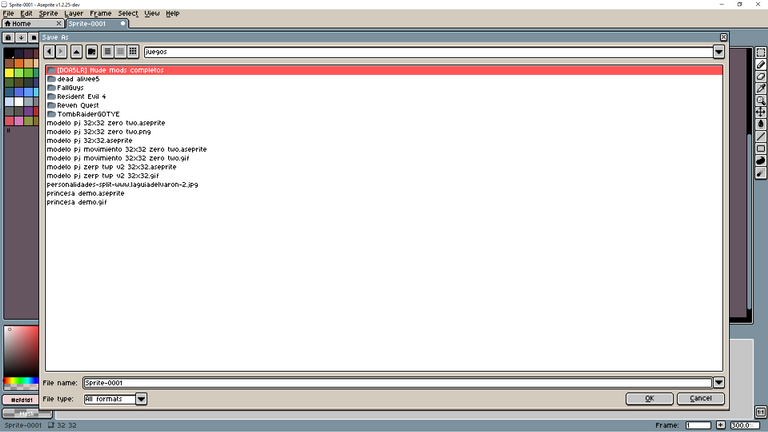
una vez acá buscan la carpeta donde quieren guardar el modelo
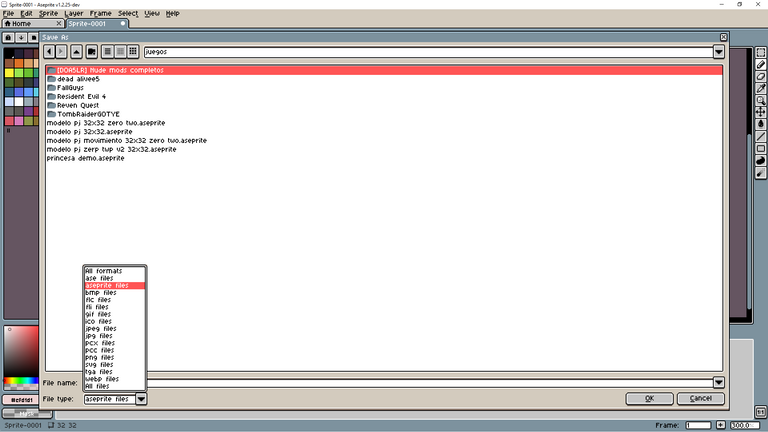
se aseguran que este en aseprite files y lo guardan
y ahora se preguntaran como creamos los ojos ,el pelo y la ropa
bueno lo primero que tienen que hacer es abrir el proyecto que guardaron
una vez teniendo todo en orden su personaje ..antes de agregarle todo eso vamos a ponerle las alas
se preguntaran por que no se las agregue antes?
es que si yo se las agregaba antes los movimientos no iban a funcionar correctamente
dirán por que?
bueno es por que ahora lo que vamos a hacer es crear otra capa
y como se crea la capa?
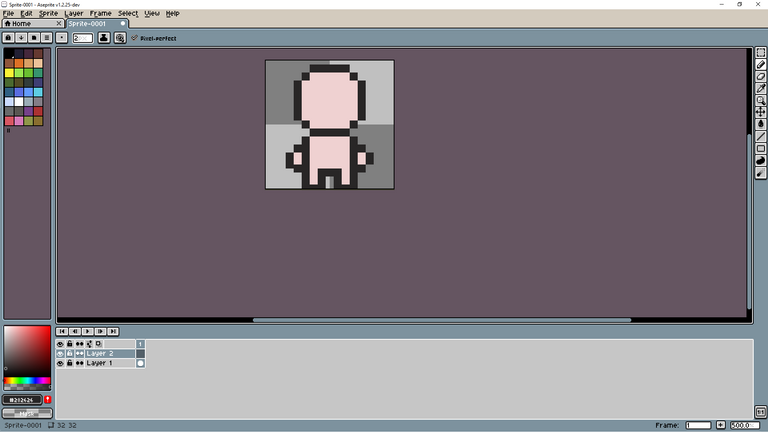
bueno ,para crear la capa tiene que dirigirse a donde dice Slayer 1 darle click derecho y tocar new Slayer

les va a quedar una capa llamada Slayer 2
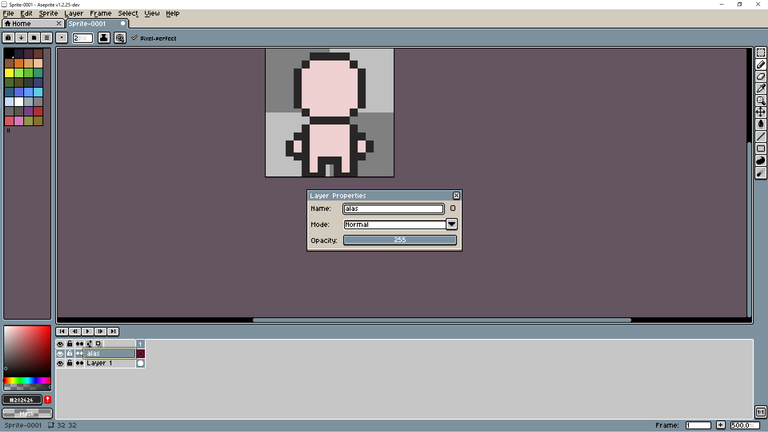
para cambiarle el nombre a la capa tenemos que darle doble click y nos va a aparecer algo así.
en mi caso le puse alas
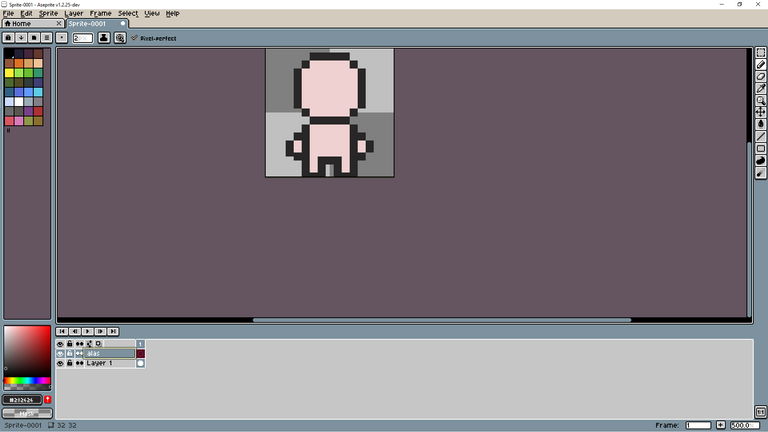
una vez puesto el nombre a la capa tocan la x de la ventana y listo...les quedaría algo así
una vez creada la capa de alas ,la seleccionamos y empezamos a crear las alas
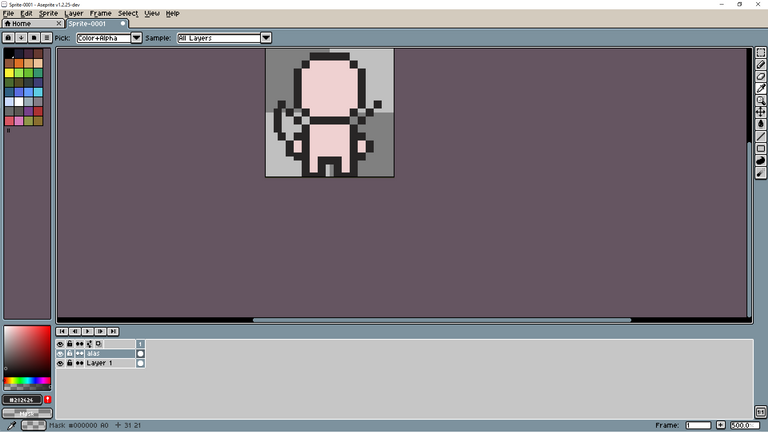
para crear las alas pintamos 3 cuadrados inclinados del hombro a mitad de cabeza tiene que quedar algo así
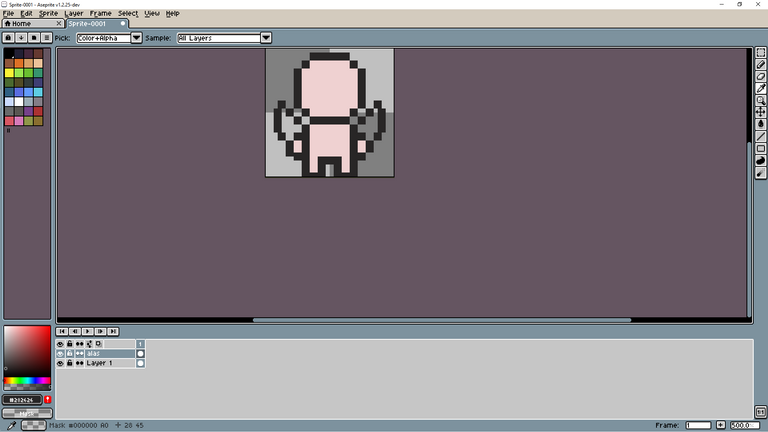
después pintamos 3 cuadrados para abajo y cerramos las alas...como la imagen
ahora procedemos a pintar las alas del color que a ustedes le guste
una vez terminada de pintar las alas quedaría algo así
hermoso no?
bueno antes de continuar tenemos que pasar las manos a otra capa....procedemos a borrarlas ..para eso vamos a la capa del cuerpo y borramos las manos ..el personaje les tiene que quedar así
...despues de haber borrado las manos creamos una nueva capa con el nombre de manos
hacemos el mismo paso que utilizamos para crear la capa de de las alas...click derecho a Slayer 1 y new Slayer
entonces a la capa creada le ponemos de nombre manos..
ahora seleccionamos la capa de manos y volvemos a crearle las manos.
les tiene que quedar algo así
ahora vamos a crearle la ropa
seleccionamos la capa del cuerpo Slayer 1
y le hacemos remera y pantalón..
en mi caso le voy a crear una remera y pantalón de argentina.
así es como va quedando
ahora procedemos a ponerle cabello y empezar a armarle la cara
a la cara la pueden crear de esta forma
les recomiendo que le hagan zoom a la cara para obtener una mejor calidad de dibujado
ahora procedemos a crearle el pelo ..el pelo se crea de una manera circular...como se lo mostrare en la siguiente imagen
lo dibujan con color desde ahora así se ahorran estar pintándolo ,después de eso eligen un color mas oscuro y le agregan las sombras en el pelo y en la cara
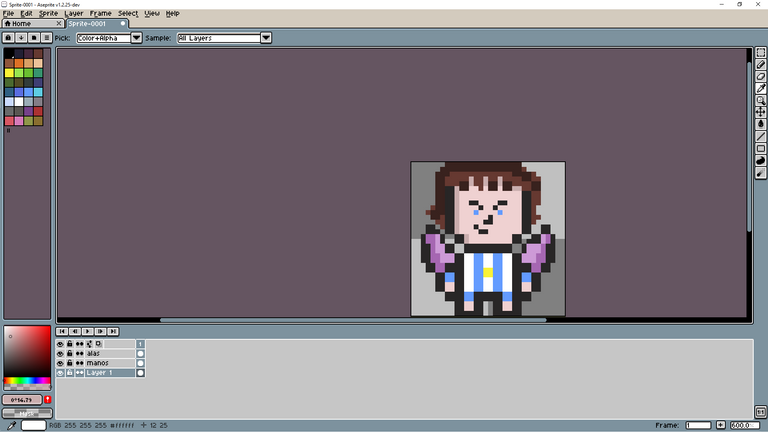
y el resultado final seria este
ahora le vamos a dar movimiento
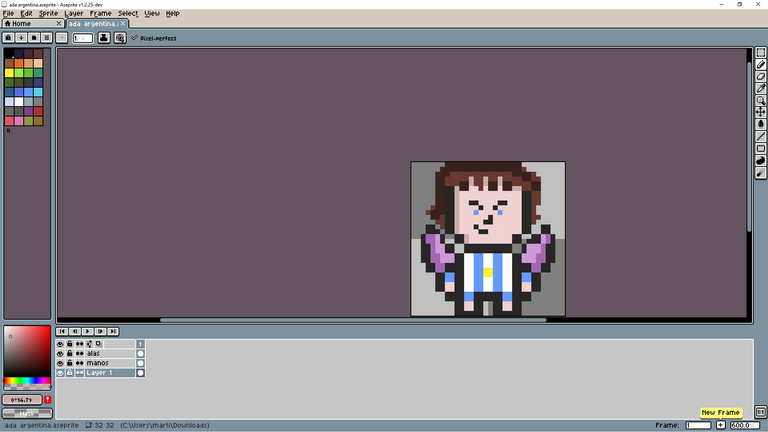
para darle movimiento tenemos que ir abajo a la derecha y tocar donde esta el botón con forma de + les va decir new frame
para que sirve esto? esto sirve para crear secuencias ,por ejemplo en la segunda secuencia le bajo la cabeza
esto que va a provocar?
que cuando yo toque el botón de play el personaje mueva la cabeza para arriba y para abajo
entonces ya explicado eso volvamos en la parte de crear la secuencia
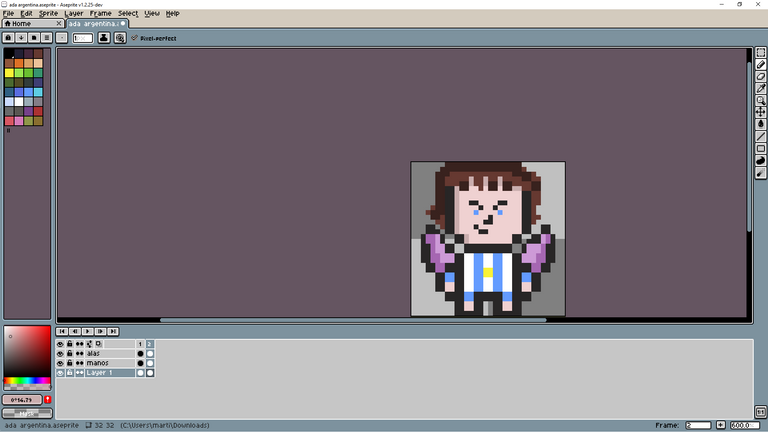
una vez creada la secuencia se crea una segunda fila de capas como en la siguiente imagen
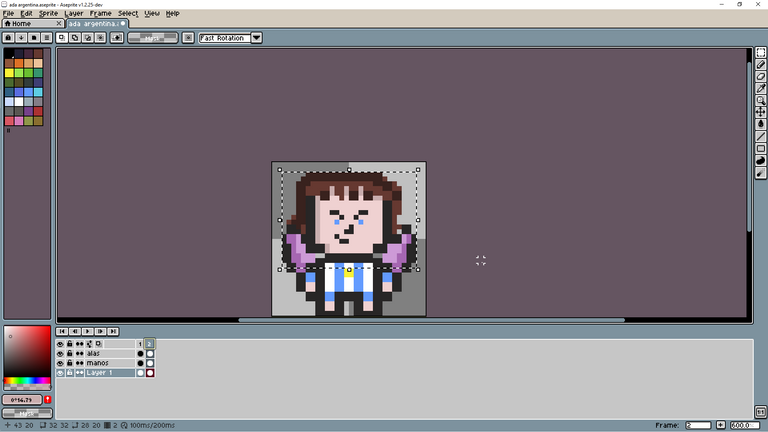
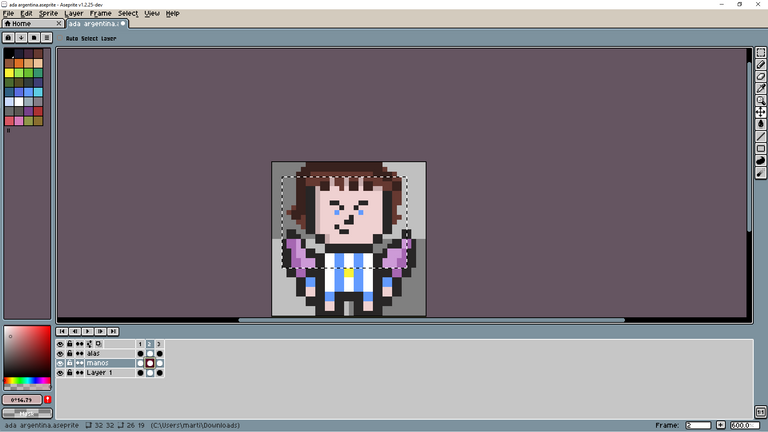
ahora lo que tenemos que hacer para mover la cabeza del persona es ir a la segunda fila y seleccionar la capa del cuerpo...lo que tenemos que hacer es bajar la cabeza seleccionándola con la herramienta rectangular marquee tool
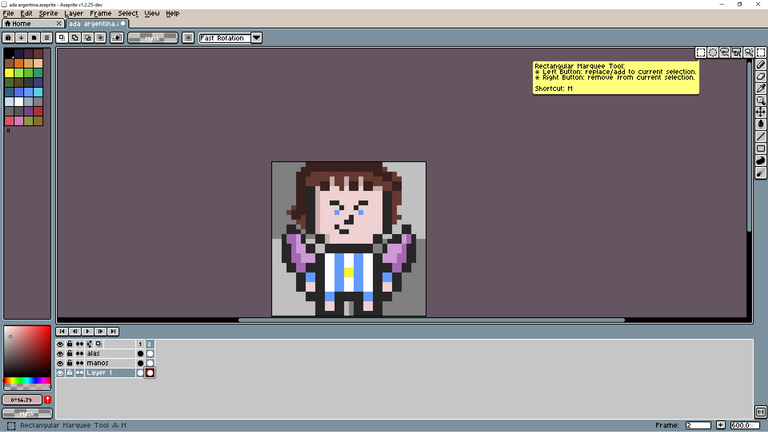
la seleccionamos y la arrastramos para abajo ..tiene que quedar así mas o menos
para ajustar la velocidad en la que se mueve...tenemos que ir al a segunda fila y darle doble click arriba del numero 2
estando en la ventana de velocidad de frame...tenemos que cambiar el numero 100 por el numero 300
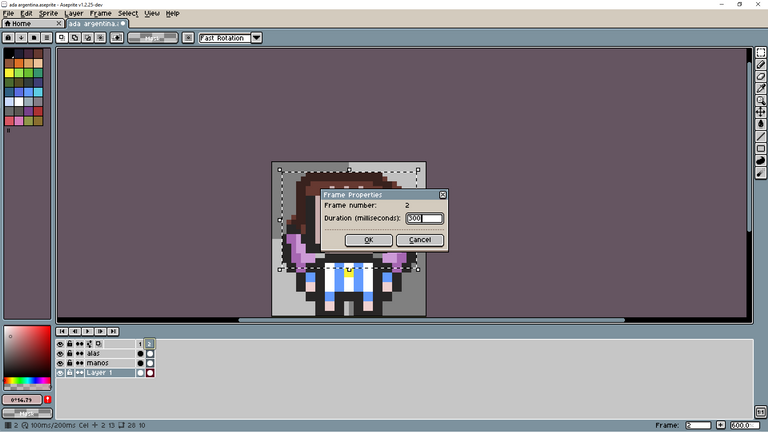
con esto lo que conseguimos es darle un movimiento natural al personaje
después para las manos creamos otra secuencia tocando el botón que se parece al + ... y esta vez seleccionamos las manos...tiene que quedar algo así
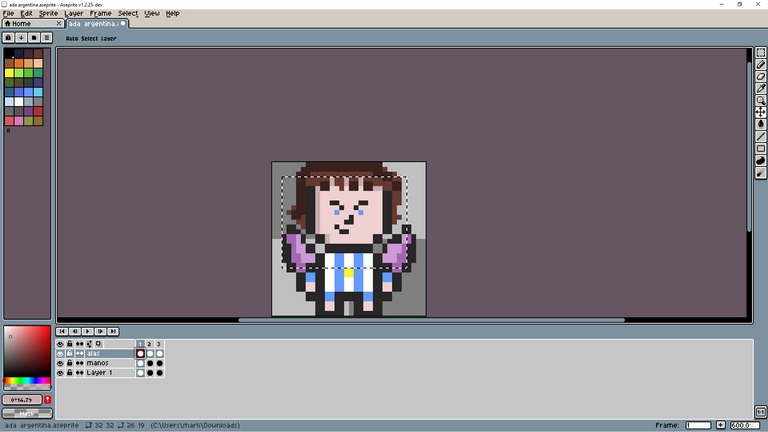
nos dirigimos a la tercera fila y seleccionamos las manos
lo que tenemos que hacer es bajar las manos con la herramienta move tool
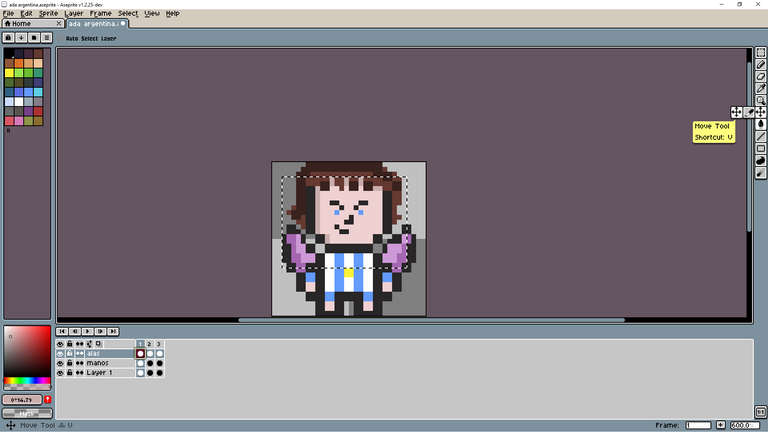
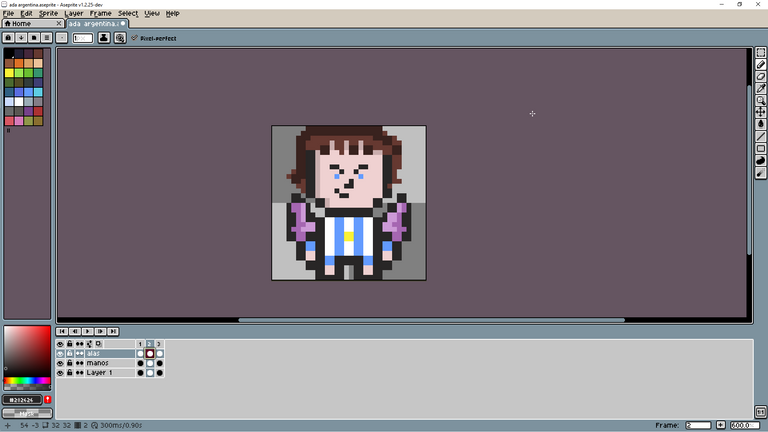
lo que tenemos que hacer es arrastrar las manos para abajo y también las alas así no se ve fea la animación
si quieren darle movimiento a las alas usan la herramienta rectangular martquee tool y corren para adentro las puntas de las alas ,esto lo que va a generar es que de la sensación de que se están moviendo un ejemplo esta imagen.
y así quedaría el proyecto terminado
hello friends today I am going to teach you how to create a pixel model in aseprite
1- the first thing we have to do is open the program and hit new
2-we choose the size of the image of the character ..here what we have to put in the case of character creation is 32 x 32
3- we start with the creation of the head, to create the head first we choose a black color
and we began to assemble it as in the image
and so for both parts of the head, once they finish forming the head they have to have something like this
4- in this step we have to assemble the body, you will wonder what size the body has to have? Or how do I calculate the measure?
well, the measurement is calculated with the character's head ... it has to be something like this
5- we have to create the hands and legs, in my case I am going to put wings on it if you like too
you can try it
To create the legs is as in the image.
now we go for the hands, to create the hands you have to put them as in the following image
ready there we already have legs and hands, now the next thing is to paint the body
to paint we use a skin color, here I leave the skin color code: efd1d1
6-we start with the painting of the character, starting from the head to the feet
and already the already with the completely whistled model would have to look like this
Now they save the model...because with the same model they can create many characters
to save the model we go to file and save as..
once here they look for the folder where they want to save the model
make sure it is in aseprite files and save it
and now you will wonder how we create the eyes, the hair and the clothes
well the first thing you have to do is open the project you saved
once you have everything in order for your character .. before adding all that we are going to put the wings
They will wonder why not add them before?
is that if I added them before the movements were not going to work correctly
will they say why?
well it's because now what we're going to do is create another layer
and how is the layer created?
well, to create the layer you have to go to where it says Slayer 1 right click and touch new Slayer
they will have a layer called Slayer 2
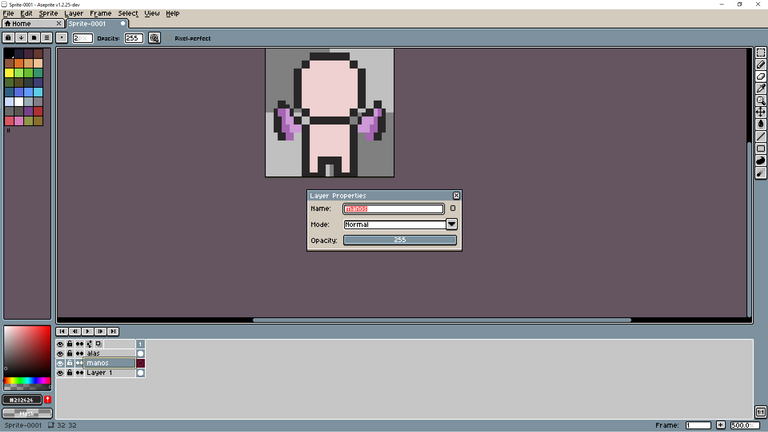
To change the name of the layer we have to double click it and something like this will appear.
in my case I put wings
once the name is given to the layer, touch the x of the window and that's it... they would have something like this
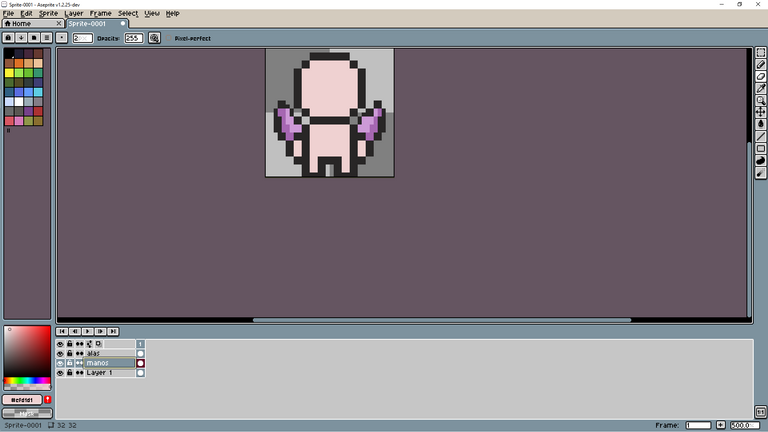
once the wings layer is created, we select it and start creating the wings
to create the wings we paint 3 inclined squares from the shoulder to the middle of the head it has to be something like this
then we paint 3 squares down and close the wings...like the image
now we proceed to paint the wings of the color that you like
once finished painting the wings it would look something like this
beautiful right?
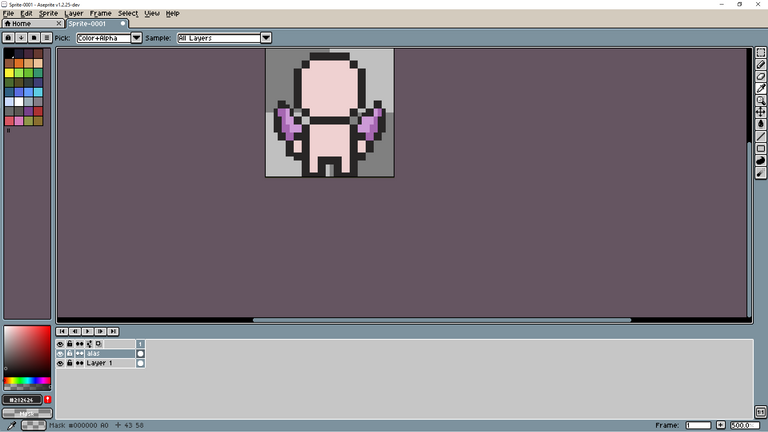
well before continuing we have to pass the hands to another layer...we proceed to delete them...for that we go to the body layer and delete the hands...the character has to be like this
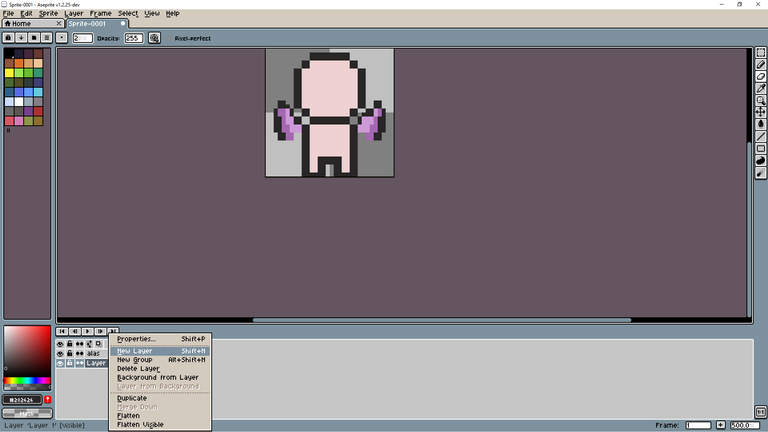
...after having deleted the hands we create a new layer with the name of hands
we do the same step we used to create the wings layer... right click on Slayer 1 and new Slayer
then we name the layer created hands ..
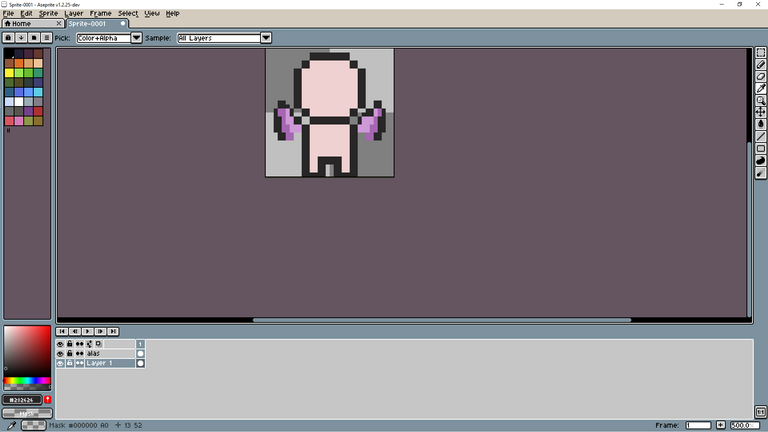
Now we select the hands layer and create the hands again.
they have to have something like this
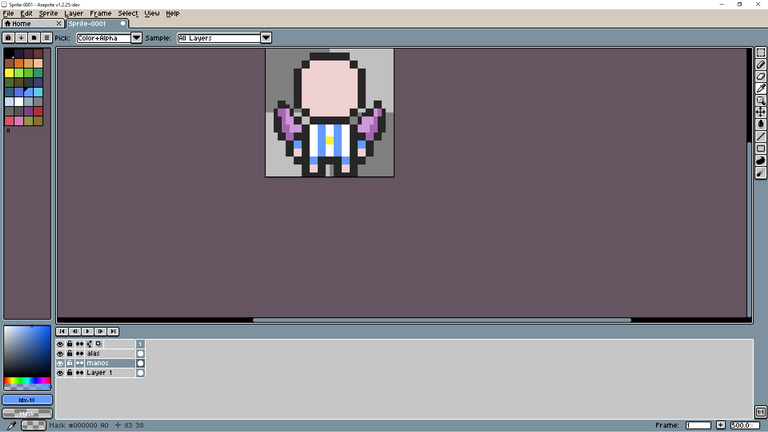
now we are going to create the clothes
we select the body layer Slayer 1
and we make him a shirt and pants..
In my case I am going to create a shirt and pants from Argentina.
this is how it goes
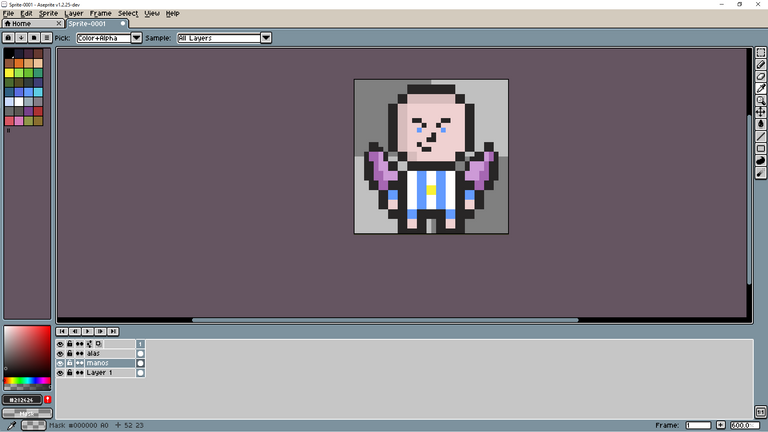
now we proceed to put hair and start putting together the face
the face can be created in this way
I recommend that you zoom in on the face to get a better drawing quality
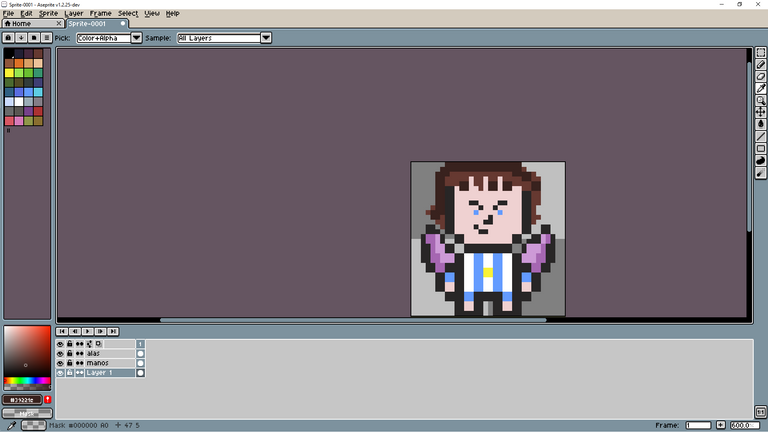
now we proceed to create the hair ... the hair is created in a circular way ... as I will show you in the following image
they draw it with color from now on so they save themselves from painting it, after that they choose a darker color and add the shadows to the hair and face
and the end result would be this
now we are going to give it movement
to give it movement we have to go to the bottom right and touch where the + button is, it will say new frame
what is this for? this is used to create sequences, for example in the second sequence I lower his head
What is this going to cause?
that when I touch the play button the character moves his head up and down
So, having explained that, let's go back to the part of creating the sequence.
once the sequence is created a second row of layers is created as in the following image
now what we have to do to move the person's head is go to the second row and select the body layer... what we have to do is lower the head by selecting it with the rectangular marquee tool
we select it and drag it down... it has to be like this more or less
to adjust the speed at which it moves... we have to go to the second row and double click above the number 2
being in the frame rate window...we have to change the number 100 to the number 300
with this what we get is to give a natural movement to the character
then for the hands we create another sequence by touching the button that looks like the +... and this time we select the hands... it has to be something like this
we go to the third row and select the hands
what we have to do is lower the hands with the move tool
what we have to do is drag the hands down and also the wings so the animation doesn't look ugly
If you want to give movement to the wings, use the rectangular martquee tool and run the tips of the wings inwards. This will generate the feeling that they are moving, for example this image.
and this is how the finished project would look
