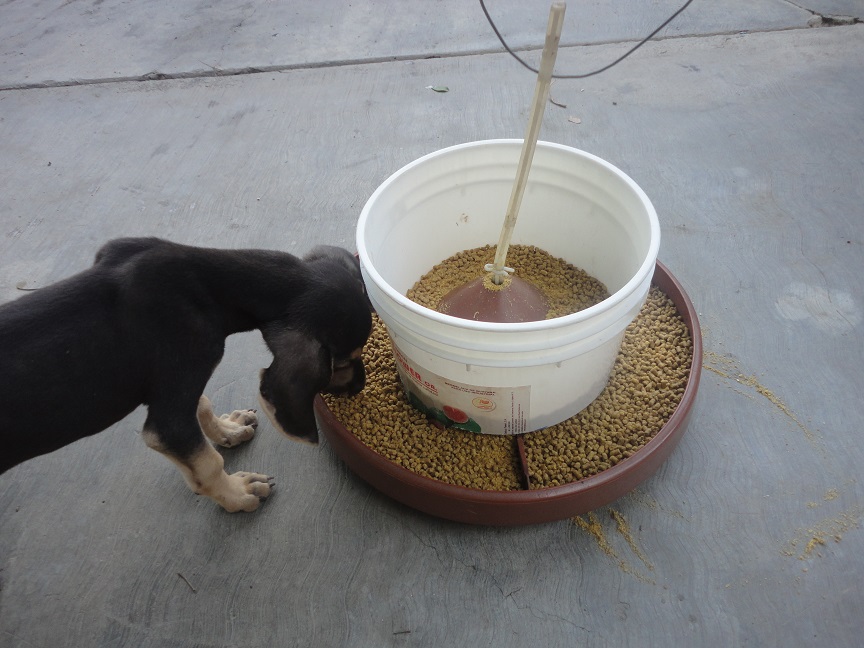
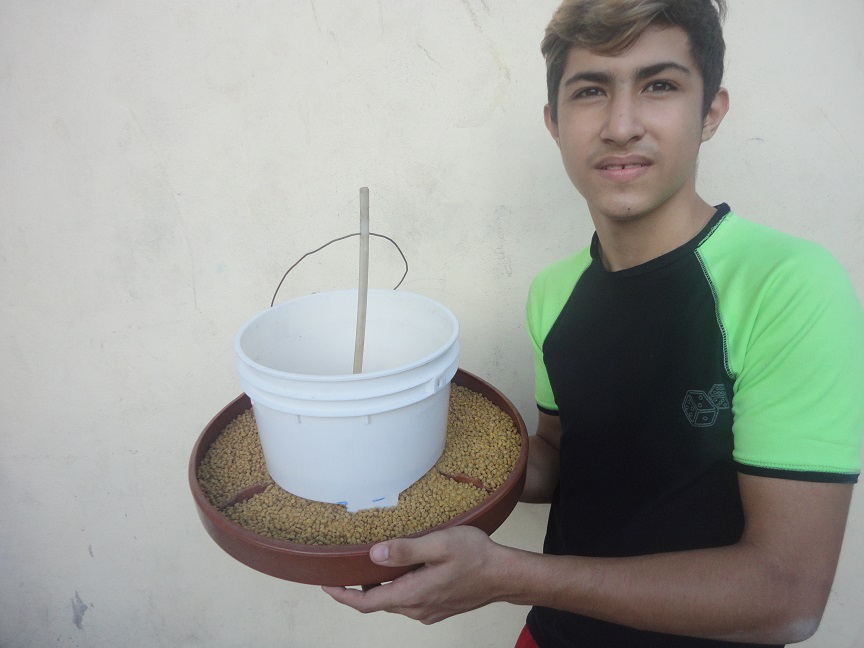
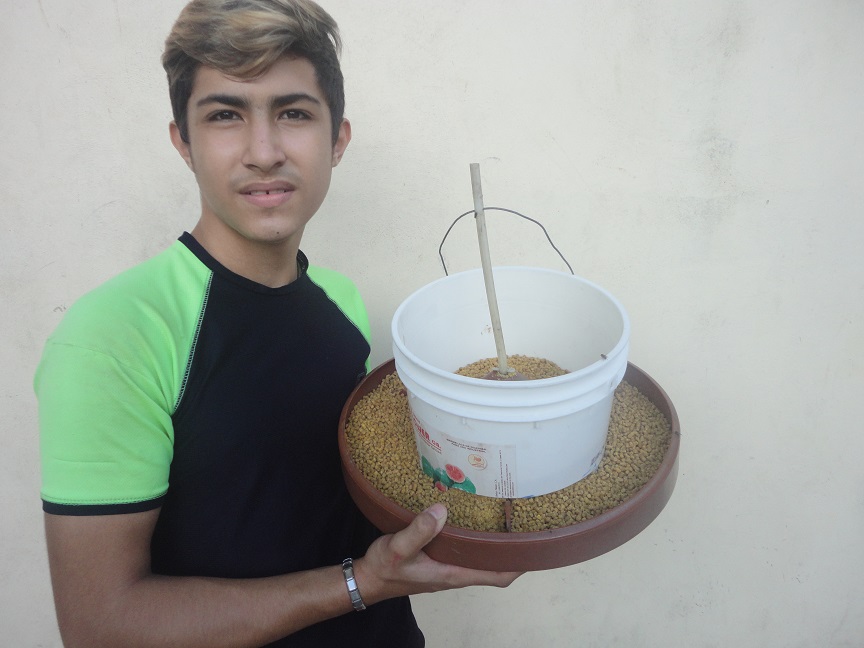
Hoy les traigo un práctico y sencillo comedero para tu mascota, muy funcional y te quitas las molestias de darle comer a tus mascotas a cada momento. Con este pequeño invento, el alimento les dura todo un día, les explicaré paso a paso para que armes el tuyo. Anímese y haga el de su mascota. Espero les agrade la idea.
Hello everyone, today I bring you a practical and simple Feeder for your pet that is very functional and you take the trouble of feeding your pets at all times with this little invention, the food lasts a whole day, I explained step by step so that arm yours, I hope to explain well. Go ahead and do that of your pet. I hope you like it.
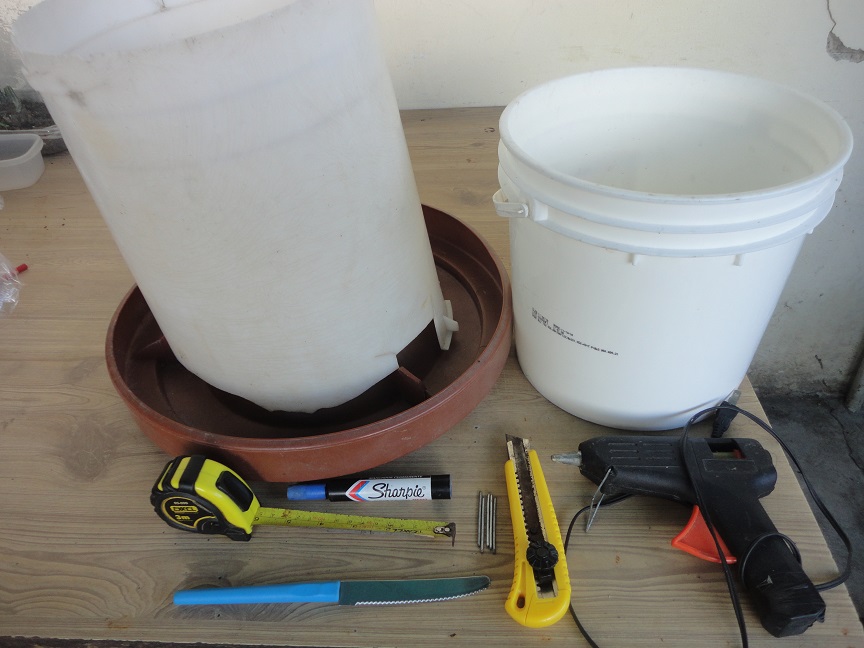
Materiales para construir el Comedero:
• Parte de un comedero dañado
• Un tobo vacío de 8 kilos
• Marcador
• Cinta métrica
• Clavos
• Exacto
• Cuchillo de cierra
• Pistola de silicón
Materials to build the Feeder:
• Part of a damaged feeder
• An empty slide of 8 kilos
•Marker
•Measuring tape
• Nails
• Exact
• Closing knife
•Silicone gun

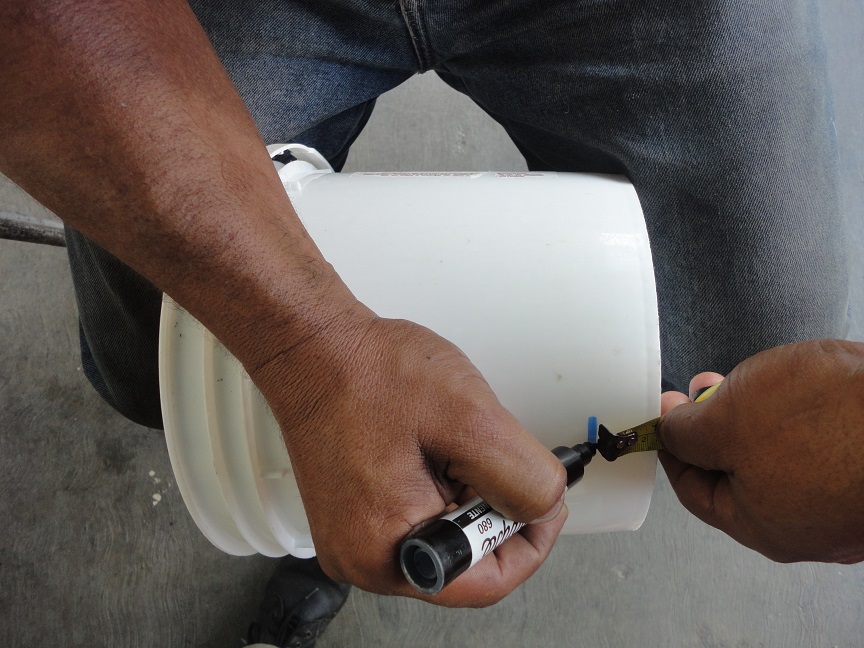
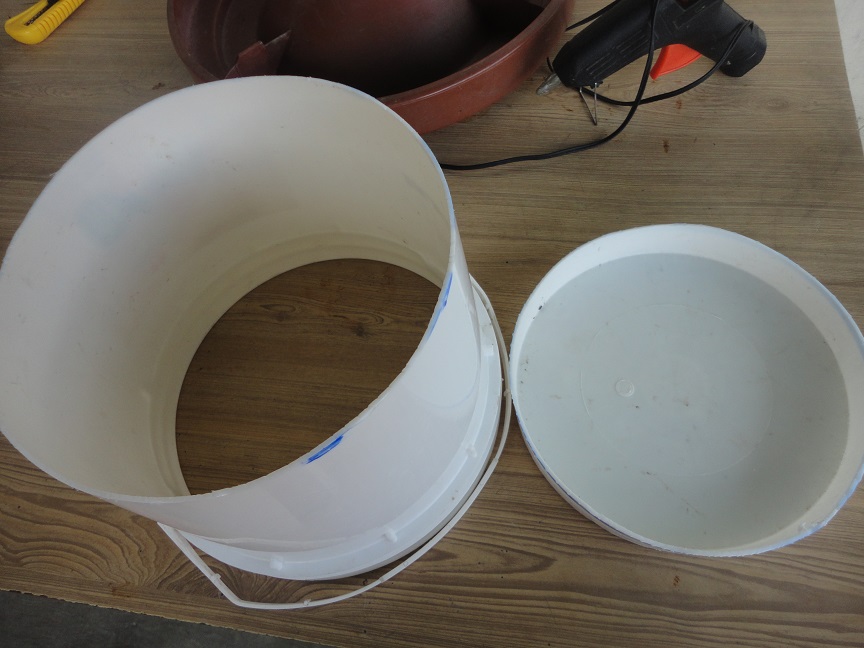
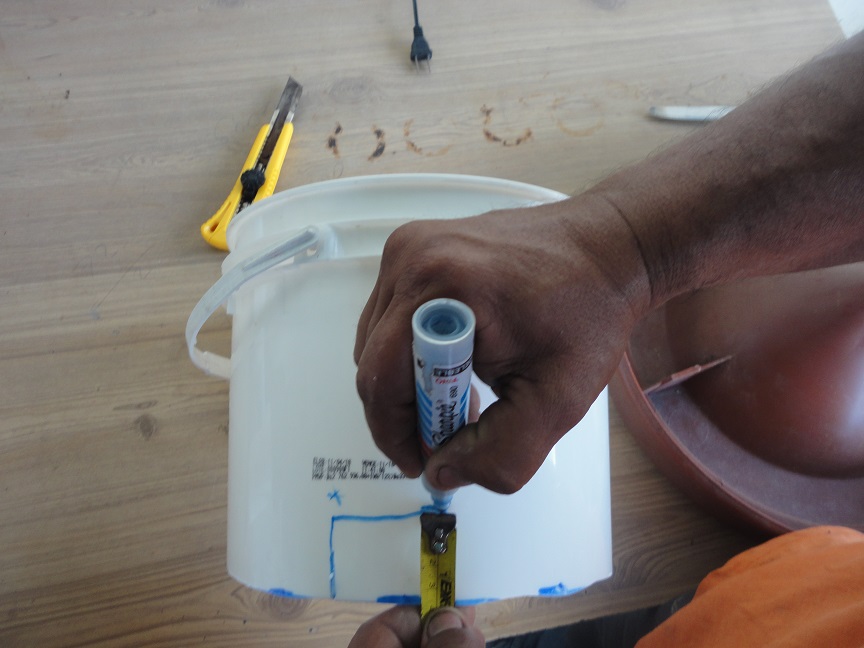
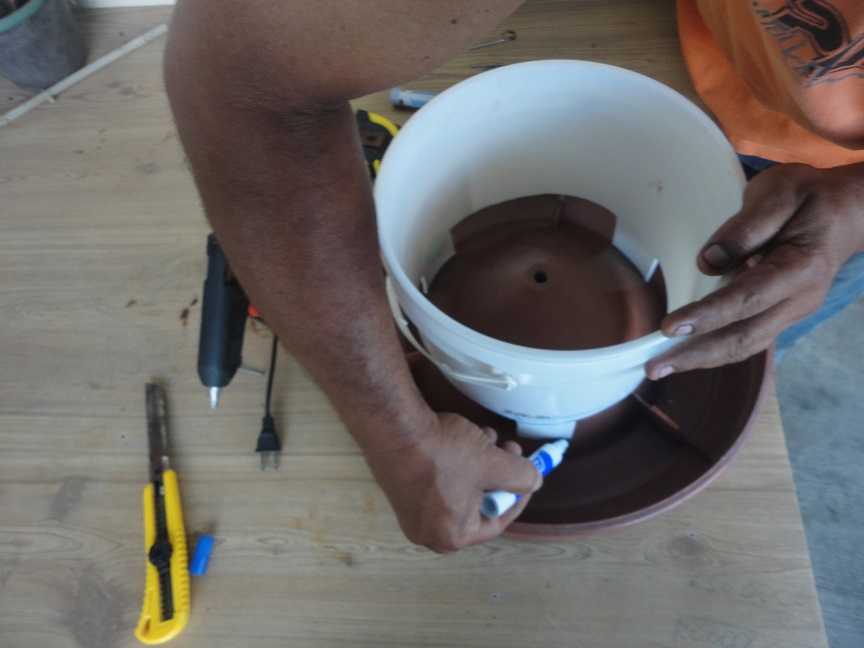
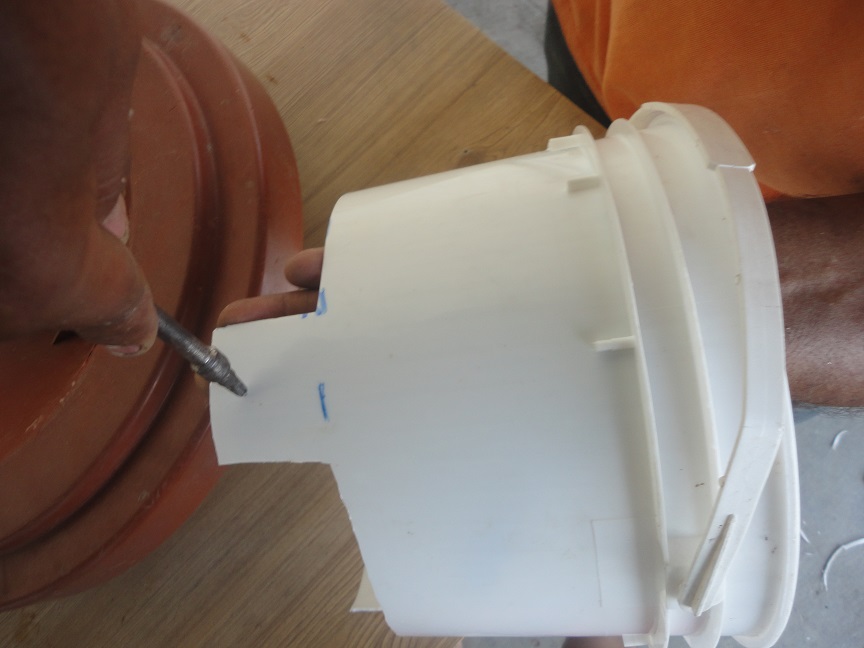
Primer paso a seguir: utilizamos la cinta métrica para medir 2 pulgadas en el fondo del tobo, mientras más marcas hagas más fácil puedes trazar la circunferencia.
First step: to follow we use the tape measure to measure 2 inches at the bottom of the slide, the more marks you make, the easier you can draw the circumference.

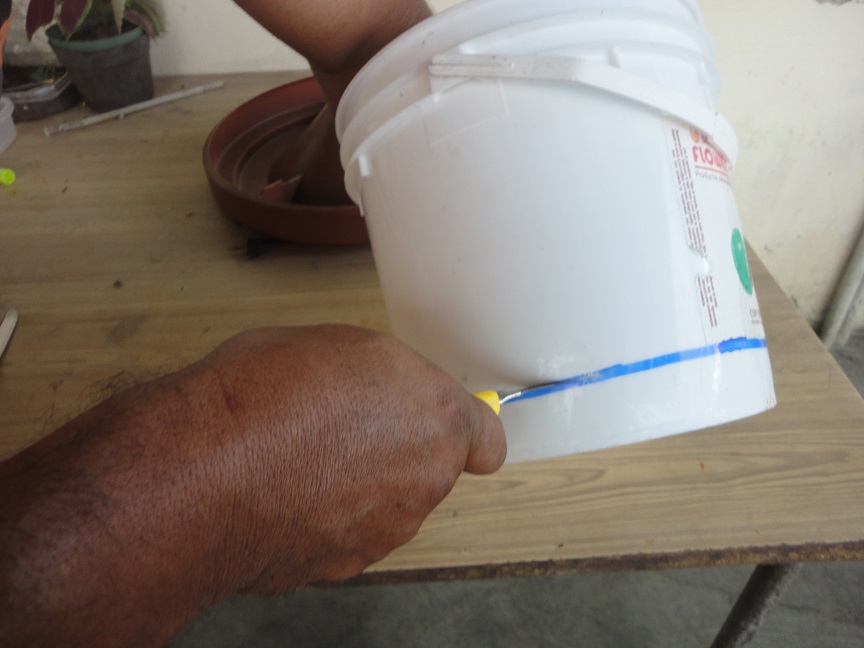
Después de marcar el tobo en todo el contorno, comenzamos a picar con el exacto o el cuchillo de cierra, siguiendo la marca con mucho cuidado hasta picarlo todo como lo ven en la imágenes.

After marking the chute around the contour, we begin to chop with the exact one or the closing knife, following the mark very carefully until everything is chopped as seen in the images.

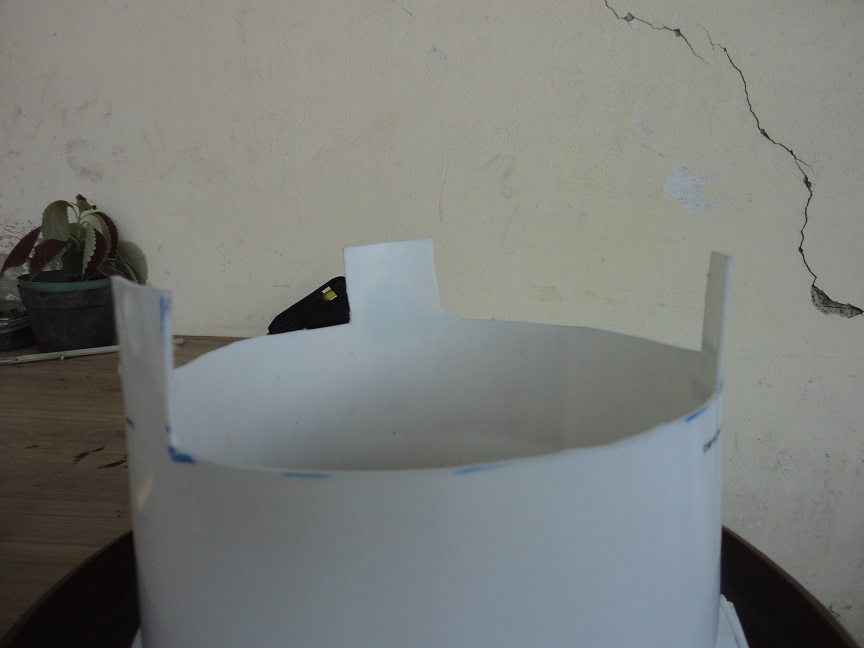
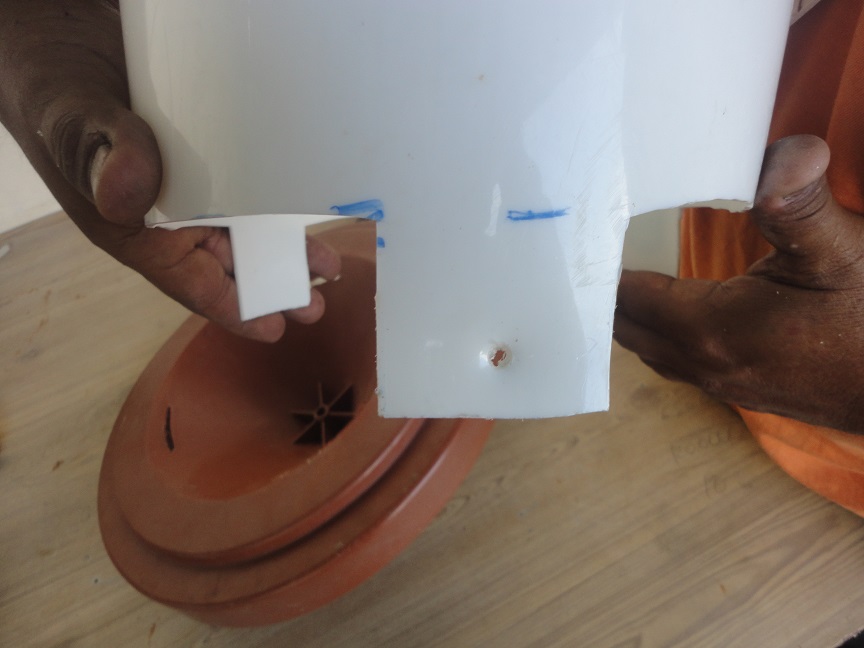
Luego que el tobo este totalmente picado a la mitad, medimos de nuevo tres puntas de 2 pulgadas más, que quede como te muestro en las fotos.

After the slide is completely chopped in half, we measure three more 2-inch tips that remain as I show you in the photos.

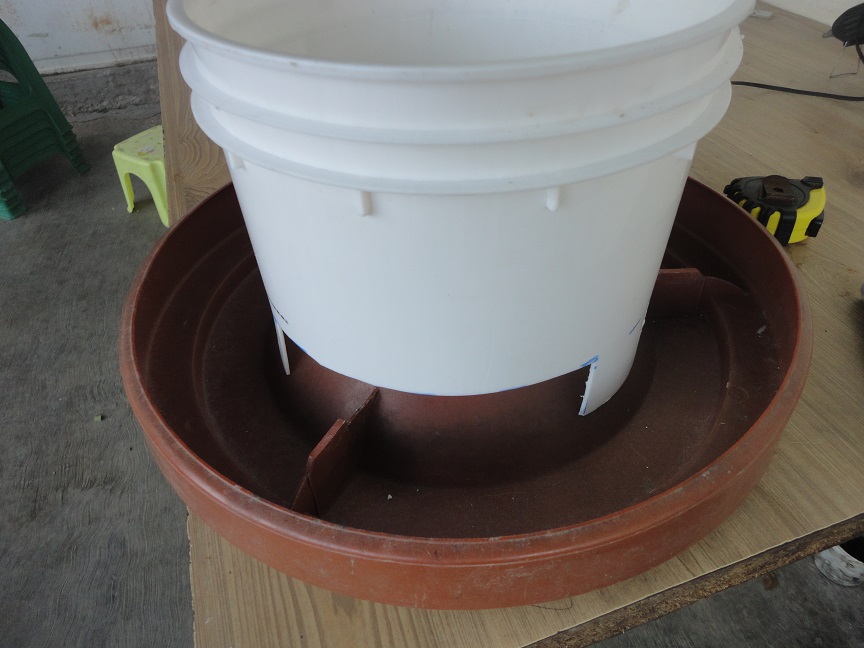
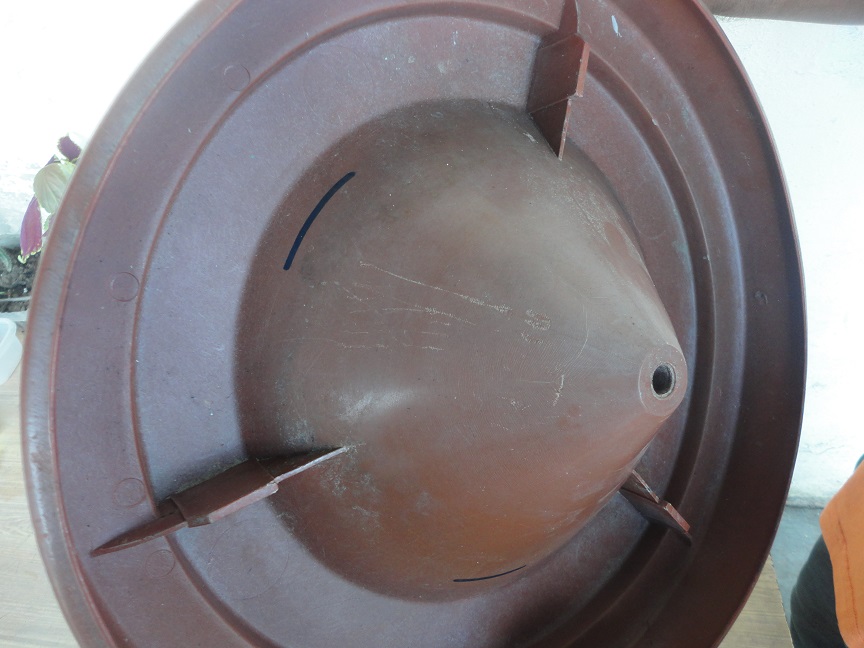
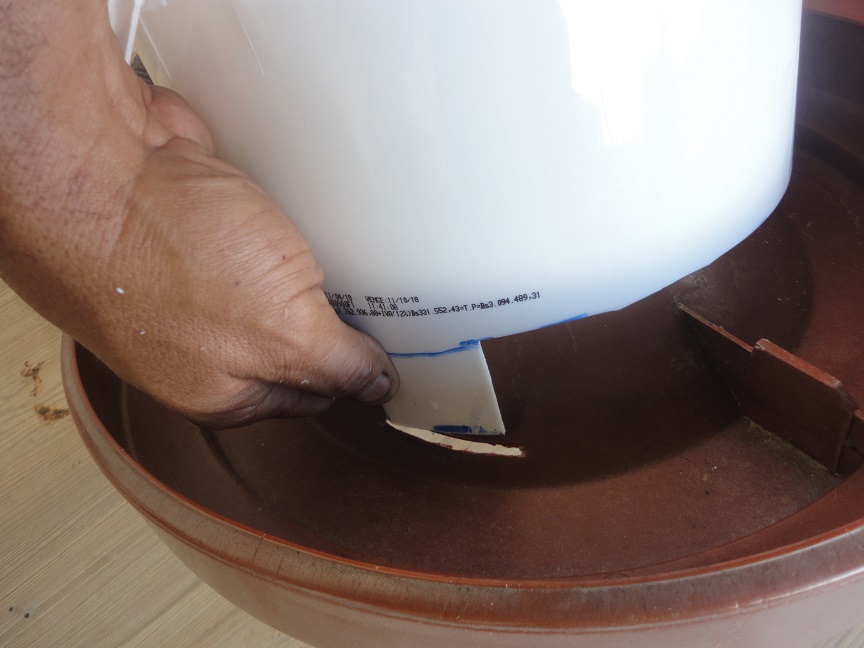
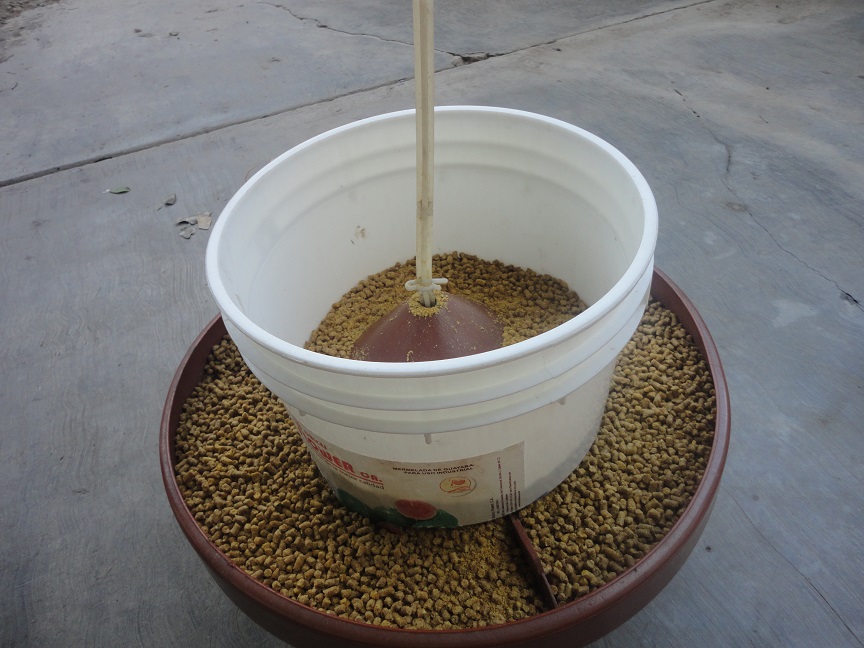
Presentamos el tobo con las tres puntas picadas del mismo tamaño sobre la base donde la vamos a fijar, observen en las fotos.


We present the slide with the three chopped tips of the same size on the base of where we are going to fix it, observe in the photos.

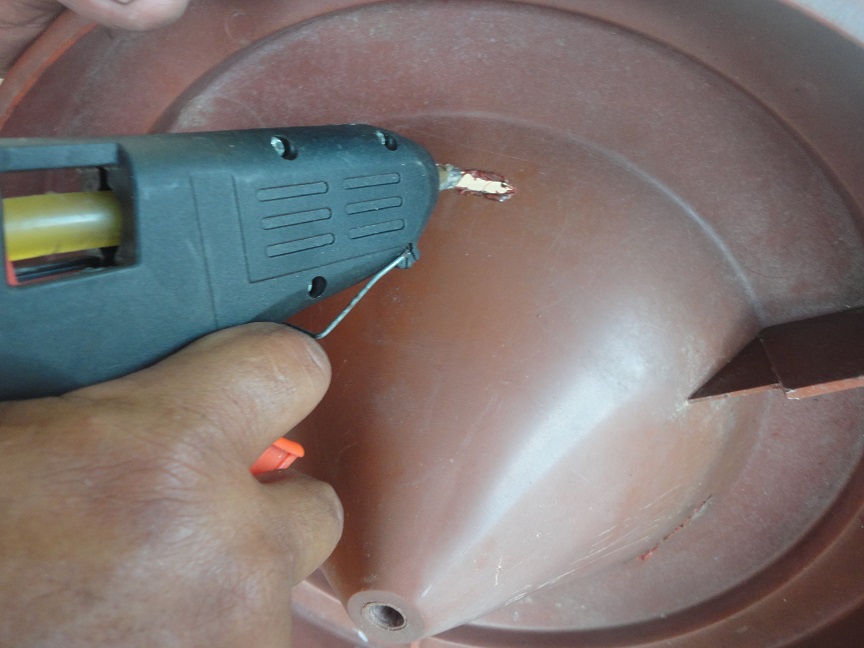
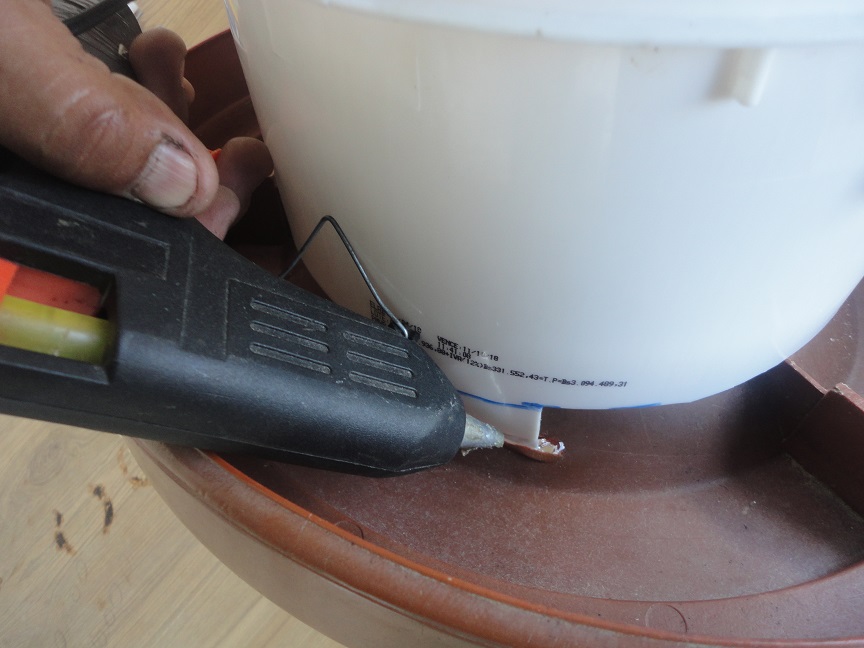
Después de marcadas con la pistola de silicón, con la punta bien caliente, hacemos las ranuras por donde encaja las tres puntas del tobo.

After marking with the silicone gun with the very hot tip, we make the grooves where the three tips of the slide fit.

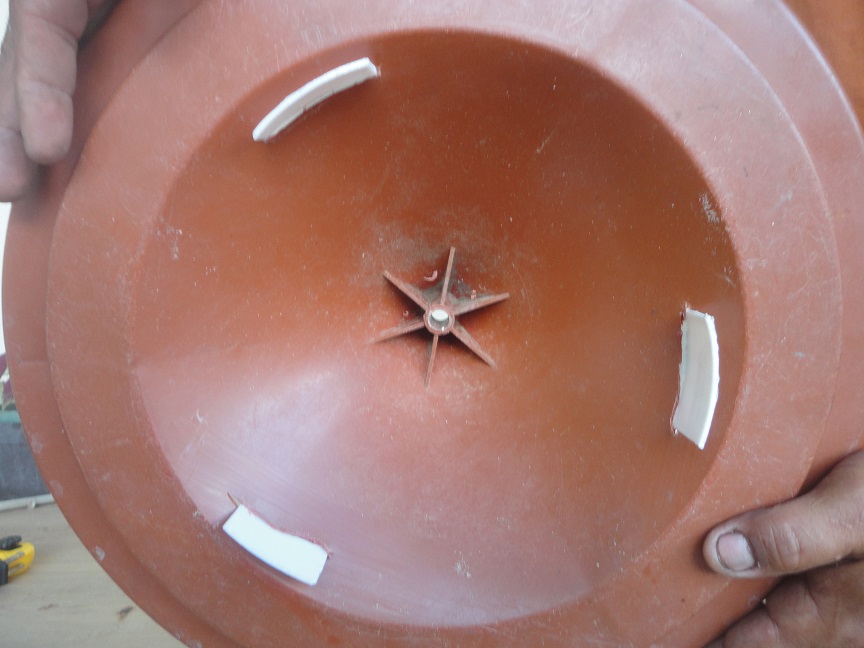
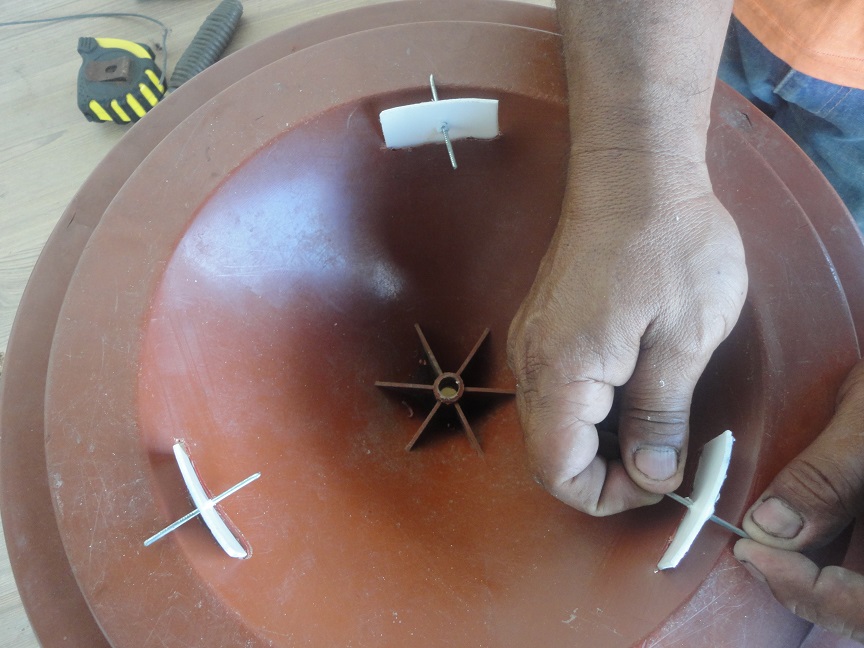
En las 3 puntas del tobo, abrimos tres agujeros, es para los clavos para fijar el tobo de su nueva base observen en las fotos.


At the 3 tips of the slide we open three little holes for the nails to fix the slide of its new base, see in the photos.

Después de este procedimiento con las pistola de silicon, tapamos unas posibles fugas lo hacemos solo por prevención.

After this procedure with the silicone gun we cover possible leaks, we do it only for prevention.

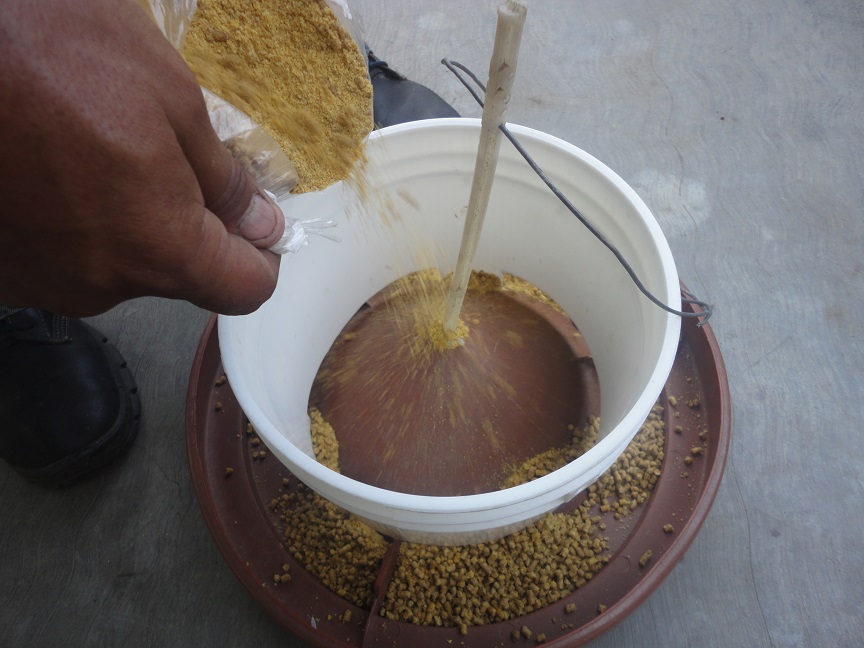
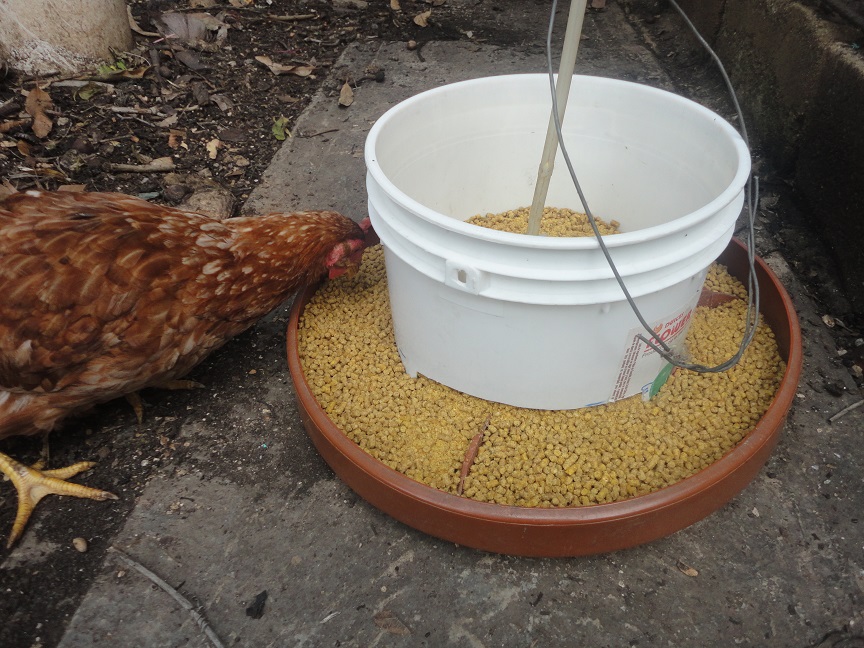
Práctico y muy funcional, hasta las aves del corral la pueden usar, anímese y haga el suyo ahora.

Practical and very functional, even carral birds can use it, go ahead and make yours now.


En nuestro tiempo libre nos gusta realizar manualidades de todo tipo, tanto para nuestros hijos como también para facilitar las situaciones que se nos presentan en nuestros día a día. Todas las compartiremos con ustedes a través de este blog.

In our free time we like to do crafts of all kinds, both for our children and also to facilitate the situations that arise in our day to day. We will all share them with you through this blog.

Pronto estaremos presentando nuestros nuevos proyectos, hasta la próxima...

Soon we will be presenting our new projects, until next time ...

***** Nota: Las imágenes presentadas se realizaron con una Camara Sony Cyber Shot , no están editadas ni se hizo uso de filtros para su presentación en este post. *****

***** Note: The images presented were made with a Sony Cyber Shot Camera, they are not edited or filters were used for presentation in this post. *****

Gracias por compartir tu contenido con la comunidad de El Arca Delegate 25 HP Delegate 50 HP Delegate 100 HP Delegate 250HP Delegate 500HP (@elarca), el mismo ha sido votado por nuestra iniciativa de curación artística @stellae. Si deseas puedes delegar HP al proyecto:
Excelente tu trabajo con mucho ingenio
Amigo @raymondelaparra gracias por su comentario,¡Saludos!
Está muy bueno tu trabajo, excelente el artículo porque explicas paso a paso como construirlo. Te felicito, una manera de utilizar los recursos que disponemos para construir algo necesario, Saludos
Muy bueno tu paso a paso no hay manera de equivocarse excelente.
Congratulations @oldboss! You have completed the following achievement on the Hive blockchain and have been rewarded with new badge(s) :
You can view your badges on your board And compare to others on the Ranking
If you no longer want to receive notifications, reply to this comment with the word
STOPDo not miss the last post from @hivebuzz: