Sprite Animation in JavaScript
When you create a 2D game, you need to handle spritesheets for characters, enemies, etc...
There are some question you will ask when you want to create a sprite animation.
- How to split the image correctly ?
- How can I control the speed of the animation ?
In this tutorial we will create a basic spritesheet handler that answer these questions. We will use HTML5 Canvas to display everything.
Assets
You can find thousands of sprites on spriters-ressource.com
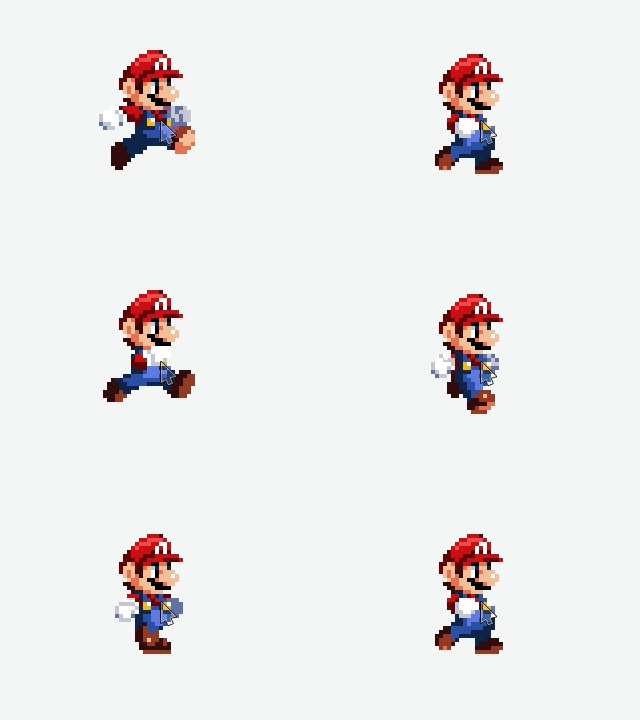
I found this sprite , and I just edited it.

Let's Code !
The sprite constructor
We start creating the sprite constructor (it is like a reusable object), it is the codebase that will handle and display every sprite.
function Sprite(model) {

this.image = model.image;
this.frames = model.frames;
this.ticksPerFrame = model.ticksPerFrame;

this.width = this.image.width;
this.height = this.image.height;
this.frameW = this.width / model.frames;
this.frameIndex = 0;
this.tickCount = 0;

}
Ok, let's recap. The sprite constructor take in parameter an object, that must have properties:
- image: it's the spritesheet
- frames: the number of frames on the spritesheet
- tickPerFrame: It is the number of ticks (update function calls) between two frames. Changing this value will change the "speed" of the animation. If the value is high, the animation will be slow, if the value is high, the animation will be quick.
You have to give these values when you want to display a sprite.
With these values, the constructor calculates:
- width and height: the size of the spritesheet
- frameW: the width of one frame
- frameIndex: the current frame of the animation, it start at 0.
- tickCount: value used to know when to display the next frame, start at 0.
The update method
Ok, we can define new sprites now. We need to create an update method, that will display the right frame. Just under the constructor, we write this:
Sprite.prototype.update = function (x, y) {
this.tickCount += 1;
if (this.tickCount > this.ticksPerFrame) {
    this.tickCount = 0;
    if (this.frameIndex < this.frames - 1) {
        this.frameIndex += 1;
    } else {
        this.frameIndex = 0;
    }
}

context.drawImage(
    this.image,
    this.frameIndex * this.frameW,
    0,
    this.frameW,
    this.height,
    x,
    y,
    this.frameW,
    this.height
);

};
Ok, in this part we just wait the right number of tick before passing to the next frame, and when we are at the last frame, we pass frameIndex to 0: the animation restart.
Let's try !
The last thing to do is defining a new sprite ! we define a new Canvas, we load the mario spritesheet, and we use our constructor:
var mario = new Sprite({
image: myspritesheet,
frames: 6,
ticksPerFrame: 4
});

function loop() {
context.clearRect(0,0,400,400);
mario.update(100, 100);
}
We are done ! You can see and try the code on js fiddle here
Here is a gif of the result :

You can improve this codebase by adding several rows for multiple animations, handling margins, etc...
If you have questions, I answer in the comments ! :)