I will show a very simple and a subtle way to make your subject pop a bit more.
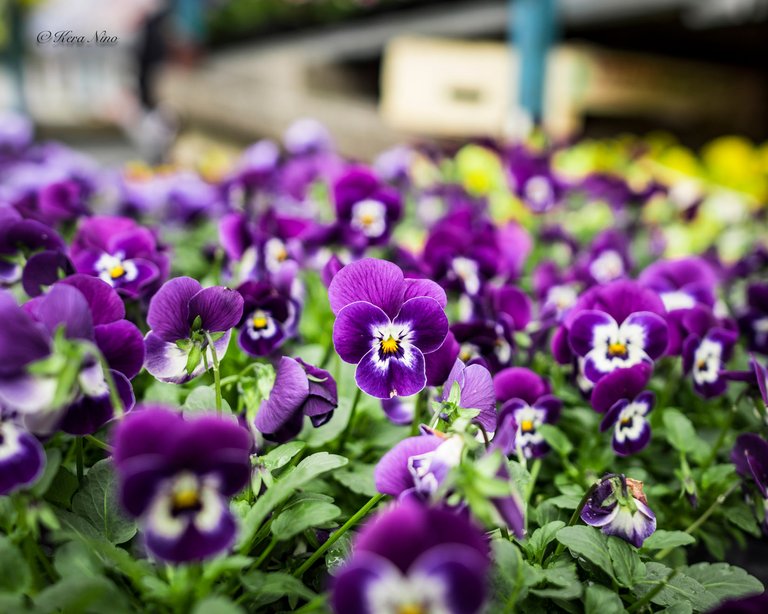
I took this photo on the city’s market few days ago.

Nikon D750 / ISO 200 / 1/200s / f2 / Samyang 24mm f1.4
Quite often I’ve seen people use the software available blur effects only, in order to enhance the appearance of the main subject on their photos. Especially the ones taken with the smartphones. In fact, I was doing this myself at the time I didn’t own a DSLR. But, whoever is at least a bit familiar with photography basics will notice this straight away…
It is always the best to use the proper camera settings in order to create the image you desire. Postproduction time is reduced this way, but it also looks more natural even if you do enhance the effect in some of the available software solutions. And that's what we are going to do here.
Just to mention, even smartphones can do this today with available features and lenses. Or, you can also come closer to your subject, focus on it, and the background should be blurred out at least a bit...
Let's get back to my image...
I focused on one of the flowers in the middle and I’ve used a big aperture size in order to get a smaller depth of field (DOF). This will create a blur on the non-focused part of the frame, straight out of the camera. It's already good, however, I'd like to enhance it a bit more.
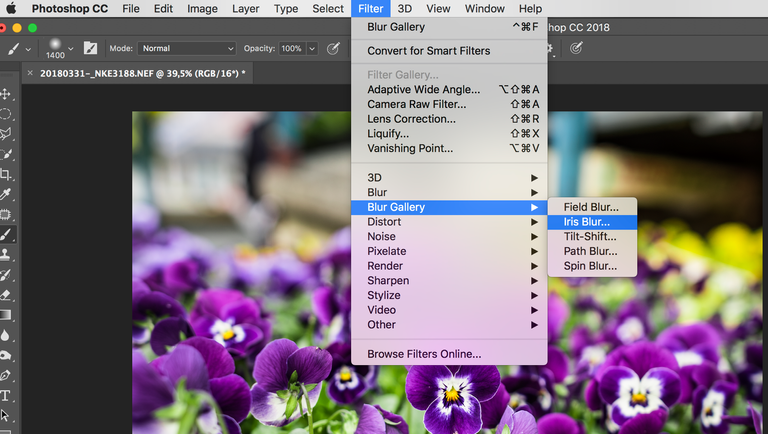
I used the 'Iris Blur' filter in Photoshop. Here's where you can find it:

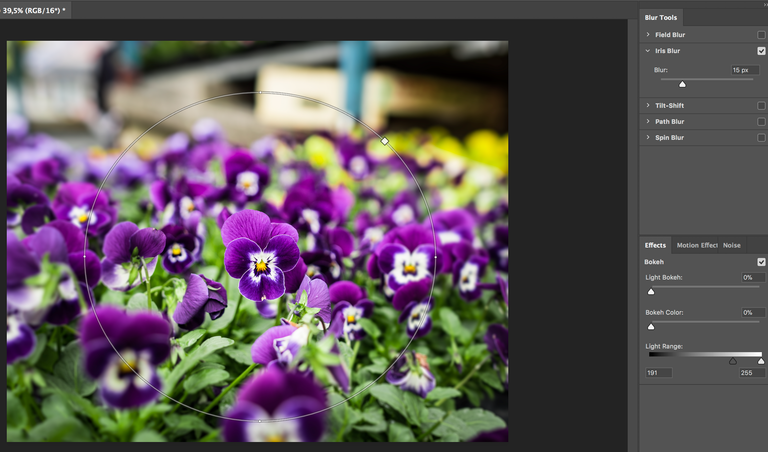
Next, it's time to play with the settings, and these are really straight forward. On the right side you will see the slider determining how much of the effect you want to apply. Now, this is somewhat subjective, but I like to do it subtle.
One more thing is important. Unfortunately I just realised that it’s not visible in the screenshot, but there’s another circle within the one on the photo, and that one determines the feather size of the blur effect.

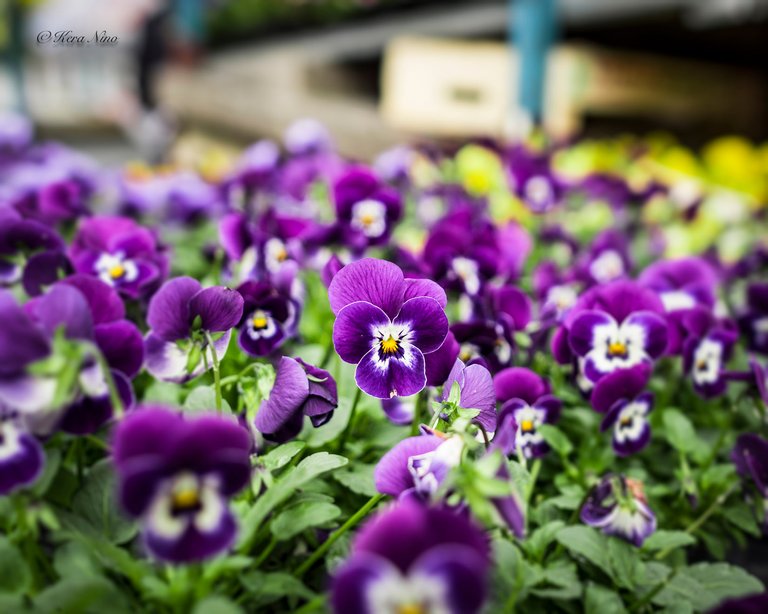
To be able to compare the difference, I will put the original image here once more, and the final result below.
No Iris Blur

With Iris Blur

See, very subtle, but your eyes will naturally go to the sharper part of the image without your conscious effort…
So, play with this to your liking and go create some amazing images :)
Cheers,
Nino.
Nice coaching @nkera. I'll not forget this when taking my shot. Thanks for your passion and generosity. Shalom man.
Thank you very much. I'll pop in a tutorial or two every once in a while, so keep following for more. Cheers!
Precious, very nice picture!.
Thanks :)
You got a 2.94% upvote from @upmewhale courtesy of @nkera!
Earn 100% earning payout by delegating SP to @upmewhale. Visit http://www.upmewhale.com for details!
nice edits, thank you for telling me how, the flowers are very beautiful
nice edits, thank you for telling me how, the flowers are very beautiful
You are most welcomed. Stay tuned for more :)
thank you, please guidance🙏
World of Photography
>Visit the website<
You have earned 5.25 XP for sharing your photo!
Daily photos: 1/2
Daily comments: 0/5
Multiplier: 1.05
Server time: 05:22:25
Total XP: 1472.51/1600.00
Total Photos: 50
Total comments: 34
Total contest wins: 23
Follow: @photocontests
Join the Discord channel: click!
Play and win SBD: @fairlotto
Daily Steem Statistics: @dailysteemreport
Learn how to program Steem-Python applications: @steempytutorials
Developed and sponsored by: @juliank