How To Greatly Improve Your Phone Photos
Hello everyone.
So as a fairly avid photographer, although I by no means claim to be anything special, I was asked at work today to produce an instructional document on how to take a good picture. I work in marketing and we always ask our salespeople to provide pictures for the social.
Or at least, we always asked. A lot of the pictures we received were not usable so we kind of stopped asking for them. Bad pictures reflect badly upon a brand, and in the vicious, short-of-attention world of social media, you don’t want to give anyone reason to pass over your voice.
"The best camera is the one you have with you."
As a bit of background, our sales team are not professional photographers and they certainly don’t have the equipment. They use their smartphones or at best a handheld camera, so these tips are designed as a best practice guide for taking high-quality photos on your smartphone.
Although these tips were written for a professional audience, they were things I learnt in taking pictures for enjoyment in my spare time. You may not agree with all of this tips, and if you don’t I’d love to hear your thoughts; but the chances are if you implement even a few of these you will see dramatic improvements in the quality of your photographs.
1. Please, no selfies!
This is, of course, personal opinion, and a controversial one at that, but it is apt for photography in a professional setting. I detest selfies, partly because my face never looks as good as I think it should! Having said that, my greatest issue with selfies is that your face consumes so much of the picture that you simply cannot capture the essence you could without it.
2. Take your time and think about the shot.
A picture can tell a 1000 words, but you want those words to be coherent.
People often rush their pictures and end up taking a lot and throwing a lot of them away. It is better to really take your time with the picture, even if it means you only take one. Let’s be honest, we all have hundreds of photographs taking up storage that we have never looked at a second time.
3. Pick your distance carefully.
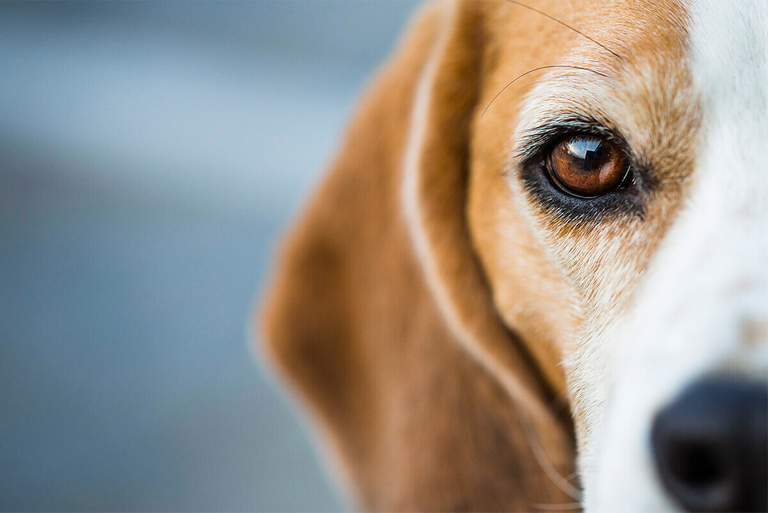
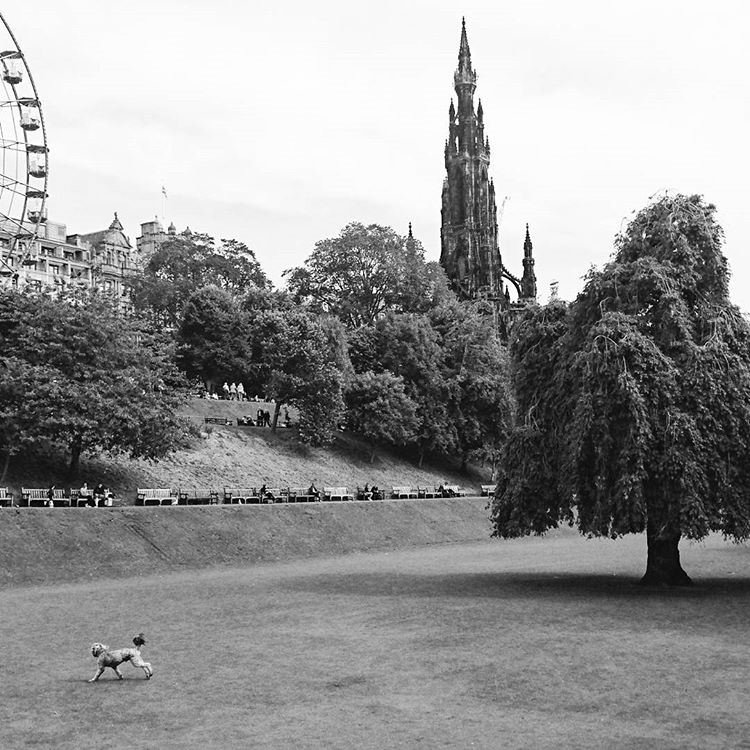
The distance you are from the focus of the photograph is key in capturing the essence you are attempting. Let’s look at some examples using dogs because... you know, dogs make good photographs…
- Close up = Showing extreme detail of a subject

- Mid-Range = Show the subject in relation to its surroundings

- Long shot = Focus on the subject in its surroundings

4. Use a steady hand and take a straight photo.
Playing around with the angle of a photo can make an ordinary photo brilliant, but just as easily can destroy what might otherwise be a spectacular one. If you want to try and be artistic the safest option is to take a normal one first, then play around.
This one below is one I'm ashamed to admit I took on holiday after a few too many cocktails - I was all over the place!

5. Utilize the rule of thirds.
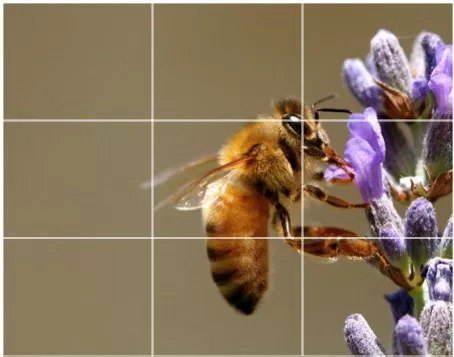
- Imagine your shot is split into 9 equal squares (some phones even have a function that does this for you). The rule of thirds states that a photo is compositionally more interesting if the important elements of the image lie on one of the grid lines or their intersections. Furthermore, the eye is naturally drawn to these areas of a photograph, so position something here you want to draw attention to.

- However, sometimes rules are meant to broken. If you are feeling artistic, let those juices flow, some of the best pictures I’ve taken have thrown rules and guidelines out the window!
6. Focus. Focus. Focus.
Tapping and holding on the screen of your phone usually adjusts the focus. Want to capture something specific? Tap and hold it! The phone’s camera will realize that is the main focus and it will look better in the final picture.
7. Play with the HDR Auto function.
Most smartphones feature a software feature called High Dynamic Range, or HDR. This function will make photos with high contrast light sources look great. If your phone just isn’t capturing the beauty of that bright sunset over a dark mountain range flick your HDR on and give it a whirl! It allows the camera to capture a nice image without allowing the differences in light to distort either area of the picture.
8. Use the camera shortcut button!
Most phones allow you to set one of the volume buttons as a shutter button. This is the key to taking good pictures! My mother has this horrible habit of lining up a picture and then tapping the screen with her finger to take the picture. All though, you know, my mother is getting on a bit in years, and her dexterity isn’t what it used to be. What she perceives as a light tap is more a deft thwack on the phone screen. All that hard work lining up the picture is ruined by the movement of the phone as the aperture is open. Long story short, this tips allows you to have two hands on the camera and reduces any shakiness as the picture is taken.
Play around with the above tips, but ultimately, photography is an art, not a science. You have to find what works best for you, and most importantly, you have to find a way you can take pictures and enjoy it. Photography is a blessing and you should treat it as such, just enjoy it! If you use any of these tips and like the pictures you produce let me know! If you have any of your own tips, post them in the comments and let's get a comprehensive guide going!
Peace, Abundance, and Liberty Network (PALnet) Discord Channel. It's a completely public and open space to all members of the Steemit community who voluntarily choose to be there.Congratulations! This post has been upvoted from the communal account, @minnowsupport, by modern-man from the Minnow Support Project. It's a witness project run by aggroed, ausbitbank, teamsteem, theprophet0, someguy123, neoxian, followbtcnews, and netuoso. The goal is to help Steemit grow by supporting Minnows. Please find us at the
If you would like to delegate to the Minnow Support Project you can do so by clicking on the following links: 50SP, 100SP, 250SP, 500SP, 1000SP, 5000SP.
Be sure to leave at least 50SP undelegated on your account.