Hello Steemians!
I've been away on vacation, visiting family and having some really great meals so I've neglected this series a little, now I've come back with a venegance! Here we go!
This is my fifth post on this series, as I've said on each one, this is meant for musicians who don't know much about recording, or people who aren't satisfied with the quality of sound they are getting from their equipment.
These are my past five posts on this series, in case you're interested:
This time I will continue to speak about DAWs, as they are more commonly known, or Digital Audio Workstations. This post will be mostly about what are the common features on most DAWs and how to get started recording. This post is not a replacement for an introduction course for your particular DAW, this is meant to teach you the basics of most DAWs and the common things they all have.
Here are the contents I'll be talking about on this post (suggested by @greencross):
- Sample rate and Buffer size
- Main screen and creating a session
- Setting up audio device driver in the DAW
- Basic common tools among DAWs
- How to start recording and common mistakes
If this feels too advanced you should check out part I of DAWs basics here :)

Let's begin!
First you need to make sure the driver for your interface is installed (PC) and your interface connected. You can start making simple recordings with a regular computer, although it is recommended to have a powerful one if you wish to go a little deeper into mixing and plugins.
Second you need to check your driver's sample rate and buffer size, 44.1 KHz or 44100 Hz is a nice sample rate for a begginer. Regarding the buffer ,the bigger it is the more latency you will experience when trying to hear yourself while you're recording, normally a 3 to 5 ms (or 256 to 512 samples depending on your setup) will do the trick.
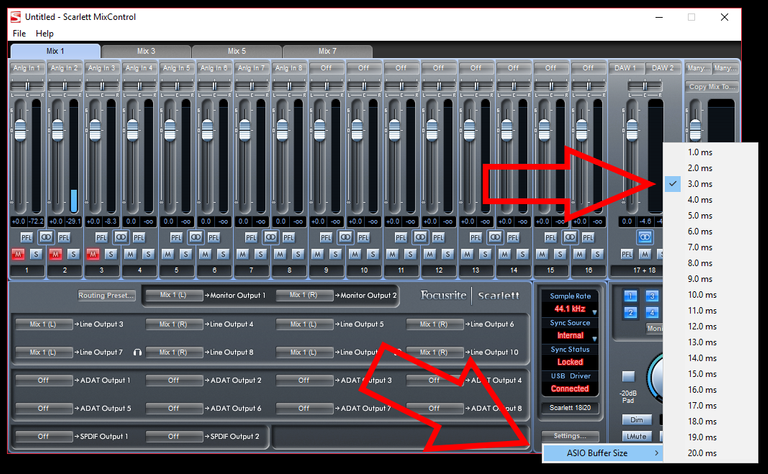
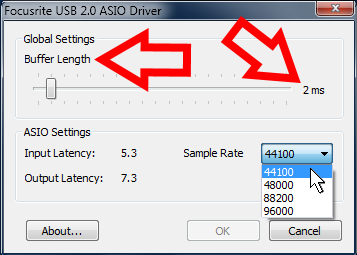
The lower the buffer, the more powerful your computer has to be. If you have a regular computer, going with a really low buffer will introduce a lot of audio artifacts and noise, which we don't want. This also depends on the type of connection your interface has, there are thunderbolt interfaces that have virtualy no latency at all, USB 2.0 interfaces are the most common ones, and they all need the buffer taken into account.
This is the main reason to get an audio interface other than having good preamps and AD/DA converters, without it there isn't much you can do to fix the latency issue, you can try getting ASIO4all, which is a free download and a really good one at that :)
If you have no idea what I'm talking about please click here, it will take you to my post explaining a lot about audio interfaces and analog and digital signals :)
There is a great variety of DAWs available today, almost for any type of workflow you choose, sometimes the user interface can be a little different but they all have many things in common.
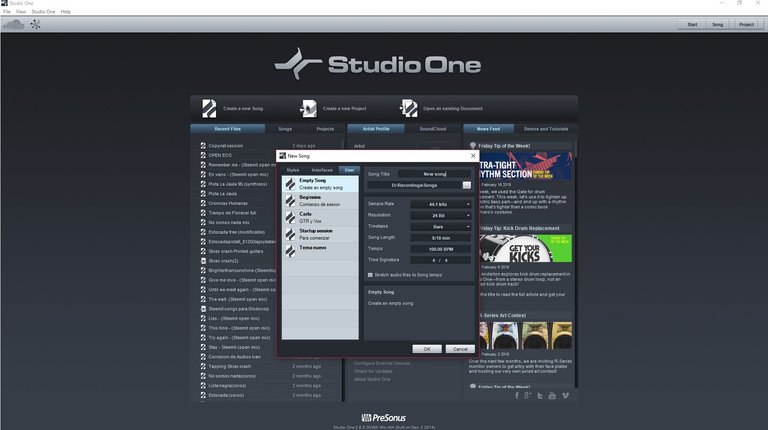
When you start up a DAW sometimes you get to the main screen right away and sometimes it will give you a start screen like this:
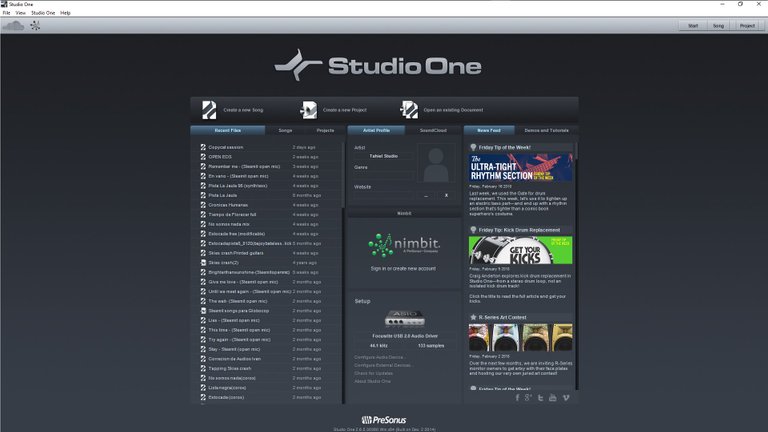
When you get here you can choose where the recording session will be saved in your computer, you can choose tempo, time signature, you can name your song and more.
Then you need to find where your audio setup menu is, it tends to be in the main options menu on most DAWs, on Studio One it looks like this:
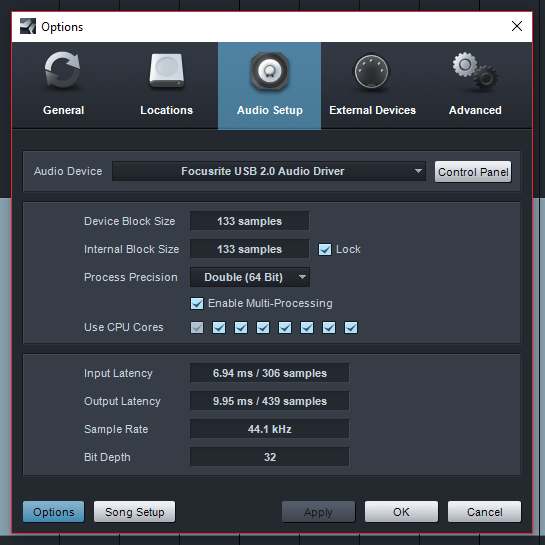
If you're on a PC you should select your interface's driver as your audio device, if you have a powerful computer make sure it is using the resourses you have, like 64 bit process precision and a low block size. Note that some of these terms are used only on this DAW, on something like Ableton live that menu is slightly different:
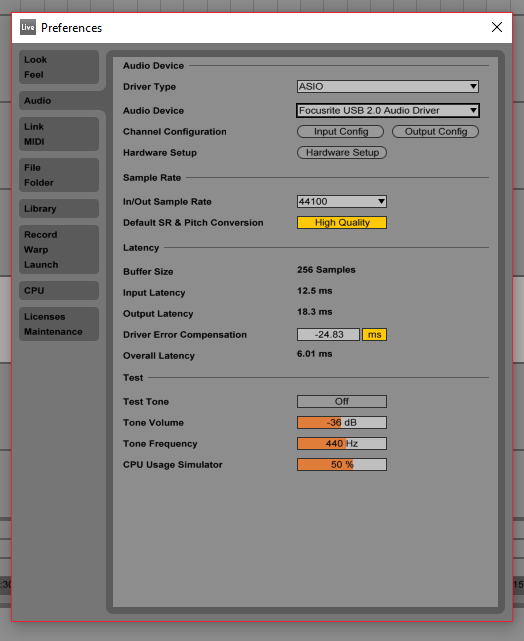
Here you need to select the driver type first, and it should be the option called ASIO, then the audio divice should be your interface's driver.
After you're done, you select create new song (or any of it's equivalents on other DAWs) and get to the main screen:
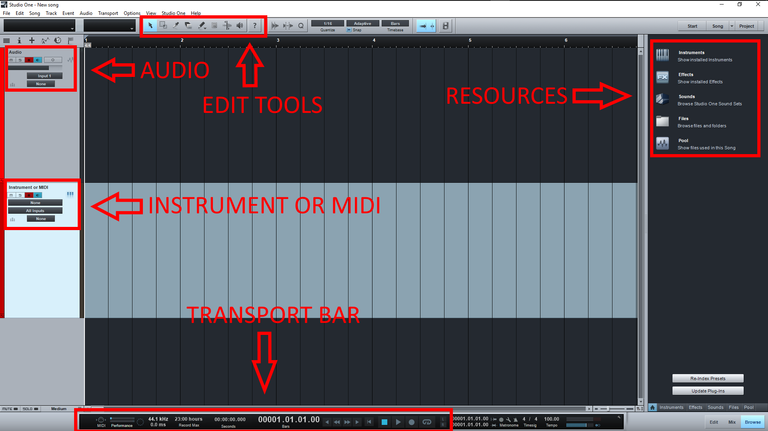
As you can see I have highlighted the most important places on the main screen, the DAW I'm using here is called Studio one, but most DAWs have very similar main screens, this is an example of Ableton live:
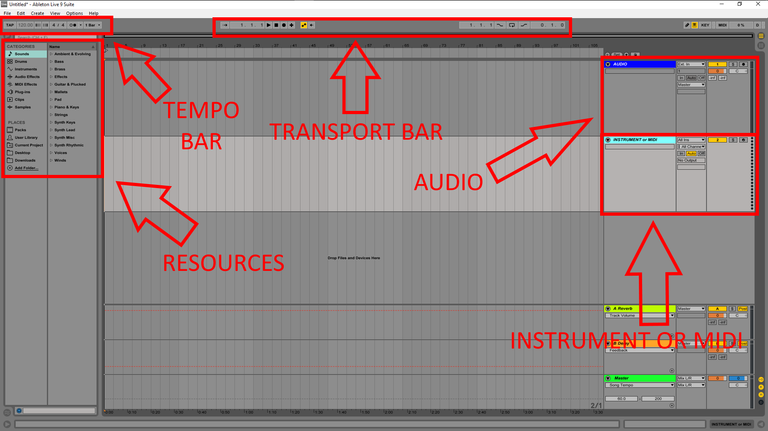
Now let's see what all this means:
-AUDIO
This is the place where your audio recordings will live, at first you need to select the input that you want to record, if you have a two channel interface and have your mic plug in to channel 1, you should select input 1 to record it :)
After selecting the input you need to arm the track, otherwise known as clicking on the tiny circle that turns red when you click it hehe.
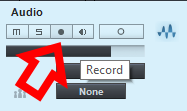
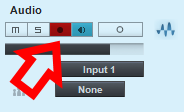
This will not start the recording, it only allows for that channel to record the input you've selected, without arming the track, you won't be able to record anything. This is the most common mistake begginer make so DON'T FORGET TO ARM YOUR TRACKS!!!!
-INSTRUMENT OR MIDI
This one is the same but for midi instruments and virtual instruments, on this one you can select whick midi controler you wish to trigger the sounds, and which plugin you wish to use for sounds, this allows you to use sounds of a choir or an orquestra or some drums, really, the sky is the limit.
I will speak a little more about plugins on a later post :)
-EDIT TOOLS
Some DAWs have different tools for cutting, dragging, erasing and drawing midi, some even have tools to take out noise and to strech out audio, this depends on your DAW of choice.

-TRANSPORT BAR

This is where you'll find most of the information about your recording, how long it is, what sample rate you're recording at, what the song's tempo is, on some DAWs you can find the metronome.
This is also where you can start the recording by pressing the record button. On some DAWs you start recording by just pressing it, on others, such as ableton you will need to press record and THEN press play(this can be modified)
-TEMPO BAR
Many times you'll find it in the transport bar, on Ableton live it is separate.
-RESOURCES
Almost always, when you get a DAW, you also get some loops and native plugins, effects such as reverbs, delays, EQs and choruses, but you also will get some form of virtual instruments. These let you use a lot more sounds than what you would be able to record, including synthetizers and strings and many many more.
You should take the time to explore what extra goodies your DAW comes with, you may be surprised!!!

If you have been following this series I would love to listen to a simple recording you've made using this info I've shared, it is one thing to write and write about audio and recording, it is another thing entirely to listen and see how people are using what I share. This is all about helping you guys, so I would really love the feedback! You can upload any audios you
wish to show me to Dsound (which rocks) or soundcloud and post them in the comments :)
Also, if you have any topic you'd like to see here, or have any questions, please feel free to comment below! :D
Next time I will be speaking about plugins and virtual instruments, about VSTs, Audiounits(Mac), RTAS and AAX types of plugins.
I hope this h useful to you! If you know someone that you know wants to start recording, please share this with them!
Til' my next post!


DISCLAIMER: dropahead Curation Team does not necessarily share opinions expressed in this article, but find author's effort and/or contribution deserves better reward and visibility.
to maximize your curation rewards!
with SteemConnect
12.5SP, 25SP, 50SP, 100SP, 250SP, 500SP, 1000SP
Do the above and we'll have more STEEM POWER to give YOU bigger rewards next time!
News from dropahead: How to give back to the dropahead Project in 15 seconds or less
Hi! this is a good post with lots of information, however I think it could benefit from a table of contents at the beginning, and a better title indicating the contents to be covered. Great series. Keep it going!
Thank you very much for the kind words and even more for the suggestions! I will fix both things ! :)
I'm looking forward to check out how it turns!. Cheers and happy indulging great mom food! Nothing's better. Hehehe
Congratulations! This post has been upvoted from the communal account, @minnowsupport, by Luisferchav from the Minnow Support Project. It's a witness project run by aggroed, ausbitbank, teamsteem, theprophet0, someguy123, neoxian, followbtcnews, and netuoso. The goal is to help Steemit grow by supporting Minnows. Please find us at the Peace, Abundance, and Liberty Network (PALnet) Discord Channel. It's a completely public and open space to all members of the Steemit community who voluntarily choose to be there.
If you would like to delegate to the Minnow Support Project you can do so by clicking on the following links: 50SP, 100SP, 250SP, 500SP, 1000SP, 5000SP.
Be sure to leave at least 50SP undelegated on your account.