I finally recieved all components and assembled my first 7 GPU mining rig. Here is the short how-to manual, to build a mining rig, that supports up to 8 Graphic cards.
Components used:
- Asus prime Z270-a motherboard
- XFX power supply 750 W
- Add2Psu adapter
- i3 processor
- Kingston HyperX SSD drive
- 8GB RAM
- Riser Cables
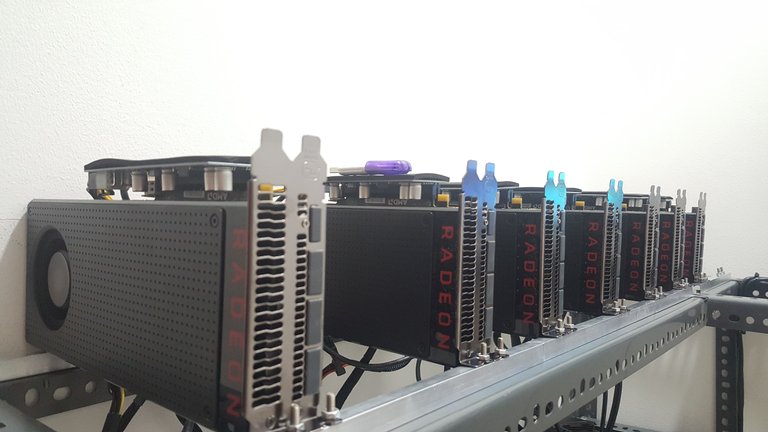
- Radeon RX480 GPU
- stand
Motherboard
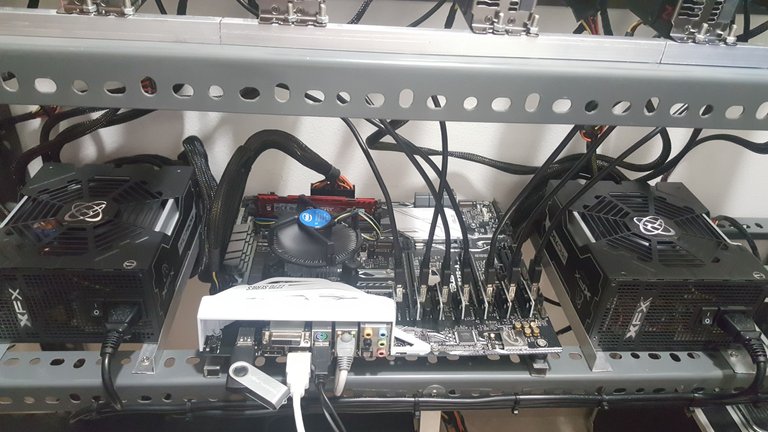
When you are choosing the motherboard, everything that matters is number of PCIe ports. Asus Prime z270a has 7. In addition it has two m.2 ports, and one of them can be turned into PCIe port with adapter. With this motherboard we can achieve a total of 8 mining cards.
Power Supply
Before building the rig, it is important to calculate the consumption of all components. Open this link http://www.coolermaster.com/power-supply-calculator/ and input all of the components you are planning to use. One of the PSU rules is, always add minimum 20% of consumption, so PSU can run cooler and longer. Getting at least gold certified power supply is a smart move, because it can guarantee us, that less electricity will be wasted during running. And belive me, mining rig consumes a lot, so golden certified PSU will pay for itself.
Add2Psu adapter
Instead of buying one big power supply (1500W) I decided to use two 750W PSUs. Power supply with higher power capacity costs a lot more than combining two or more PSUs in daisy chain.
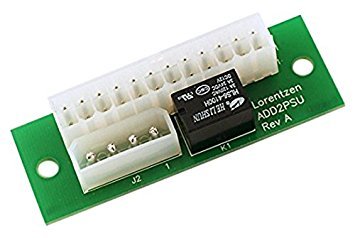
PSU needs a signal from the motherboard to power up and because motherboard supports only one PSU connection we need to provide the signal to the second one. I have seen a lot people just shorting the 2 pins on PSU together to power it up. If you want to have control over your secondary PSU it is advisable to connect it together with add2psu adapter. It is a small board that has connection from primary PSU molex connector to secondary motherboard PSU connection. When it detects power on molex it shortens the secondary one and powers it up.
Processor
If you are not planning to do any GPU mining, selecting the CPU is easy. Just go with the cheapest option that fits your motherboard. Any i3 processor will do just fine.
RAM
Amount of RAM doesn't have any effect on mining speed. The important thing is VRAM (GPU ram). You can select any module, but it is still advisable to use at least 4 GB.
Hard drive
We need to store our operating system and mining software somewhere. A standard SSD drive will do just fine. You need to decide if you are planning to mine in a pool or solo. In case of solo mining you will have to download the entire blockchain, which requires some space and a bigger drive.
Riser cables
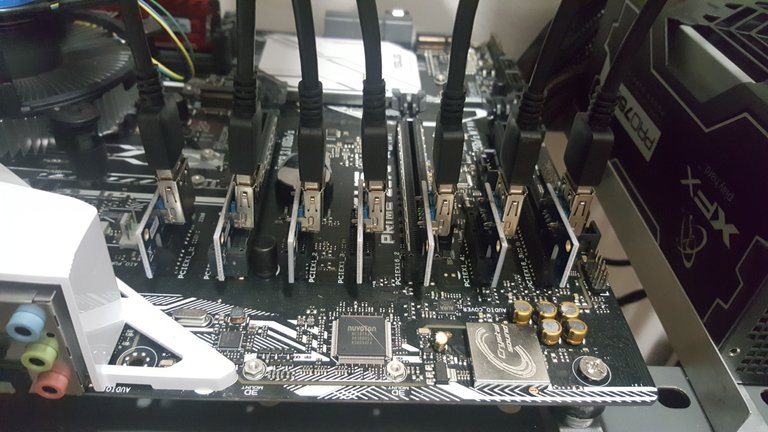
Riser cables will enable us to connect multiple GPUs on the motherboard with transferring the PCIe 1x port to PCIe-16, shich is required for GPU. It is advisable to look for a powered riser cable with USB connection. These are safer for your equipment and mininmize the fire hazard. If you can find, try buying the riser cables with 4pin PSU power supply. In my opininon revision 6c works best.
Graphic cards
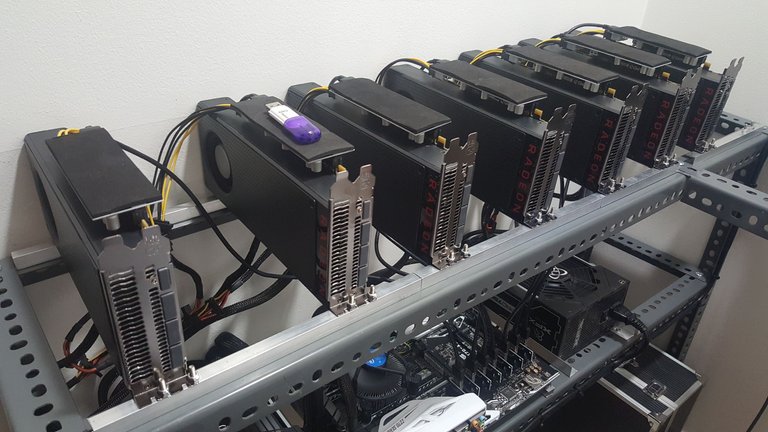
This is the main part of your rig, where all the magic happens. Pick your "weapon of choice" wisely. Some graphic cards will cost you a fortune but the return on investment can be pretty quick. Finding the right balance between power consumption and hashing rate (computing speed) is the key to success. Some of the good cards are RX470/570 and RX480/580. If budget allows you can go with Nvidia 1080 which costs more, but consumes less power.
Stand or a case
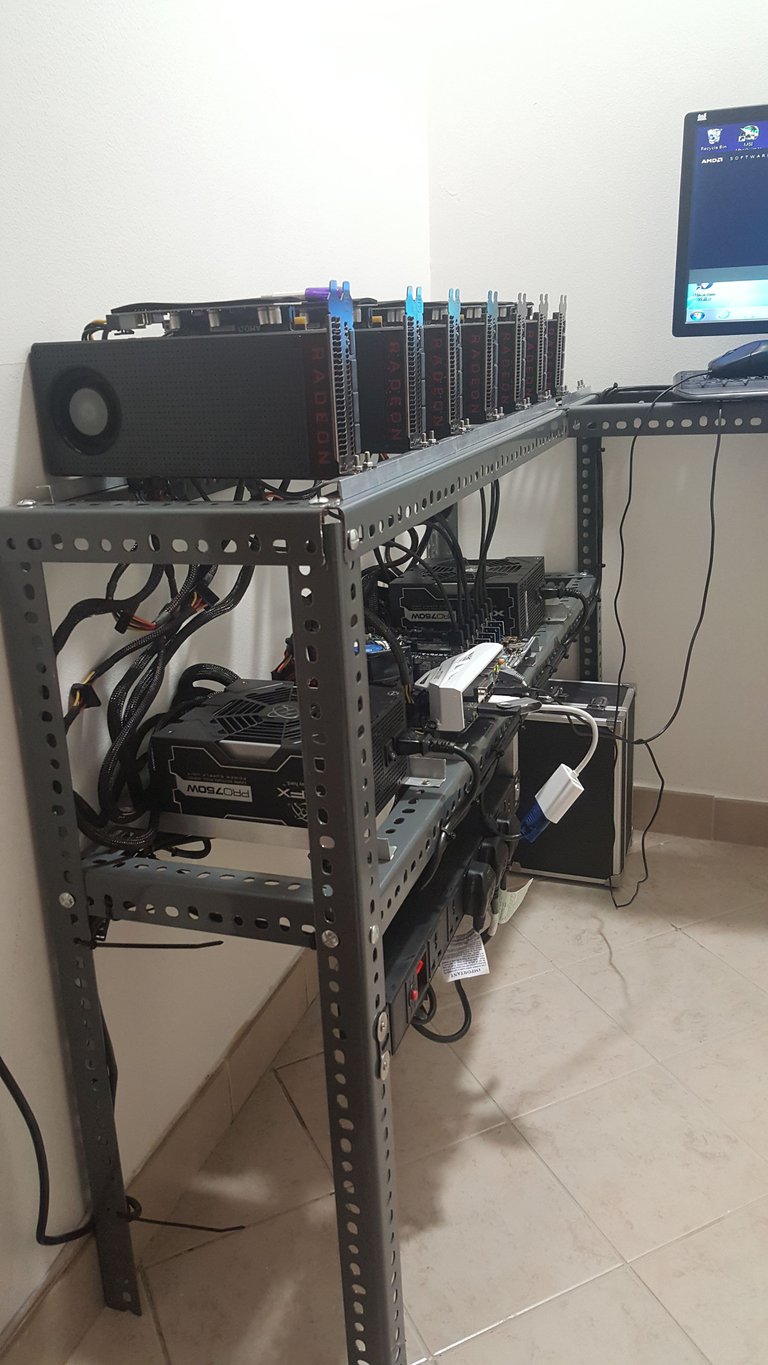
Mounting everything into a standard case is next to impossible. You will have to improvise, use your DIY skills and make a case by yourself or buy one of pre-made ones. Make sure you leave enough space between components for efective cooling. It wouldn't be the best move to burn your house down for these few ethers that you can mine before everything catches fire :)
Assembling the rig
- Mount the processor and ram onto the motherboard, connect SSD drive and primary PSUs motherboard and CPU power connector
- With add2Psu join secondary PSU with primary one. From primary one we will power CPU, motherboard, SSD drive and 3 Graphic cards.
- Connect PCI risers into PCIe ports. Attach USB cable to both ends of risers.
On the GPU side of riser cables, we need to connect power supply for the riser cables and USB cables leading from motherboard end of risers. - Insert graphic cards into the risers and connect power supply to the GPU. Connect first 3 cards from primary and 4 cards from secondary one.
If PC boots up, we are done. Install the windows or linux OS. Make sure you are using 64 bit version and update windows and drivers.
Bravo! Keep me updated on ROI :)
Good job and good luck. Looks kind of complicated to me so you already have my vote for all the effort :D Steem on!
I like you rig, it seems very well built.
Thank you for writing how to connect 2 PSU-s. Didn't know it was that simple.
This post received a 4.8% upvote from @randowhale thanks to @sticker! For more information, click here!
Very cool set you got there @noperope! So powerful, definitely should be fire proof :)))
Let's hope for the best about the fireproof part :) I am a little worried only about the sata to 4pin power connector for riser cables
Nice rig there!
That metal frame is swanky.
My farm is all made of wood XD
I used the metal frame becuse of lack of space. Next rig will be above this one scrued to the bottom one :)
Rockin!
Very awesome friend. I hope you get your ROI very fast.
Nice rigs... Great setup!
Nice article man! You did really nice work with the riser cables. 2 PSU's seem like a bit of overkill though, I managed to get all 7 of my GPU's to run on one 1200 watt PSU(only 900 watts total). I wrote a post about it if your interested. Power bill over here in Japan is killer so I had to find a way to lower the power without losing hashrate
Not an overkill, single PSU is only 750W. No way that I an run 7 cards on it. Also electricity is cheap here in UAE 0.08 USD so it shouldn't be an issue
Cool rig! I like how you attached the monitor and keyboard so you can stand and use it and not have to move it around. I have two rigs and if I change the coin I'm mining then I have to move the monitor and keyboard along with it. Lets hope Ethereum takes off the difficulty bomb since they postponed the Proof of Stake until next year so we can make our money back faster!
KVM switch is the answer :) not so expensive for the "luxury" of not reconnecting everything
I actually saw an 11-gpu- mining rig using the exact same motherboard, which it's cool, you could just add more graphic cards to this exact rig, instead of just buying new motherboard, processor, ram, ssd, etc etc
Anywho. Pretty sick rig you got yourself, gratz on that!
I saw it, with the PCIe splitters. For now I just don't trust daisy chaining riser cables - you still need to connect a riser cable from the splitter to the card.
cool rig ... good luck for mining :-)
thing of beauty
How much did this whole thing cost?
Around 3k usd. ROI should be around 5 months with current ether prices.
Very very cool. Thanks for sharing. Nice job on the build!
Good stuff. I like how you flipped the cards over to mount them above... very DIY.
What hash rate are you getting on ETH? The calculator says is should be around 200MH/s. I'm mainly asking because it will effect the ROI.
Also, for people using Nvidia cards, I would go with the 1070s, they are cheaper , do better on ETH, & consume less power. I have 1 rig with 5 of them and another with 4 1070s and a 1080.
I had to turn it around because of the fan exhaust. I didn't want it to blow directly into the wall. Now I am getting around 28 MH/s for ethereum per card so around 190.
We were testing 1080s evga FTW it was giving around 32 per card stable, but you are right, the price difference between 1070 and 1080 is too big for few hashes that you can get on 1080.
For how long are you running yours? How fast was the return?
I get about 30.5MH/s out of each of my 1070s. I use MSI Afterburner to boost the Memory Clock Speed and drop the power level (+600ish on the Memory Clock and 70% of the power). This actually boosted me from like 5MH/s and dropped the power consumption nicely.
I haven't found that secret sauce for the 1080 yet, I'm getting around 25MH/s on that card.
I built the rigs at the beginning on July, so I have a long way to go before I get my ROI.
30.5 is amazing on 1070. With the current price of ether we will have to wait before we can cover the investment. Hopefully after august it starts climbing back up.
I need a VGA and you have to many , can you give me 1? :)
Hehehe..u will have to goto a shop!
And just 1 will do you no good
Take all or none...hahah
I need only 1 to play DOTA 2 whit it :)
Awesome setup and very well done :)
Thx for sharing