Good evening guys,
So this makeup look is inspired by the beautiful weather we had for today!
Nearly 30 degrees, blue sky, no clouds and only sunshine! The best time of the year has arrived, and I can’t wait to enjoy more of these days. (:
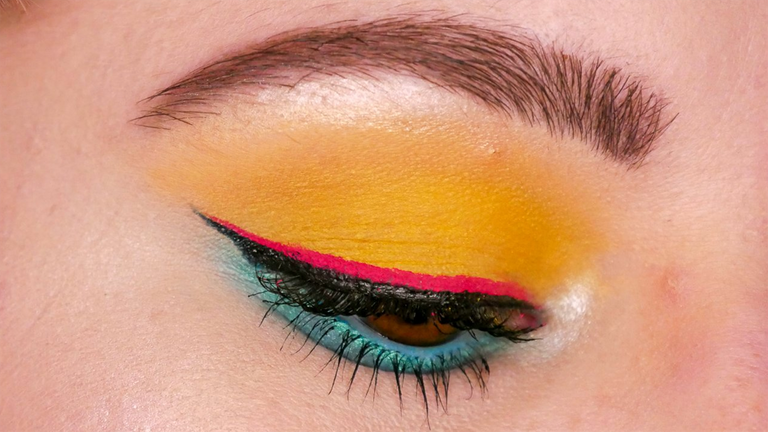
So, to start off this Photo Makeup Tutorial, I’m going to list up the products you will need and as usual I’m not going to list the products which you need for your base, but if you would like to see me doing a full-face makeup, let me know in the comment below (:
What you will need:
- Eye Primer
- Yellow Eyeshadow
- Blue Eyeshadow or Shimmer Blue Liquid Lipstick or Eyeliner
- Blue Eyeliner Pencil
- Black Liquid Eyeliner
- Any other color Liner
- Concealer/Foundation
- Mascara
- Liquid or Powder Highlighter
- Nude or a Natural Lipstick
- Brow Liner
- Brow Gel
- (Setting Spray)
- Brushes
I think that’s it if I used some different products or I forgot to list them, I’ll let you know (;
Step 1: Prime
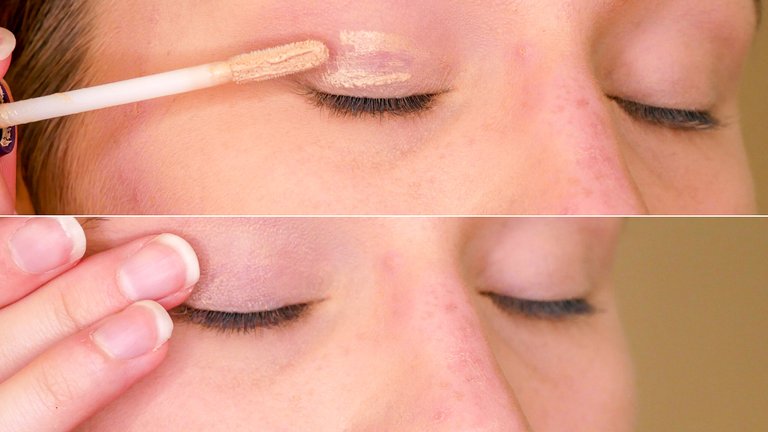
To start off, you should prepare your eyelids before you apply whatever else. Apply some eye primer with your finger on the mobile lid and blend it also towards the brows. Give it a few seconds so that it can dry before we are moving on to the next step.
Step 2: Yellow
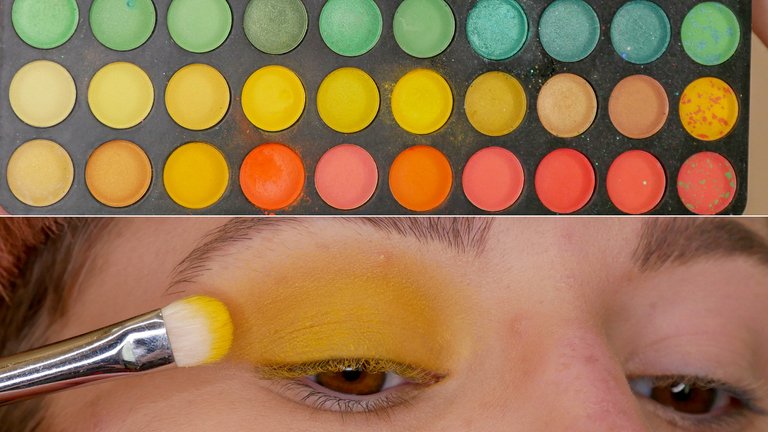
Choose a yellow eyeshadow color that’s pigmented and outstanding. Apply this shadow onto your mobile lid with your finger or a damped (with setting spray) flat eyeshadow brush. We want the full pigmentation, so that’s noticeable.
Keep the main pigmentation towards the lash line/mobile lid and then you can take a fluffy blending brush and blend it towards your crease and above. The color should still be visible when you’re opening your eyes.
The main focus ought to be your middle lid, there should be color intense! When your blending towards your crease and above, the color should be faded similar to a color wash eye makeup look.
Step 3: Blue
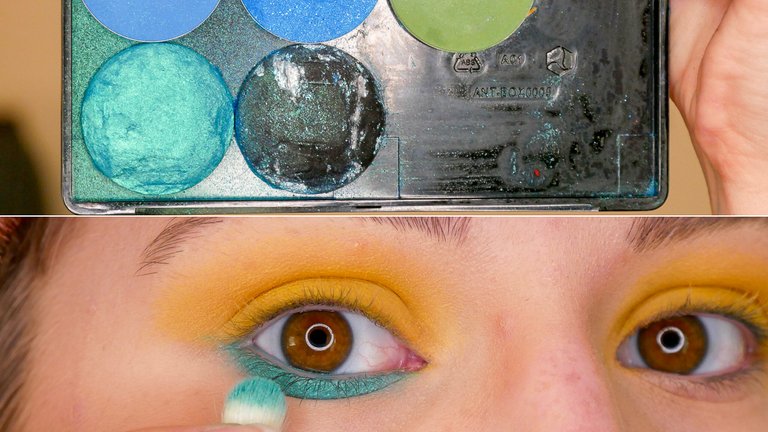
It doesn’t matter if you’re using powder, gel or liquid on your lower lash line but it should be in blue and blendable. If you’re in the mood for a matte finish, choose a matte blue otherwise you could go with a shimmery blue shade or glitter, let your creativity flow!
I’m going for an aqua blue eyeshadow which is in a shimmery blue. I love this finish of the eyeshadow. The reason why I’m choosing this one that is shimmery.
This will add attention and action to the eye makeup look.
Choose a flat eyeshadow brush/ smudge brush which will allow you to smudge it out over your whole lower lash line; there shouldn’t be any harsh lines. Like a smokey eye effect.
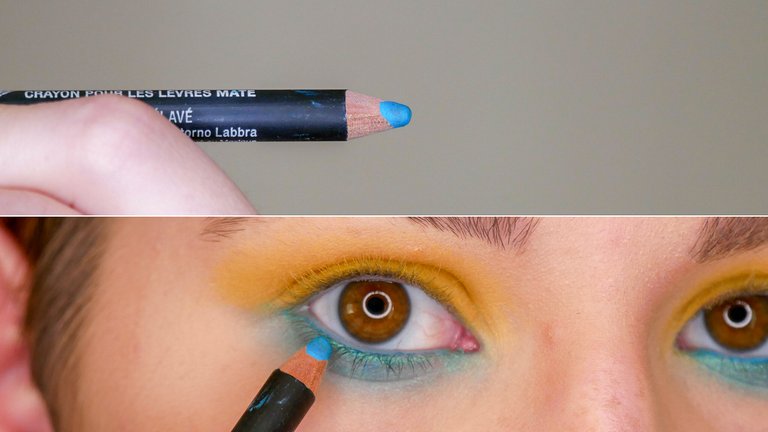
Step 4: Blue Eyeliner Pencil
To let the blue pop even more, you could go in with a blue eyeliner pencil and add this to your lower lash line.
So your whole bottom lash line will be standing out because it so deeply coated in aqua blue.
Step 5: Clean up
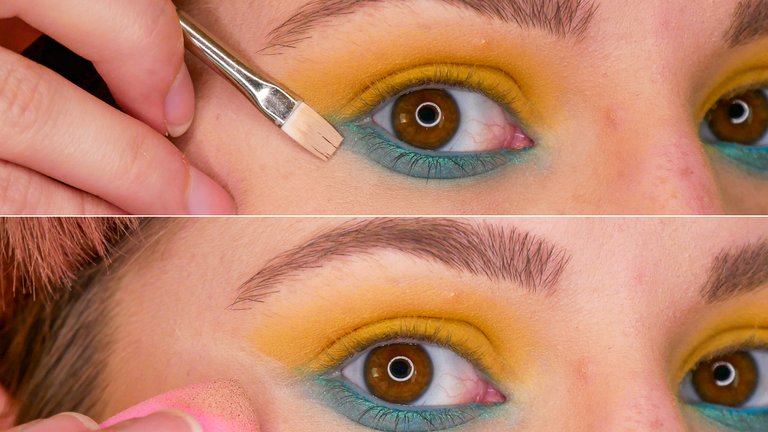
Take a flat concealer brush or any kind of flat brush and dip it into some concealer or (leftover) foundation.
Then clean up the outer part of your eye, following your lower lash line towards your brow tail.
This will be your guide line for the winged eyeliner - to make it easier and even.
You can blend the concealer/foundation into the skin with a damped sponge or foundation brush.
Step 6: Black Eyeliner
You could skip the eyeliner part if you’re already happy with the makeup look, but I’m going to continue the look (;
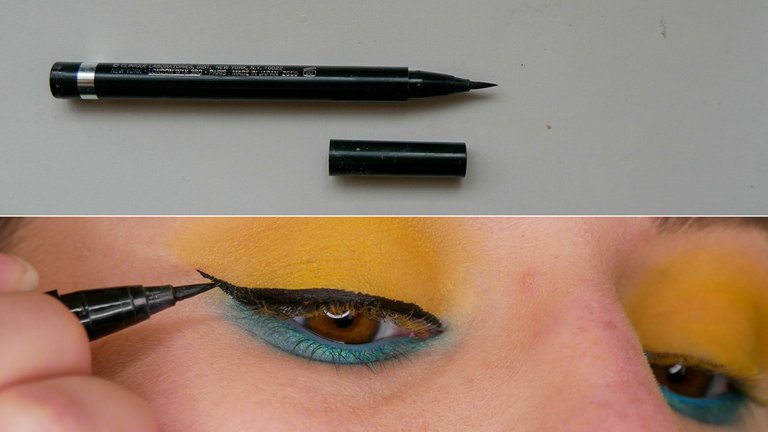
Adding a simple winged eyeliner with a liquid eyeliner pen/ felt tip pen, makes it the easiest. If you don’t know how you can create winged eyeliner,
then you can check out his link right here:
https://steemit.com/tutorial/@mvd/how-to-finally-be-able-to-get-winged-eyeliner-done
Go for simple black eyeliner and add a sharp wing at the end.
Step 7: Colorful eyeliner.
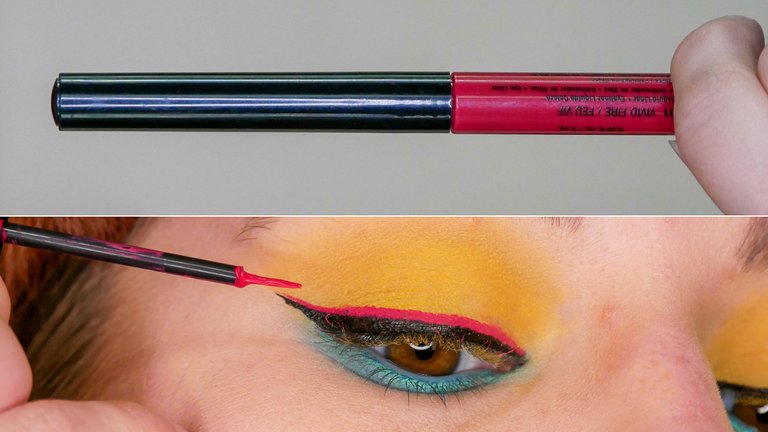
Yes, we are going to add second winged eyeliner on top of the black one! Like a double winged eyeliner. This one should have any other color except black or grey (;
I’m going to choose a red/pinkish type of liquid eyeliner.
Repeat the same style of winged eyeliner as before but we are going to apply it along the black liner, and at the end of the wing we are going to extend/sharpen the tip of wing even more.
Step 8: Clean up again
To create a sharp winged eyeliner look, you can clean up again the outer part of your eye. Just follow your lower lash line towards your brow tail, the same way as we did earlier.
Make sure that you're taking off a little bit of the winged eyeliner so that you're able to create a pointed and sharp winge.
If this has worked out for you, you now can add a little bit more of that aqua blue shade and let it melt in with the winged eyeliner. - This will create a completed eyeshadow look.
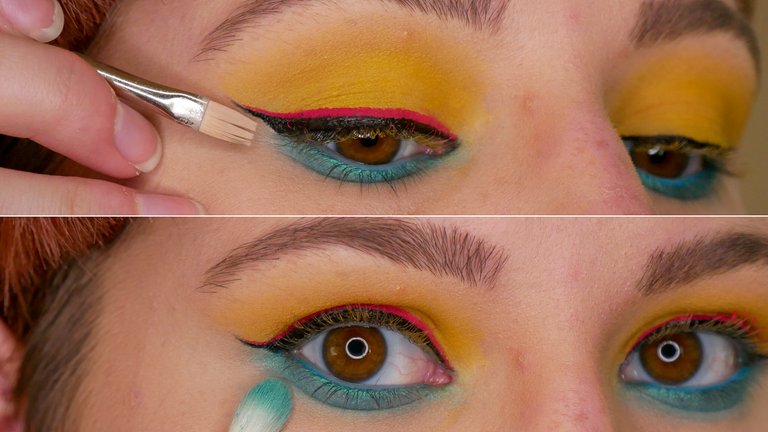
Step 9: Brows
Fill in your brows with brow pencil or brow pomade, depending on how you are doing your brows. Don’t overdo it too much, keep it simple and natural. Fill in any spear areas and softly line your lower brow line. In between, you can brush through your brows with a spoolie or a brow and lash comb.
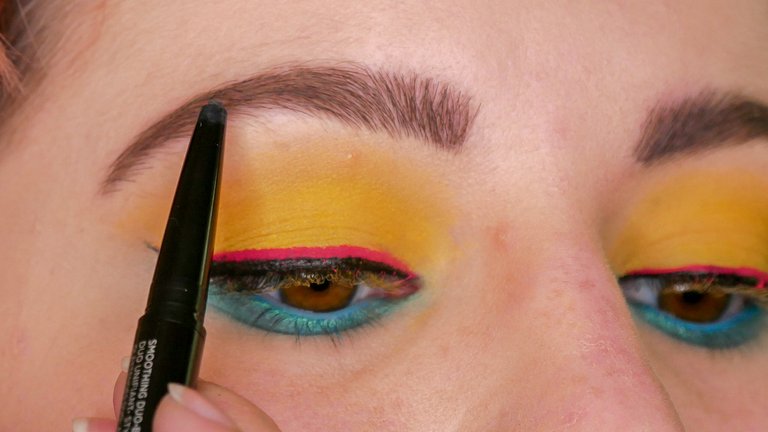
Step 10: Brow Gel
To set your brows, you could choose a clear or tinted brow gel and brush them in place so that they will stay in place all day long and you don’t have to worry about it.
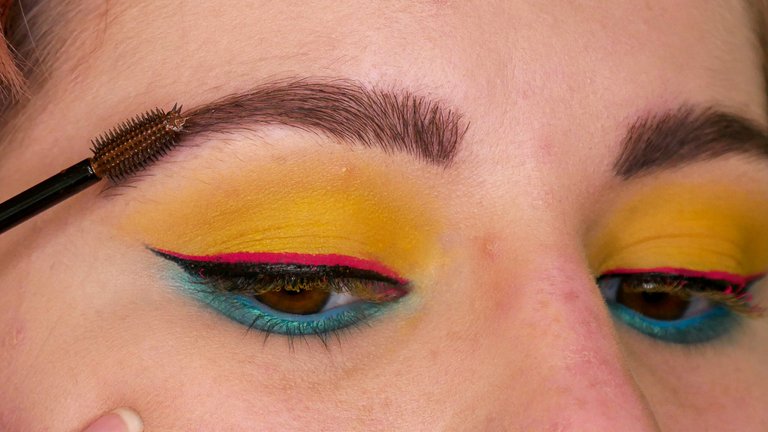
Step 11: Highlighter
Add some liquid or powder highlighter in the inner corner of your eye and under your brow bone. If also needed on the other higher points of your face such as nose, cheekbones…
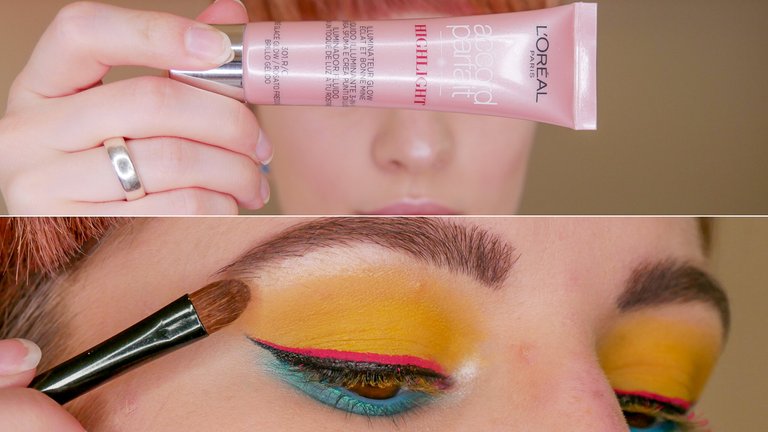
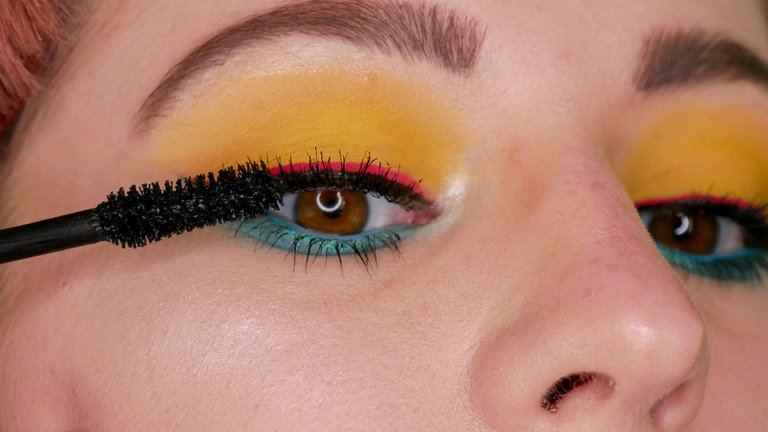
Step 12: Mascara
Add a few coats of mascara to finish your whole eye makeup look.
Step 13: Lips
Last but not least lips, because there is so much going on, on the eyes, we can keep it natural and fresh on the lips. Choosing a nude or lipstick shade that’s close to your natural lip color will round up the whole makeup look.
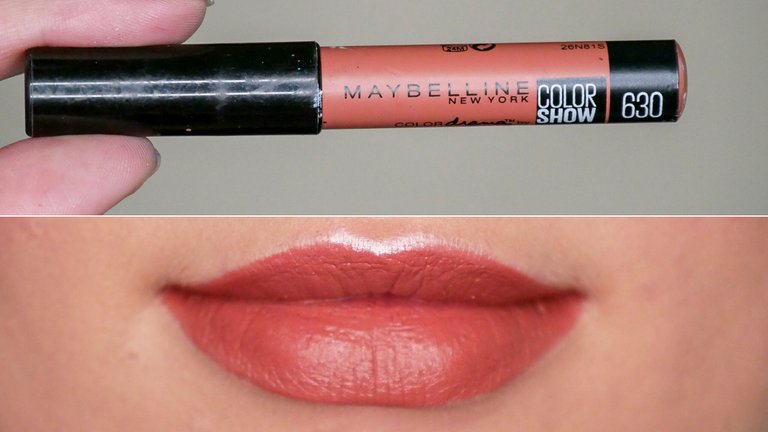
Don’t forget also to add a little blush to your cheeks (:
That’s it, guys! If you have any ideas or recommendations for any makeup looks you want me to do, let me know, I’m always open to something new (:
Here is also the video for this Eye Makeup Look :
Exceptional Communities on Steem
Exceptional Services an Dapps On Steem
Join The Ecological Movement Become a Part Of


Extremely well done!
Really impressive results worth sharing. Thanks for doing so.
Namaste :)
Very nice
I love the blend of colours, it reflects the glow in sunshine. Excellent for a fair skinned person.Great job!
I just loved it. So colorful and sunny :D
I commend you for your ability to put your readers through a comprehensive walkthrough on getting this Eyemakeup look, the addition of a video tutorial (aside from the detailed steps mentioned above) to this feed made it perfect. Authors like you deserve more publicity on this platform for coming up with Original content like this.
Oh wow this is awesome!! I need some makeup tutorials!! I’d love to learn new skills in makeup so I’ll follow :-)
Yet another amazing post and makeup job. The colors are perfect. Sunny day blue skies - perfect look :)
This post was nominated by a @curie curator to be featured in an upcoming Author Showcase post on the @curie blog. If you agree to be featured in this way, please reply and:
You can check out the current Author Showcase to get an idea of what we are doing with these posts.
Cheers - Carl (@curie curator)
Wonderful, I love how colourful this is! I just resteemed it :)
The idea behind the makeup is simply interesting and amazing. 💓 I love sunshines ✨
looks exactly like a sunset on the beach! love!
WOW :-o Love the pink and the blue!!!! 100% my colours!!
i voted for you, and you should also vote and follow me.
Author showcase post is up :)
https://steemit.com/curation/@curie/curie-author-showcase-april-27th-2018
cool! Love to learn from you , have follow you