If you’ve only eaten potatoes from the market, you’re missing out on a lot of fresh flavor. Home-grown potatoes are incredibly tasty, easy to grow, and honestly, there’s nothing quite like the feeling of digging up a hill of potatoes and finding all those sweet tubers just waiting to be eaten. You don’t need to even have a garden to grow them—they grow well in containers as well. All you need is sun and a bit of know-how.

So without further ado, here’s a guide to growing your own tasty tubers.
How to Plant Potatoes
If you live in the Pacific Northwest (Cascadia), now is technically the time to get them in the ground if you’re planting outside.
When to Sow: March-May; August for second cropping
Harvest: August-September; late December
Germination: 7-14 days
Full Sun
Preparing the Beds
Choose a sunny location where nightshades (tomatoes, potatoes, peppers, etc.) haven’t been grown in the last two years. Prepare the soil with plenty of well-rotted manure and/or other organic material. Potatoes flourish in fertile, well-drained soil, but can do well in many other soil types. In fact, if you’re not too particularly worried about the looks and getting a huge yield, you can grow them just about anywhere in Cascadia. Still, they do best in sandy or loamy soil.
In Cascadia we tend towards more acidic soils and potatoes prefer a pH between 5.2-5.8, which means some soil amending might be in order. If you know your soil is below 5.2 and you’re planting this year, choose dolomite limestone over straight agricultural lime. Agricultural lime in the wrong proportions can cause scabbing. (If you’re preparing a bed for next year, agricultural lime will work fine.) It’s best to lime your soil well before planting (months, if possible). Of course, that doesn’t do much good now at planting time, but for future reference consider amending in the fall. Also, it’s well worth it to test your soil—pH tests are quite cheap and easy to do.
If you’re trying to plant out now (late March) the soil might still be too water-logged, so it might be best to chit your potatoes until the soil dries out a bit more. (Ours is heavy clay, so as much as I’ve been chomping at the bit, I’m holding off a bit longer.) For more information on chitting, go here.
There are many ways of planting potatoes—hilling, planting them in a pit, etc. If you’re doing it pit- or trench-style, work the soil to a depth of 6-8 inches. If you’re using containers or bags they’ll need to be able to hold at least 2 gallons. (We use 5 gallon pots.) Fill them about 1/3 full with good compost. Place a single, ideally chitted tuber into the compost about 5 inches deep with the shoots pointing upwards, then and add another 4-6 inches of soil on top. Place in a sunny location and water regularly to keep compost moist.
 )
Here we have three different varieties. The red on the left is an early potato. The yellow finn in the middle is a mid-season potato, and the russet on the right is a late season potato.
Cutting
Larger potatoes will need to be cut into pieces. The ideal piece will have as few cut sides as possible, and will be about the same size and weight as a golf ball. They will also have to have at least 3 eyes apiece. There seem to be two theories of thought on cut potatoes. One says to plant them right away. The other says to let the cuts heal for a couple of days before planting and then dust them with a bit of agricultural sulfur. Both ways have worked fine for me, though I tend to just cut them and plant them.
If you’re planting into a garden, sow the seed potatoes into trenches 4-8” deep, 15" apart, and with 2 feet between rows. Keep the soil from the trench nearby, as you’ll need it later. You can work compost and/or organic fertilizer into the bottom of the trenches if you like. We use Steve Solomon’s recipe, though we swap out the lime for oyster shell in potato trenches.

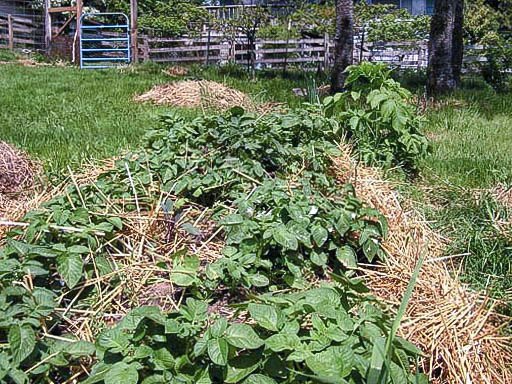
Hilling potatoes with straw.
Hello @teryani,
Just wanted to say hi and let you know that your wonderful post have been picked up for the weekly Sustainability Curation Digest in association with Minnow Support Project.
Your post will be upvoted by @msp-curation bot on behalf of MSP.
Thanks for writing awesome content and if you have some time, make sure to check out some of the other posts from this week.
Sustainability Curation Digest #2 🌄🌍🌝 by Carpedimus - MSP
Keep up with the great work :) and thanks for sharing!
Thanks for the helpful tips! I'd not thought of digging trenches. We have about an inch of topsoil over heavy clay. We planted about 4 pounds last year but blister beetles ate the tops before they flowered so the growth was stunted. I want to grow many potatoes this year but haven't figured out a solution for keeping the blister beetles away. Do you have any suggestions?
I've never had blister beetles. The first things that come to mind is whether there's any type of row cover that would help. Second is companion planting. Third is learning what attracts the beetle to both your region and your potato (for example, is it because your potatoes were lacking in a nutrient?). Good luck. (I'm also planting in clay this year...)