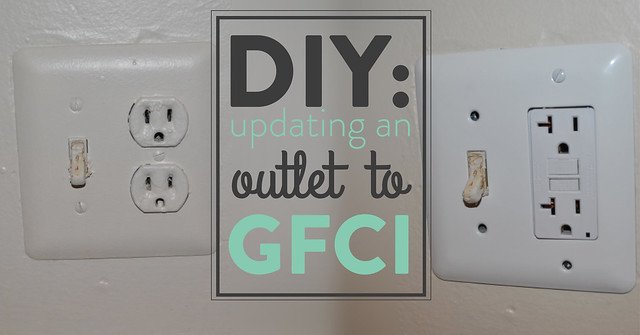
You may have noticed that in some areas of your home your outlets look a bit different than others. Some outlets in your kitchen or bathroom may have two buttons with “test” and “reset” on them. These outlets are called GFCI outlets, and are an important safety feature in modern electrical systems.
What is a GFCI Outlet?
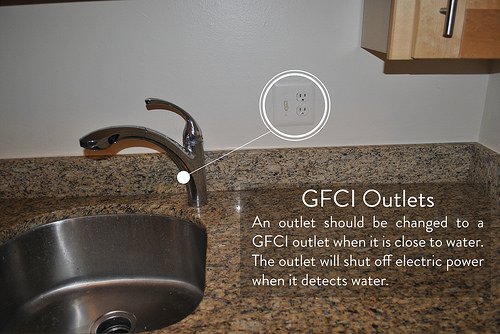
GFCI stands for Ground Fault Circuit Interrupter. This type of outlet constantly monitors the electric current running through it. If there is any inconsistency with how much current is going out of the outlet versus how much is returning into the outlet, the GFCI can automatically shut off the current. This is important for many kitchens and bathrooms since these outlets are usually near water. Without the GFCI outlet, if something were to happen and an appliance was plugged in and fell into water, the electricity would travel through the water and could cause a deadly shock. Instead, the GFCI shuts off the power when it can tell the current has changed, ensuring that the electrical current does not travel somewhere it shouldn’t – like into water or into you!Read more about GFCI Outlets here!It’s important to update your outlets within your kitchen or bathroom to GFCI outlets to protect you, your family and your home from shock and electrical fire.
How to Change a Normal Outlet to a GFCI Outlet
Materials you will need for this DIY project:
Wear rubber soled shoes while you are completing this project. Although you will be shutting electrical power off to the outlet, you want to make sure that you are taking any and all precautions possible.
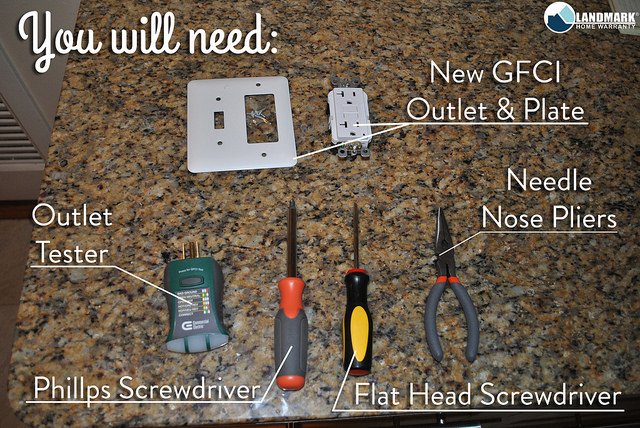
You’ll need:
- A new GFCI outlet and outlet plate
- A flat head screwdriver, for removing the outlet plate and old electrical outlet
- A Phillips screwdriver, for replacing the GFCI outlet, and tightening the connections.
- A wire stripped and cutter, or needle nose pliers, to bend and shape the electrical wiring.
- An electrical outlet testing tool, to ensure the outlets are working properly, or do not have current running through them.
Ensure the outlet is off before beginning this project
To begin, plug your outlet tester into the outlet you want to convert to a GFCI outlet. Although many outlet testers are similar, you’ll want to read the instructions for yours to make sure you understand what it’s telling you. Make sure that the electrical connection is on.
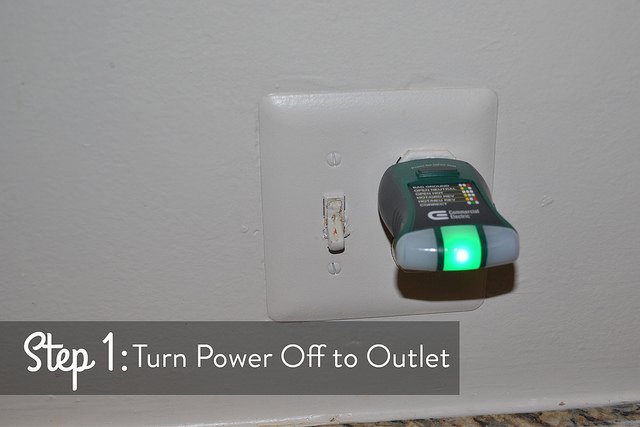
Next, go to the circuit breaker box and turn off the corresponding circuit to your outlet. Ensure that there is no electrical connection flowing through the outlet by using your outlet tester.

Remove old electrical outlet from the outlet box
After you have ensured that there is no electrical connection to this outlet, take off the old electrical plate.
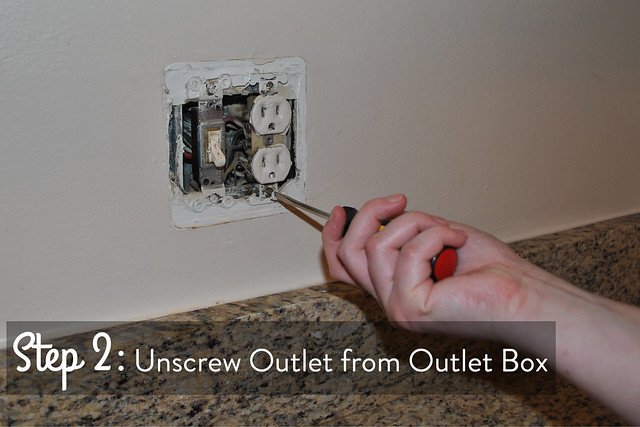
Then, using your flat head screwdriver, unscrew the old outlet from the electrical box.
Gently move the old outlet from the electrical box.
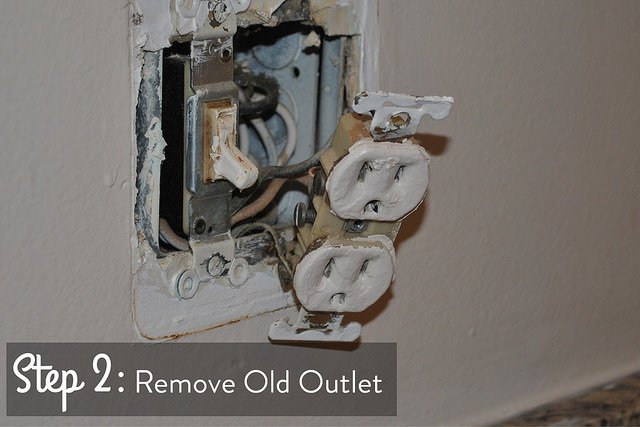

Remove the wires connecting the old outlet to the electrical system
After you have pulled the old electrical outlet out of the outlet box, you will want to unwire it.First, take a look at how many lines are connected to the outlet. If you see that there are more than three lines connected to the outlet, you need to call a qualified electrician. However, if you only have three lines connected to the outlet, you can proceed as follows:Always begin this process by disconnecting the “hot” wire on the right side of the outlet. This is the wire that brings the electrical connection to the outlet from the circuit breaker box. It usually has black insulation and is always connected to the side of the outlet with the brass or gold screw.
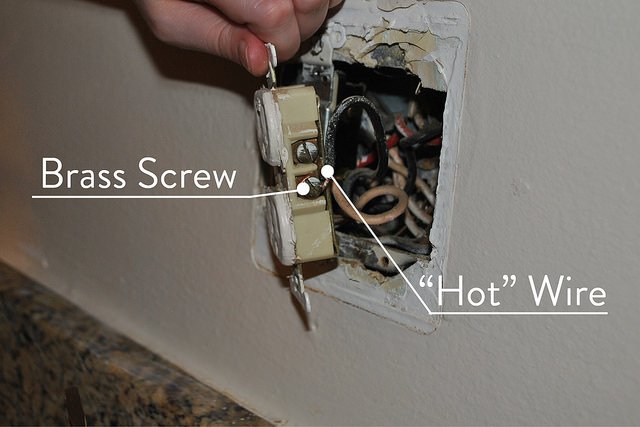
Using your flat head screwdriver, unscrew the screw on the outlet and remove the wire from the old outlet.
Next, you’ll want to remove the “neutral” wire, on the left side of the outlet. This wire completes an electrical circuit when you plug something in, bringing the electrical current back to the circuit breaker box. This wire should be white, and connected to the silver screws.
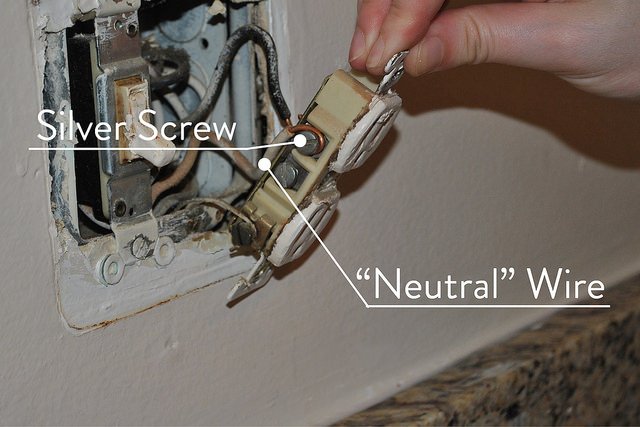
Unscrew the silver screw and carefully remove the wire from the old outlet.
Finally, remove the grounding wire. If your outlet only has two wires (and two holes) you will also need to call a qualified electrician about installing a grounding wire into your electrical system.The grounding wire is connected to the bottom of the outlet and is usually bare or in green insulation. The grounding wire may be connected to a green screw. Unscrew the bottom screw and release the grounding wire.
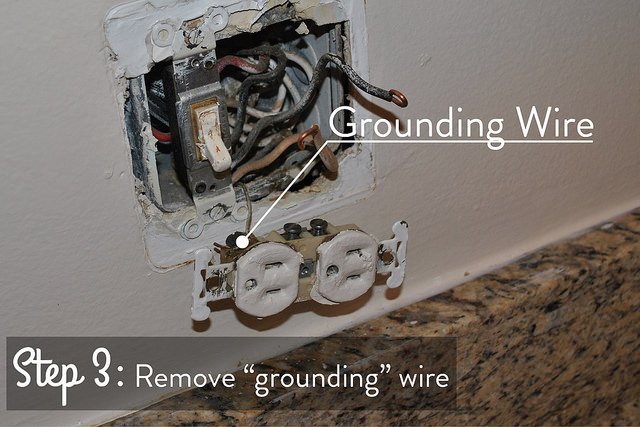

Rewire the GFCI outlet to the electrical system
After you have removed the old outlet, you can begin replacing it with the new GFCI outlet.Using your needle nosed pliers or wire cutter, make sure the wires are straight and able to be put into the new GFCI outlet.As you begin, turn the outlet over. You should have four different screws, two brass- or gold-colored screws and two silver-colored screws. Your GFCI outlet should tell you (by placing tape over them, or somewhere on the back) which of these screws are line screws, and which are load screws. You only want to be rewiring your GFCI outlet into the line screws. The load screws are for qualified electricians. Pay attention to where the line screws are on your GFCI outlet and only proceed if you are sure you know where to put your lines into the new outlet.
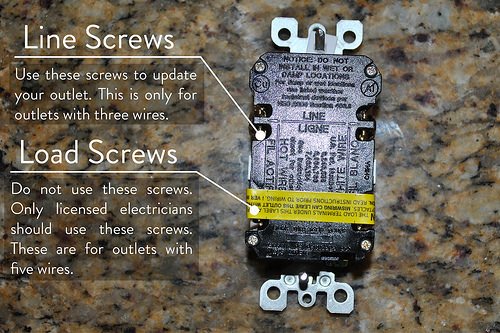
Unscrew the three screws you will be using so you can easily insert the wires into the holes of the new GFCI outlet.Next, you’ll want to rewire the outlet in the opposite way you disconnected the old outlet. Put the grounding wire into the outlet first and tighten the screw using the Phillips head screwdriver.Next, replace the white “neutral” wire on the left side, with the silver screws, and tighten it.
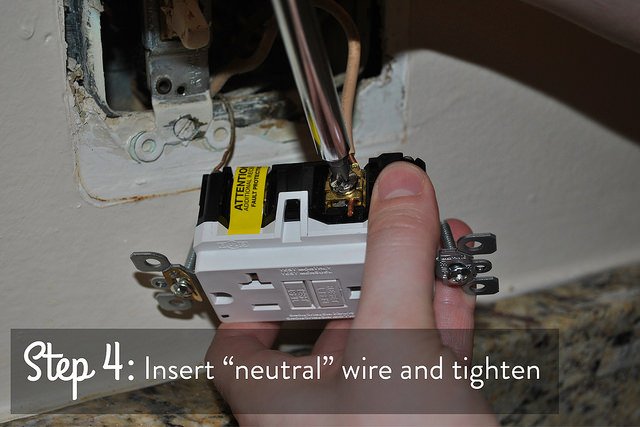
Finally, replace the black “hot” wire on the right side, with the brass or gold screws, and tighten that.

Replace GFCI outlet into the outlet box
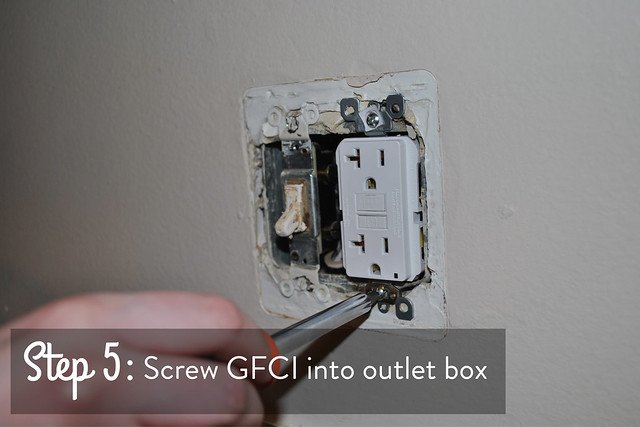
Carefully bend the wires so the uninsulated parts don’t touch each other and put the outlet back into the outlet box. Screw the outlet onto the box.

Replace outlet plate
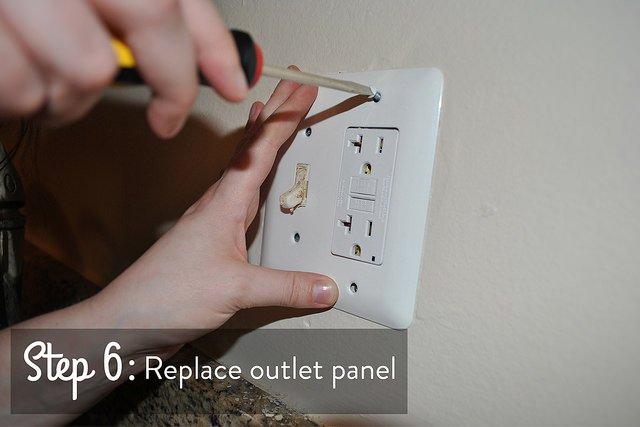
Now that you have a new GFCI outlet, most older outlet plates won’t work. Make sure the outlet plate you use is correct and fits properly. Use the flathead screwdriver to replace the new plate.

Turn on circuit for outlet
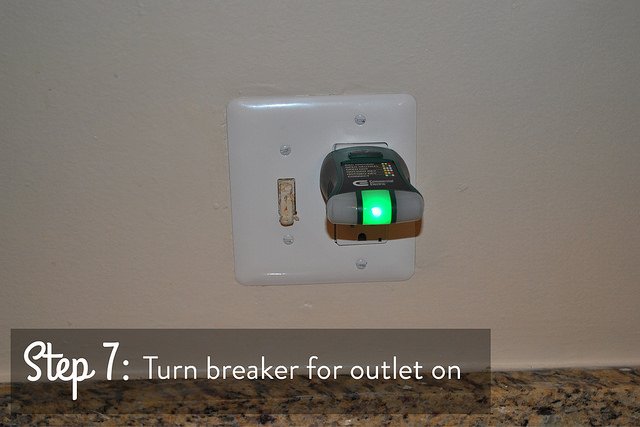
After you have made sure the outlet is installed correctly, flip the circuit breaker back on to test the outlet. You may need to push the “reset” button in the center of the outlet for electricity to begin flowing.

Test GFCI outlet
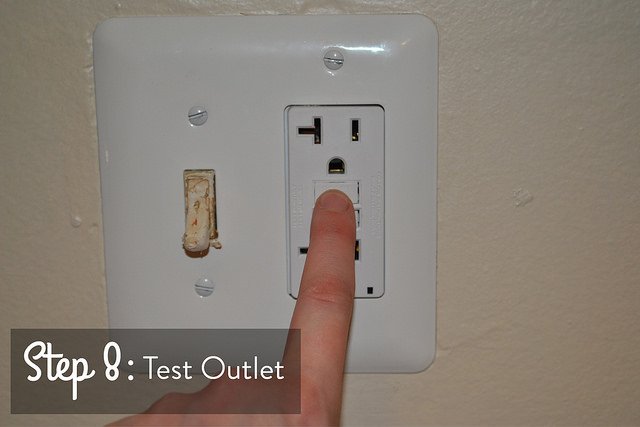
Finally, test the outlet to make sure it is operating as a GFCI outlet should be. Insert your electrical outlet tester and ensure it is showing that electricity is flowing.Push the “test” button on the outlet. This mimics what happens when some appliance has fallen into the water and should cause the GFCI outlet to shut off electrical power. If your electrical outlet tester shows there is no power flowing through the outlet, it should be working.Make sure to put the “reset” button to get electricity flowing through the outlet again.That’s it! If you have successfully completed all of these steps, you have replaced your normal outlet with a safe and secure GFCI outlet. Make sure to test your GFCI outlets by pushing the test and reset buttons and using your electrical outlet tester every month to make sure they are still functioning properly. If you have any electrical questions or concerns, call a qualified electrician. If you have a Landmark home warranty, you can also give Landmark a call.If you want to get your home’s electrical system protected and save hundreds of dollars on repairs and replacements around your house, consider a home warranty. A home warranty provides peace of mind for homeowners, and ensures that you never pay full price for a repair or replacement if it included in your contract
thanks my friend for your opinion and ... off course what are saying is a good way to do.....