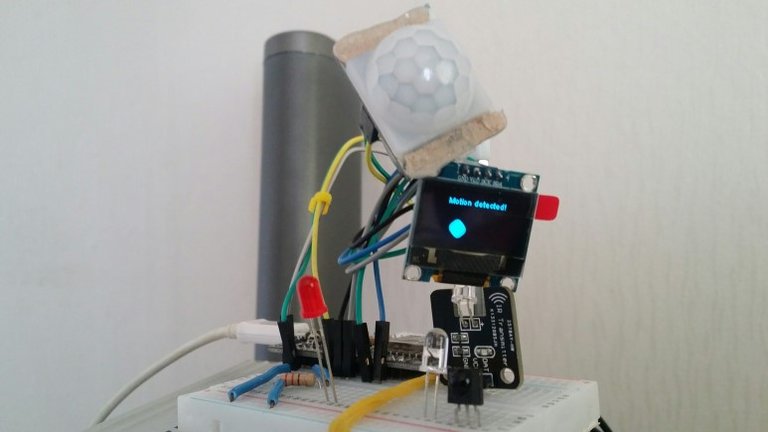
이번에는 인체감지센서를 보드에 연결하고 인체가 감지되면 어떤 동작을 하도록 해보자. 인체감지센서에 대한 자세한 내용은 아래 링크를 참조 하자.
http://cosmosjs.blog.me/221159214131

감지센서의 3개의 핀을 보드와 연결해 주면 되는데 시그널 핀을 보드의 D6(GPIO 12번)과 연결했다.
이제 센서에서 동작이 감지되면 뭔가 해주면 된다. 간단한 소스를 작성했다. 더 간단히도 될것 같은데 풀어서 작성했다.
<소스보기>
#include <Wire.h> // Only needed for Arduino 1.6.5 and earlier
#include "SSD1306.h" // alias for #include "SSD1306Wire.h"
// Include custom images
//#include "images.h"
// Initialize the OLED display using Wire library
SSD1306 display(0x3c, D2, D1);//D1는 SCK(SCL), D2는 SCA과 연결한다.
int sensor = 12; //D6
int w = 128;
int h = 64;
int rad = 10;
float xpos, ypos;
float xspeed = random(1,3.0);
float yspeed = random(1,2.0);
int xdirection = 1;
int ydirection = 1;
String message;
void setup() {
Serial.begin(115200);
Serial.println();
Serial.println();
pinMode(sensor, INPUT);
message = "Ready...";
xpos = w/2;
ypos = h/2;
// Initialising the UI will init the display too.
display.init();
display.flipScreenVertically();
display.setFont(ArialMT_Plain_10);
display.setTextAlignment(TEXT_ALIGN_CENTER);
display.clear();
}
void loop() {
//sensor
long state = digitalRead(sensor);
if (state == HIGH){
message = "Motion detected!";
xspeed += 0.2;
yspeed += 0.2;
} else {
message = "Motion absent!";
xspeed += -0.2;
yspeed += -0.2;
}
// clear the display
display.clear();
//update the position of circle
xpos = xpos + (xspeed * xdirection);
ypos = ypos + (yspeed * ydirection);
if(xspeed > 3 || yspeed > 3){
xspeed = 3;
yspeed = 3;
}
if (xspeed <= 0 || yspeed <= 0){
xspeed = 0;
yspeed = 0;
}
//revers its direction
if (xpos > w -rad){
xpos = w-rad;
xdirection *= -1;
}
if (xpos < rad){
xpos = rad;
xdirection *= -1;
}
if (ypos > h - rad ) {
ypos = h-rad;
ydirection *= -1;
}
if(ypos < rad){
ypos = rad;
ydirection *= -1;
}
//draw circle
display.drawString(w/2, 5, message);
display.fillCircle(xpos, ypos, rad);
display.display();
delay(10);
}
작은 모니터이지만 디바이스가 제대로 동작하는지 체크하는 용도로 괜찮은것 같다.