Nichiyou Daiku - Sunday Carpenter
Let's build an entryway bench!
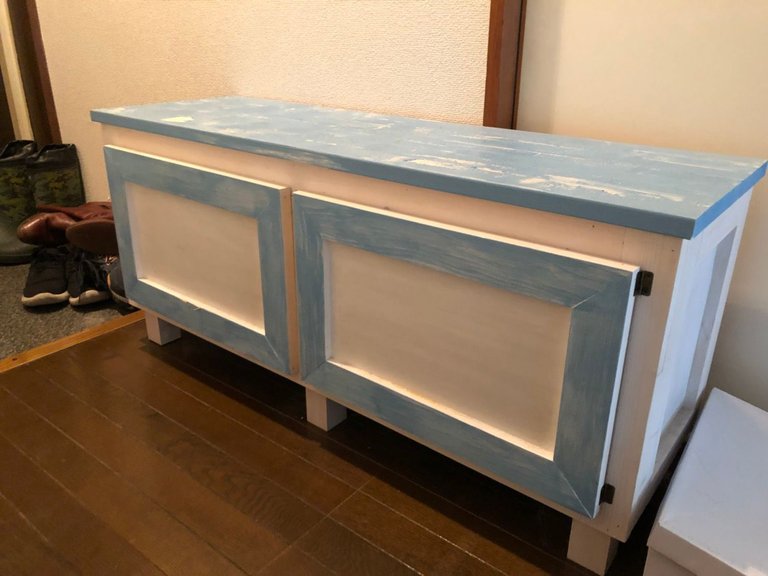
There's a phrase in Japan for the men who build things on Sundays, Nichiyou Daiku, Sunday Carpenter. My wife asked me to build her a small entryway bench so she could store shoes and have a place to sit when taking her shoes off. So, one Sunday I broke out the tools and this is what I made.
Design
The first rule in life is to have a plan. Carpentry is the same! Sit down and sketch something out on paper to determine the materials you'll need as well as assuring you won't build some monstrosity.
Many things like desks and cabinets have standard sizes, for example a desk usually stands between 29 - 30” to the top of the work surface. A sitting bench stands at about 18” tall. Of course there are slight variations depending on the users, but those are standard sizes. Once you know your overall dimensions you can then work backwards to determine your measurements.
Unfortunately I left my book that had my drawings in it back at my house in Japan so I can't show you the sketches I did.
Materials
In Japan getting the normal raw materials I would usually use is a challenge. Melamine(White material used in cabinetry, think IKEA), shop grade plywood, maple and other hardwoods can’t be purchased at the home centers like the can in the US. You are stuck with lower grade plywood like Luan and soft boards like pine or douglas fir.
So for this bench I had to settle with luan plywood for the box, pine for the face frames and top and MDF for the door panels.
Building It

Building cabinets is actually quite easy as long as you have the tools and get that initial design drawing right. It’s just a box with a face frame, toe kick or feet, doors, end panels and a top. Measure twice, cut once.
The trick to making cabinets is making sure everything is square, which is also easy enough to do. In order to check if a box is square, before putting your back on you measure form one corner to the other diagonally, then do the same for the other two corners. They should measure equal distances. If they don’t you can just push each diagonal in the opposite direction until they line up. Once they line up you glue and nail the back on and your box is done.
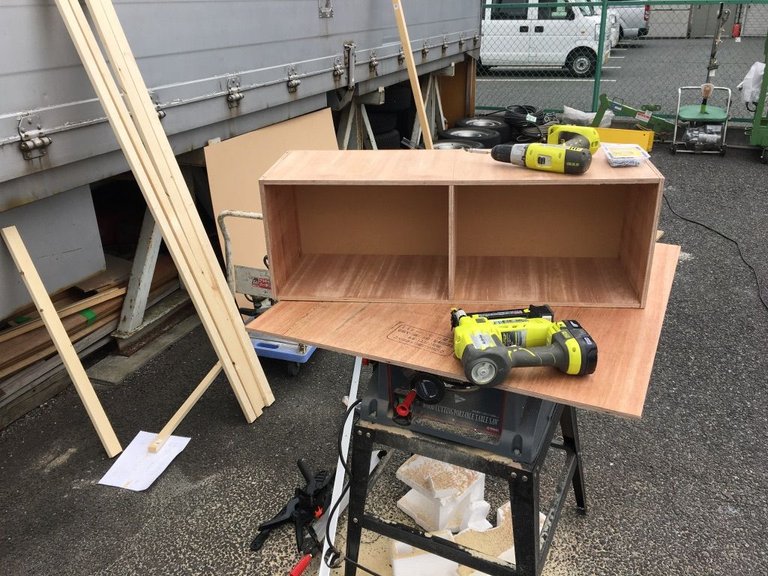
Another way to do it is to cut triangular blocks to fit in the corners.
Once the box is built you double check the measurements of the box with the measurements you made when doing the drawings. If everything checks out you can move on to the face frame end panels and doors..
Face Frame, End Panels And Doors
The face frame and end panels are used to cover the exposed edges of the plywood or what ever material you used to make the boxes out of. This gives it a finished edge and dresses up the cabinet a bit.
The end panels go on the sides of a cabinet. They are like a door, but fixed in place.
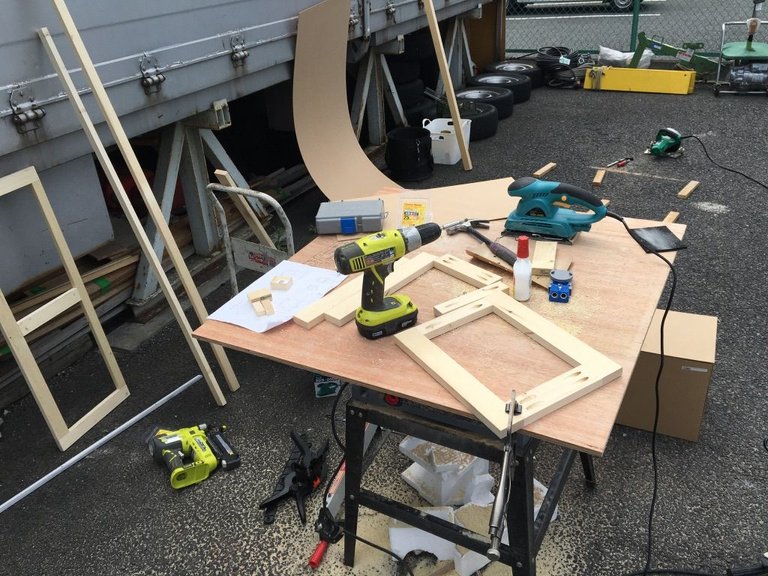
For this entryway bench I made the face frame, end panels and door styles & rails 2.25” wide and the bottom rails 1.25" high. You can choose to make them any width and height you like depending on your taste, but generally 2.25" is a standard size.
When cutting the face frame the styles(vertical) run the full height of the box, while the rails(horizontal) sit in between the styles. If you have a center style that usually will sit in between the rails, making it smaller than the other styles. Same process for end panels and doors.
Attaching the end panels is easy. Just clamp them on to the side of the box, then pilot a hole on the inside of the box for the screws. Screw each corner and you're done! Simple.
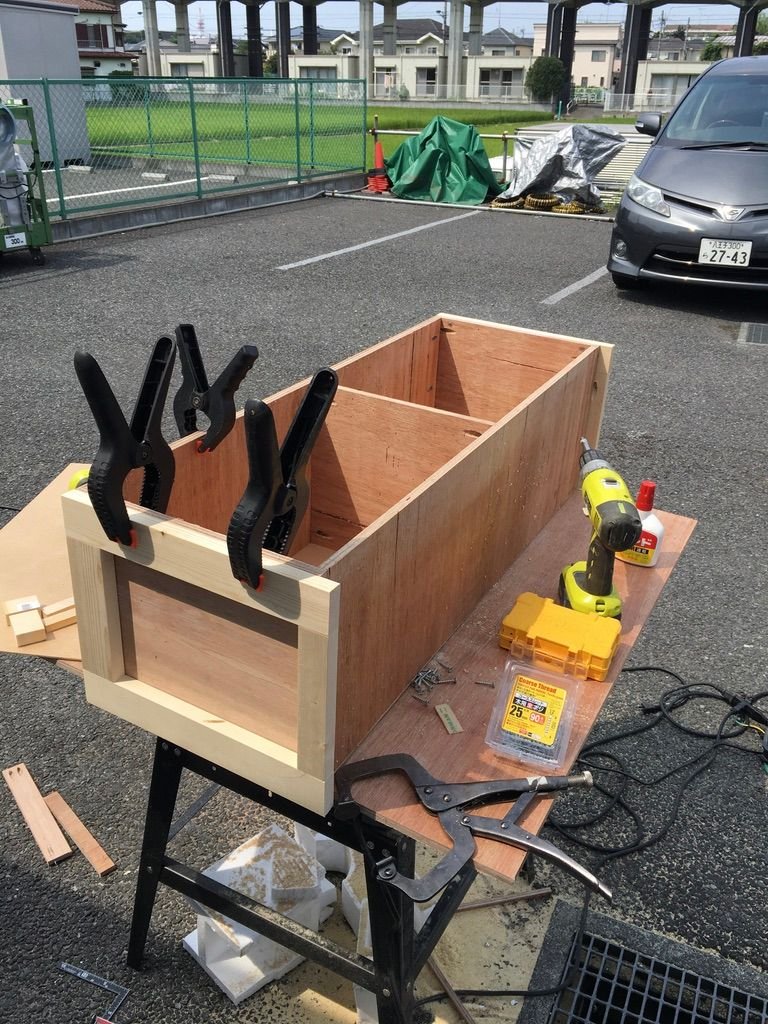
After attaching the end panels you can attach the face frame to finish it off.
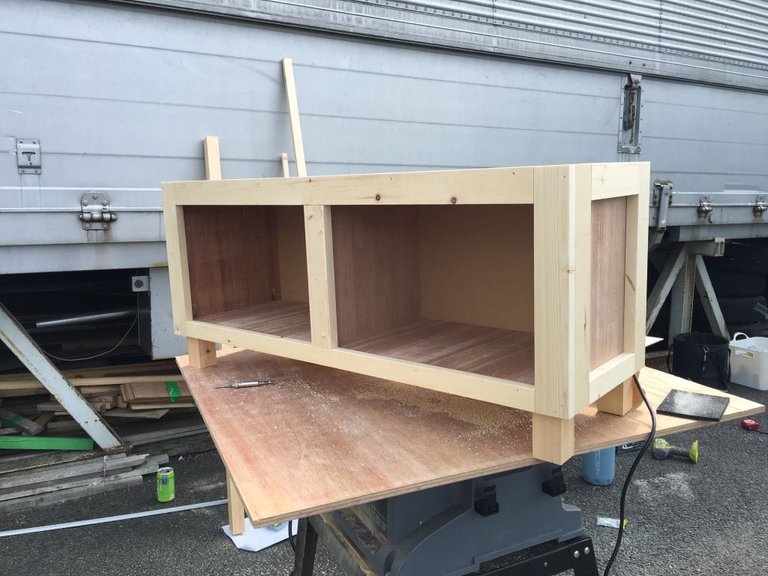
I added 3" x 3" blocks for the feet as you can see in the picture above.
Next up assembling the doors. Doors are a different animal because they must be square, have to be straight and assembled properly otherwise they will warp, not open/close properly, etc. I usually have my doors made by a professional shop because they have special machines to cut and shape them, but in Japan I am the shop.
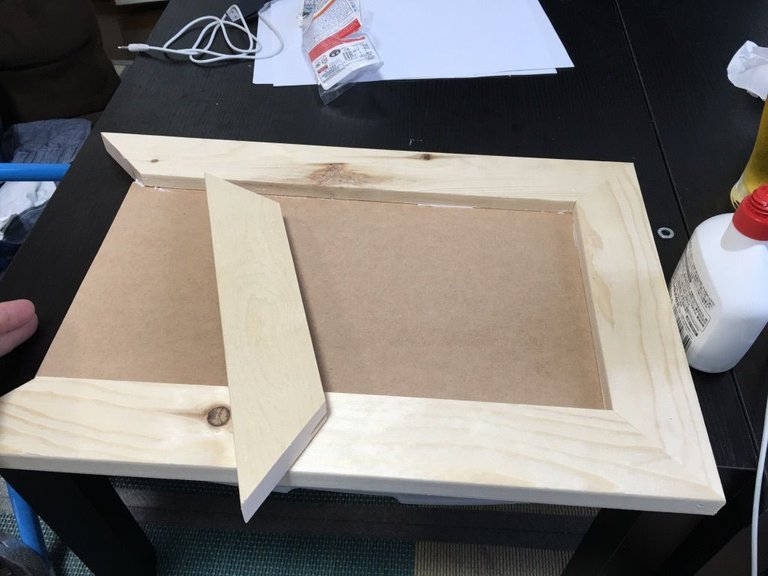
I had to use my table saw to cut a dado, small channel, in the styles and rails so I can slide the mdf panel into them. Cutting these dedo's creates a problem though, it will expose the dedo on the outside of the door, so I cut them at a 45 degree instead of square.
The same process we used to square the box, we use to square the doors. Measure from corner to corner diagonally tomake sure they measure equal distances.
Once the doors are done then I build the top. I used three boards, with the center board being thinner so I could span the top. I let the top over hang the front of the box by 1" and 0.25" on the sides. This gives an overhang of about 0.25" once the doors are put on.
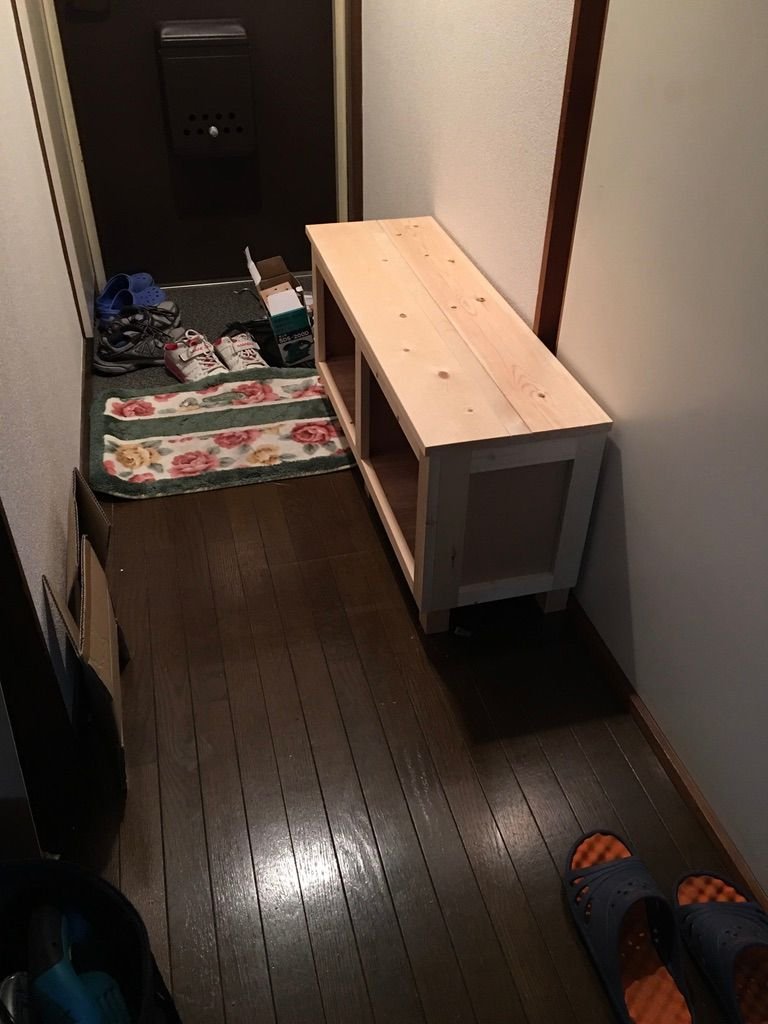
Next up attaching the doors. Usually I would use soft closing, euro hinges, but getting them in Japan is a pain in the ass, so I settled for just simple butt hinges. They actually add a bit of character to the piece so it worked out.
Lastly was the finish. My wife wanted an antique, blue & white finish. So we both painted it with the base coat, white then used a blue antiquing paint that cracks and peels when it dries.
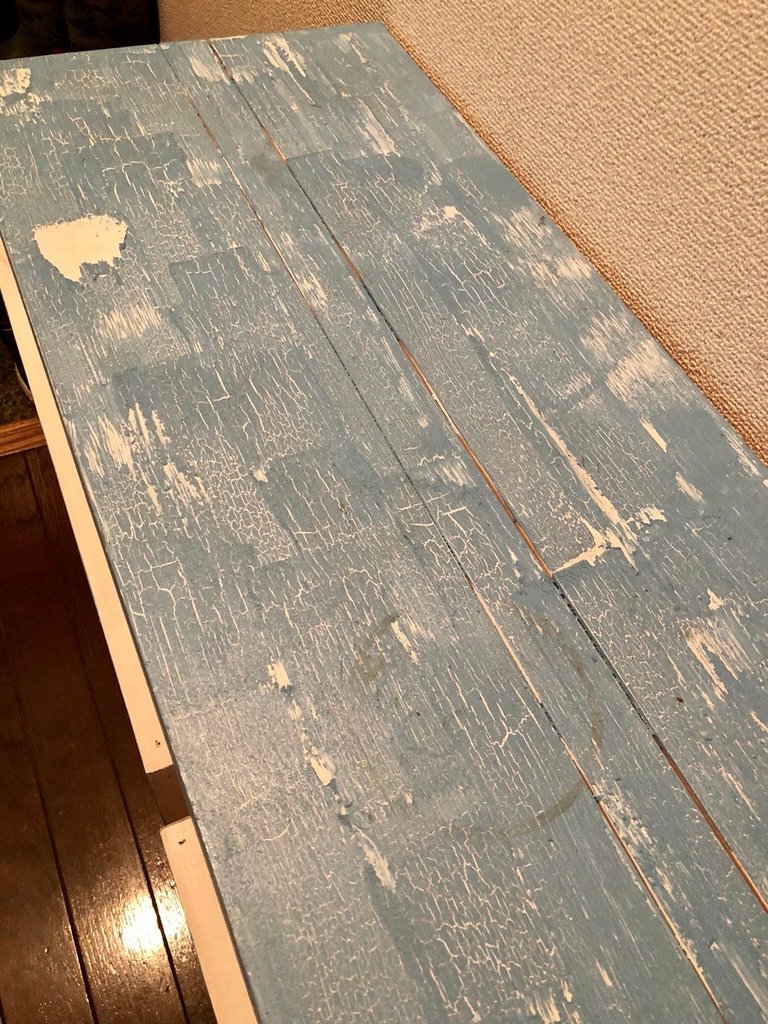
There are still a few things that need to be touched up, nail holes, seams that the paint didn't reach into, but other than that, not bad for a day's work. My wife is happy and that's what matters.
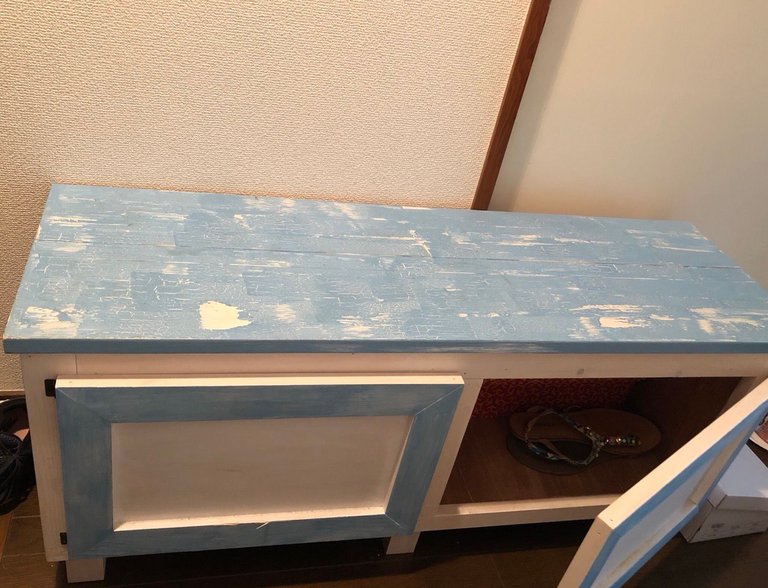
In closing, the power tools I used were, a circular saw, a chop saw, a table saw, a sander, a cordless drill/screw gun and a cordless nail gun. The materials cost about $50 not including the paint.
Thanks for reading!

I am part of Steemit Blogger Center.
Steemit Blogger Central is building communities and empowering Leaders.

- Follow me for stories on Japan, Gems & Minerals, Crypto, DnB, Cali & living life!
- Follow my wonderful wife for her adventures! @tokyowomanslife

Thanks for reading!
Our Steemit Blogger Central Discord community is here:

Discord:
https://discord.gg/e5XFZKa
If we have the tools, we can do with wood everything we want to do, the limit will be given by our imagination.
There are always useful things that we can do and there will be a place in our home where we can place them, besides this piece of furnitureThe carpentry work is comforting my friend @rt395
Thank you @steemito. I agree, if we have the imagination we can do it!
アルファベット表記の日曜大工、新鮮です。@rt395さん、器用なのですね。
@ yasu24さん、ありがとうございます。 日本におれのニックネームは棟梁です。😅 もっと時間と、より良い道具と、より良い材料を持っていれば、はるかに良い家具を作ることができます。
日曜大工の域は超えてますね!
プロ!すごーい!!
@denjiroさん、ありがとうございました。まーまです。。
You got a 1.00% upvote from @postpromoter courtesy of @rt395!
Want to promote your posts too? Check out the Steem Bot Tracker websitevote for @yabapmatt for witness! for more info. If you would like to support the development of @postpromoter and the bot tracker please
Wow, really impressed @rt395! Furniture making is always so impressive to me. I did a short furniture making course a while back and it's amazing how complex a subject it is. I haven't made anything recently but am determined to give it a go soon! Thanks for the inspiration and keep up the good work.
Certain furniture is actually difficult to make, but any sort of cabinet is very easy though once you get the hang of it. There are so many good tutorials on-line now anyone can do it as long as you have the tools and time. Thanks.
すごーい✨ Great job👍
売り物みたいですね‼
私の日曜大工のレベルは、犬小屋に色を塗ったくらいです(笑)
ありがとうございました。 これは基本的なものでした。より良いプロジェクトについて書くつもりです。
やさしい旦那さまですね♥日曜大工できる人すっごくカッコいいです😁✋
今日からsteemit jp 関西マネージャーのチャンス頂きました♥宜しくお願い致します。
@mihoさん、それは良いニュースです!おめでとうございます!もっと関西のユーザーが必要です!
Nice work. And well explained.
We have started a woodworking community here on steemit and would welcome you. We have a discord channel, link here: Woodworking on Steem Discord Channel And a weekly woodworking post competition ,
you can read the post here
Thanks
Thanks for finding me @jist. Happy to join you guys and learn from everyone. I live part time in So. Cal and part time in Tokyo. I've got lots of stories to tell and I'm looking forward to hearing lots of stories. Cheers.
Absolutely great work on that! Blown away over here!
Nice work! Love the whitewash finish!
Thanks @canadianwoodguy. I would have gone dark, but the choice was up to the Mrs. so there it is. Whitewashing is cool though. In fact the post I am doing tomorrow is about a whitewashed deck I built in Japan.
Followed. Cheers.