TABLE OF CONTENTS
- Introduction
- The Dollar System
- Making Money
- The Parts System
This article was written under Jagged Alliance 3 Game Version: Larry (1.5.1)
I am happy to make any corrections if more accurate information is discovered. If you have any comments, you can either post here or e-mail me at: byzantinekitty@gmail.com
1. INTRODUCTION

Some newcomers to Jagged Alliance 3 complain that you can't sell excess equipment. While it's true that you can't sell your spare items for dollars, you can turn many of them into parts. If you think of parts as a secondary currency system, then you can essentially "sell" extra gear for parts.
This article will delve into the dollar system and the parts system, explaining how you can acquire and spend each of these currencies.
2. THE DOLLAR SYSTEM
In Jagged Alliance 3, dollars are mainly used for:
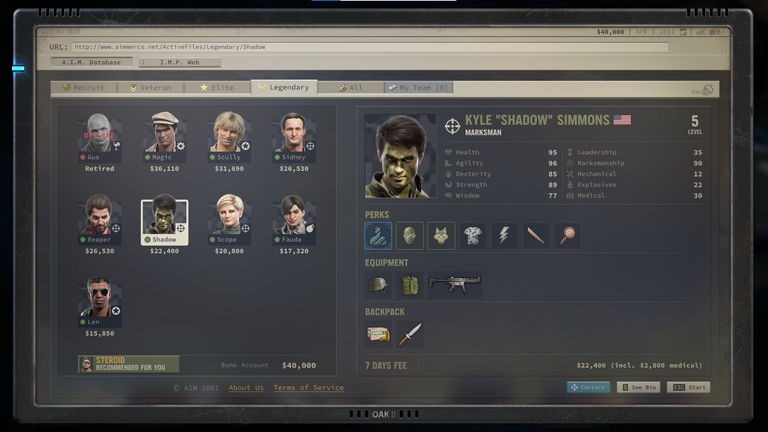
#1. Hiring mercenaries (including the customized IMP merc) and extending their contracts. While there are 5 special mercs that can be recruited and do not require a salary, all of the A.I.M. mercs in the game need to be paid in dollars.
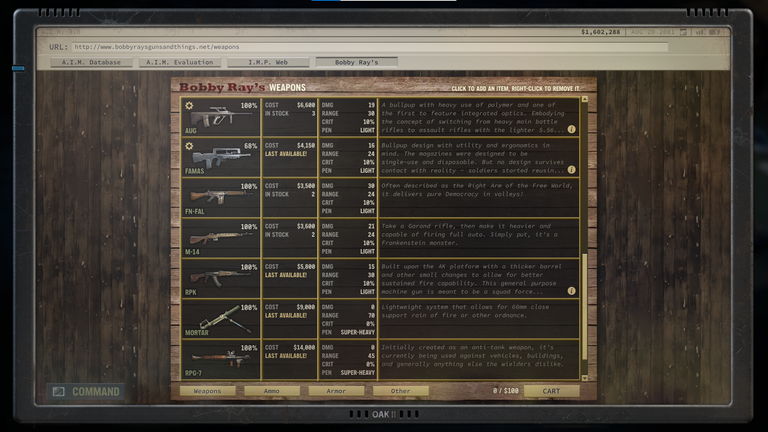
#2. Buying equipment from Bobby Ray's or local merchants in specific sectors. While it is possible to scavenge most of your equipment from loot that you find, that puts you at the mercy of RNG. Buying from Bobby Ray's or local merchants lets you round out your inventory to compensate for bad luck or to min/max what you need the most.
#3. Certain operations (such as Militia Training, R&R, Craft Ammo, and Craft Explosives) require dollars. Water travel also costs dollars based on distance, loyalty, and whether or not you have a Negotiator.
#4. There are some quest/dialog options to spend dollars but there aren't many, they are optional, and none are that important. For example, if you meet Martha and Herman at the Refugee Camp, one option is to give them $2,000. One way to open the clinic in Pantagruel is to donate $3,000. And if you want to talk to Headshot Hue you can give him $400, and then an additional $100 for some minor information on the President and the Major. There are also numerous cases where a character is willing to give you dollars as a reward but you have the option to forego the money to get a loyalty gain instead. While not getting additional money is technically different than spending money you already have, the end effect is the same.
Occasionally, you might find bags of Grand Chien franks. Unfortunately, due to inflation, the local currency is not worth very much and is not very liquid. There are only two places where you can spend Grand Chien franks:
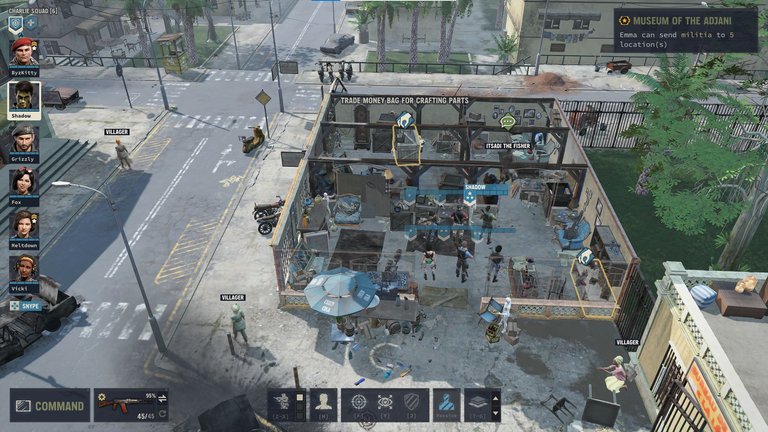
#1. In Port Cacao, Itsadi the Fisher sells random items for Grand Chien franks. This merchandise can include magazines, field resources (i.e. grenades), meds, crafting parts, detonator parts, special parts (i.e. chip/lens/steel pipe), and the red wig quest item. What he offers changes every few days so it can be beneficial having a merc near Port Cacao who can periodically browse Itsadi's wares.
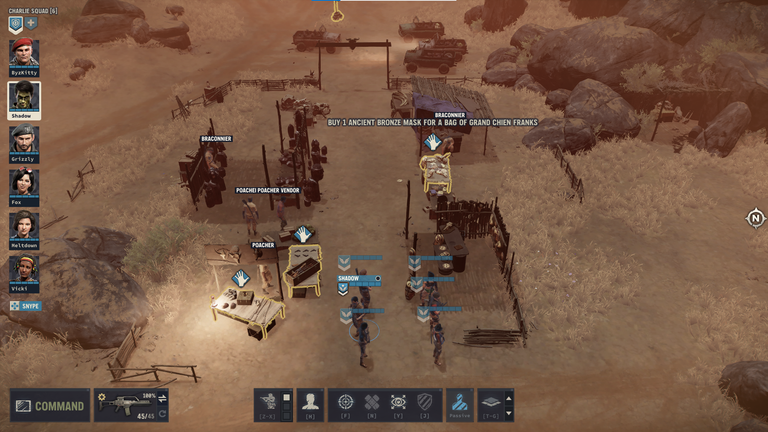
#2. At the Poacher's Camp, a local merchant sells an Ancient Bronze Mask that is purchasable with Grand Chien franks. This gets refreshed after a certain number of days. If you coerce the Gouverneur to fund Emma's museum, this essentially lets you convert Grand Chien franks into U.S. dollars.
3. MAKING MONEY
The next question is - how do you get more dollars? While there are a handful of guides discussing how to make money, I've personally found most of them to be incomplete. At the beginning of the game you start with $40,000 (First Blood difficulty), $30,000 (Commando difficulty), or $24,000 (Mission Impossible difficulty). Managing your cash flow is a critical part of the game. Here are additional ways to boost your income:
A. The primary source of income in Jagged Alliance 3 revolves around controlling diamond mines.
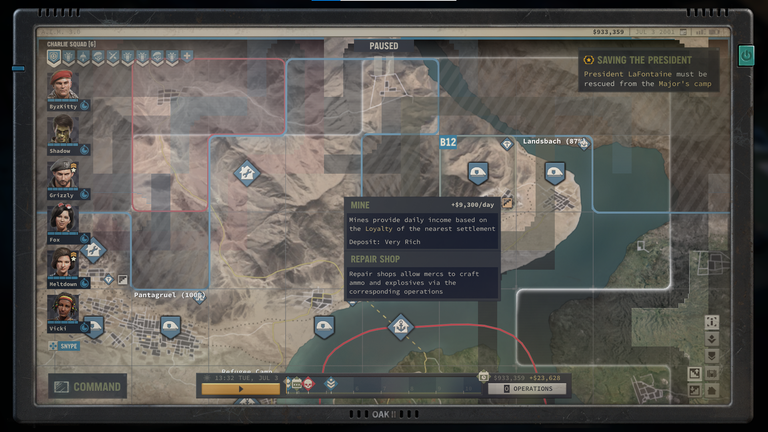
There are 7 diamond mines in the game - Mfumu's Mine, Diamond Red, Old Diamond, Fosse Noire, Drachenberg Mine, Wassergrab, and Belle Eau.
Mfumu's Mine, Diamond Red, Old Diamond, and Fosse Noire are early game mines located on the western half of the map. Drachenberg Mine is a mid-game mine in the middle of the map. And Wassergrab and Belle Eau are late game mines on the eastern half of the map (though you can get them early if you beeline for them).
To take control of a mine you have to eliminate all the enemies there. The exceptions are Fosse Noire and Drachenberg Mine. To gain control of Fosse Noire you can kill all the communists there or you can get it without spilling any blood by completing a quest for Chimurenga. To gain control of Drachenberg Mine you need to complete the Diesel quest.
Each mine has a base value and the amount you get is proportional to the loyalty of the nearby city. If you have 100% city loyalty you get the full amount but if the city loyalty is low, then you will get much less income. You can increase loyalty by clearing nearby sectors of enemies, defending the city against enemy patrols, completing quests, and positive dialog options with key NPC's. Diamond Red is the only mine without an attached city. You can think of it as having 100% loyalty but the income may be lowered if miners are killed when you take control of the mine. There are also three cities (Ernie, Refugee Camp, and Chalet de la Paix) which have loyalty stats but do not have a mine attached. The loyalty will still give you a discount on water travel and militia training, and you can get some special armor at the Refugee Camp if you get high enough loyalty.
Most of the early game mines will become depleted over time and will eventually run dry. Depending on the difficulty level, they will eventually get depleted to 50% (First Blood), 25% (Commando), or 0% (Mission Impossible) output. There is an excellent article that explains how long it takes for each mine to get depleted:
25 days for Mfumu's Mine
90 days for Diamond Red
180 days for Old Diamond
and the 4 remaining mines never get depleted.
B. Many of the mines have ways to boost their base income.
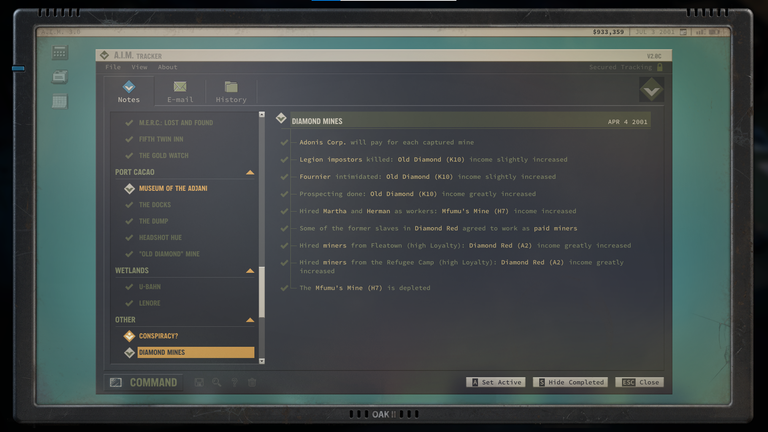
When you are attacking Diamond Red, Graaf gives the order to start killing miners. The number of slaves who are killed will impact the income of the mine (base income of $5,000). If all 10 miners are killed (serious casualties), then this value is halved to $2,500. If 8 miners survive (minimal casualties) then it stays at the default value of $5,000. If 9 or 10 miners survive (also minimal casualties), meaning that no more than 1 miner is killed, you end up with $6,000 income (120% of the base value). After you defeat Graaf, you have to decide his fate. One option is to hire him as foreman. If you choose to do so, this greatly increases mine income by $1,250 (+25% of base value). The main trade off is that you won't get his unique Gold Fever gun. Furthermore, regardless of whether any slaves were killed or whether you hired Graaf, you can also recruit additional mine workers at the Fleatown Flea Market and the Refugee Camp to boost your mine income. If your loyalty with that city is low, then it will slightly increase income by $500 (+10%) but if your loyalty with that city is high, then it will greatly increase income by $1,250 (+25%).
At Old Diamond there are some Legion imposters that can be spotted at night. If you kill them, you can boost mine income. Additionally, if you intimidate and spare Fournier, you can further boost mine income. Some of the workers might mention that Fournier doesn't allow them to mine in certain areas. If you go to the second floor of the building where Fournier is and complete a skill check, you will unlock a Prospecting operation which, when completed, will also boost mine income.
If you control Fosse Noire and send a merc with high Wisdom to the underground sector and explore it, you can find several veins of silver which each increase mine income.
If you encounter Martha and Herman at the Refugee Camp, one option is to give them a job at the mines. This will permanently boost mine income. I suspect it is tied to the first mine you obtained (i.e. in one game it always boosted Mfumu's Mine but other people have reported it as boosting other mines).
If you side with Boss Blaubert against Luigi, Boss Blaubert will offer to partner with you (or you can take a one-time cash reward). If you accept, this will boost the incomes of all your mines as long as Boss Blaubert remains alive.
C. Intercept diamond shipments.
Mines that are under enemy control will periodically send diamond shipments or weapon shipments. These can be seen on the map and if they pass through certain sectors you control they may also show up on the timeline.
Diamond shipments are worth $12,000 and weapon shipments can give you access to higher end weapons. It may be worthwhile to leave some mines in enemy hands in order to farm them.
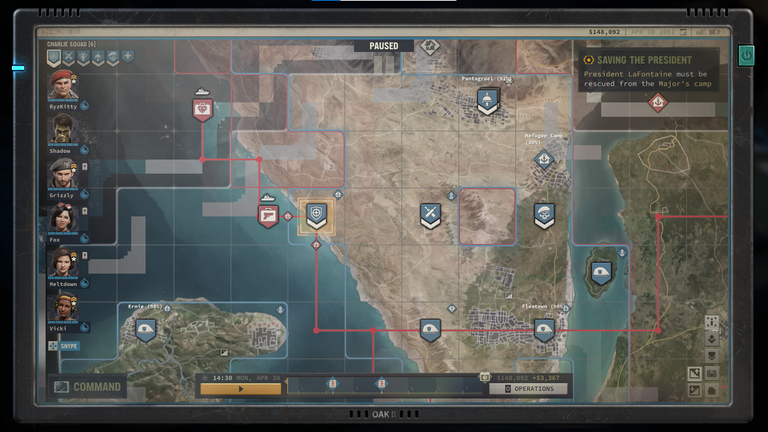
For example, in this game, I intentionally left Diamond Red untouched so that they would regularly send diamond and weapon shipments towards my forces in Fleatown and Port Cacao.
D. Hacking electronic devices
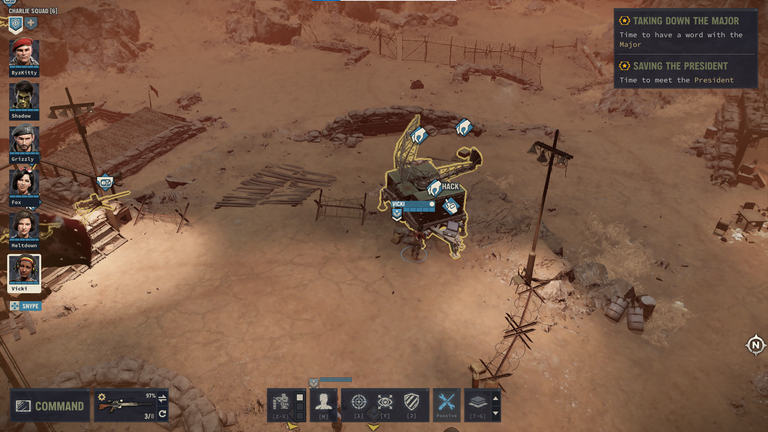
When exploring maps, the Wisdom skill helps you find herbs, the Explosives skill lets you detect landmines and explosives traps, and the Mechanical skill lets you detect mechanical traps, sources of salvage, and hackable electronic devices.
You need a moderate to high Mechanical skill to find hackable devices though once you find one, anyone can hack it (though it helps to have high Mechanical and/or have the Mr Fixit trait).
When you hack a device, you either gain Intel for a random nearby sector or you get a random amount of dollars. If Livewire gets intel, her unique PDA automatically gives you Intel for a second nearby sector. If you get a random amount of dollars, early game hacks tend to give you $500 - $1,250 though I have seen some late game hacks provide $1,500.
E. Cash in valuables
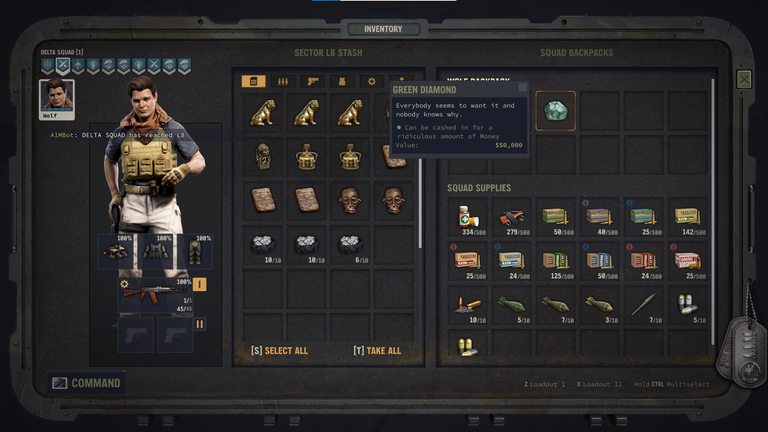
There are some valuable items that can be cashed in immediately for dollars (the in-game explanation is that the contract you sign with Adonis at the beginning of the game lets them facilitate these sales):
| Item | Cash In Value |
|---|---|
| Green Diamond | $50,000 |
| Diamond Shipment | $12,000 |
| Diamond Necklace | $9,000 |
| Big Diamond | $5,000 |
| Ancient Bronze Mask | $3,000 |
| Ancient Clay Tablet | $3,000 |
| Ancient Figurine | $3,000 |
| Ancient Golden Dog | $3,000 |
| Ancient Idol | $3,000 |
| Gold Bar | $3,000 |
| Gold Watch | $1,000 |
| Tiny Diamond | $500 |
| Chipped Sapphire | $350 |
There are a few items which have additional uses and you probably should not cash them in:
- The Green Diamond has special endings if you donate it to the museum or if you keep it in your inventory at the end of the game.
- The Diamond Necklace and the Gold Watch can technically be cashed in but you are probably better off using them to complete their associated quests. With the Diamond Necklace, if you have a Negotiator you can get $15,000 for it (which is more than the $9,000 cash in value). However, if you don't have a Negotiator (which could happen in a solo run), then you only get $3,000, a random number of Tiny Diamonds, and a Sleight of Hand magazine. In this case you might be better off cashing the Diamond Necklace in.
- The five ancient archaeological treasures (Ancient Bronze Mask, Ancient Clay Tablet, Ancient Figurine, Ancient Golden Dog, and Ancient Idol) can be donated to the museum. Each time you do so you get 5 loyalty with Port Cacao, you can send 4 recruit-level militia to a selected sector, and if you intimidate Gouverneur Le Pingouin to fund the museum you also get $1,000 with each donation. Please note that there is an unlimited supply of Ancient Bronze Masks, since you can keep buying them periodically at the Poacher's Camp.
- There are alternative uses for Tiny Diamonds. Lalee Leewaylender sells 10 loot boxes with various contents. It is random which of the 10 you get but it is advisable to save 5-10 Tiny Diamonds to get the loot boxes you need. Lalee can also sell information to you for a Tiny Diamond each, but that isn't really necessary though it does boost your Fleatown loyalty. Last of all, in the early game (and possibly longer), you can sell Tiny Diamonds for more than the $500 cash in value. Father Tooker is willing to buy them for $600 each (and if you talk to Lalee about the diamond arrangement and then talk to Father Tooker again, you can secure a rate of $700 each) as long as he and Boss Blaubert are alive (but interestingly enough it's okay if Lalee is dead).
- The remaining items (Diamond Shipment, Big Diamond, Gold Bar, and Chipped Sapphire) can be freely cashed in as there do not seem to be any special uses for them.
F. Quests
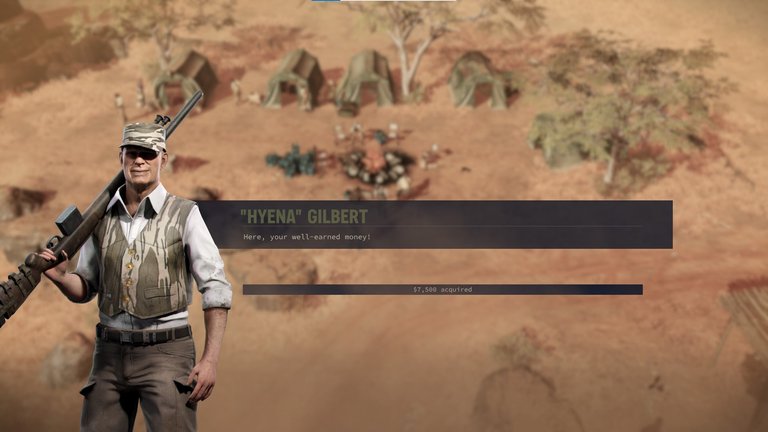
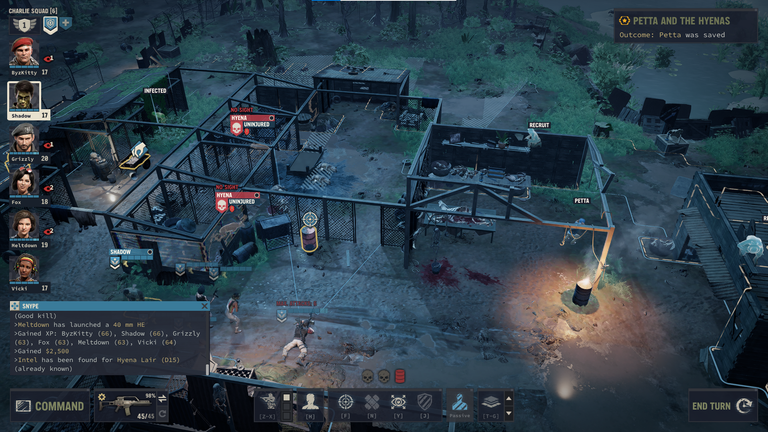
Some quests (Karen's Passport, The Haunted Mansion, The Dead Poachers, Petta and the Hyenas, Maman's Girls, Right Hand Man, etc.) grant a cash reward. With some quests you will be notified of your reward during the NPC conversation while for other quests, players might not realize that they got a reward because it is only mentioned in the Snype window, which you might have closed.
G. Dialogue options

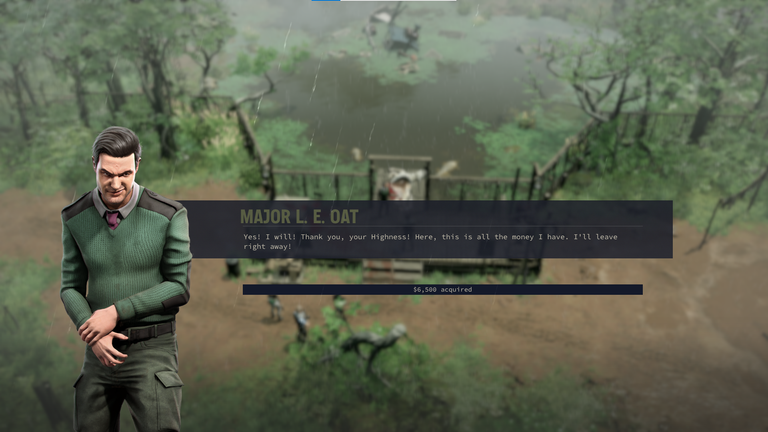
Some dialogue options may result in earning money. A lot of them also involve the Scoundrel trait.
For example, when you first meet Emma at Flag Hill, she offers to give you $2,000. You can either accept it, decline the reward (and gain loyalty with Ernie), or ask for more (and lose loyalty with Ernie). If you ask for more and have a Scoundrel, then she will give you some Tiny Diamonds.
Also, when you defeat certain bosses like Graaf and Major L. E. Oat, you get to decide their fate. One option is to let them go in exchange for money.
H. Sell meds or parts
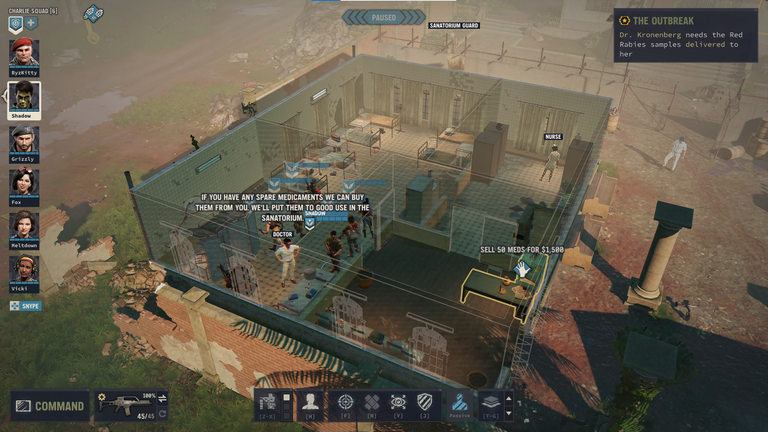
At the Sanatorium you can sell 50 meds for $1,500 ($30/med). However, you can only do this every several days.
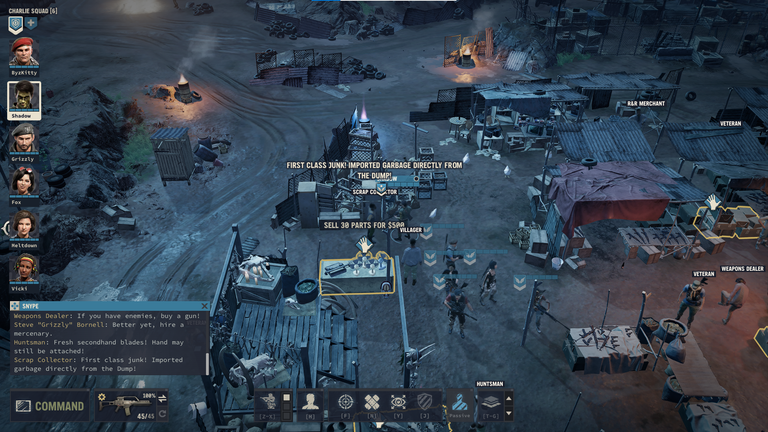
At the Fleatown Flea Market you can sell 30 parts for $500 ($16.66/part). However, you can only do this every several days. Due to the way the Scrap Collector advertises his junk, some players mistakenly think that they are buying parts from the collector instead of selling parts to the merchant.
I. Gambling
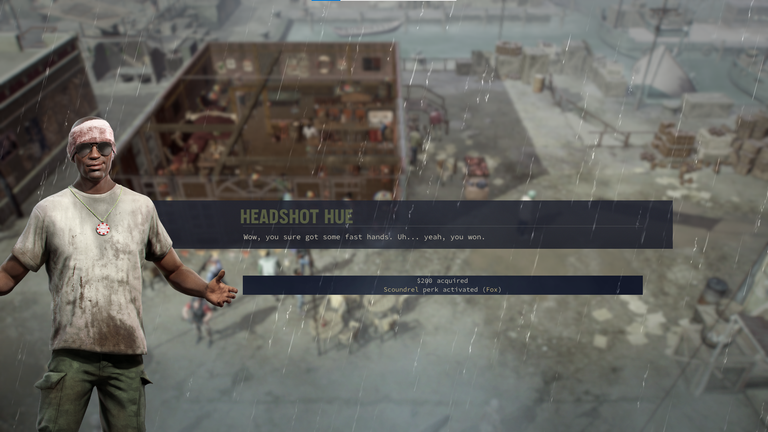
You can gamble with Headshot Hue at the Port Cacao docks. You bet $200 and you have a chance of losing it or earning an extra $200. Without a Scoundrel you will probably lose money on average. With a Scoundrel, you have a chance to make a potential profit of $200 each time. It's not a reliable way to make money and probably isn't worth the time and effort except possibly in the early game.
4. THE PARTS SYSTEM
In Jagged Alliance 3, parts are used for several things:
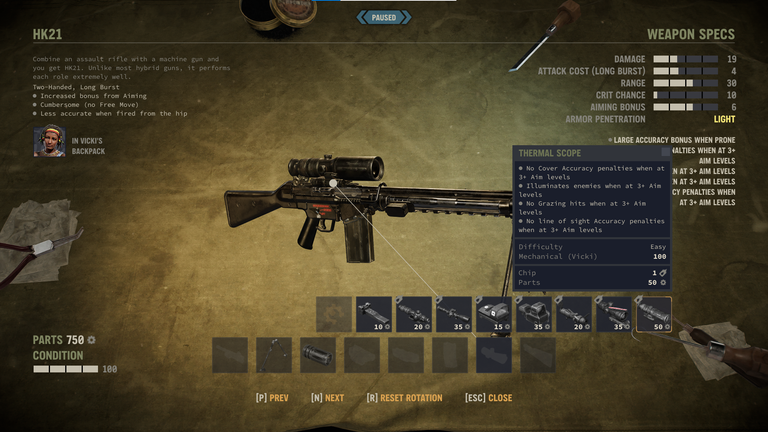
You will probably be spending most of your parts on weapon mods. Most guns have a number of slots that can be used to customize and upgrade their capabilities. You will need a mercenary with a high Mechanics skill and some weapon mods may require additional components like steel pipes, lenses, or chips.
Crafting ammo and crafting explosives requires parts. Repairing lightly used equipment costs no parts and only requires time but repairing significantly damaged equipment requires a small number of parts.
There are a few NPC's where you can give them parts in exchange for some items. You can give Deedee Bombastic 25 parts for some explosives and a Red Wire magazine. Later in the game, Wlad the Tinkerer can make a variety of items for parts. He can provide a unique Plasma Crowbar, a Kevlar Vest, an RPG-7, a unique Composite Machete (also requires Throwing Knives), and an AK-74 (also requires an AK-47). Wlad can also produce an unlimited number of AK-47's at the cost of 40 parts each.
As previously mentioned, you can sell 30 parts for $500 every several days at the Fleatown Flea Market. Thus you can turn spare equipment into parts and then into dollars, albeit at a slow and inefficient rate.
As for how to obtain parts:
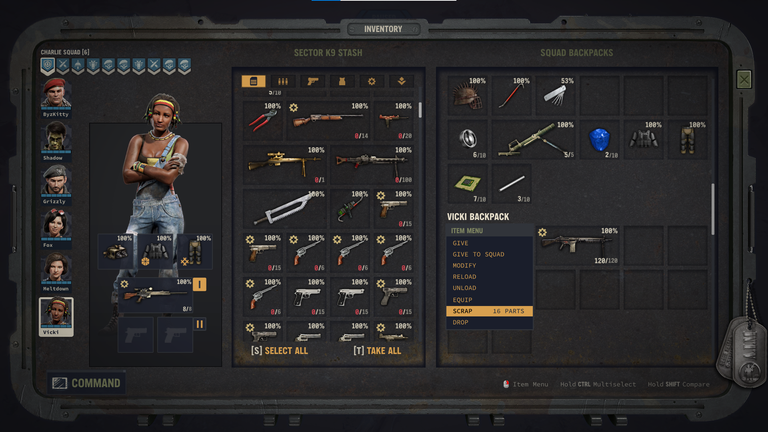
A. The most common way you will be obtaining more parts is by scrapping excess equipment. All armor and weapons can be turned into parts, along with crowbars, lockpicks, wire cutters, remotes, and detonators.
B. Sometimes you will find parts as random loot.
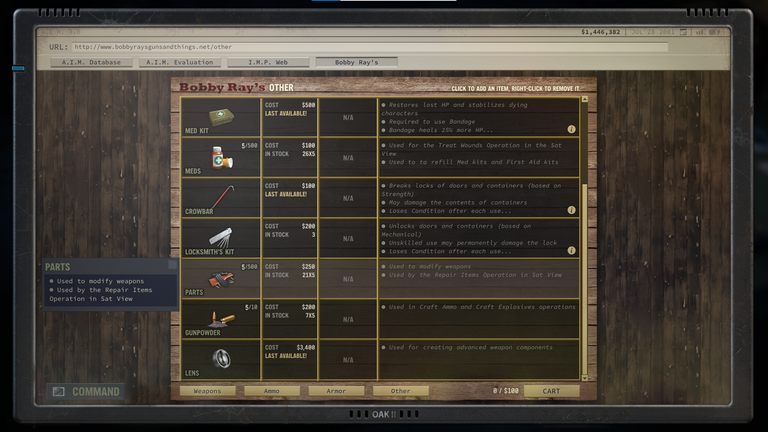
C. You can buy parts from Bobby Ray's at a rate of $250 for 5 parts ($50/part). For comparison, if you spend $500 (not including shipping) at Bobby Ray's you get 10 parts but if you are selling parts at the Fleatown Flea Market you need to sell 30 parts to get $500.
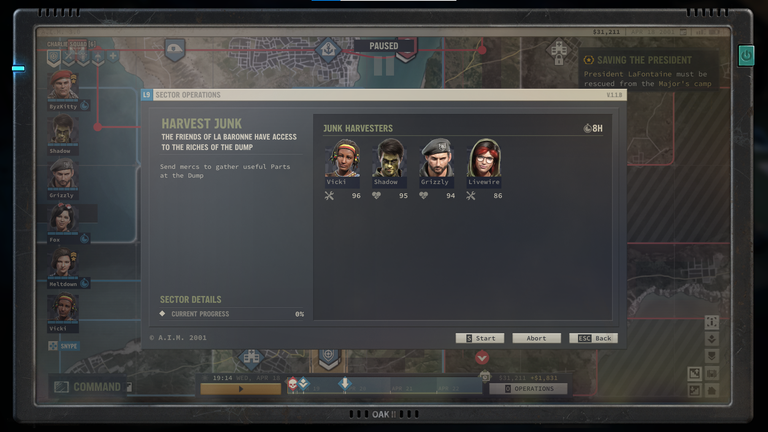
D. If you side with the Baroness at the Dump, then it unlocks a special repeatable Harvest Junk operation. A single mercenary can complete the operation in a little over a day. With 4 mercs sifting through junk, you can complete the operation multiple times in a single day. Each time you complete the operation, you get some parts and then some random items (the best things you can find are magazines and chips).
Updated March 4th, 2024:
#1. Added small details (giving Martha and Herman money is $2,000, Chalet de la Paix is another city without an associated mine).
#2. Added a lot more information about the income of Diamond Red (how the mine income changes due to the number of miners killed, hiring Graaf as foreman, and hiring additional workers from Fleatown and the Refugee Camp).
#3. Clarified that getting the $700 Tiny Diamond rate from Father Took simply requires talking to Lalee and does not require the Negotiator trait.
Updated March 9th, 2024:
#1. Added a few additional examples of using dollars in quests (clinic in Pantagruel) and dialogue (Headshot Hue).
#2. Slight correction in the items you can buy from Itsadi the Fisher.
#3. Added the cash in value for the Gold Watch.
#4. Mentioned that Father Tooker will still keeping buying Tiny Diamonds at the preferred rate even if Lalee is dead.
#5. Added a screenshot of receiving dollars as a quest reward via conversation.