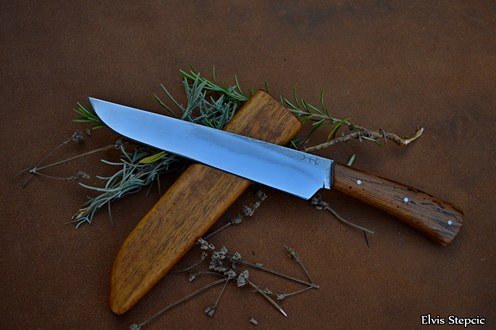
Hello, i want to share with you this small sequence of pictures that i took at key moments during the make of a kitchen knife for a friend of mine.
In this case i used some simple 1085 high carbon steel, stabilized reclaimed wood, stainless steel pins and other reclaimed wood for the saya/scabbard.
Salve, voglio condividere con voi questa sequenza di foto delle fasi chiave di come ho realizzato questo coltello da cucina per un amica.
Per questa lama ho scelto del semplice acciaio al carbonio denominato c85, faggio di recupero stabilizzato, perni inox e altro legno di recupero per il saya/custodia.

i start by using a template of mine to mark the shape and then i profile it from a piece of steel with the help of a belt grinder.
inizio con l applicazione di una sagoma su una barra d acciaio, e poi ne sgrosso la forma con l'aiuto di una levigatrice a nastro.

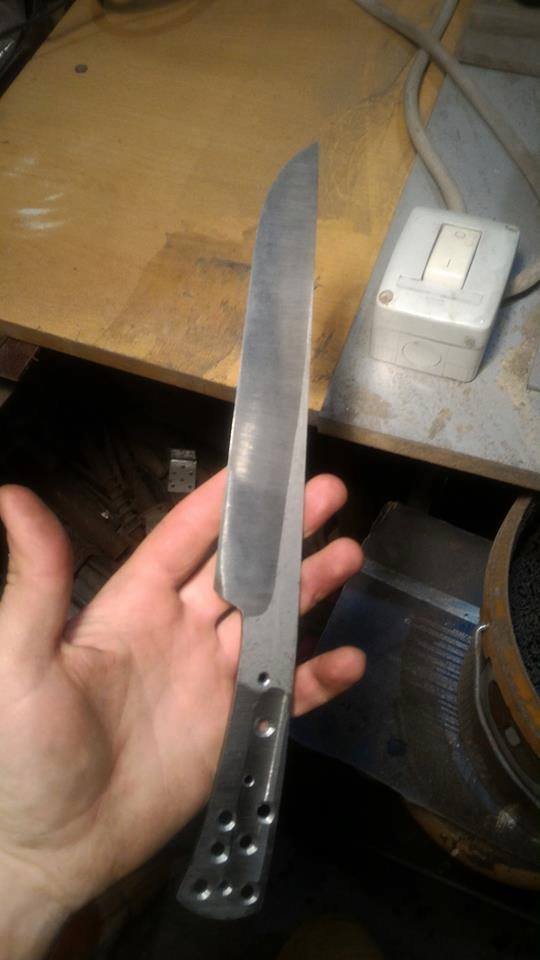
next step was to grind the main bevels, drill the holes and adjust the balance between the blade and handle.
nel passaggio successivo bisello e faccio i fori per i perni, correggendo anche il bilanciamento fra il manico e la lama.

the blade was prepared for heat treatment, for fun sake i applied some clay to the blade to try my luck with hamon lines.
the knife was heated up to 810°c and quenched in 60°c vegetable oil, the oil was rather warm as this steel needs a faster quench but i don't like to risk with water quenching.
questa foto è stata fata prima dei trattamenti termici, per curiosità ho applicato un po di argilla per vedere se riuscivo ad ottenere un hamon, la lama è stata portata a 810°c e spenta in olio vegetale misto sui 60°, spento in olio caldo visto che questo acciaio necessita di un spegnimento piu rapido ma preferisco evitare di farlo in acqua.

this is right after the quench, now i put it back in the oven for 1 h at 180°c to temper it, kinda aiming for 58-60 hrc a good compromise for this kind of steel and use.
questa è la lama subito dopo lo spegnimento in olio, ora rimetto il tutto in forno per 1h a 180°c a rinvenire, punto a 58-60 hrc un buon compromesso per l'acciaio e la destinazione d uso.

after the tamper the blade is cleaned with the grinder with increasingly finer belts, then hand finished to 800-1000 grit before buffing it to a almost mirror finish.
in seguito la tempra la lama viene pulita con la levigatrice a nastro con grane sempre piu fini, poi viene ri-pulita a mano fino alla grana 800-1000 e la lucido con la ruota di stracci a specchio.

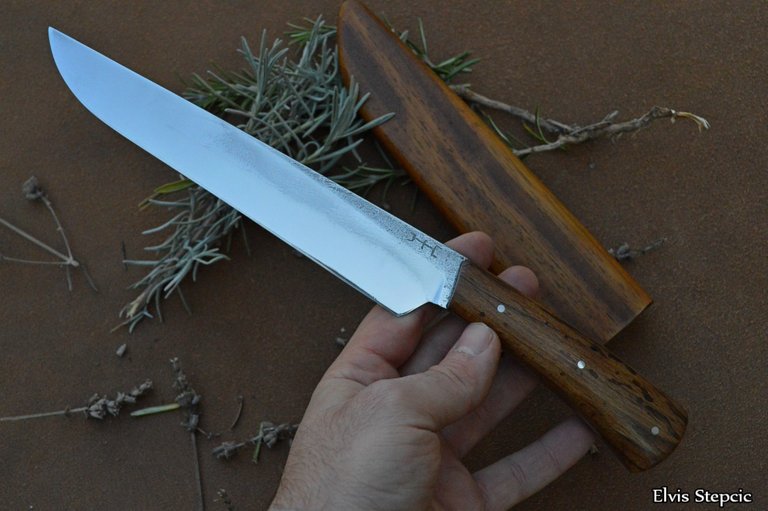
i degrease the tang, prepare the wood to be glued on and put everything together with 3 pins and high grade epoxy glue. let it cure for at least 24 h, then i proceed to shape it and polish it till it nice and smooth, once i put the edge on i also buff the handle with carnauba wax.
a questo punto è tutto pronto per l assemblaggio, preparo il legno e sgrasso il tutto. Il tutto è tenuto assieme con 3 perni e colla bi-componente ad alta tenuta, lascio maturare la colla per 24 ore e poi procedo all sagomatura e finitura con grane fini. Un a volta affilata passo il manico con la lucidatrice e cera carnauba.
I know that isn't a detailed guide but when i work i get carried away and just forget to take pictures :)
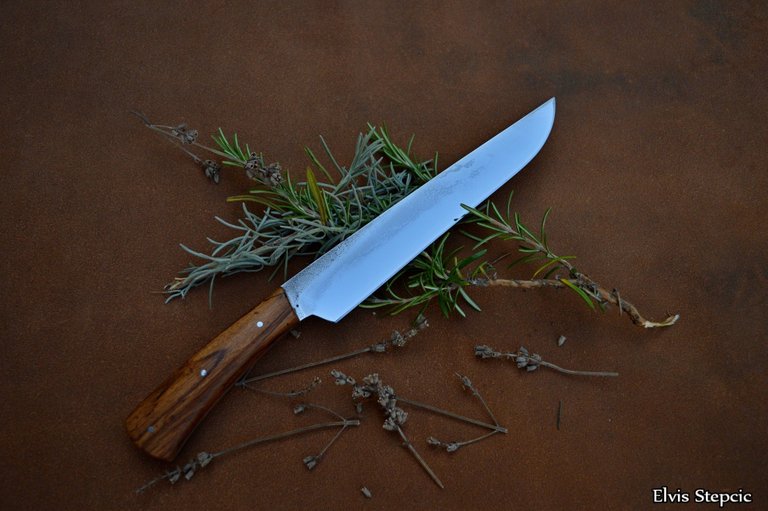
This is the final result, hope you like this kind of content that dwells a bit more in to the actual behind the scene.
So che non è una guida molto dettagliata, ma preso dal fare mi dimentico di documentare con foto le varie fasi :)
Questo è il risultato finale, spero che questo tipo di contenuto sia di vostro gradimento.


I'm still learing on how to steemit xD have mercy, any tips? i'm all ears for those! :)
Another fine piece of hand craft. You will soon build up your reputation with that kind of high quality content. It is amazing how in this virtual world real things, you can touch and feel, are very much appreciated. Steem on and show us your beautiful craft.
Your first picture is a real still life taken from the art gallery.
:D thank you for your kind words! i'm glad to see ppl that like this kind of content
You are doing it very well. Post more like this!
Keep showing your unique works.
The World deserves to see a talent! ;)
hehehe thx :)
Great post!
And you are doing just fine ;) Keep posting and people will notice you in no time.
thx man! :D i'll try to do my best :)
Great post. I too trends to get carried away when working and forget to take pictures. I agree that water quenching is nerve wracking but ithink you get used to it after some time. Apart from the risk of warping I have had cracking and one time it cracked all the way through.
thx. i had some bad exp with water as a quenchant medium xD so i just warm up the oil a bit more and call it a day. was planing on buying some fast oil something like parks 50 but kinda low on budget so will have to wait :D
yeah, with 1085 you should be fine with oil anyways and it does reduce warping quite significantly. I invested in 15 liters of quenching oil some time back but I rarely use it because most of my steel is water-hardening, and it is really hard to get a proper hardness with oil with that steel. I used it for heat-treating some 12c27 sandvik which it is really good for.
ohh yeah, for ss i want to move to aluminium plates and air quench, they say it's good for thin kitchen knives (i use 2.2 or 3 mm stuff) but will see xD
Finalmente non sono più solo! Contento che hai voluto partecipare alla comunità italiana. In bocca al lupo per tutto quanto.
Ottima lama da cucina naturalmente!
Un saluto, nicola
;) grazie ancora per i consigli. provo per un po a fare i post bi lingue, vediamo come va xD
This post has received a 19.71% UpGoat from @shares. Send at least 0.1 SBD to @shares with a post link in the memo field.
To support our daily curation initiative, please donate 1 SBD or delegate Steem Power (SP) to @shares by clicking one fo the following links: 10 SP, 50 SP, 100 SP, 500 SP, 1000 SP, 5000 SP.
Support my owner. Please vote @Yehey as Witness - simply click and vote.