One of the very first steps to setting up a website is to buy a hosting plan. Buying a hosting plan is not difficult, but most new bloggers find it challenging to understand which web hosting service is the best choice, which plans to buy, and how to make the purchase.
In this guide, I will help to answer the questions related to what a new blogger needs to know when buying a hosting service for his website.
In this tutorial, I will be using Hostgator as an example.I also offer a discount coupon here, which will help you to save money on your hosting plan.
Hostgator offers many plans, but for a new website (WordPress, Static, PHP, etc.), shared hosting offers a good start. In this tutorial, I will be buying Hostgator’s “Baby” plan for one year. The Baby plan offers unlimited everything, and it is especially perfect for any blogger who would like to host more than one website.
Buying web hosting from Hostgator with the maximum discount:
Hosting service charges are usually based on the package you are buying. The cost of hosting increases with the level of the package you buy. For example, a cloud and dedicated servers are the costliest forms of hosting, followed by VPS, and then shared hosting.
For beginners, I always suggest buying a shared hosting package, due to the low cost. So let’s get started with our beginner’s guide to purchasing a hosting service:
Go to the Hostgator homepage, and click on Webhosting in the navbar or click on get started now (follow screenshots below).
Select Hostgator Hosting Plan

Select your domain name:
If you already own domain, select the part which says “I currently have a domain name.” Otherwise, you can buy a domain from Hostgator. Remember, Hostgator charges $15/domain. I would suggest buying a domain from GoDaddy and use that domain, placing it in the field which says “Currently Have a Domain Name.”

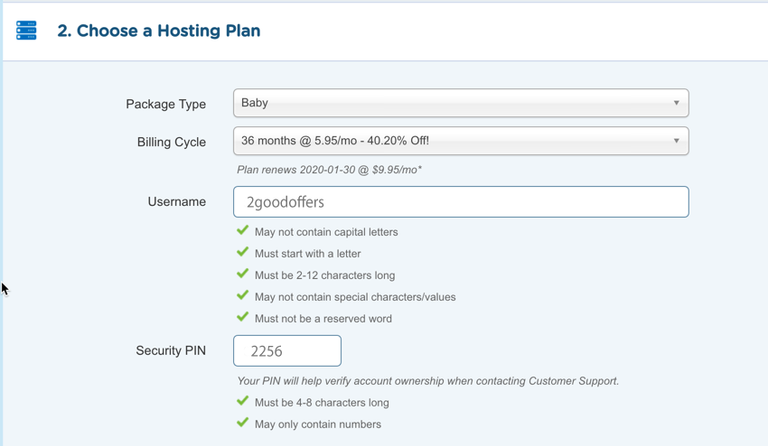
Select hosting plan
Here you can select the hosting plan you want to have. By default, it would pick the hosting package that you have selected in step 1.
What really important is the billing cycle. My suggestion is to get hosting for 24 to 36 months period.This is the last page, where you will complete the purchase of your Hostgator account. You can change the duration of hosting from here. Select a username for your account, as well as a security pin.
Reason being, as you increase the tenure, overall cost decreases. Moreover, in the next step, you will find a discount coupon worth 30% of total bill. This is your only chance to get the discount on your purchase.

Billing Info
In the “billing info” field, you need to give your address and phone number. I suggest that you double check this information making sure it is correct, as they are going to call you on your provided mobile number to verify the intended purchase.
This is to ensure the security of your account. Here you can also select your payment method: PayPal or Credit card. If you select PayPal, on the next page, you will be redirected to the PayPal payment page.
In the additional service section, ensure you uncheck everything. Most of the paid add-ons are not worth is as we have the complementary free alternatives.
( )
)
Add coupon code & Verify your order:
In the coupon code field, add “2goodoffers” and click on validate. This will give you flat 30% off on your total order.
Below the billing info, you can see the complete details of your order. Before you move ahead with the order, be sure to verify your order.
Once you are satisfied, click on “Create Account.” Depending on your payment method, you will be taken to the PayPal payment page, or the “successful order placed” page.
In about a minute you will receive an email from Hostgator confirming your order, and within an hour you will be receiving a call with your new hosting account details.
(Coupon: 2goodoffers)