Maybe I'm the only one who has done this, but have you named your homestead or your farm? If so, comment down below what the name is. Maybe you want a sign? Here's an easy sign I made. I mean it. It's easy. You can do it. My whole sign, including the sign post and concrete cost me less than $75.00 and a few hours of time. This was at my last house (which I still own, but I let my parents live there) I have to build or make a new sign for my new homestead also.
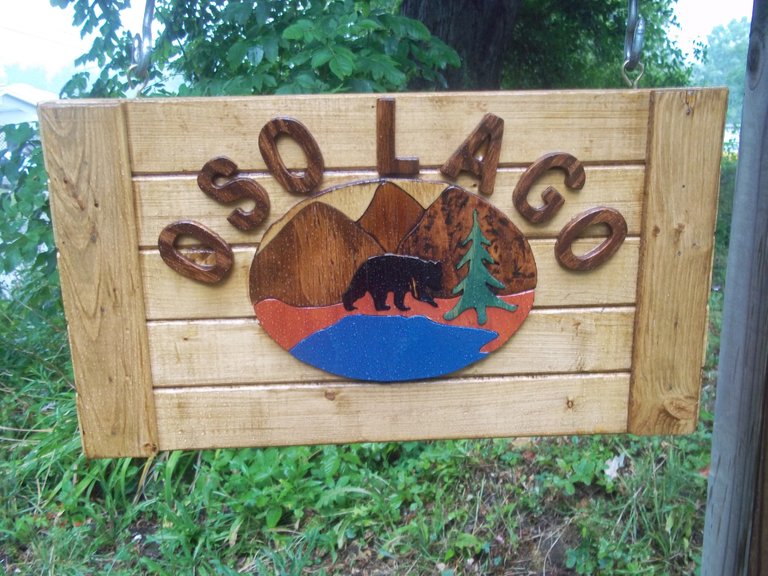
The finished sign.
HOW I DID IT
This sign is all wood. I wanted something that looked rustic but sharp. I had 1x4 pine and some plywood laying around. The plywood was 3/8" exterior CDx type plywood.
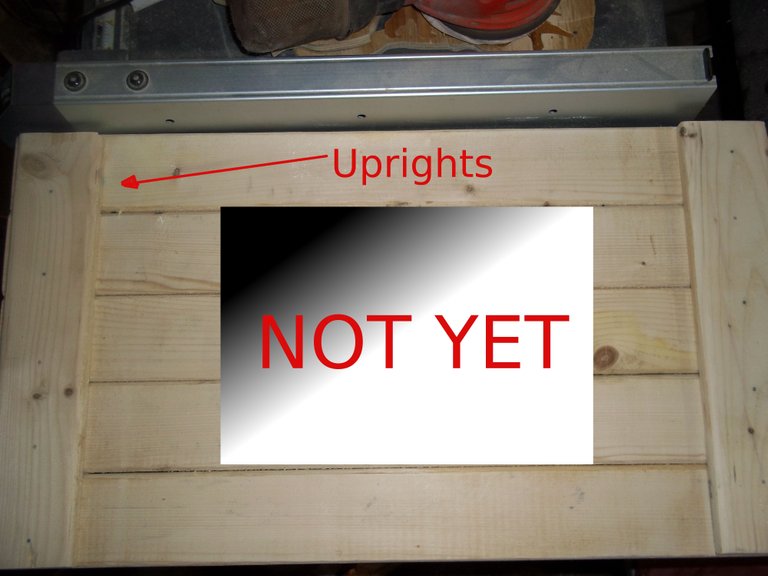
1x4 pine. 5 boards cut 24". 4 boards (for uprights on both sides) cut to length (about 18") of the 5 boards. Nail them together. I used small finishing nails
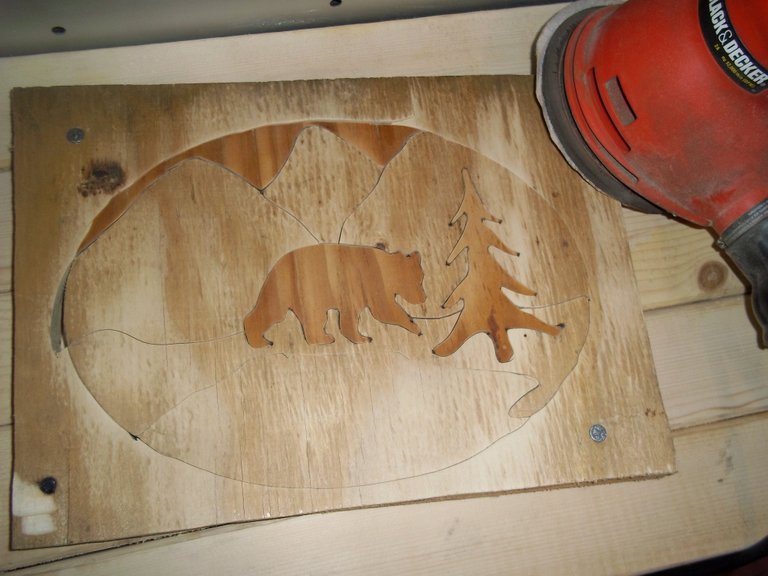
Cut 2- 12" x 14" pieces of Plywood. Screw them together. This part is important. You want them to have the front surface on one and the back surface on the other facing in the same direction because you will be pulling them apart and alternating for differing finishes. Draw your scene. My place was called Oso Lago for "Bear Lake" technically in Spanish it should have probably been Lago d'Oso but it's Pennsylvania so it's all good. Use a scroll saw to make your cuts along your scene lines. You want to basically create a Jig-Saw Puzzle. Take apart, figure out the contrast, reassemble and sand it all down.
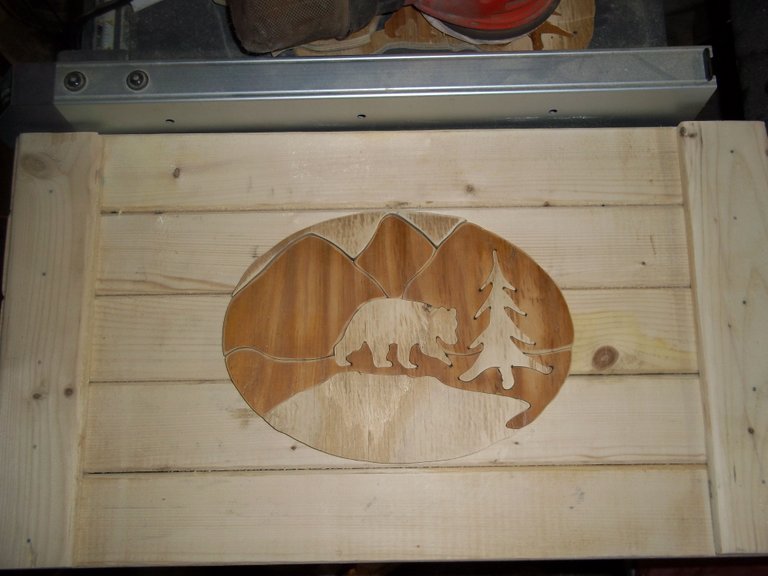
Figure out the locations and mark them before you stain it.
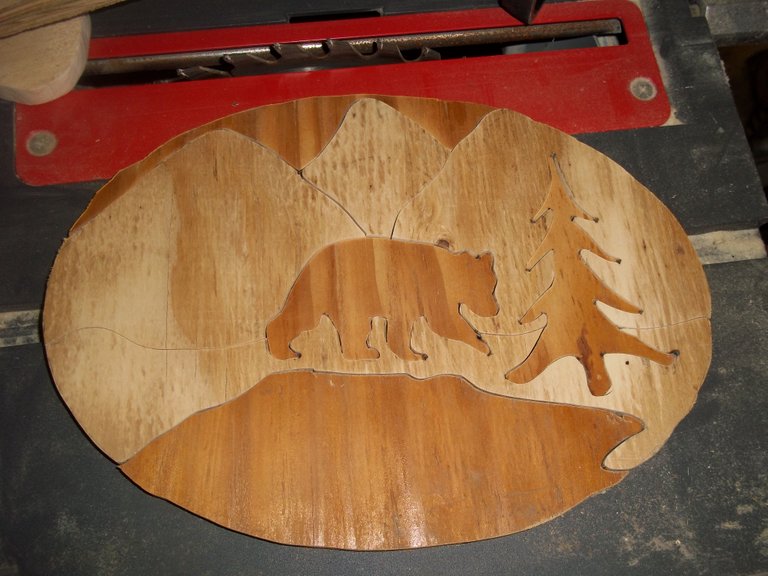
It doesn't look great at this stage that's ok. Purchase colored stains and stain while at this point. On my bear, I used my torch to make it black. Years later, even after it was PolyUrethaned with Spar finish, the bear actually was the only thing that faded. Hmmm... I guess the stains were the best choice. Remember you're doing this on both sides! That's why we want TWO pieces of plywood for the contrast and the two sides!
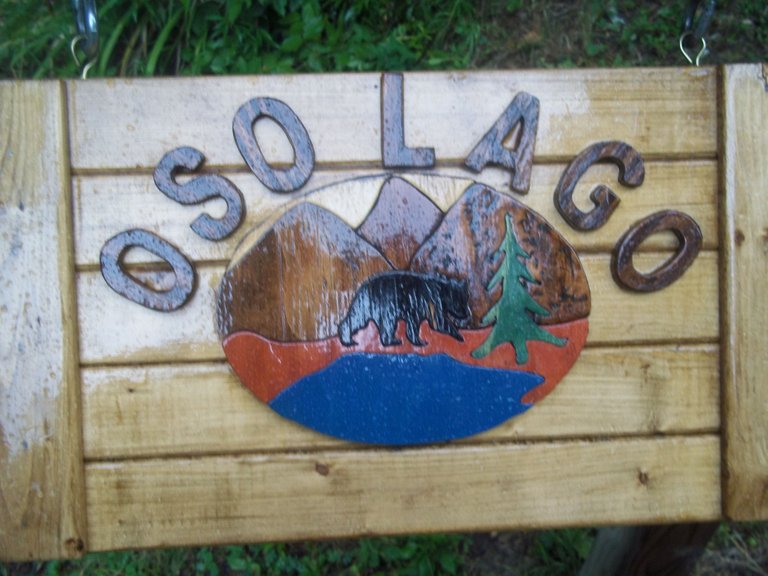
Stain the sign what color you want it first. Then cut out letters from the plywood. You can use other board wood if you have it. I was worried about the letters because of their plywood edge at the top of the sign. I stained them completely before attaching them. Once stained, I Polyurethaned it with an UV resistant Marine finish. That's why it's so glossy.
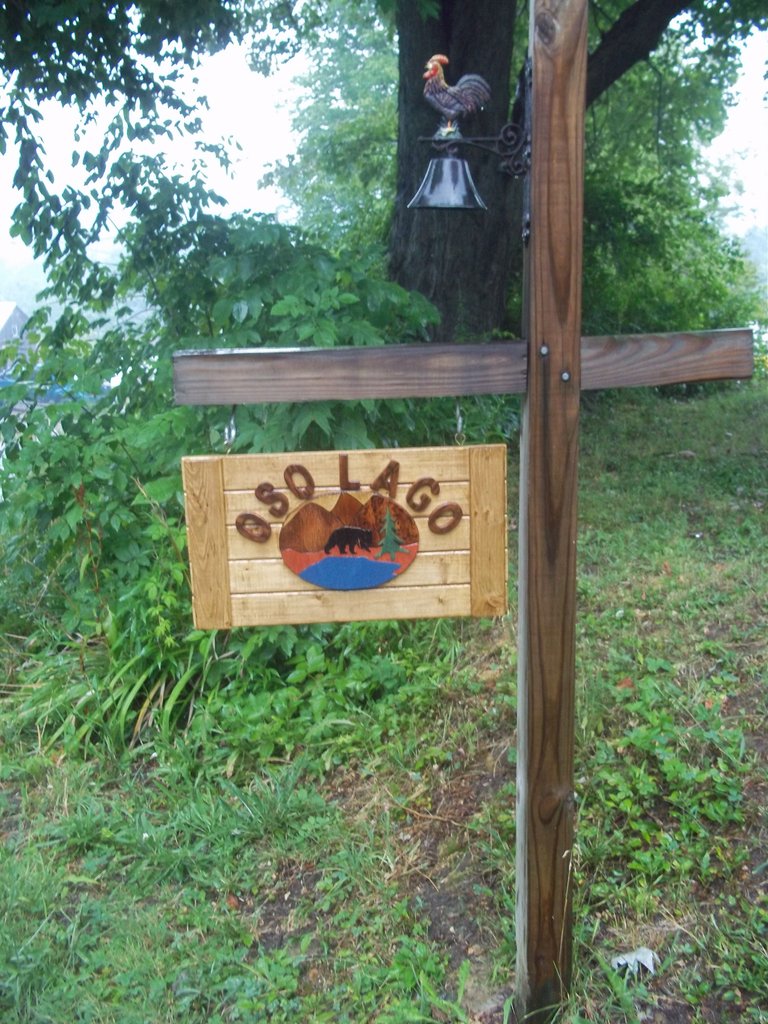
- I notched out a 4x4, lagged it together, dug a post hole by the road and cemented in. Cast Iron Chicken bell is optional.*

See! Easy-peasy! You CAN do it! You can probably even make some side money if you wanted to spend a little more time and had a nice assortment of boards lying around.
Ok... so what's the name of your homestead? Don't be shy. Post it below!

GROW WHERE YOU ARE
If you found this post helpful, informative or just entertaining, please consider an upvote, a resteem, a follow and a comment!
Nice job!
Love the sign! Great job - I think I could get the backing done but the picture is beyond me lol
Nah, I'm sure you could do it or something like it! :)
We've made 3 of our 4 signs for our farm. This was the last one.
I love your sign, especially the 3D features! wonderful job!
Thanks @goldenoakfarm! I've always liked the look of them. I love your sign. It's ripe for some 3D treatment!
I like how you put together the scenes - very nice sign. Our homestead is Sunset Valley, but I haven't decided yet if it ends with Acres, Farm, or Gardens :)