Cost Vs. Value. Everything comes down to cost vs. value. When I look at the value of something I take into account how long I plan/need to use it, how long it will last, and how much it will cost over that time. If I'm short sighted, I'll look only at the how much the initial price of the product is. I'm going to share with you my best dollar for dollar chicken brooder. I've used a few different brooder through my years of raising chickens. This is what I've settled on. I'll share why and how with you.
Brooder Basics
I've tried a bunch of different styles of brooders, anywhere from cardboard boxes with newspaper, to barn stalls with boards, and a lot of things between. The key for a brooder for me is that it needs to be:
easy to clean,
durable,
and not take up a bunch of room while still raising healthy chicks with strong legs.
Early in my chicken raising days, I read about people's choice not to use newspaper for the bottom of their brooders. I read a lot of back and forth from people who used it and said it was fine and those who swore that it was bad on the chickens feet. I tried it for two groups of chicks in a row and my personal experience confirmed that it's not good for the chicken's knees. After I raised some turkeys on it and had splayed leg, I stopped using it. I liked that it was easy to clean, but it wasn't good for the health of the birds. If you've had good experience with it, feel free to comment below.
The one that I kept coming back to though was the one that still gives me service now, after about 9 years of use. I've made improvements to it and I will share those here.
THE PROTOTYPE
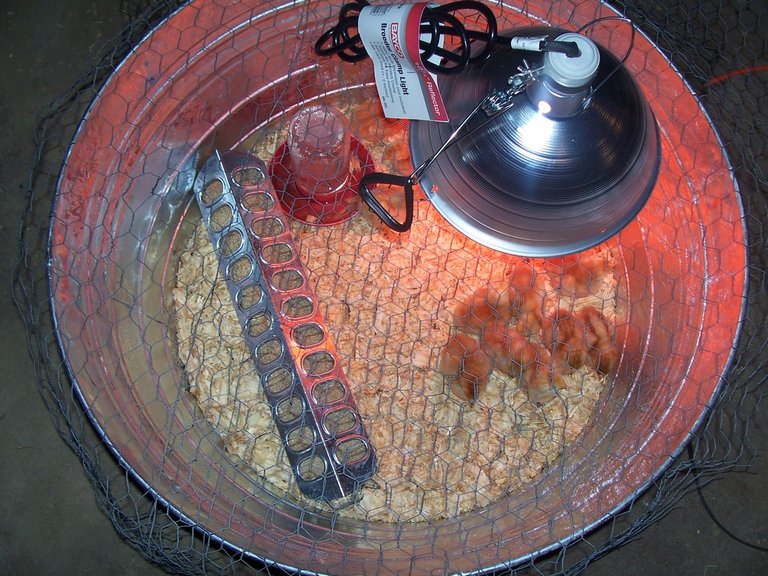
This is a 35 gallon galvanized wash tub, with chicken wire stretched over the top and a heat lamp sitting on top.
HEAT LAMP AND BULB This is the prototype that I used for about a year. It worked well, but feeding was a pain, and when the kids fed they were not careful with the heat lamp and we broke several bulbs that first year. Heating lamp and initial bulb around $22.00. Heating bulbs cost around $5.00 each. They aren't very durable.
GALVANIZED 35 GALLON TUB The galvanized wash tub is certainly durable. They are pretty much bulletproof for multiple uses around the homestead. The "downside" is that they are a little more expensive. You can still find them on sale at various times of the year but the normal price of this is going to be about $60.00. I've let this one hang on the outside wall of my garage for many years and pull it off whenever I need it for brooding, or even other uses. If I amortize the cost over the years it's been about $3.50 a year. Very affordable if you ask me... because it's going to get cheaper every year I use it.
POULTRY NETTING (CHICKEN WIRE) This was just an extra piece I had sitting around. Let's say it was $1.00.
THE UPGRADE
Bulbs got expensive, wasted feed got expensive and little scrapes on little arms were a nuisance. It was dangerous to take the chicks out when cleaning time came because of the chance of them getting scratched by the chicken wire. It was time to make some improvements.
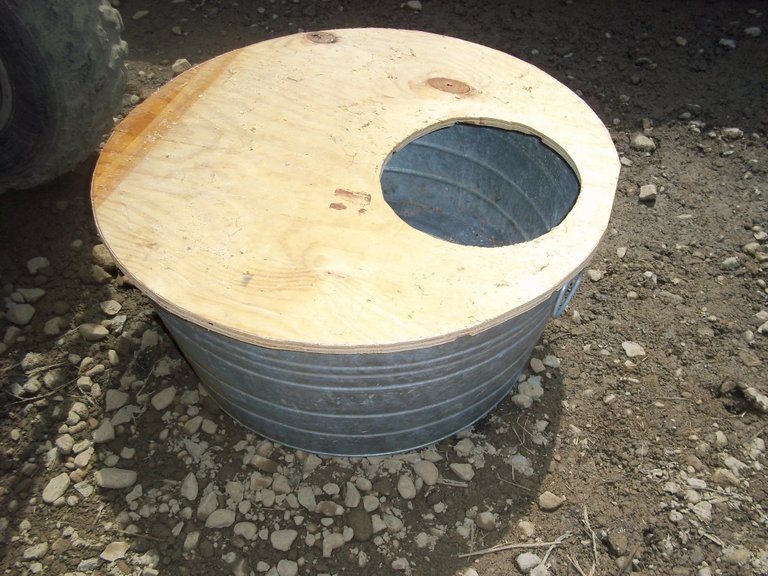
First I found an old piece of T-111 siding laying around. I laid the wash bucket over it, traced it, and then cut it out. I placed the heat lamp on the plywood, traced it and then cut it out also.
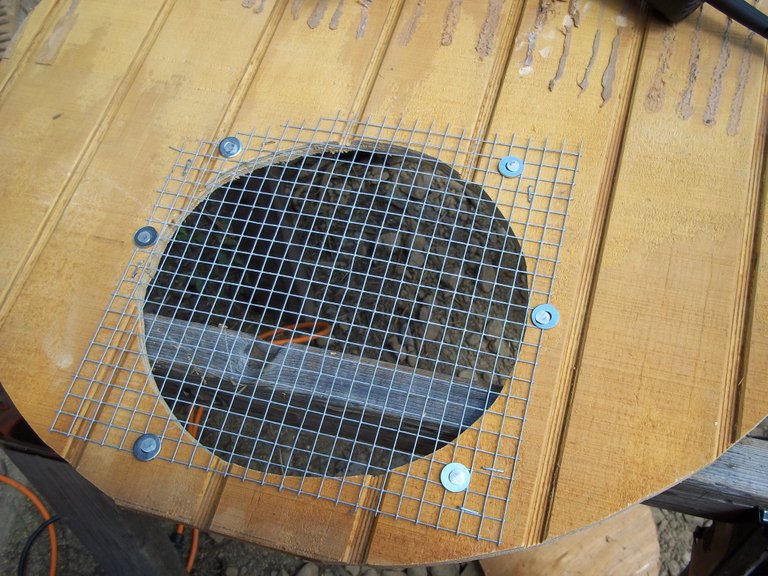
I then cut a piece of hardware cloth out and nailed it on the heat lamp hole from the bottom so the nails were through the top. I used roofing nails and washers to cover the holes on the wire. I learned this method when I built my Chicken Tractor.
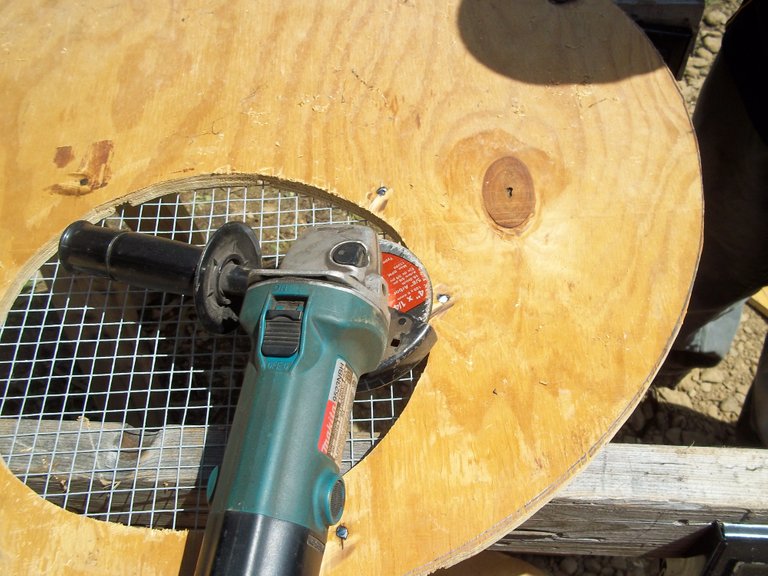
I then ground off the heads of the nails with my angle grinder.
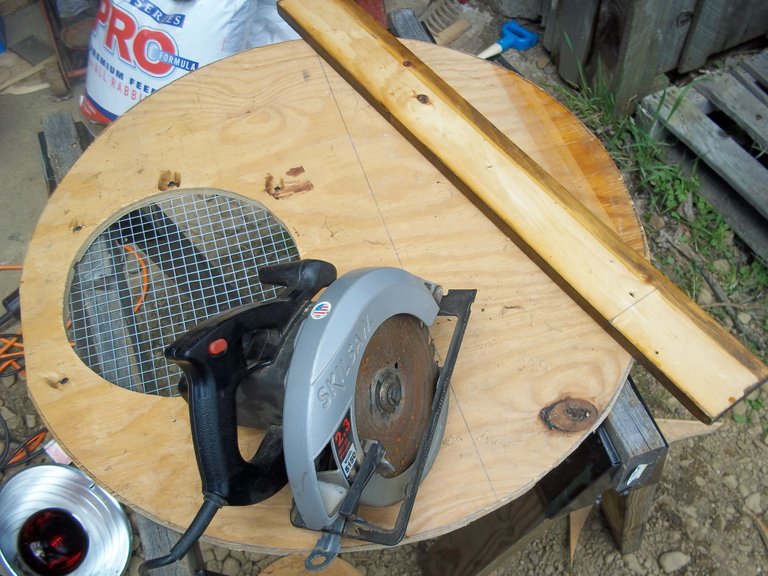
I then figured out where I wanted the hinges to be and cut a board to go across. This gets attached on the bottom for a cover of the hinged crack. You only nail this to the side with the heat lamp on it.
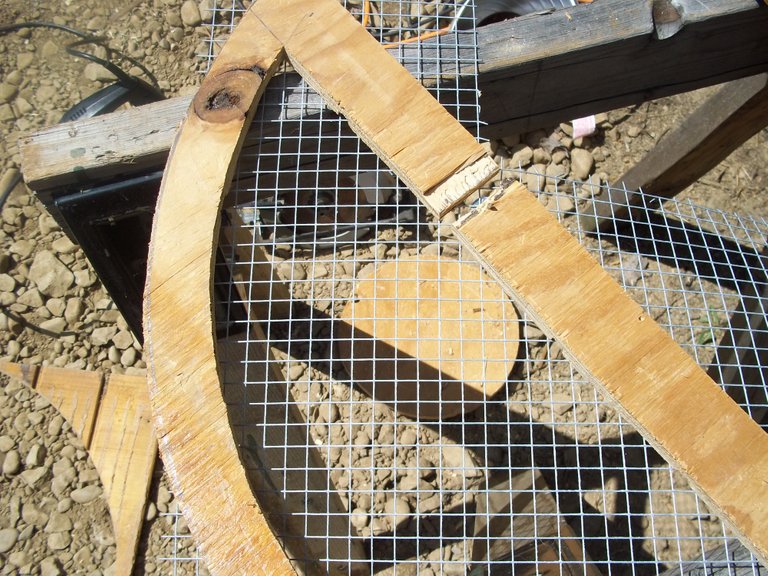
I cut out a window - it broke, but no problem a little a little wood clue and some screws fixed it right up. I attached hardware cloth the same was as the heater lamp window.
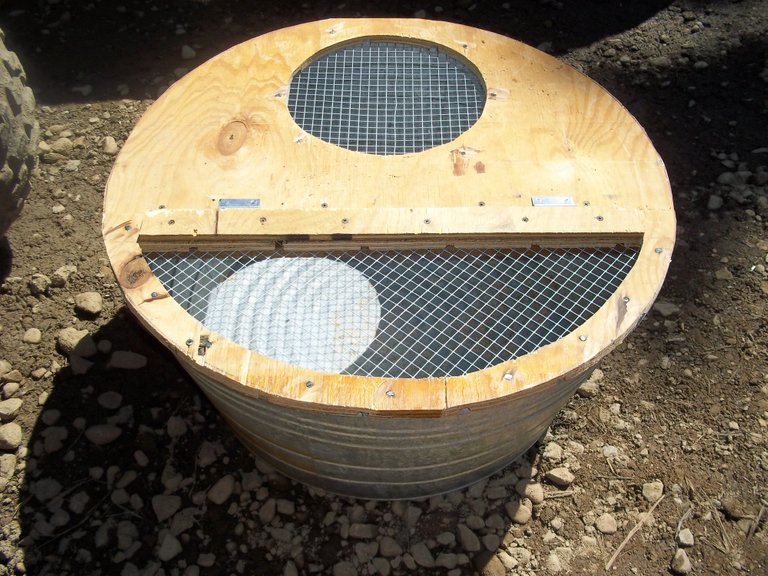
I attached the hinges. It's almost ready to try.
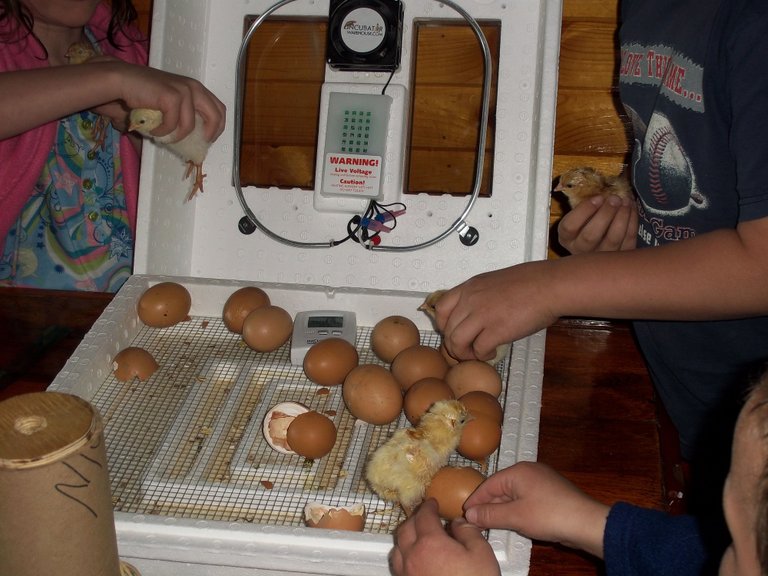
I line up the test subjects...

...and some helpful assistants.
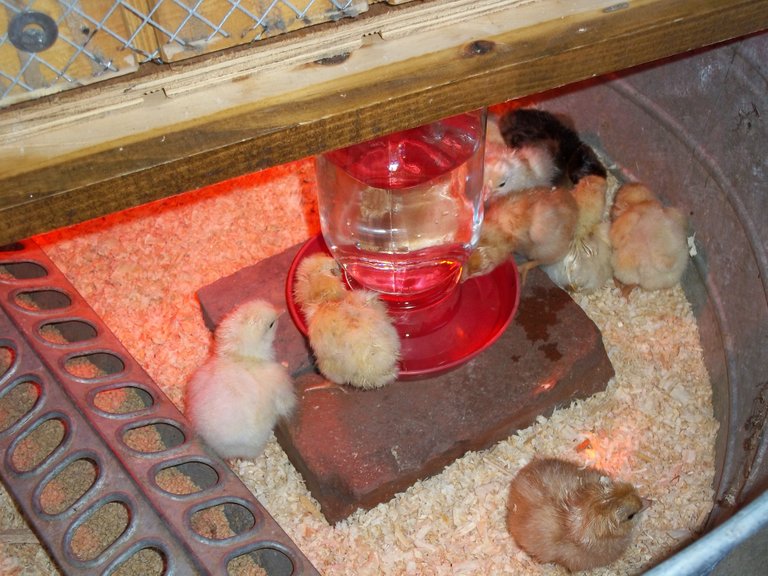
I put the water on a couple of bricks, fill it with pine chips and put the feeder in along with the new occupants.
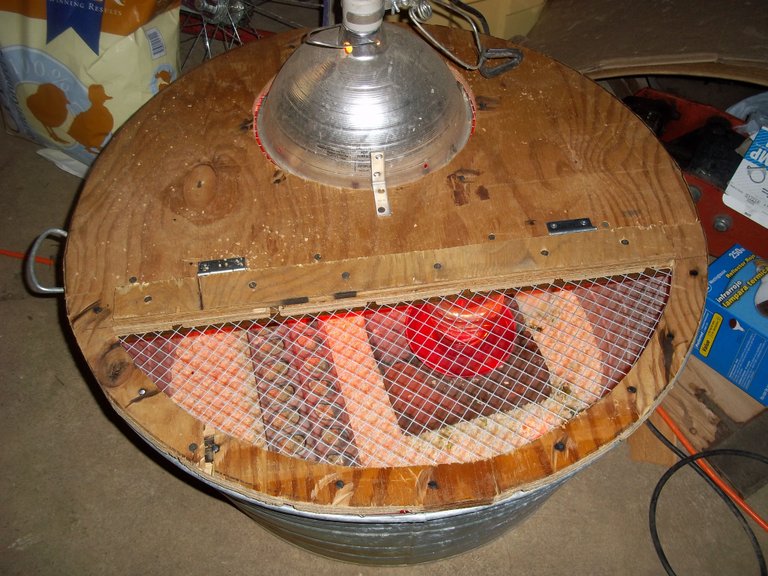
I put a little angle strap on the heat lamp that swings over on a single screw to keep the heat lamp tight. I test it for a while to make sure it doesn't heat the plywood, but we've left enough space around that it's not a problem at all.
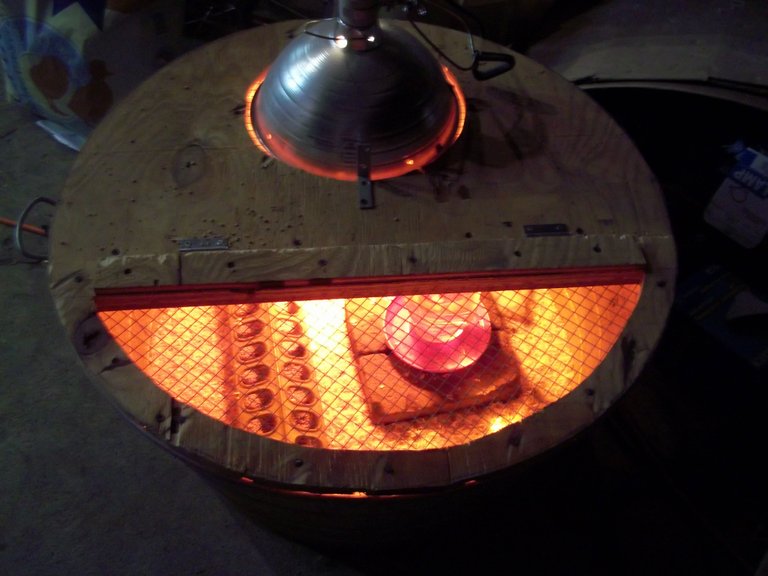
...and it looks pretty much the same after 8 or 9 years of use.
The center board at the hinge joint keeps the lid from moving off the top of the tub. I keep the chickens in this until they are large and strong enough to move to bigger surroundings.
I take the lid and heat lamp off every year and store them on the wall inside the garage and the washtub gets stored on a nail on the side of the garage outside... no worse for the wear.
Total cost for this to build right now would be about $90.00 dollars if you had to buy everything new and not on sale. You'd still need to have some scraps of wood around. But COST VS. VALUE... that's another story. I expect to use this brooder for decades to come. Who knows, maybe the kids will too.


GROW WHERE YOU ARE
If you found this post informative, helpful or even just entertaining, please consider an upvote, a resteem, a follow and a comment.
This is great! I'll have to show the Husband so he can make a lid like that. We kept chicks in a big Tupperware tote, but an appropriate lid was a challenge!
I considered a tote, but I think me and my family must be rougher on stuff than others... LOL. So I make it STOUT!
Great design love it, should work extremely well. How do you adjust the heat from the lamp or don't you need to?
Two bricks to raise it up above the hole typically.
Wow! I love it!
@homesteadbuilder - Thanks!