IF con FOR son amigos✨
Hola compañeros de hive hoy voy a explicar como combinar un if con un for, es una técnica común en programación para hacer evaluaciones condicionales dentro de un bucle. Aquí te explico cómo funcionan juntos con un ejemplo. Todo este contenido es el que uso para mis clases en la escuela técnica de CABA,Argentina.
Explicación Básica🖥️
Bucle for🕵️♂️🔍: Permite iterar sobre una secuencia de elementos, como una lista, un rango de números, o cualquier iterable.
https://hive.blog/stemsocial/@tecnotronics/descubre-el-poder-del-for-en-arduino-discover-the-power-of-for-in-arduino
Condicional if✅🚫: Permite ejecutar un bloque de código solo si se cumple una condición específica.
https://hive.blog/stemsocial/@tecnotronics/descubriendo-el-condicionante-if-en-arduino-un-puente-hacia-la-automatizacion-discovering-the-if-conditioner-in-arduino-a-bridge
Cómo Funcionan Juntos✨🧙♂️
if dentro de un for: Utilizado para aplicar una condición a cada elemento durante la iteración. Ideal para filtrar y procesar datos basados en una condición.
for dentro de un if: Utilizado para ejecutar un bucle solo si se cumple una condición previa. Ideal para realizar operaciones complejas o generar datos condicionalmente.
Ejemplo en Arduino🚀🔧 :
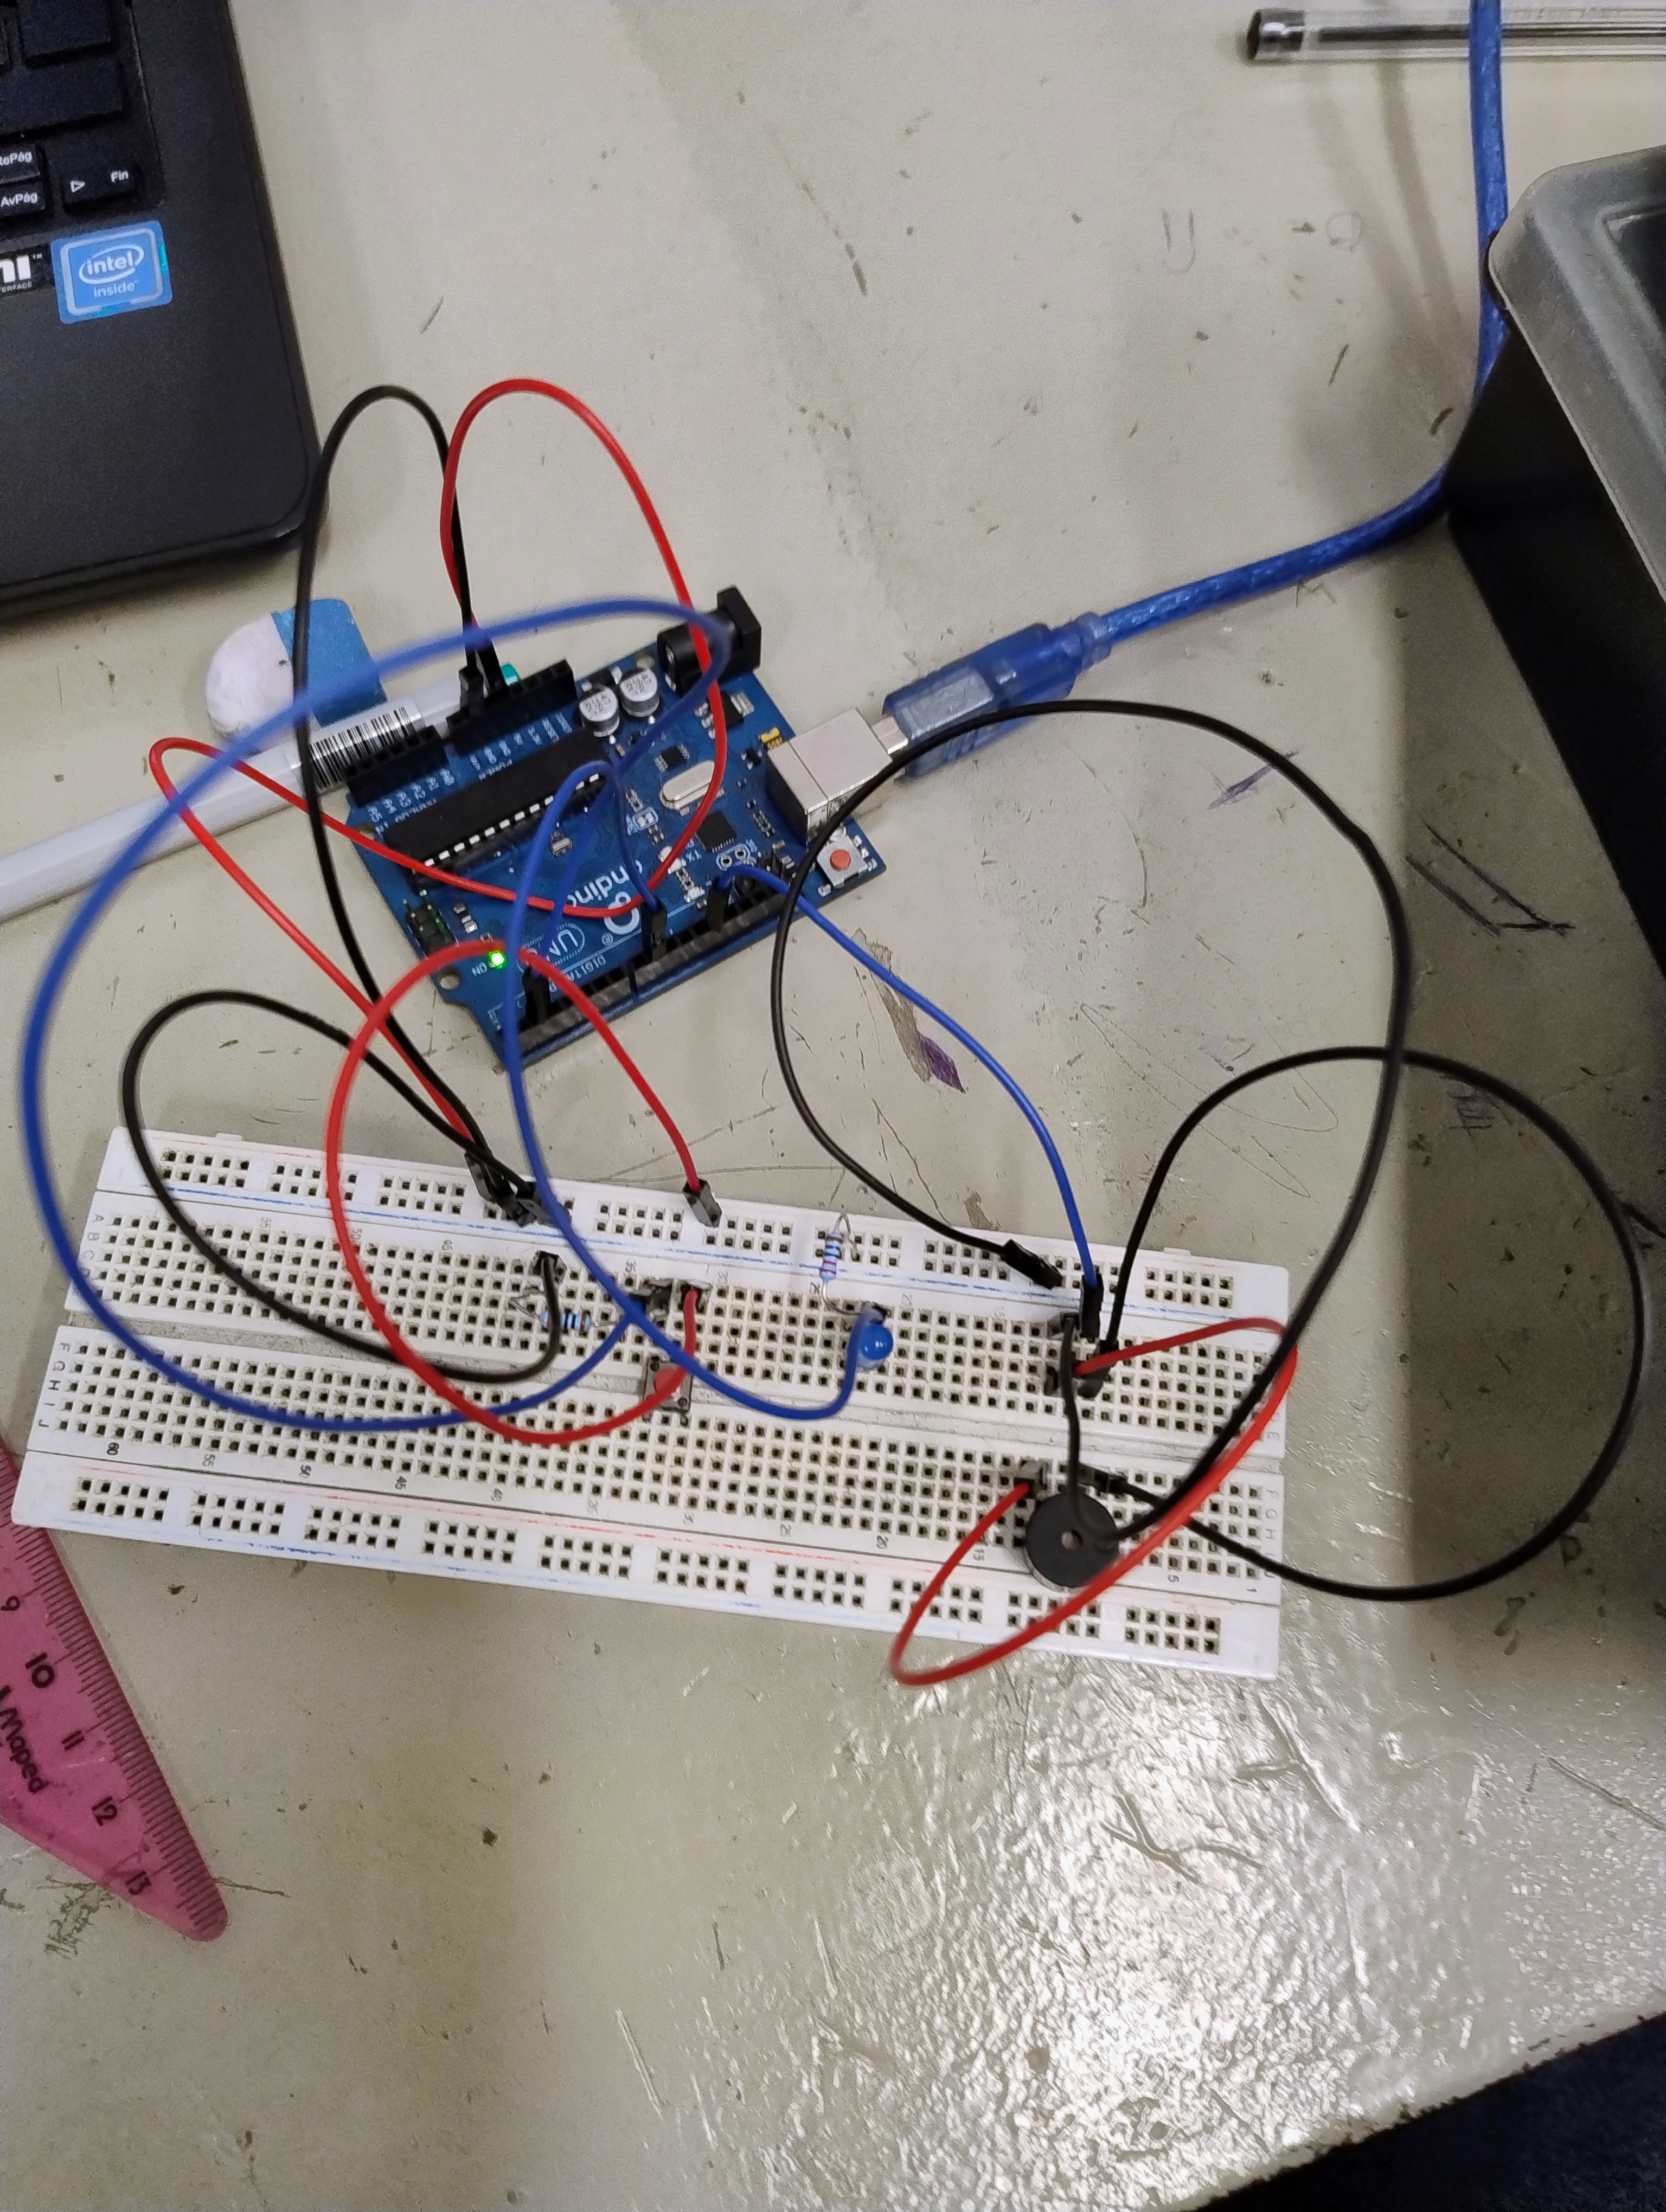
Pretendemos crear un circuito en el cual, al pulsar un botón, se active de manera alternada el buzzer y el encendido del LED. Cuando el buzzer esté sonando, el LED se encenderá, y cuando el buzzer deje de sonar, el LED se apagará. Cada ciclo del buzzer seguirá el siguiente patrón: se reproducirá un tono a una frecuencia de 220 Hz durante 0,1 segundos, luego se detendrá durante 0,4 segundos. De esta manera, cada ciclo completo durará 0,5 segundos. Después de diez ciclos completos, tanto el buzzer como el LED se apagarán indefinidamente.

const int buzzer = 13; //buzzer al pin 13
const int led = 9; //ánodo del led al pin 9
const int puls = 2; //pulsador al pin 2
void setup() {
pinMode(buzzer, OUTPUT);
pinMode(led, OUTPUT);
pinMode(puls, INPUT);
}
void loop() {
if (digitalRead(puls)==HIGH){
for(int i=1;i<=10;i++){
tone(buzzer,220);
digitalWrite(led,HIGH);
delay(100);
noTone(buzzer);
digitalWrite(led,LOW);
delay(400);
}
}
}

Acá lo resolví utilizando un IF y dentro un FOR, espero les sirva de ejemplo y lo puedan utilizar en sus proyectos o para aprender sobre Arduino y electrónica.

Cualquier consulta me lo pueden dejar en los comentarios , justo este ejercicio lo arme y lo comprobé el día de hoy en mi clase de enseñanza practica (taller) es el trabajo practico 11 (TP11) con mis alumnos de 3er año en la escuela técnica de capital federal! un saludo colegas de Hive.
....................................................................-
IF with FOR are friends✨
Hello hive colleagues, today I am going to explain how to combine an if with a for, it is a common technique in programming to make conditional evaluations within a loop. Here I explain how they work together with an example. All this content is what I use for my classes at the technical school in CABA, Argentina.
Basic Explanation🖥️
for🕵️♂️🔍 loop: Allows you to iterate over a sequence of elements, such as a list, a range of numbers, or any iterable.
https://hive.blog/stemsocial/@tecnotronics/descubre-el-poder-del-for-en-arduino-discover-the-power-of-for-in-arduino
Conditional if✅🚫: Allows a block of code to be executed only if a specific condition is met.
https://hive.blog/stemsocial/@tecnotronics/descubriendo-el-conditioner-if-en-arduino-un-puente-hacia-la-automatizacion-discovering-the-if-conditioner-in-arduino-a-bridge
How They Work Together✨🧙♂️
if inside a for: Used to apply a condition to each element during the iteration. Ideal for filtering and processing data based on a condition.
for inside an if: Used to execute a loop only if a precondition is met. Ideal for performing complex operations or conditionally generating data.
Example on Arduino🚀🔧:
We intend to create a circuit in which, when pressing a button, the buzzer and the LED turn on alternately. When the buzzer is ringing, the LED will turn on, and when the buzzer stops ringing, the LED will turn off. Each buzzer cycle will follow the following pattern: a tone will play at a frequency of 220 Hz for 0.1 second, then stop for 0.4 second. This way, each complete cycle will last 0.5 seconds. After ten complete cycles, both the buzzer and LED will turn off indefinitely.

const int buzzer = 13; //buzzer al pin 13
const int led = 9; //ánodo del led al pin 9
const int puls = 2; //pulsador al pin 2
void setup() {
pinMode(buzzer, OUTPUT);
pinMode(led, OUTPUT);
pinMode(puls, INPUT);
}
void loop() {
if (digitalRead(puls)==HIGH){
for(int i=1;i<=10;i++){
tone(buzzer,220);
digitalWrite(led,HIGH);
delay(100);
noTone(buzzer);
digitalWrite(led,LOW);
delay(400);
}
}
}

Here I solved it using an IF and inside a FOR, I hope it serves as an example and you can use it in your projects or to learn about Arduino and electronics.

Any questions you can leave me in the comments, I put this exercise together and checked it today in my practical teaching class (workshop) it is practical work 11 (TP11) with my 3rd year students at the technical school of federal capital! Greetings Hive colleagues.
Thanks for your contribution to the STEMsocial community. Feel free to join us on discord to get to know the rest of us!
Please consider delegating to the @stemsocial account (85% of the curation rewards are returned).
You may also include @stemsocial as a beneficiary of the rewards of this post to get a stronger support.
Thank you for the support of the stemsocial project community, keep posting about electronics🖥️
Nice explanation!!!
And thanks for the follow 😉🙏
!BBH
!DOOK
thanks for the support friend!
Likewise!!
!PIZZA
$PIZZA slices delivered:
@borniet(9/10) tipped @tecnotronics
thanks!