Welcome to one of the most technically challenging Milkyway shots I've ever created. I hope you find the following both inspiring, educational, and a good insight into the work that myself and a lot of other photographers go to in order to create pieces such as this.
The Final Image
Why start here? - well, mostly because this first images becomes the main blog image. But secondly, because it will act as an immediate impression of this image. An end goal, so that as you see the next images you can understand where we are going. This will be a broad overview of how I planned and executed this shot, as well as the thought process behind my editing choices.
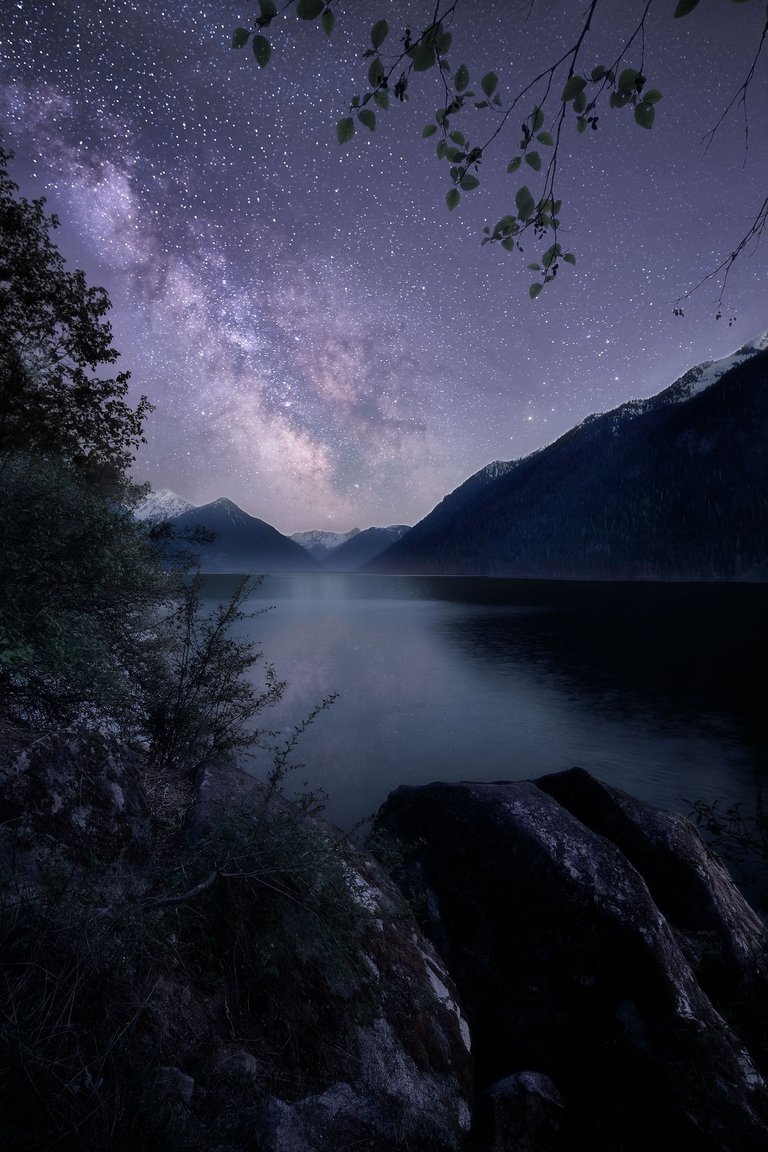
Step 1 - Location Scouting
When I decided to attempt a shot at the milkyway here I did so on a whim the night before as I was looking at the weather. I use a variety of sources to figure out the likely-hood of a successful Milkyway shot, but I'll review that in a different post. For now, what you need to know is that the weather was clear, the time of year was right, and I had the time and energy to be up all night. I arrived at this lake an hour before sunset giving me enough time to walk around the area and scout out multiple potential shots I could take.
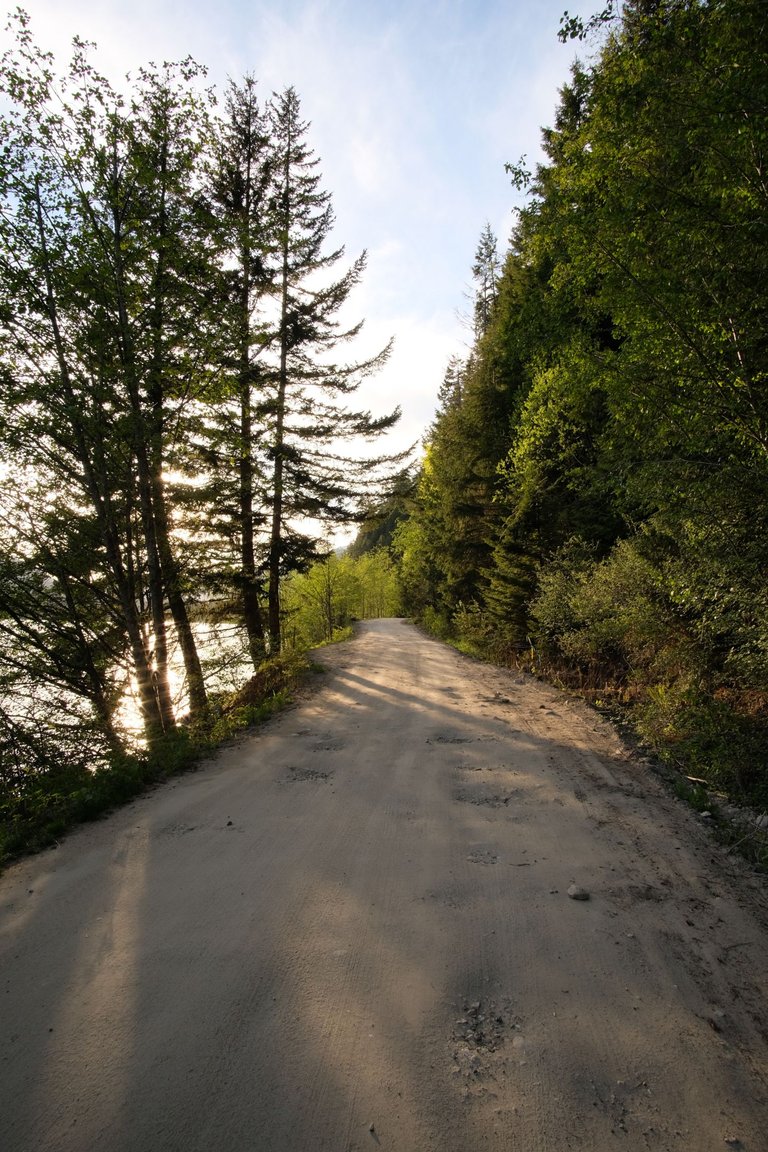 | 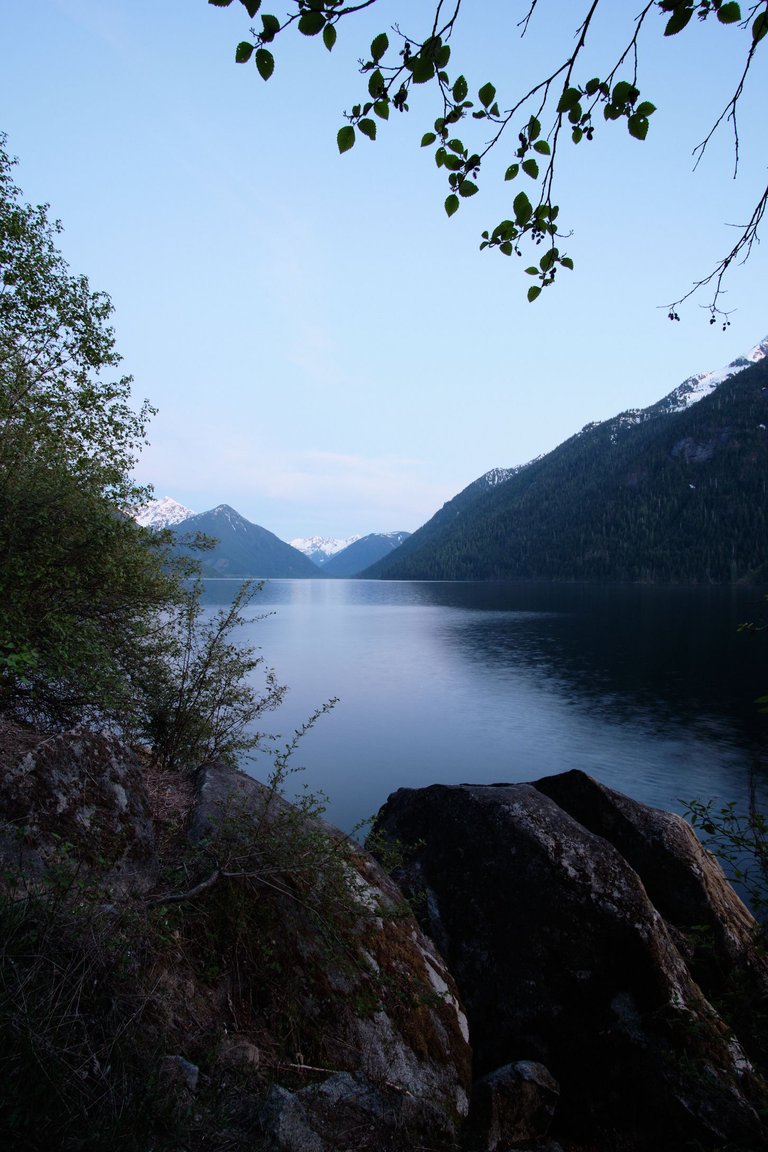 |
|---|
Scouting your location in the daylight is one of the most important steps, unless you're already familiar with the location. It gives you a chance to see everything nicely lit, without stumbling through the dark searching for good foreground elements.
I ended up on this small side dirt road with just enough space to pull over and park. The image on the right was the scene I thought I would capture. In the remaining light of the day I took a variety of shots to end up with this final composition. I setup my tripod and returned to my car for a nap as the sun went down.
Blue Hour - A Shooting the Foreground
Blue Hour is what I would argue is the most important shot. The light that occurs during the blue hour will make every foreground of a milkway that much easier to work with. You could shoot in the midst of the dark night, stack a bunch of frames or use noise reduction methods to help with the foreground... but it is many many times easier to just blend a blue hour frame into your final image.
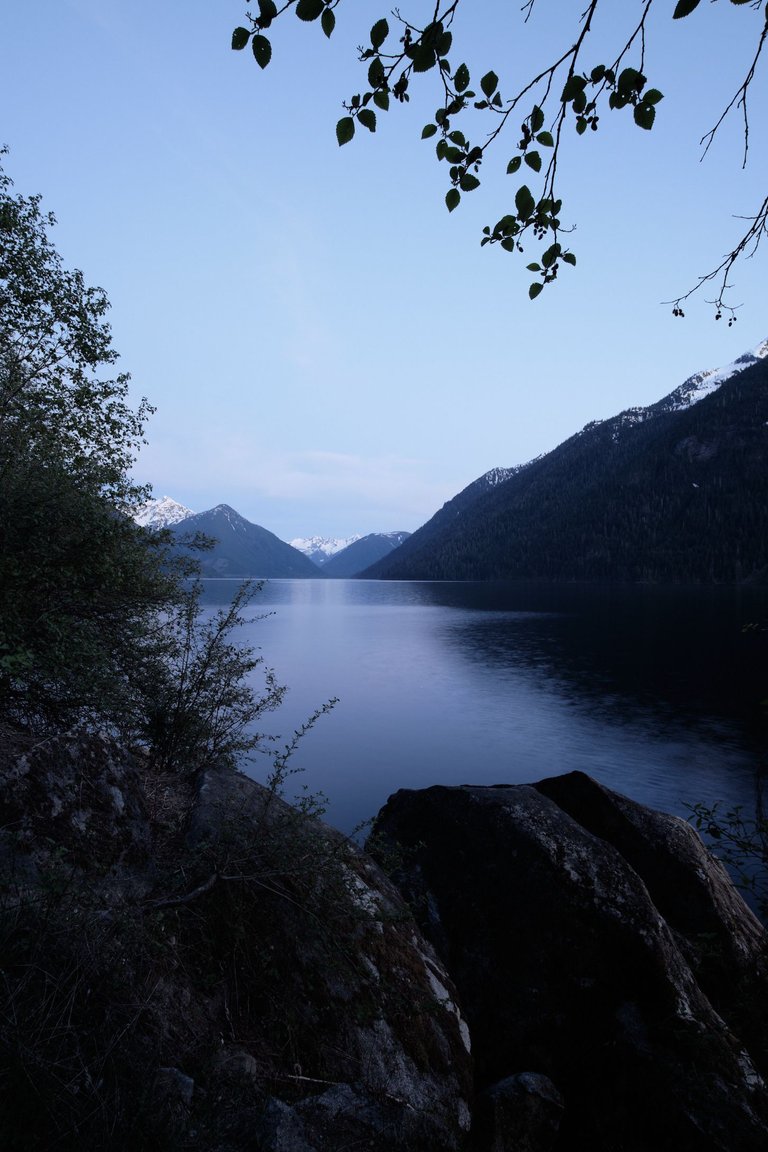
When my alarm went off at the start of blue hour I just hopped out of the car, put my camera on the tripod, and snapped the first frame of my final image. Below, is the unedited and the prepared RAW image that was used for the foreground - the Blue Hour Shot
 |  | |
|---|---|---|
| Unedited RAW | Prepared RAW |
Rokinon 12mm, f/8, ISO400,2.1s
What you'll notice is there is very little that is changed here. The only true adjustments are darkening the shadows a bit, adding a slight purple/blue tinge, and reducing some of the contrast. Thats usually all that is needed. There isn't much light at night, and the deep dark of space creates more blue like tones to the eyes. So thats all that I needed to change to make it match the colors of the night. I've ignored the sky entirely, because I plan to replace it shortly.
The Milkyway - The Battery Drainer
Next it's time to setup the shots for the milkyway. You'll see from my catalog here that I took no shortage of frames. 109 to be exact, plus 5 dark frames.
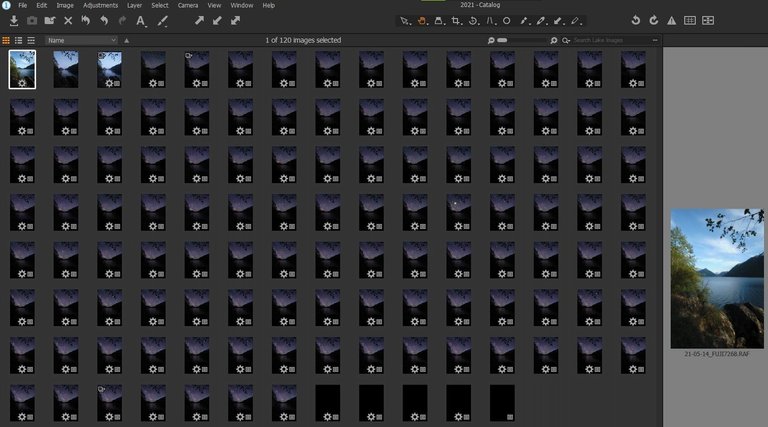
Dark frames are used in software to help reduce sensor noise. When you leave your camera on taking continuous frames for so long the electronics get tired and start producing hot pixels and noise, neither of which are good for your image. The easiest way to do this is use an intervalometer to set up reoccurring shutter fires without you needing to be there to manually press the button. You can also figure out your shutter speed with these two handy rules.
| For Online | 500/focal length | 500/20mm = 25sec |
|---|---|---|
| For Print | 400/focal length | 400/20mm = 20sec |
For my setup, I was using the Rokinon 12mm for Fujifilm X-Mount. Factoring in the crop factor, I get the following -> 400 / (12mm x 1.5crop) = 22.2sec ~ 20 sec shutter speed.
I set my intervalometer to 21sec, and told it to fire infintiely. That gives approximately 1sec in between frames. Shutter speed is important because if you leave your shutter open too long you'll get blurred stars as they transit across the sky. Keep this in mind!
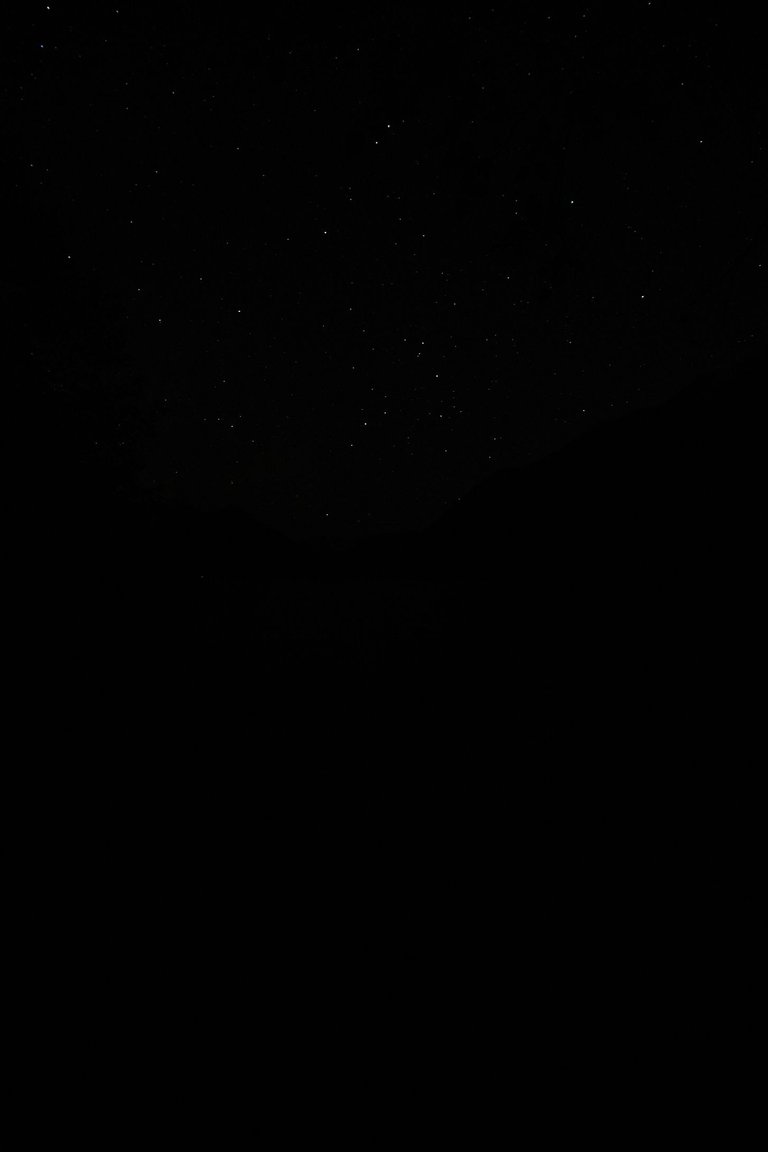
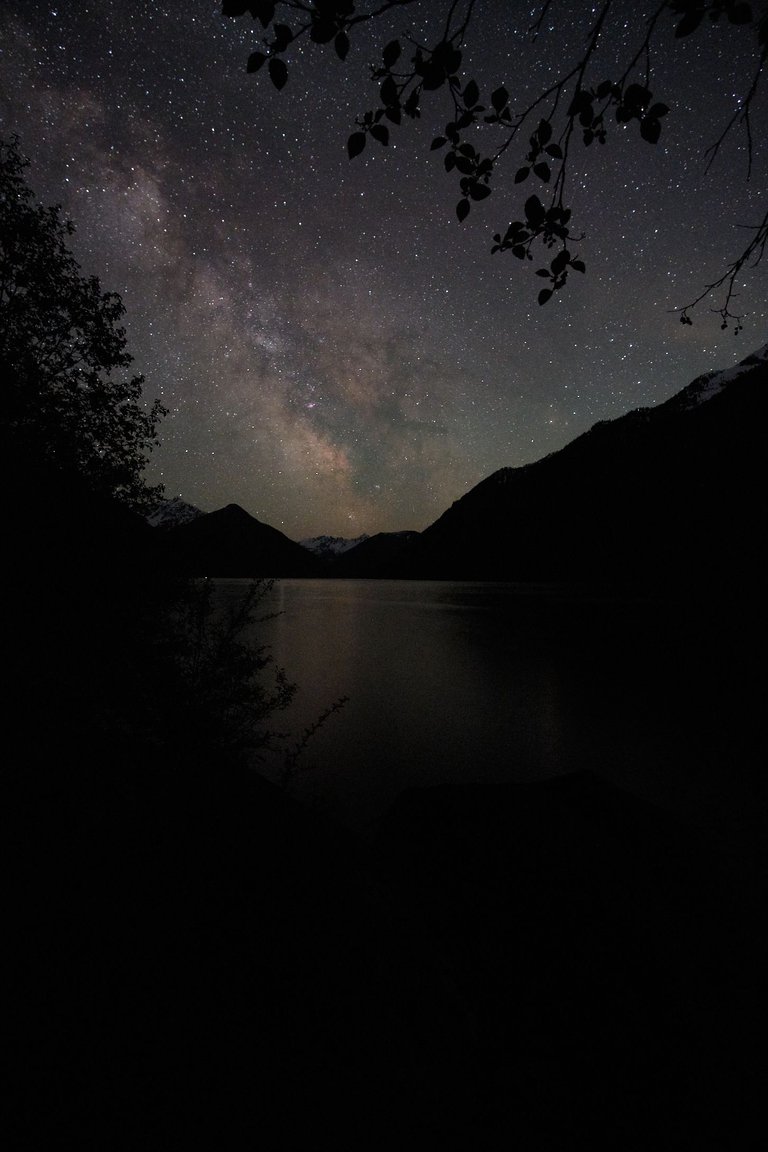
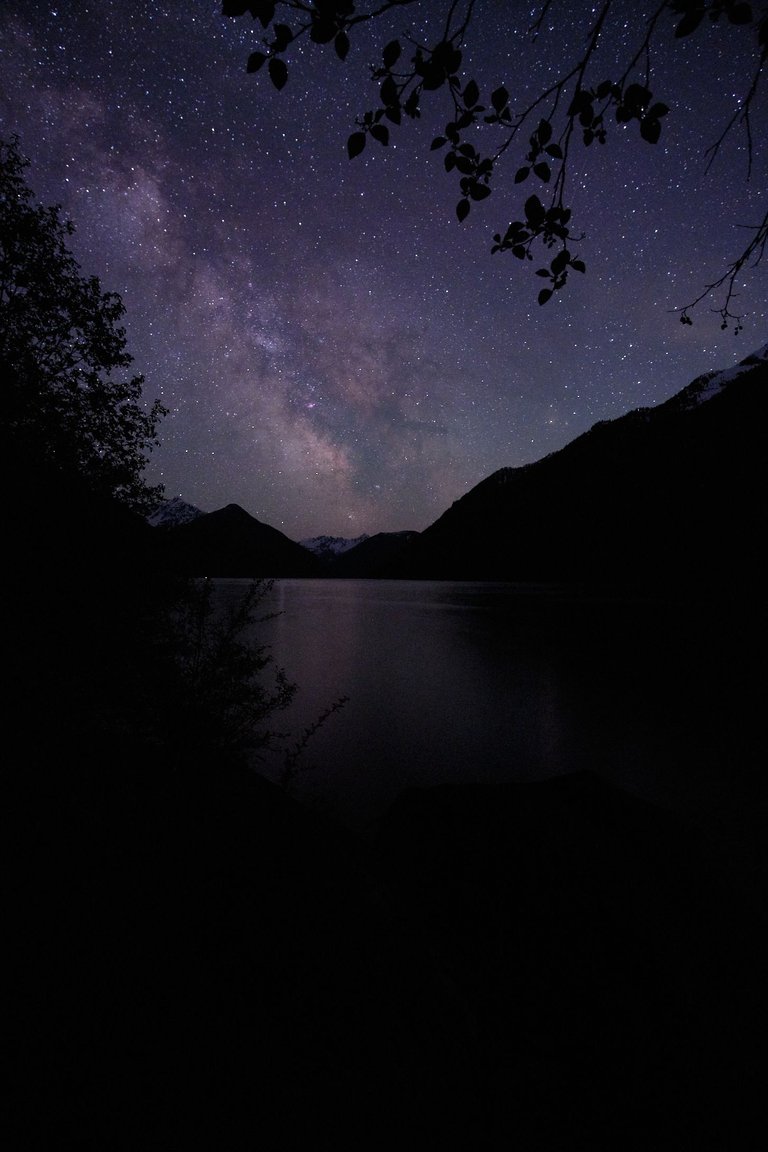
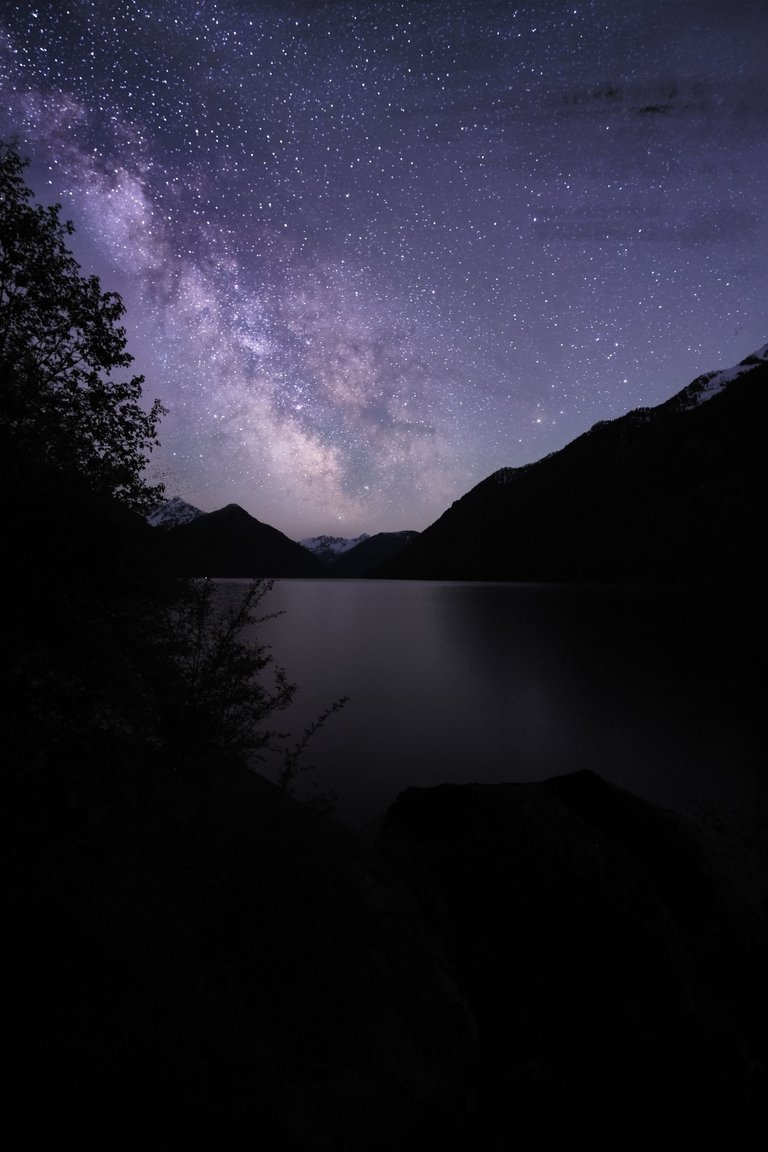
Once finished, I plug these all into a software called Sequator to create the combined image. You'll see why below.
 |  |  |  |
|---|---|---|---|
| SKY RAW | +3 Exposure | Prepared RAW | Sequator Merge |
                                        Rokinon 12mm, f/2.2, ISO800, 20s
                                            Total Merge time = 35min
Looking at these four images it should be clear why I use Sequator to help my process my astrophotography. The incredible amount of brightness, color, and noise reduction the software can pull from the combined images is insane! And even better, the more frames you have the more you pull. It only needs a min. of 4 frames too. The software merges and aligns the entire sky, keeps the foreground still, and uses an algorithm to produce the best color depth it can.
Processing the Final Image
This is the hardest part. Most people would choose to use a software like photoshop Photoshop to do this. You can also use others like GIMP, or competitor options like Affinity Photo or Corel Paintshop Pro. I personally use Affinity Photo.
First you'll want to bring in both your Blue Hour and Sequator Merge Files. If your software has an auto-align option I'd use it here. However, if you don't, or yours doesn't work quite right like mine didn't, just take the top layer and change its layering type to difference and manually stretch it from there. I'd recommend placing the Sequator Merge image layer on top.
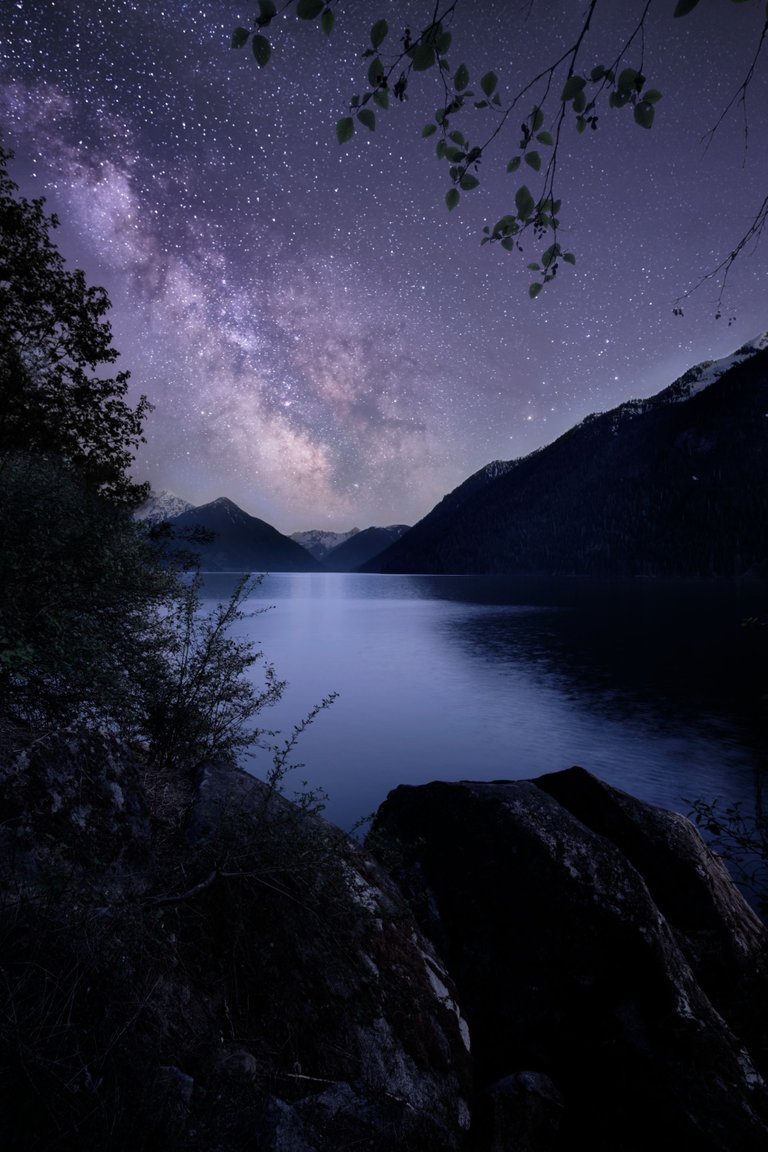
Apply a mask to the sky image, and mask out the foreground. This is what you should get.
 |  |  |
|---|---|---|
| Blue Hour | Sequator Merge | Blended Image |
Something important to note is the tree branches missing from the Sequator Merge. Sequator can't deal with objects in the sky very well, it does better at ground level items. This was easily one of the hardest parts of this image. Blending these branches back into the sky in a believable way. Keep things like this in mind if you go choose to shoot astro... it will haunt you in the post processing.
Now, the next issue we need to deal with is the dynamic range. Its ugly. The lake is bright like daytime, and the rest of the image is dark like it should be. Its also too "clean". So we need to bring this image back to reality. My tip for this; take some video on your phone and describe the colors you see during the night you take your image. For my edit here, I've added some false light pollution to help blend the sky and mountains together better, as well as some fake mist off in the far distance to give the lake more realistic nighttime feel.
Another thing to note is the color of the water versus the sky. The sky has a more purple tinge to it, while the water remains blue in the initial blend.
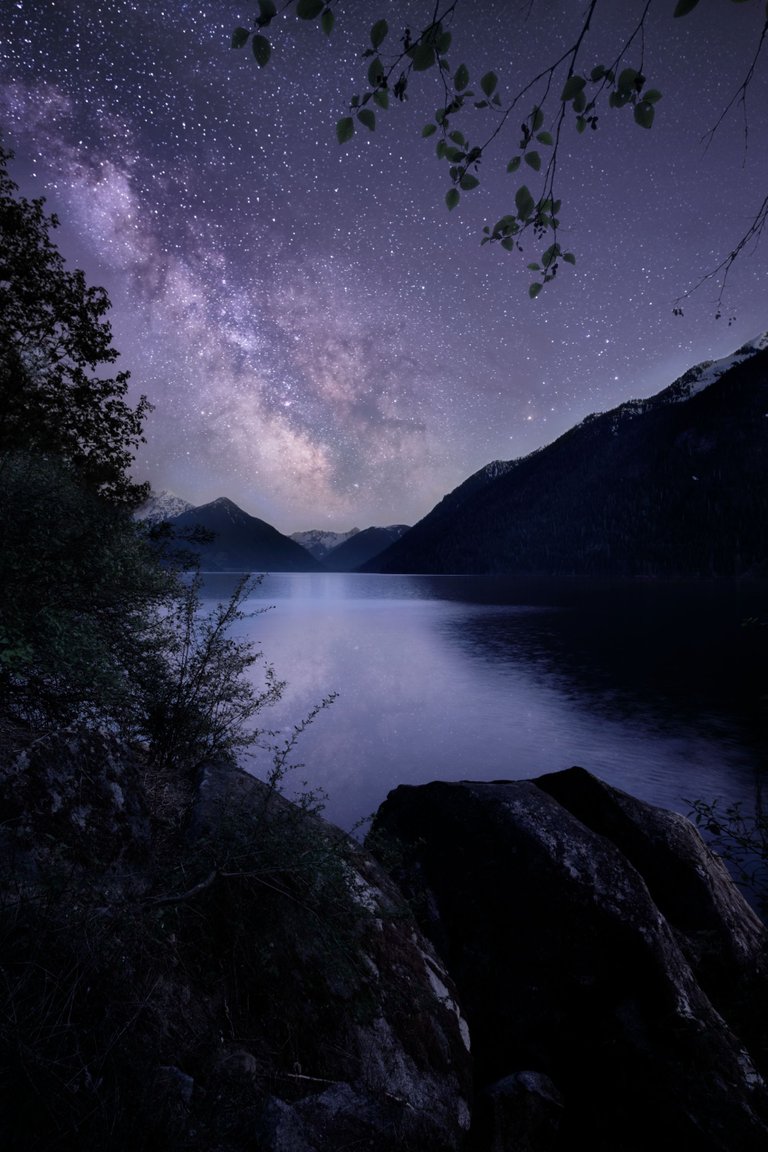
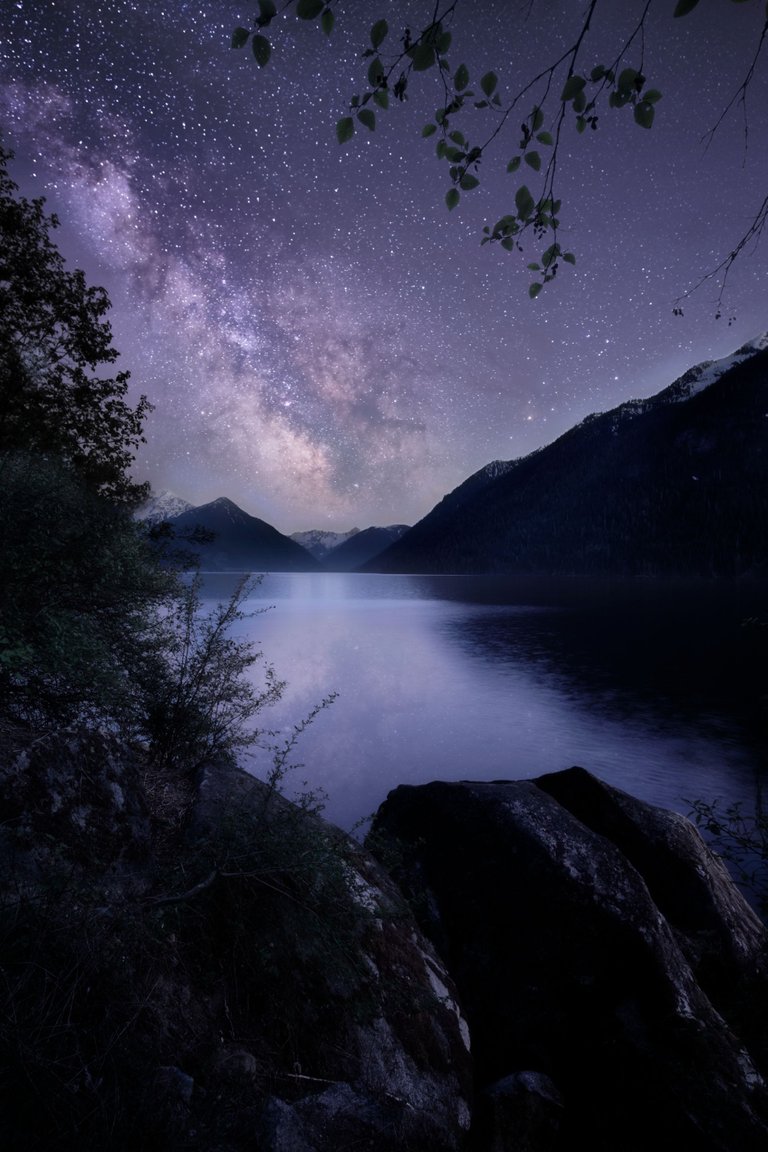
To fix this I first did some color adjustments and shifted the blues in the water towards purples. I also wanted to capture the reflection, something I've witnessed before and felt was fitting to this scene. And while there was some reflection here in reality, the lake was far too windy that night to truly show the reflection in any meaningful way. I've inverted and masked the milkyway into the water here as my small cheat.
 |  |  |
|---|---|---|
| Blended Image | Blend w/ - Reflection | Reflection with Reduced Opacity |
Between the 2nd and 3rd shot above here the biggest changes I've made were specifically to the way the water blended with the mountains, the reflection opacity and saturation, and also how clear the stars were. Water blurs things, so I tried to blur and obscure the reflection slightly as well.
 |  |
|---|---|
| Reflection with Reduced Opacity | Final Image |
I decided after sitting on this image for a few weeks that the water was still too intense, so the final step I took was further reducing the waters saturation and giving it a slight shift back towards to blue. Adding in further mist, and some glow to the overall image along with a shadows boost to bring some more details into the darkest parts of the image.
There are still many things I'd like to tweak further on this image - especially now that I'm once again revisiting the steps I'd taken to create this. New techniques and preferences... but we all have to stop somewhere. And so that's where this image will remain for the foreseeable future.
I hope you enjoyed this start to finish look behind the scenes at how I create this image! Now go shoot some stars yourself!
The Final Image

If you've enjoyed this blog please consider supporting my work through HIVE/Dyptre or following me on Twitter/Dyptre or Instagram/Dyptre
Really cool to see the process, and the final image is beautiful. I have had a single hot pixel in nearly every Astro image I have shot on the Nikon Z5 and never thought to shoot some dark frames. Thanks for the in depth article!
Dark Frames are almost a must if you're shooting multiple frames! It will definitely help.
An important note. You should take dark frames each time you shoot, I recommend at the end of your shots before you pack up. That way the temperature of the camera is the same as the previous images you've just shot. It can make a big difference sometimes
This is so pretty! I feel like you have unlocked some of the magic of the picture for me. I am a little torn in how I feel about it. LOL. I want to go out in the forest and sit and see this image. Now, it seems that it was a lot of work to create it, but it means I couldn't ever go out and just sit and observe this magical moment? Did I understand that right? I think what I got from this is that you had to get your original image (blue hour) and then take multiple pictures throughout the night and then merge them and edit them with software magic. It is very impressive, and it takes talent, so I hope I don't sound like I am taking away from that. I feel like I got a behind the scenes look into how the image was created, but I realllllly do want to go and sit under the stars and see this. :O I hope that all made sense. It truly is a beautiful picture.
It absolutely makes sense! I also agree. I sometimes feel torn about how much editing should be done in an image. It can surely take away from the feeling, and for you, I feel like it may feel like learning how a magician has done his trick. It ruins the illusions.
The good news is that you CAN see this by just sitting under the stars. When I did this edit I wanted to recreate the image as I felt it should be seen while sitting there, what I could see, and what I wanted to be richer. I was able to see the milkyway that night with my own eyes, and it was reflected partially in the water. I could see the rocks, the stars... everything! But the camera can't do that in one single shot. Its just not powerful enough. Our eyes truly are amazing. Where I made this photo more hyperrealistic is in how bright the sky is. Its wasn't quite this defined - but this is mostly due to light pollution. If you travel far enough from manmade lights the Milkyway truly is this bright!
Here is the image quickly altered to how bright it was to me in person. As you can see, it's mostly the sky that I have added the magic too.
If you'd like to see the Milkyway in person some day, I'd suggest using this Light Pollution Map to find a dark sky area near where you live! I usually find I can see it with my eyes anywhere in the green-black areas.
You've given me great idea though! I'll make another walkthrough on HOW to find the milkyway!
Wow this is really neat to see this process. I've taken long exposures of the sky but I haven't tried blending multiple compositions. Looks like I have a thing-I-need-to-try. Great work!
Glad I could introduce you to the idea. Honestly, it's been a life saver when it comes to astrophotography. I started with doing just single frame night skies. But with stacking your creative ability just explodes.
Your content has been voted as a part of Encouragement program. Keep up the good work!
Use Ecency daily to boost your growth on platform!
Support Ecency
Vote for new Proposal
Delegate HP and earn more
Congratulations @dyptre! You have completed the following achievement on the Hive blockchain and have been rewarded with new badge(s):
Your next target is to reach 3000 upvotes.
You can view your badges on your board and compare yourself to others in the Ranking
If you no longer want to receive notifications, reply to this comment with the word
STOPCheck out the last post from @hivebuzz:
Support the HiveBuzz project. Vote for our proposal!
Absolutely amazing shot and the whole process of planning it!
!PIZZA !WINE
Congratulations, @krusty81 You Successfully Shared 0.300 WINEX With @dyptre.
You Earned 0.300 WINEX As Curation Reward.
You Utilized 1/2 Successful Calls.
Contact Us : WINEX Token Discord Channel
WINEX Current Market Price : 1.999
PIZZA Holders sent $PIZZA tips in this post's comments:
@krusty81(1/5) tipped @dyptre (x1)
Learn more at https://hive.pizza.
Amazing shot and composition! Thanks for sharing the walkthrough as well!
Absolutely! Glad you like the shot and hopefully I provided some good insight in to how to create images like this
Thank you so much for sharing your process… the end result is stunning to say the least.
😊
Absolutely! Glad you enjoyed the read and the final image! Feel free to let me know if you have any questions ever
Thank you 😊 much appreciated. I maybe will do that one day. At the moment; my DSLR camera died with my last trip abroad to Cuba…. I’m researching what replacement would be best for my needs etc. once that is sorted I can take photos again 😎
Fantastic to read! Nice to be able to have shot the Milky Way a lot but still get useful information from another photographers process.
Oooooh interested to know if there was anything new you learnt. The whole community of sharing tips and tricks is one of the greatest things about the internet
This is pure art. Of course, the picture itself was already beautiful, but even so, you found another way of improving it a lot more.
Congrats on this work, I loved it!!!
Thank you so much :) what a nice comment. I'm glad you've enjoyed the walkthrough and the final image!
Nice work. Thanks for sharing your workflow. I like the trick of adding in a reflected and blurred milky way on the water.
This was a fascinating, in-depth look into your process for creating such a beautiful image! As someone who is barely beginning to break into astrophotography, this was extremely insightful and I'll be bookmarking it for future reference. Hope to see more of these educational writings from you!
Epic amount of detail here. Glad to see it.
Amazing work and details. The final image is breathtaking! I like how you started with the blue hour shot. And that reflection. 🤩
Damn I know a lot of work goes into photography (especially certain types like astrophotography) but damn that's a lot of work O_O
And an absolutely stunning end result.
And now I know what those interesting light periods are called XD
Personally, I think Astrophotography and Macro are the absolute most technical. Where landscapes relies more on weather and timing, macro and astro require a ton of computer work to create an image in a way that's visually pleasing. It really can be a lot of work!
That is really cool! I LOVE the final result!
I'm just on the beginning of how to learn editing images. Can you advice me which program is the best to start with? Considering I'm a newbie, and no experience at all? I don't want something complicated, I just need to give my photos a 'sparkle' :d
greetings from Romania, also in love with Vancouver :x
Hey missdeli! Sorry for the slow response. For software I've used and can recommend all of these. Usually I start with the RAW processors to adjust colors, get the WB right etc. Then I'll stick the image into one of the RAW processors to do some more intense work like cloning, stacking, and blending etc of the frames.
For Image Manipulation I'd look at these:
GIMP - Free
Affinity Photo ~$50
Photoshop
For RAW Processing
Darktable - Free
Sequator - (Free) Star stacking after RAW Process
CaptureOne
Lightroom
The last option, although I personally think it limits your ability to grow, is Luminar. The reason I say that is they use AI to achieve the results, but don't really help you learn what its doing to your photo. But, depending on what you want to do it could be the easy 2 button option too.
Lightroom and Photoshop are the two most popular. I personally use CaptureOne and Affinity because of the costs