Hola queridos amigos de Hive y Graphic Desing, espero que se encuentren muy bien, hace poco instale uno de mis juegos preferidos de estrategia, mucho de ustedes sabrán cual es por la miniatura, pero para los que no lleva por nombre Starcraft II y mientras jugaba unas cuantas misiones de campaña, tuve la idea de realizarme un fotomontaje dentro del famoso traje de infantería Terran. En realidad tuve esta idea hace tiempo pero nunca la realice quizás por falta del mismo o por olvido, siempre me ha gustado mucho el traje de combate CMC, sobre todo después de ver la cinematica de Wing of Liberty hace unos cuantos años ya, incluso desde que jugué por primera vez Starcraft tuve la pequeña fantasía de estar dentro de uno de estos trajes y reventar a todo cuanto bicho se me
cruce.
Hello dear friends of Hive and Graphic Desing, I hope you are very well, I recently installed one of my favorite strategy games, many of you will know which one it is by the miniature, but for those who don't, it's called Starcraft II and while I was playing a few campaign missions, I had the idea to make a photomontage inside the famous Terran infantry suit. Actually I had this idea a long time ago but I never realized it maybe for lack of it or for forgetfulness, I have always liked the combat suit CMC, especially after seeing the cinematics of Wing of Liberty a few years ago, even since I played Starcraft for the first time I had the little fantasy of being inside one of these suits and blow up every bug I came across.
Pero con prótesis aumentadas para romper ese hilo entre maquina/humano y lograr una sinergia completa con el exoesqueleto del traje. Algo totalmente fuera del lore del juego pero bueno uno deja volar su imaginación 😂, como siempre dejare el paso a paso tras el montaje que resulta ser bastante sencillo y los recursos que utilice para realizarlo. 😁
But with augmented prosthetics to break that thread between machine/human and achieve a complete synergy with the exoskeleton of the suit. Something totally out of the lore of the game but well you let your imagination run wild 😂, as always I will leave the step by step after the assembly that turns out to be quite simple and the resources I used to do it. 😁

Resource ~ Recursos

click on the images to go to their sources ~ clic en las imágenes para ir a sus fuentes
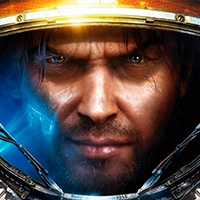
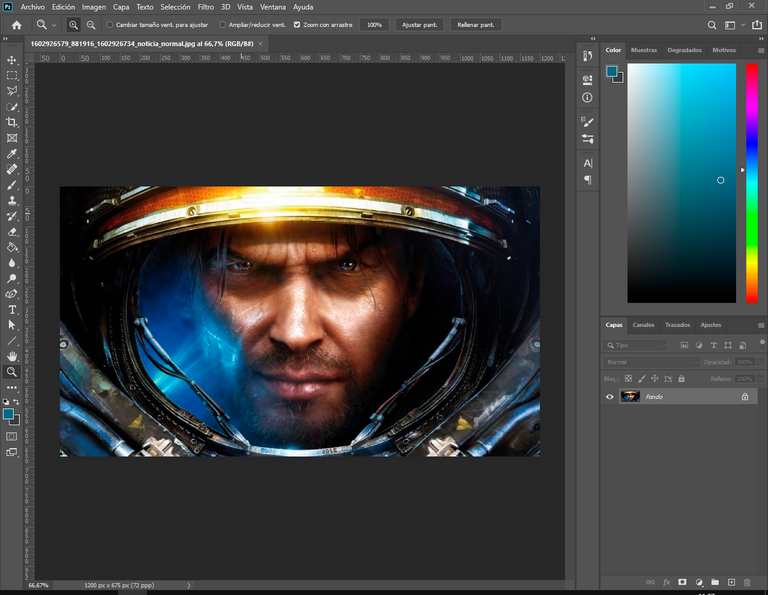
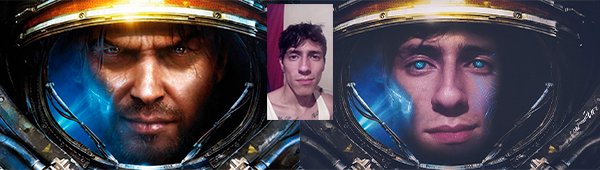
The first thing I did was to look for the image of the cover of the game which shows the face of Jim Raynor (protagonist) with his respective suit, I used directly this image with its dimensions as background (1200x600px) to not lose any detail of the suit, so I just dragged it as a new project in Photoshop.
Lo primero que hice fue buscar la imagen de la caratula del juego la cual sale el rostro de Jim Raynor (protagonista) con su respectivo traje, utilice directamente esta imagen con sus dimensiones como fondo(1200x600px) para no perder ningún detalle del traje, así que solo la arrastre como nuevo proyecto dentro de Photoshop.
Then I added my picture and positioned it so that it was next to Jim's face with Ctrl + T.
Después agregue agregue mi fotografía y la posicione de manera que quedara par a la cara de Jim con Ctrl + T.
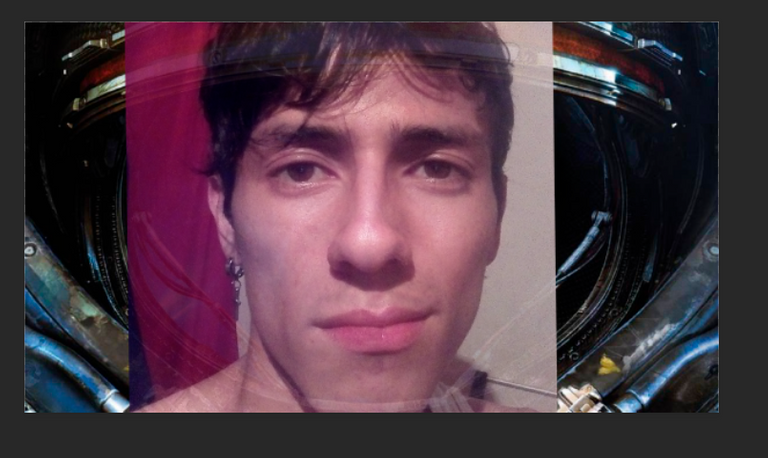
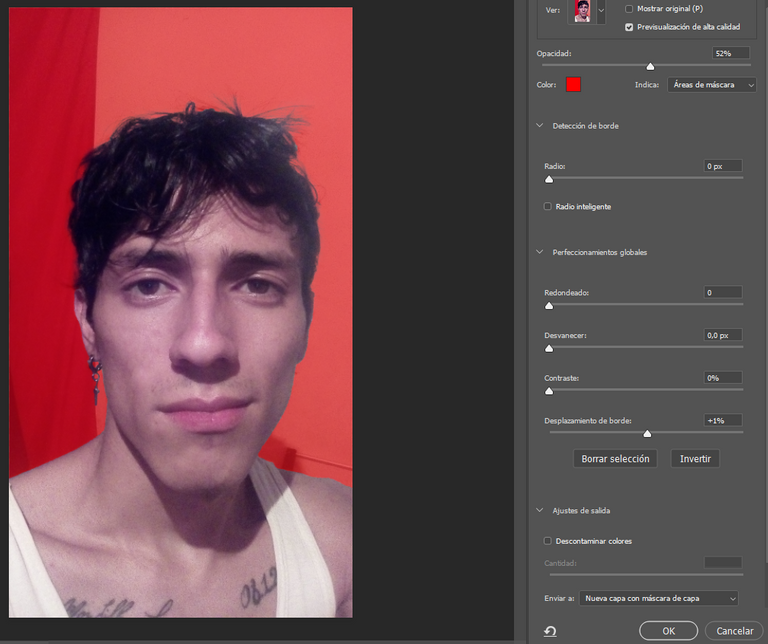
I then made a selection of me and removed the background of the photograph, for this I went to Selection > Subject, then to "Select and Apply Mask" to better enhance the selection and add a layer mask to the clipping.
Para después realizar una selección de mi y eliminar el fondo de la fotografía, para esto fui a Selección > Sujeto, después a "Seleccionar y Aplicar Mascara" para mejorar mejor la selección y agregar una mascara de capa al recorte.
For the second step I had to get inside the suit, for this I duplicated the background layer (The suit) and put it over the photo layer, then I added a new Fill and Adjust layer with black color as a background layer so I could add two layer masks over the two layers of the suit and work on them without losing the black background of the helmet.
Para el segundo paso toco meterme dentro del traje, para esto duplique la capa del fondo (El traje) y la puse sobre la capa de la fotografía, luego agregue una nueva capa de relleno y ajuste de color negro como capa de fondo base y así poder agregar dos mascaras de capa sobre las dos del traje y trabajar en ellas sin perder el fondo negro del casco.
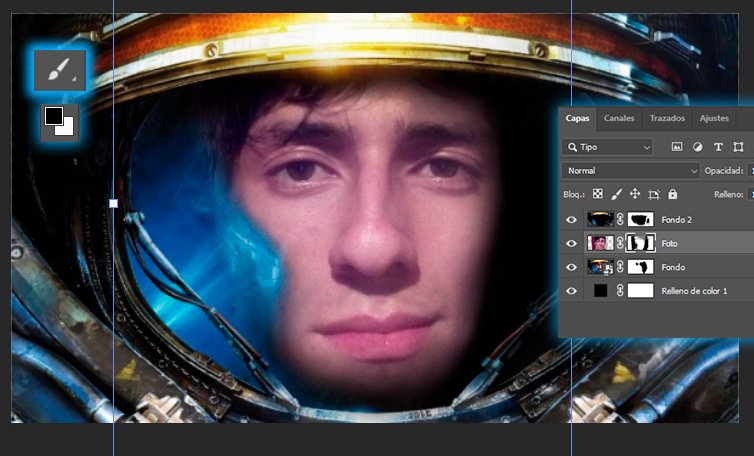
With the front black brush I erased information from the first background layer which gives the effect of being inside the suit, then on the photo layer with a blurred brush flow between 60% and 10% I also hid certain details and added shadows and the hologram. I also gave a little more depth with the background mask.
Con el pincel negro de frente borre información de la primera capa de fondo lo que da el efecto de estar dentro del traje, luego en la capa de la fotografía con un flujo del pincel difuminado entre 60% y 10% oculte también ciertos detalles y agregar sombras y el holograma. También le di un poco mas de profundidad con la mascara del fondo.
For the third step I preceded to change the colors of the photograph and for that I created a new fill and adjustment layer of levels over the layer of the photograph, then with Alt + Click between the two I made a crop so that the layer of levels only affects the photograph. Once that was done I set the parameters as follows.
Para el tercer paso precedí a cambiar los colores de la fotografía y para eso cree una nueva capa de relleno y ajuste de niveles sobre la capa de la fotografía, luego con Alt + Clic entre las dos hice un recorte para que la capa de niveles solo afecte a la fotografía. Una vez hecho eso configure los parámetros de la siguiente manera.
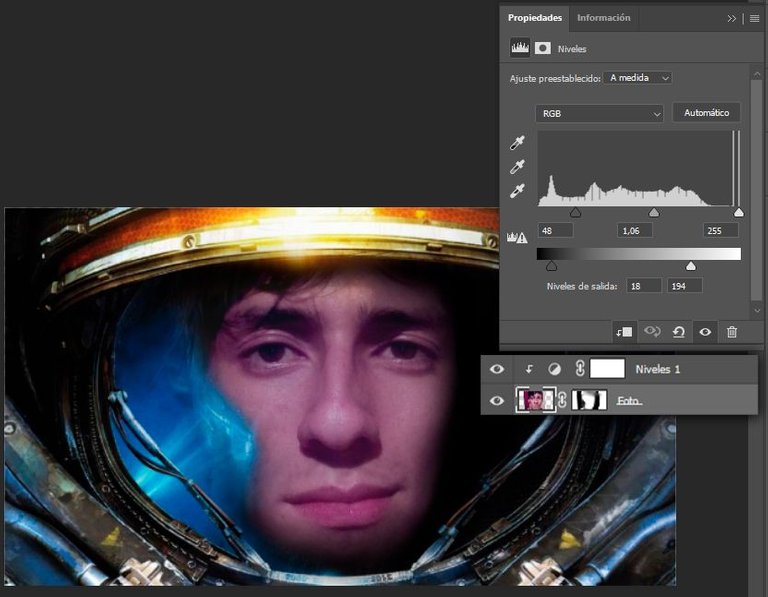
Everything to turn off a little more the brightness of the photograph and give it a cooler tone that levels to the surrounding environment giving to notice a little more the shadows.
Todo para apagar un poco mas el brillo de la fotografía y darle una tonalidad mas fría que se nivele al entorno de su alrededor dando a notar un poco mas las sombras.
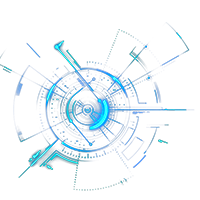
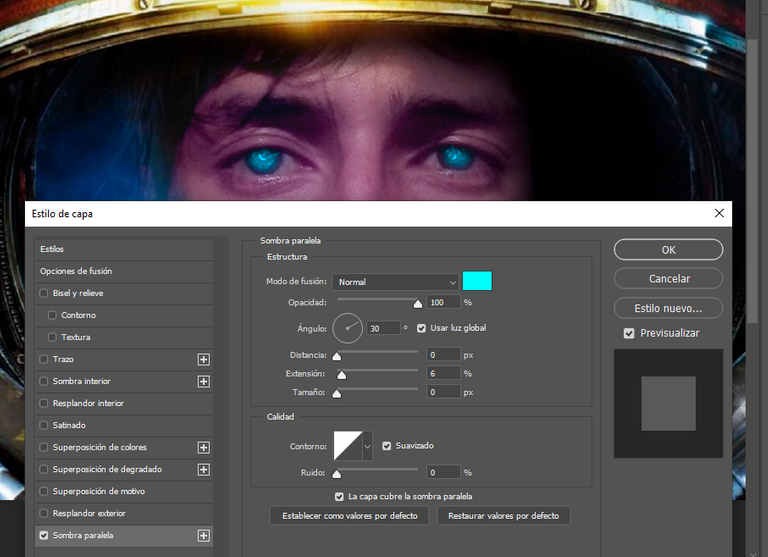
For the fourth step add the first png resource which is the electronic circle that will replace my iris and pupil, after adding it duplicate the layer with Ctrl + J and adjust the size of these two layers to the size of the eye with Ctrl + T. And add the following effects on the two layers.
Para el cuarto paso agregue el primer recurso png el cual es el circulo electrónico que remplazara mi iris y pupila, luego de agregarlo duplique la capa con Ctrl + J y ajuste el tamaño de estas dos capas al tamaño del ojo con Ctrl + T. Y agregue los siguientes efectos en las dos capas.
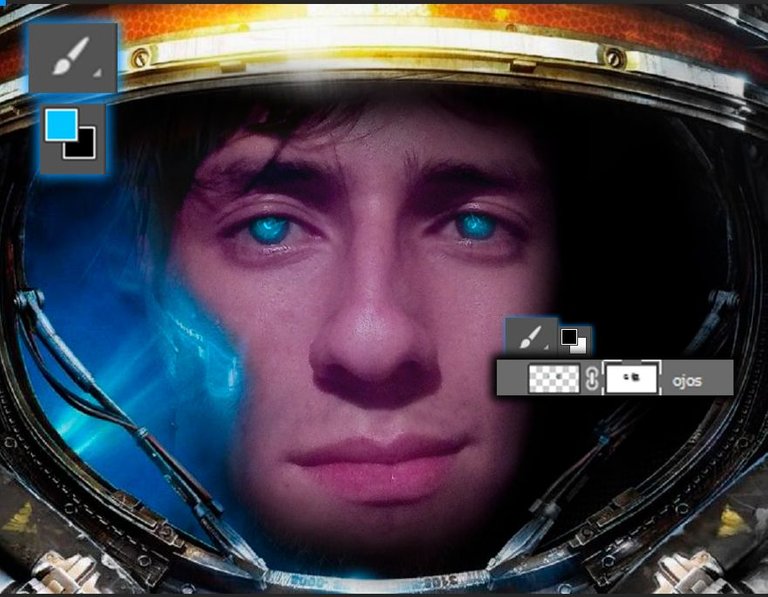
Then add a mask on layer layer to remove the excess details and give the effect with a flow of 60% merging with part of the eye.
Luego agregue una mascara en capa capa para eliminar los detalles sobrante y darle el efecto con un flujo de 60% que se fusionan con parte del ojo.

Then under the two duplicated layers, create a new empty layer and with a light blue blur brush, give two touches in the center of each eye, then with a layer mask and the black brush with a flow of 40% erase the remaining color ends around the eye, finally lower the opacity of the layer to 66% to achieve the following effect.
Luego debajo de las dos capas duplicadas, cree una nueva capa vacía y con un pincel celeste difuminado, di dos toques en el centro de cada ojo, luego con una mascara de capa y el pincel negro con un flujo del 40% borre los extremos de color restante al rededor del ojo, por ultimo baje la opacidad de la capa a un 66% para lograr el siguiente efecto.
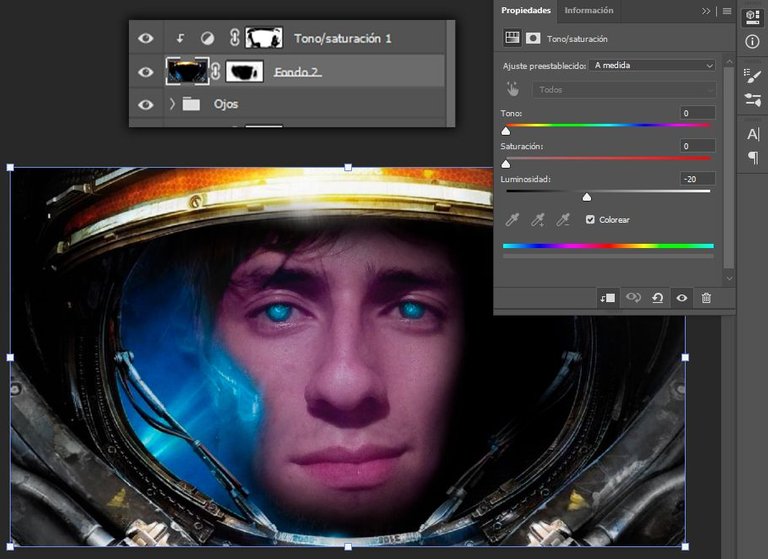
In the fifth step I thought to change the color of the suit to black, for this I created a new **fill and adjust tone/saturation layer over the duplicate layer of the suit and with Alt + Click between the two to create a clipping. Lower the saturation to the maximum to remove all the color and a little luminosity to highlight the grays, then in the layer mask and with a blurred black brush and a hardness of 70% I gave color in the helmet glass and certain parts around.
En el quinto paso se me ocurrió cambiarle el color del traje a negro, para esto cree una nueva capa de relleno y ajuste de tono/saturacion sobre la capa duplicada del traje y con Alt + Clic entre las dos para cree un recorte. Baje la saturación al máximo para eliminar todo el color y un poco la luminosidad para resaltar los grises, luego en la mascara de capa y con un pincel negro difuminado y una dureza del 70% di color en el vidrio del casco y ciertas partes al rededor.
Then I realized that the base of the hull is very empty, there is a very deep black there and I wanted to fill it with some texture from the surroundings, for this I selected with the quick selection tool, part of the hull texture and with Ctrl + J I created a new layer with the selected area, then I made several more copies, I grouped them next to each other with Ctrl + T and combine all the layers into one, then I created a new layer over that one and with the light blue brush I colored the texture I had created and changed the blend mode of this new layer to Soft Light, lowered the opacity to 55% and then I retouched it with the layer mask to increase a little more its shadows.
Luego me di cuenta que la base del casco esta muy vacía, hay un negro muy profundo ahí y quise rellenarlo con un poco de textura de los alrededores, para esto seleccione con la herramienta de selección rápida, parte de la textura del casco y con Ctrl + J cree una nueva capa con el área seleccionada, luego hice varias copias mas, las agrupe una al lado de la otra con Ctrl + T y combine todas las capas en una sola, luego cree una nueva capa sobre esa y con el pincel celeste di color al texturizado que había creado y cambie el modo de fusion de esta nueva capa a Luz Suave, baje opacidad a un 55% para luego darle unos retoques en la mascara de capa y aumentar un poco mas sus sombras.
For the sixth and last step in Photoshop add the second resource which is the data circuit on the cheek, after adding it duplicate the layer with Ctrl + J and position them so that they were around the cheek with Ctrl + T, then with a mask on each one and with the black brush blurred of different sizes and a flow between 80% and 5% merge the two layers with the background of my face as smooth as possible, then change a little the tonality of the circuit with a new fill and color adjustment layer and a blend mode of color overexposure and an opacity of 46%, the circuit layers also have an opacity of 55% to achieve the following effect.
Para el sexto y ultimo paso en Photoshop agregue el segundo recurso que es el circuito de datos en la mejilla, luego de agregarlo duplique la capa con Ctrl + J y las posicione de manera que quedaran alrededor de la mejilla con Ctrl + T, luego con una mascara en cada una y con el pincel negro difuminado de distintos tamaños y un flujo entre 80% y 5% fusione las dos capas con el fondo de mi cara lo mas suave posible, luego cambie un poco la tonalidad del circuito con una nueva capa de relleno y ajuste de color y un modo de fusión de sobre exposición de color y una opacidad del 46%, las capas de circuitos también tienen una opacidad del 55% para lograr el siguiente efecto.
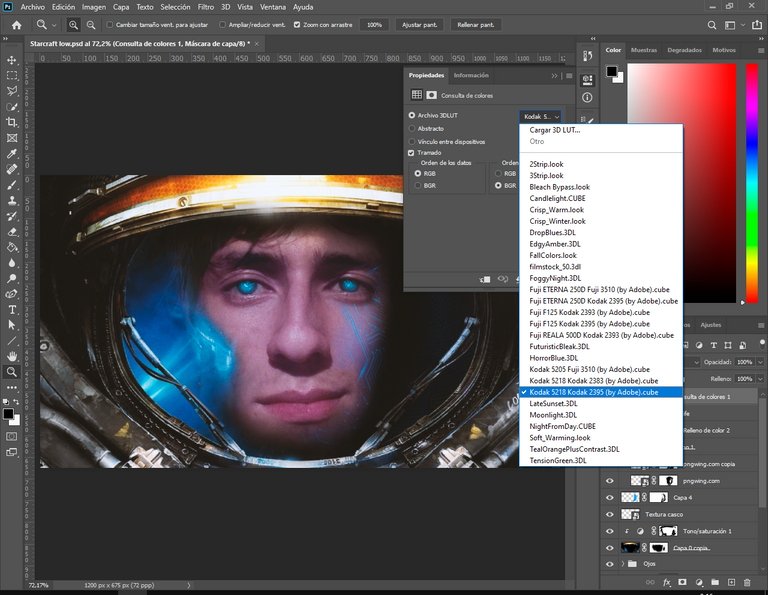
Then to finish add a 3DLUT filter, for this add a new top color query layer on top of all the layers and add one of the following default filters.
Luego para finalizar agregue un filtro 3DLUT, para esto agregue una nueva capa de consulta de colores de primera sobre toda las capas y agregue uno de los siguientes filtros predeterminados.
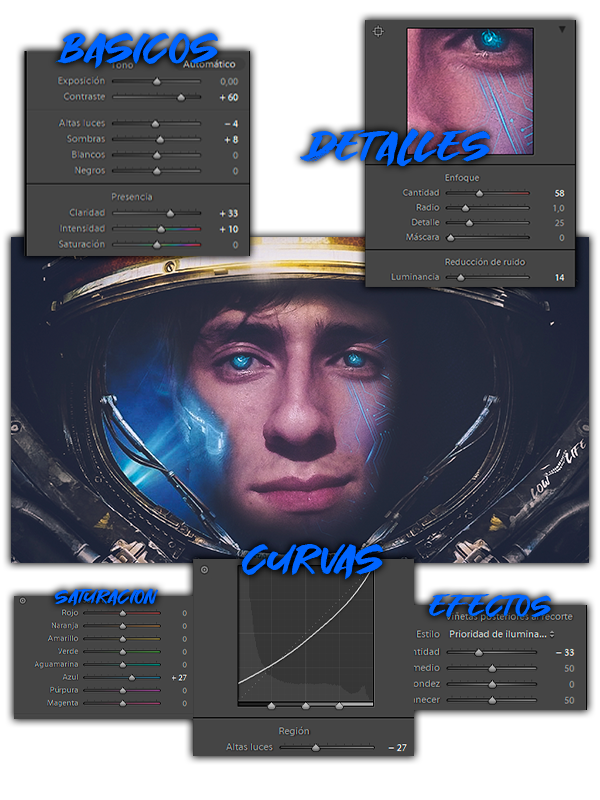
After exporting it to Lightroom I wanted to witness a little more skin tone and color effects, without losing that cool matte around it, for that, I increased the contrast and shadows a little more, along with the clarity and intensity, then I lowered the high lights of the curves tone, increased the focus a little and decreased the noise a little more, to finish I gave a little more saturation level to the blue and added a fading effect on the edges of the image.
Luego de exportarlo a Lightroom quise presenciar un poco mas el tono de la piel y el color de los efectos, sin perder ese mate frio a su alrededor para eso, aumente mas el contraste y un poco las sombras, junto con la claridad y la intensidad, luego baje las luces altas del tono de curvas, aumente un poco el enfoque y disminuí otro poco el ruido, para finalizar le di un poco mas de nivel a saturación del azul y agregue un efecto de disminución de luz en los bordes de la imagen.
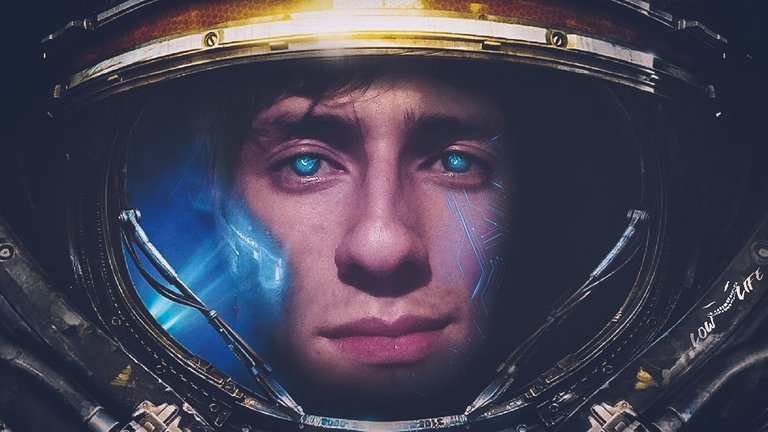
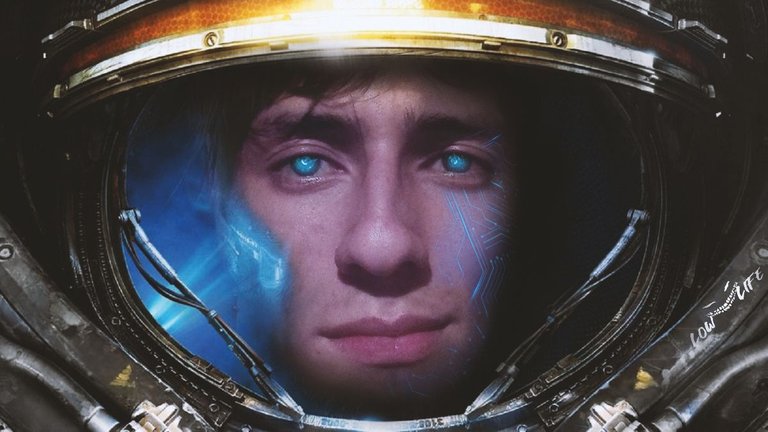
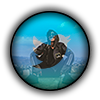
To conclude with the following result. ~ Para finalizar con el siguiente resultado.
Y bueno amigos este a sido todo el procedimiento para lograr este foto montaje, espero que les haya gustado y les pueda servir de ayuda en caso de que quieran aplicar alguno de estos efectos en sus ediciones, como siempre cualquier critica constructiva es bien agradecida de mi parte, yo seguiré asesinando zergs un rato mas en Starcraft II, espero que tengan un excelente fin de semana lleno de buenas vibras y salud, nos leemos en otro post!
And well friends this has been the whole procedure to achieve this photo montage, I hope you liked it and it can help you in case you want to apply any of these effects in your editions, as always any constructive criticism is well appreciated from me, I will continue killing zergs a while more in Starcraft II, I hope you have a great weekend full of good vibes and health, see you in another post!

Another very satisfying design! I love anything to do with going to outer space. You did something really cool with this one.
Thank you very much, as always your support is what drives me to publish some of my projects, soon I will be much more active in the community with better content. 😁
I congratulate you for a very good montage.
Thank you very much I'm glad you liked it 😄