Hey amigos como están? Espero que se encuentren super bien y que estén teniendo una excelente semana, hoy me gustaría compartir con ustedes otro de mis trabajos de edición realizado con Photoshop y Lightroom, este es un poco mas complejo que los anteriores y tiene una temática bastante fría y fantasiosa, quizás puedan notar un exceso en la tonalidad de los colores, pero fue totalmente intencional para hacer ese efecto de magia rúnica y gélida, como siempre dejare los recursos utilizados con sus respectivos enlaces y el paso a paso lo mas simplificado posible, espero que les guste!! 😁😁
Hey friends how are you? I hope you are doing great and are having a great week, today I would like to share with you another of my editing work done with Photoshop and Lightroom, this is a little more complex than the previous ones and has a rather cold and fantasy theme, perhaps you may notice an excess in the tone of the colors, but it was totally intentional to make that effect of runic and icy magic, as always I will leave the resources used with their respective links and the step by step as simplified as possible, I hope you like it!

Sources ~ Recursos


Click on the images to go to their sources ~ Clic en las imágenes para ir a sus fuentes
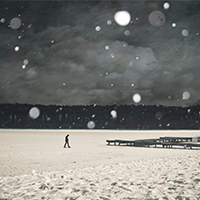
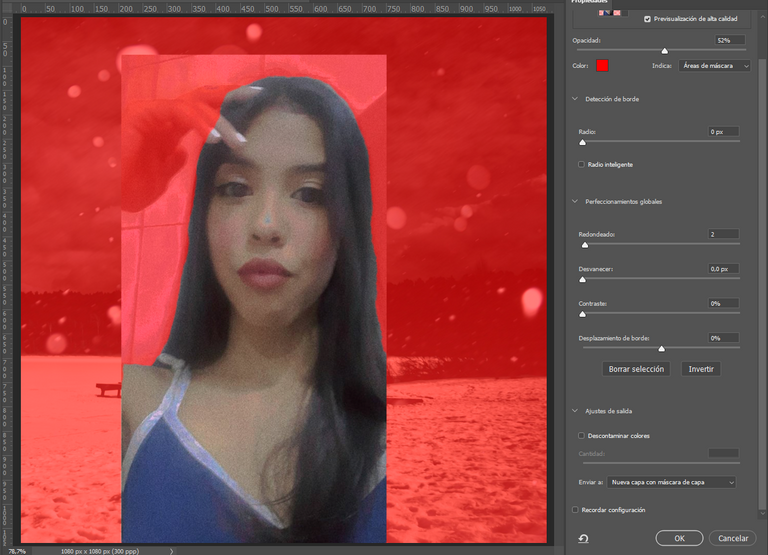
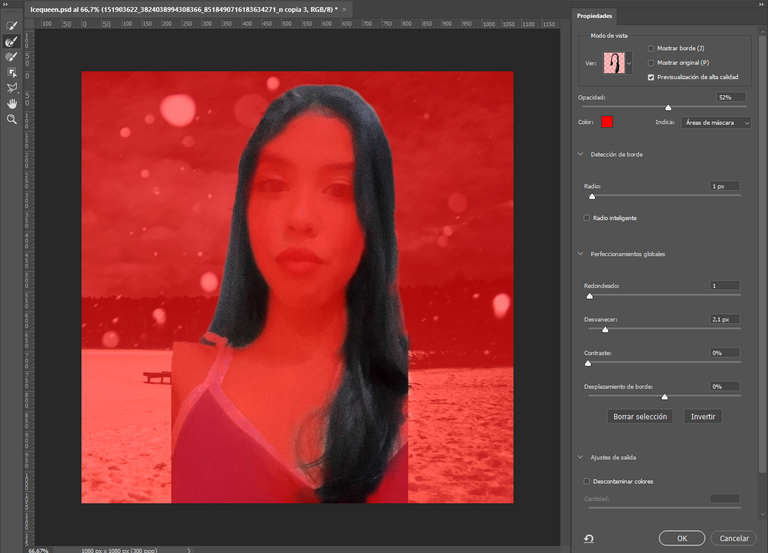
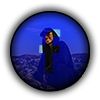
The first step was to open a new project in Photoshop with the dimensions of 1080x1080, after that I added the first resource that would be the snowy background and the photograph of the girl on it, and then create a cutout of her with a mask and remove the natural background of the photograph.

El primer paso fue abrir un nuevo proyecto en Photoshop con las dimensiones de 1080x1080, luego de eso agregue el primer recurso que seria el fondo de nevado y la fotografía de la chica sobre este, para luego crear un recorte de ella con mascara y eliminar el fondo natural de la fotografía.
The second step was to eliminate the fingers of the hair and the face, for this I used the tool Clone Field on the layer of the photograph and for that I selected with Alt + Click parts of the skin of the face and the hair to hide the fingers and that will be as follows.
El segundo paso fue eliminar los dedos del cabello y el rostro, para esto utilice la herramienta Tampo de Clonar sobre la capa de la fotografía y para eso seleccione con Alt + Clic partes de la piel de la cara y del cabello para ocultar los dedos y que quedara de la siguiente manera.

For the third step I proceeded to change the hair tone and before that I created a new selection with mask of the hair, once the selection was created in the new layer I changed the blending mode to Frame and lowered the opacity to 78% to give a little more presence to the hair highlights.
Para el tercer paso procedí a cambiar la tonalidad del cabello y pero antes para eso cree una nueva selección con mascara de el, una vez creada la selección en la capa nueva cambie el modo de fusión de a Trama y baje la opacidad a un 78% para darle un poco mas de presencia a los reflejos del cabello.
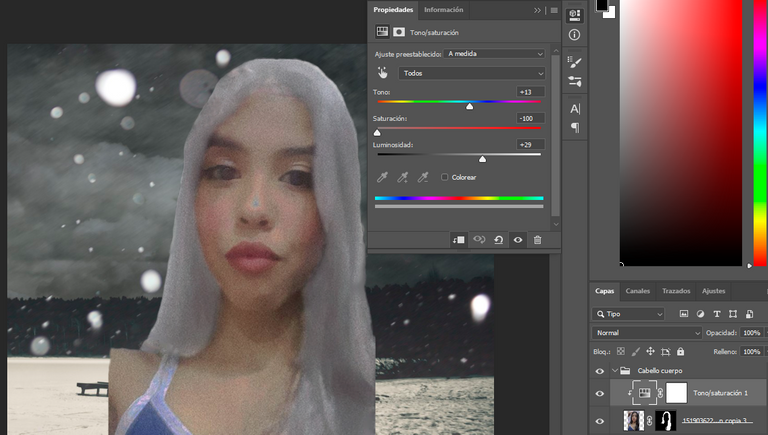
In the fourth step if I change the color of the hair to a quite striking silver, for this create a layer of Hue and Saturation on the layer of the cropped hair, create a clipping mask so that it only affects the layer of the hair and lowered to a -100 its saturation range and raised its luminosity to a +29 to be as follows (In the mask of the hair with a black brush with flow to 60% I corrected some details el.).
En el cuarto paso si cambie el color del cabello a un plateado bastante llamativo, para esto cree una capa de Tono y Saturación sobre la capa del cabello recortado, cree una mascara de recorte para que este solo afecte a la capa del cabello y baje a un -100 su rango de saturación y subí su luminosidad a un +29 para que quedara de la siguiente manera. (En la mascara del cabello con un pincel negro con flujo al 60% corregí algunos detalles el.)
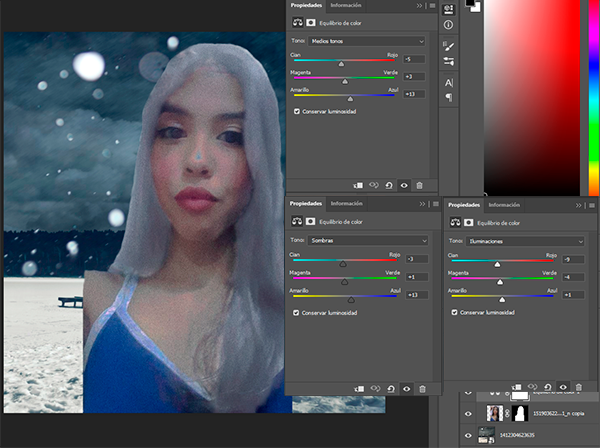
For the fifth step I proceeded to match the color of the photograph with the background and for this under the layer of the hair, I added a new layer of Color Balance, being above the layer of the photograph and the background, this only adjust the color of these same and not the hair, I modified the tones, shadows and illuminations to have a cooler tone to look like this.
Para el quinto paso procedí a igualar el color de la fotografía con el fondo y para esto debajo de capa del cabello, agregue una nueva capa de Equilibrio de Color, al estar por encima de la capa de la fotografía y del fondo, esta solo ajustara el color de estas mismas y no la del cabello, modifique los tonos, sombras y iluminaciones para que tuviera una tonalidad mas fría se viera de la siguiente manera.
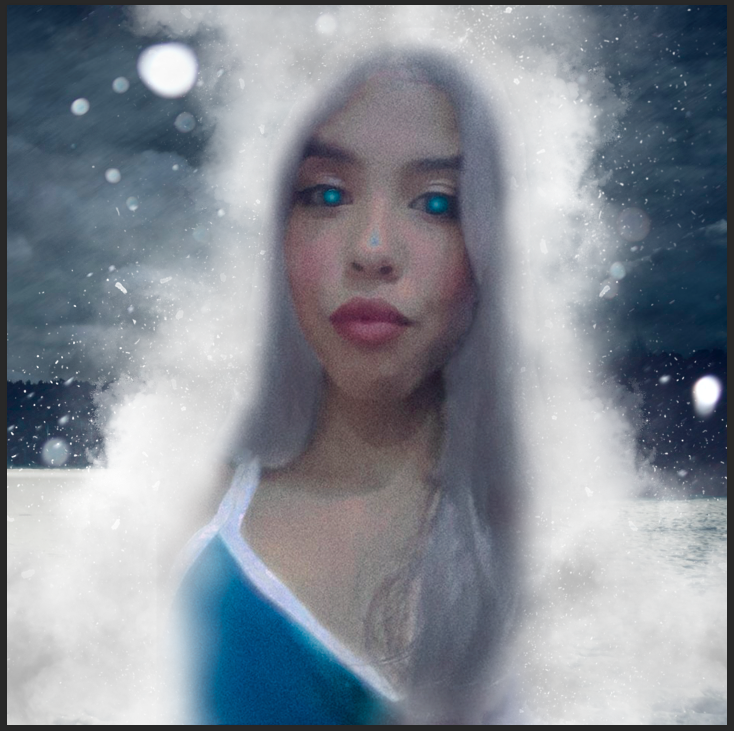
Then in the sixth step, change the color of the eyes, for this create two new and empty layers above the others and with a blurred light blue brush draw the new iris of her eye in the first layer, then change the blending mode of this layer to Color and lower the opacity to 50%, create a layer mask to remove the excess color with a black brush. For the second layer I used a white blur brush but a little bit smaller, I drew the white pupil to have a glow effect, I changed the diffusion mode of this layer to Soft Light and the result was as follows.
Luego en el sexto paso, cambie el color de los ojos, para esto cree dos capas nuevas y vacías por encima de las demás y con un pincel celeste difuminado dibuje el nuevo iris de su ojo en la primera capa, luego cambie el modo de fusión de esta capa a Color y baje la opacidad a un 50%, cree una mascara de capa para eliminar el color excedente con un pincel negro. Para la segunda capa utilice un pincel difuminado blanco pero un poco mas pequeño dibuje la pupila blanca para que tuviera un efecto de resplandor, cambie el modo de difusión de esta capa a Luz Suave y el resultado fue el siguiente.
In the seventh step, add the snow effect around it, for this add the following resource and duplicate it 4 times around it with Ctrl + J and with Ctrl + T adjust the size and the place where they would go, then group everything in a folder and create layer masks on each of the copies so that with a black brush with a flow between 40% and 90%, I merged these layers with the photograph and removed the edges of them, finally in the group layer I added another layer mask to do exactly the same but with a level of detail in general and not with each layer.
En el septimo paso, agregue el efecto de nieve al rededor de ella, para esto agregue el siguiente recurso y lo duplique 4 veces al rededor de ella con Ctrl + J y con Ctrl + T ajuste el tamaño y el lugar donde irían, luego agrupe todo en una carpeta y cree mascaras de capas en cada una de las copias para que con un pincel negro con un flujo entre 40% y el 90%, fusionar estas capas con la fotografía y eliminar los bordes de las mismas, por ultimo en la capa de grupo agregue otra mascara de capa para hacer exactamente lo mismo pero con un nivel de detalle en general y no con cada capa.
Then I wanted to change the color of the clothes, for this I created two layers below the group of the mist so it doesn't affect the color of the mist, in one layer I used a light blue brush and colored the whole center of the flannel, change the blend mode to Color and lower the opacity of the layer to 50% so it won't be so saturated, in the other layer use a white brush and draw all the white part of the flannel with it and just change the blend mode to Soft Light to give it a glow effect.
Luego quise cambiar el color de la ropa, para esto cree dos capas por debajo del grupo de la neblina esto para que no afecte el color de la misma, en una utilice en un pincel celeste y coloree todo el centro de la franela, cambie el modo fusión a Color y baje la opacidad de la capa a un 50% para que no quedara tan saturado, en la otra capa utilice un pincel blanco y dibuje toda la parte de blanca de la franela con este y solo cambie el modo de fusión a Luz Suave para darle un efecto de resplandor.
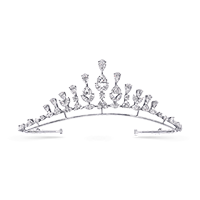
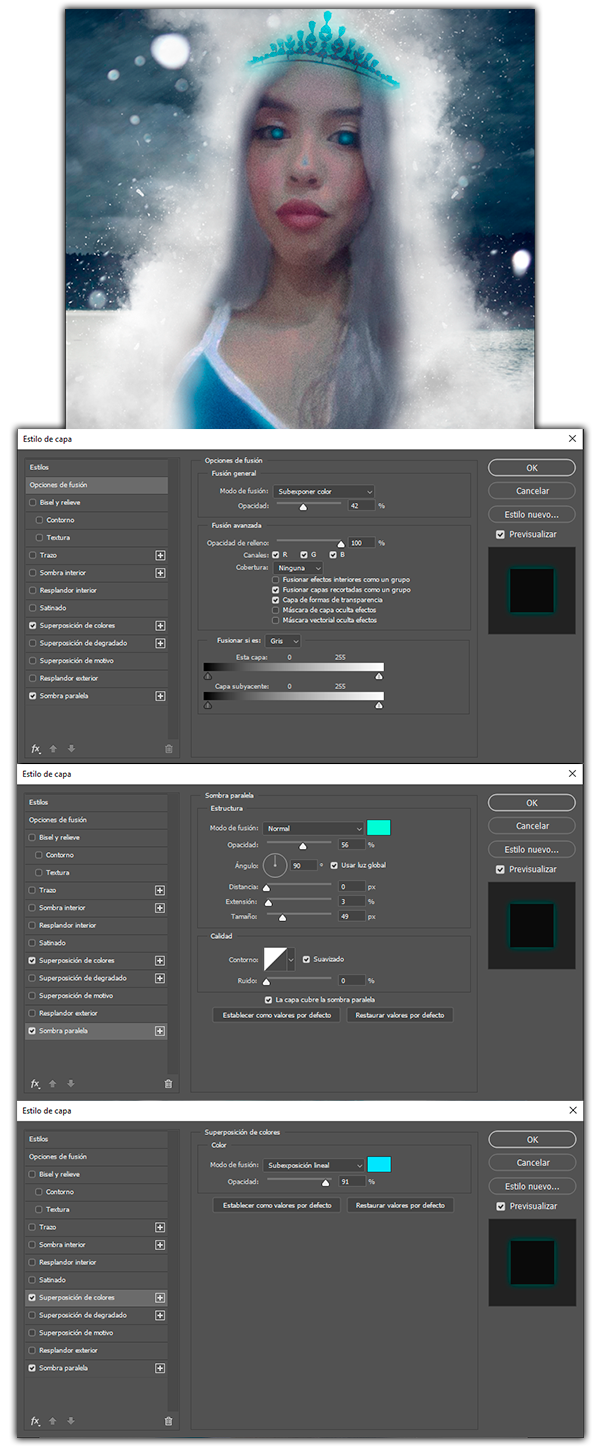
For the eighth step add the next resource, the tiara, change its size and its inclination with Ctrl + T and right click to place it in its respective place, then enter in the blending settings of the layer with (double click on it) to change almost completely the color, the transparency and add a little glow, the parameters that I use you can see in the following image. Finally I added a layer mask again to remove the edges and to give the effect that the fog goes through.
Para el octavo paso agregue el siguiente recurso, ósea la tiara, cambie su tamaño y su inclinación con Ctrl + T y clic derecho para colocarla en su respectivo lugar, después entre en la configuración de fusión de la capa con (doble clic sobre ella) para cambiar casi en su totalidad el color, la transparencia y agregarle un pequeño resplandor, los parámetros que utilice lo pueden ver en la siguiente imagen. Por ultimo agregue una mascara de capa nuevamente para eliminar los bordes y que diera el efecto que en atraviesa la niebla.
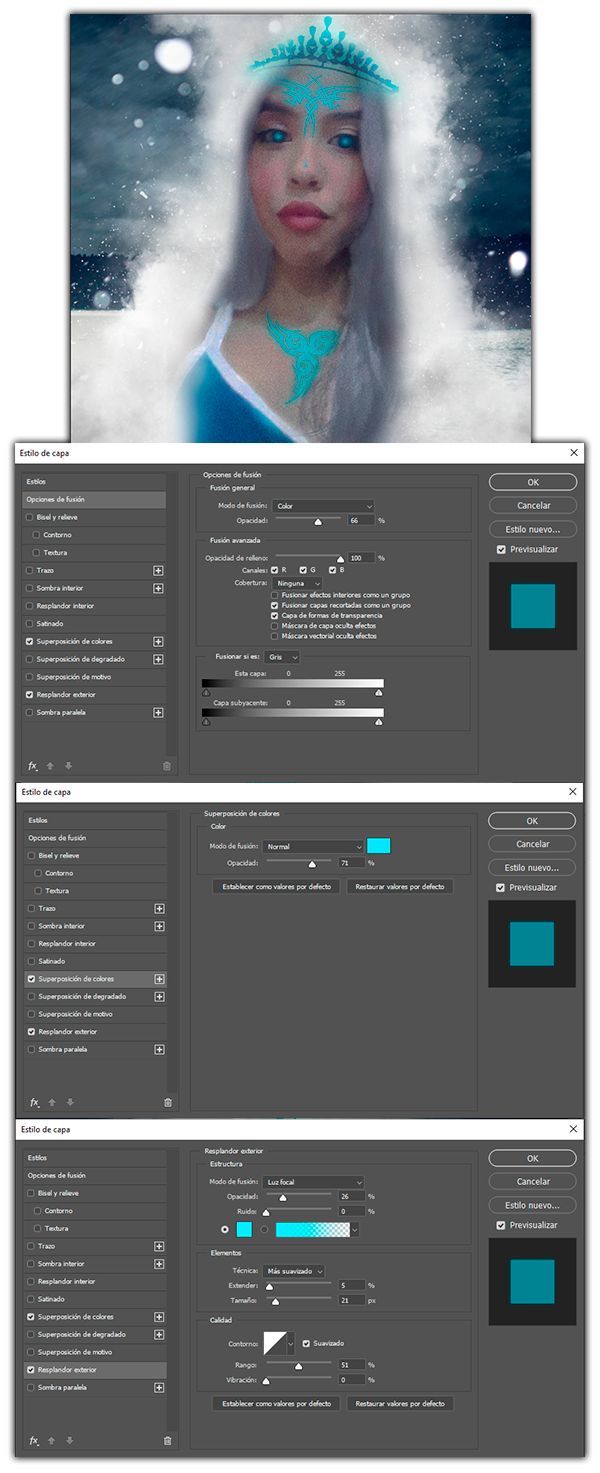
In the ninth step add the other resources that are the tattoos, in the same way as with the previous step, adjust their size and place with Ctrl +T and then enter the blend settings of both layers and set the following parameters, and give the effect that are runic marks by magic with glows and color, then add a layer mask on both to erase certain details of both layers with the black brush.
En el noveno paso agregue los otros recursos que son los tatuajes, de la misma manera que con el paso anterior, ajuste su tamaño y su lugar con Ctrl +T para luego entrar en la configuración de fusión de ambas capas y establecer los siguientes parámetros, y darle el efecto que son marcas rúnicas por la magia con resplandores y color, luego agregue una mascara de capa en ambas para borrar ciertos detalles de ambas capas con el pincel negro.
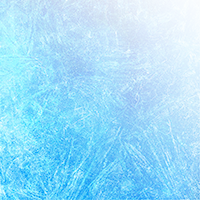
For the last step in Photoshop, add the last resource which are the ice cracks around, for this duplicate the layer with Ctrl + J, resize and postpone with Ctrl + T and right click, merge the two layers and add a layer mask to remove the remaining content with the black brush.
Para el ultimo paso en Photoshop, agregue el ultimo recurso que son las grietas de hielo al rededor, para esto duplique la capa con Ctrl + J, modifique su tamaño y posposición con Ctrl + T y clic derecho, combine las dos capas y agregue una mascara de capa para eliminar el contenido restante con el pincel negro.
Then before exporting I wanted to add a 3DLUT filter, just so that all the effects were under a single plane, for this I created a new Color Query layer and added the following default filter.
Luego antes de exportarle quise meterle un filtro 3DLUT, solo para que todos los efectos quedaran bajo un solo plano, para esto cree una nueva capa de Consulta de Colores y agregue el siguiente filtro predeterminado.
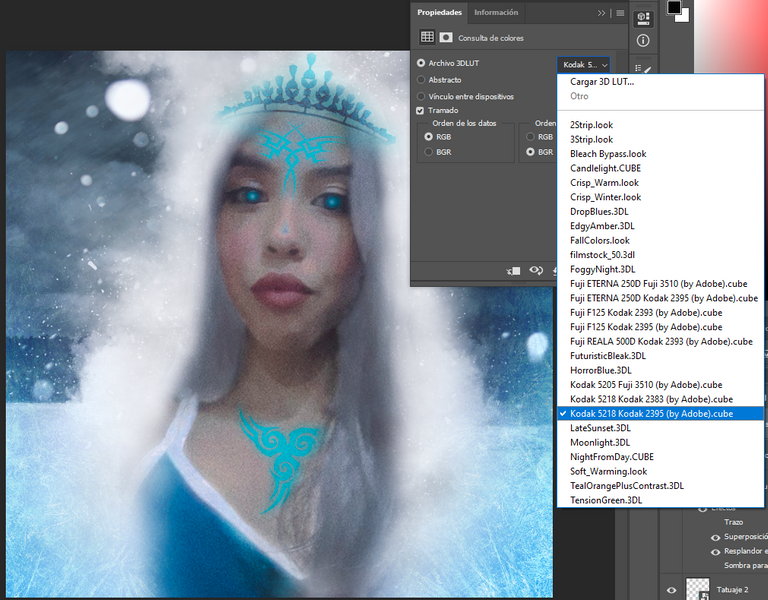
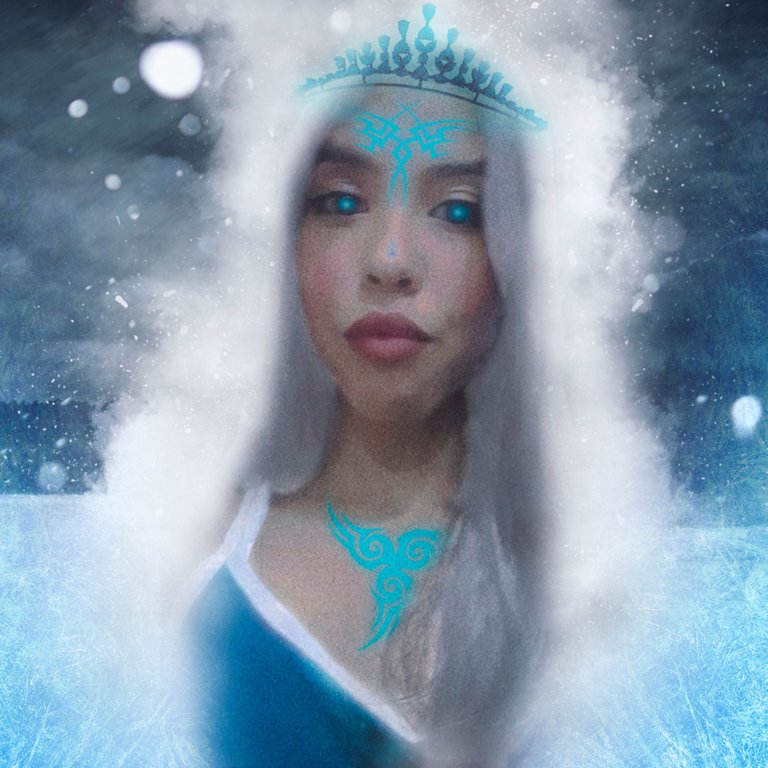
And the image looked like this, ready to export it to Lightroom and modify its tonality and make it more fantasy and magic.
Y la imagen quedo de la siguiente manera, lista para exportarla a Lightroom y modificar su tonalidad y volverla mas fantasiosa y magica.
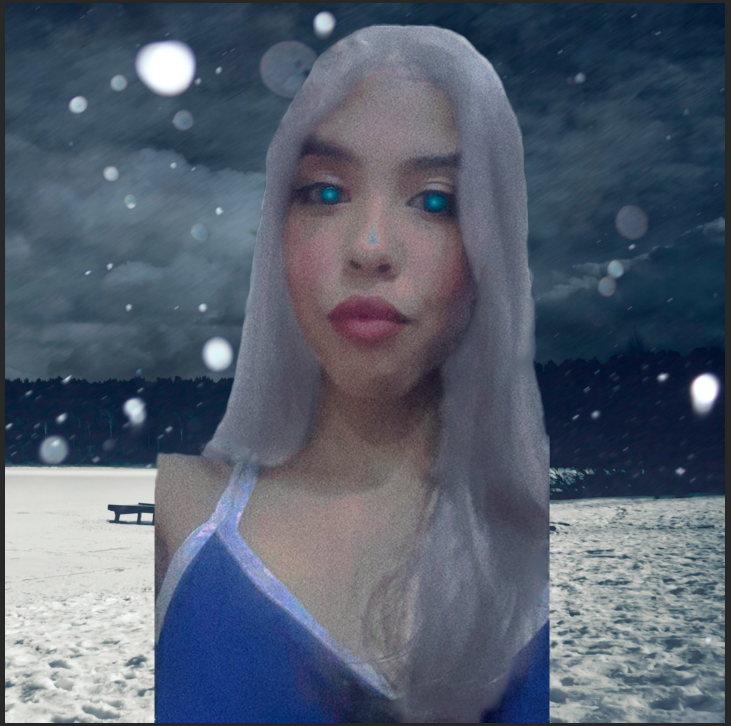
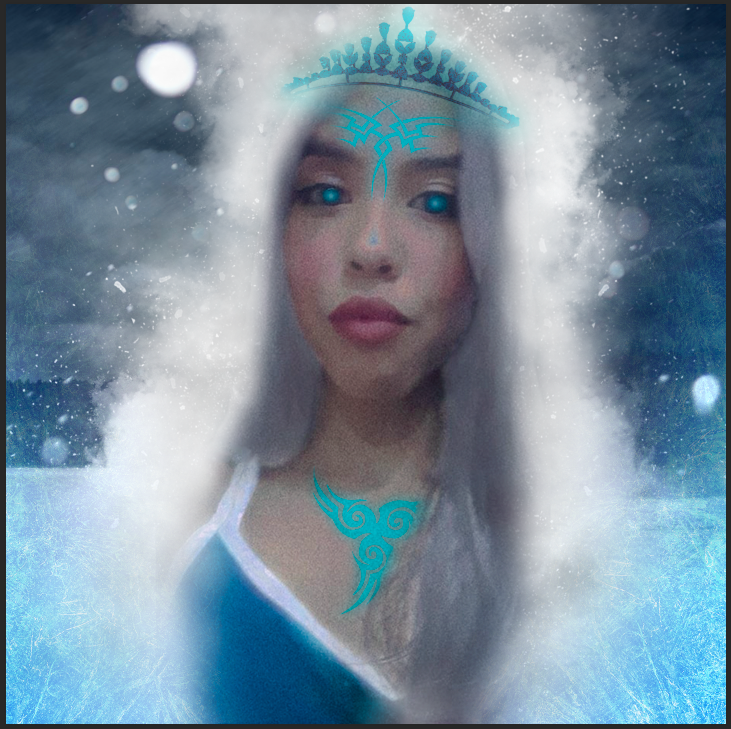
Once in Lightroom, I proceeded to increase a little the contrast and lower the high lights, I increased a little the shadows and a little more the whites, I also lowered the blacks and the clarity almost to the half, I increased a little the intensity so that it did not lose so much tonality the colors, I modified its curves with a little more of dark and lights and I decreased a little more the shadows, to finish I increased a little the focus and the detail to give a filter of dark vignette to the surroundings.
Una vez en Lightroom, procedí a aumentarle un poco el contraste y bajarle las luces altas, subí un poco sus sombras y un poco mas los blancos, también baje los negros y la claridad casi hasta la mitad, aumente un poco su intensidad para que no perdiera tanta tonalidad los colores, modifique sus curvas con un poco mas de oscuros y luces y disminuí un poco mas las sombras, para finalizar aumente un poco el enfoque y el detalle para darle un filtro de viñeta oscuro al rededor.
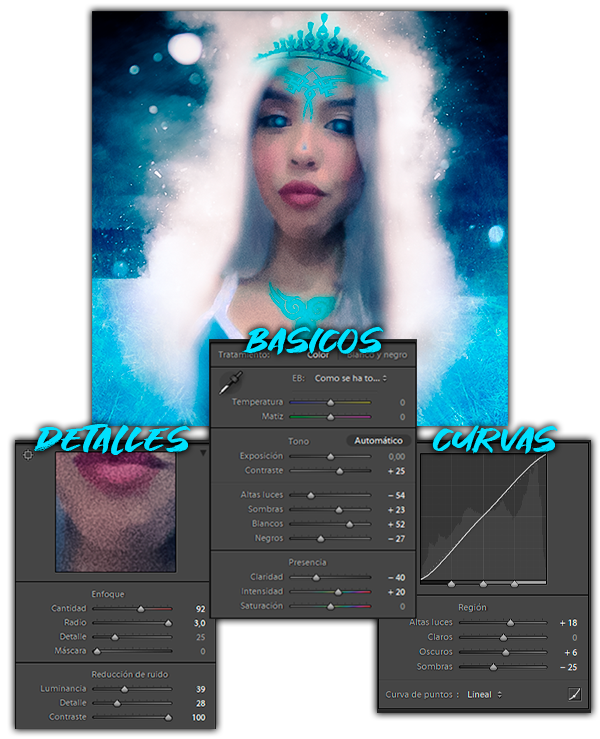
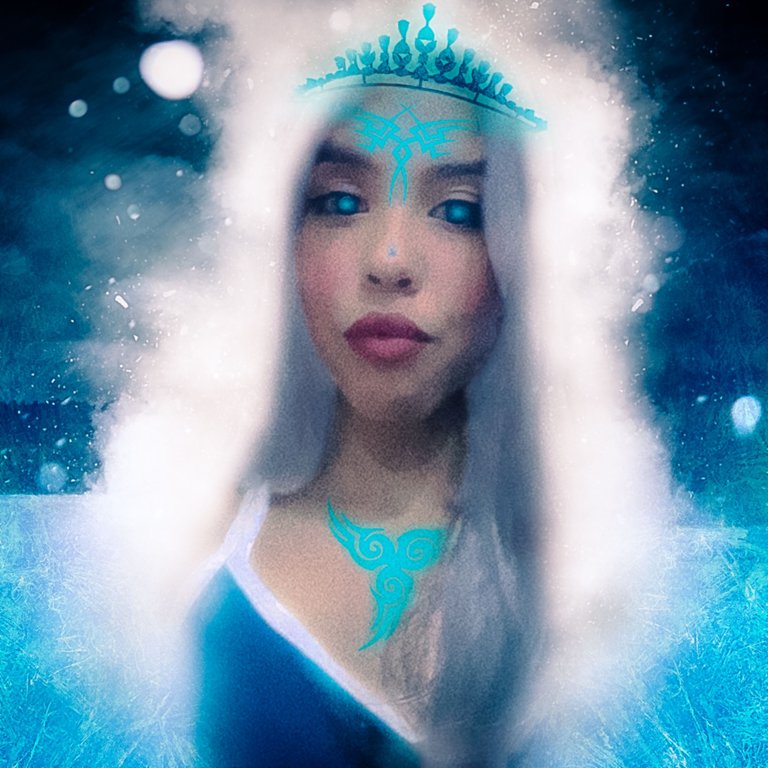
And the result was the following. ~ Y el resultado fue el siguiente.
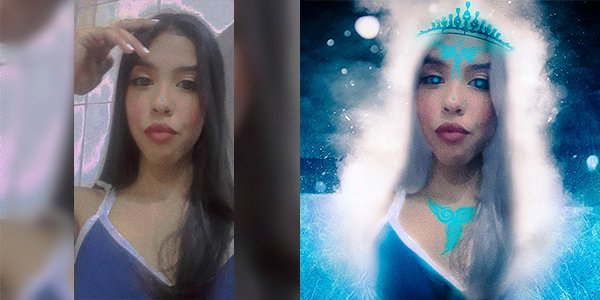
Musa: Keily Carballo
And well friends this has been all the background of the editing work, I hope you liked it and it has helped you in case you want to apply any of these effects in your editions, as always any advice or input is very welcome and appreciated from my part, as I am also in the process of learning and I would like to improve every day more, without further comment I hope you have a great week and until a next post! A hug! 😁😊❄
Y bueno amigos este a sido todo el trasfondo del trabajo de edición, espero que les haya gustado y les haya servido de ayuda en caso de que quieran aplicar alguno de estos efectos en sus ediciones, como siempre cualquier consejo o aporte es muy bien recibido y agradecido de mi parte, ya que tambien estoy en proceso de aprendizaje y me gustaría mejorar cada dia mas, sin mas que comentarles espero que tengan una excelente semana y hasta un proximo post!! Un abrazo! 😁😊❄

Nice job! Working with a low quality image is never easy, but you still made this one into a good looking design. Great work, I love the color palette and icy feel. She deserves a better camera, she’s gorgeous. Hopefully she will be able to upgrade soon so you can have some high resolution photos from her to edit.
Keep up the awesome posts, I love how you show your steps.
Thank you very much for your support and observation, the truth is that it was a challenge to work with this image, but even so, with the necessary knowledge, one can do wonders with these programs. Really grateful and I hope the same too, perhaps in the future she can also be part of this great community.
A hug and thanks for such good vibes 🙏🏻🥰