¿Hola amigos como están? Espero que se encuentren excelente y que tengan un gran fin de semana, en esta oportunidad quiero compartir con ustedes otro fotomontaje realizado por mí, pero esta vez un poco más complejo que los anteriores, como siempre explicare el paso a paso tras la edición, los recursos y programas utilizados, espero que les guste y les sirva de ayuda en sus proyectos. 😊
Hello friends, how are you? I hope you are excellent and have a great weekend, this time I want to share with you another photomontage made by me, but this time a little more complex than the previous ones, as always I will explain the step by step after editing, resources and programs used, I hope you like it and it will help you in your projects.

Para esta edición utilice los siguientes recursos
For this edition use the following resources.
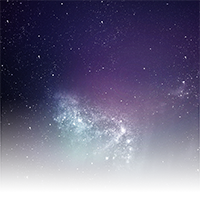

Clic en las imágenes PNG para ir a sus fuentes
Click on the PNG images to go to their sources.
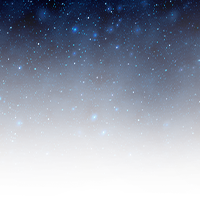
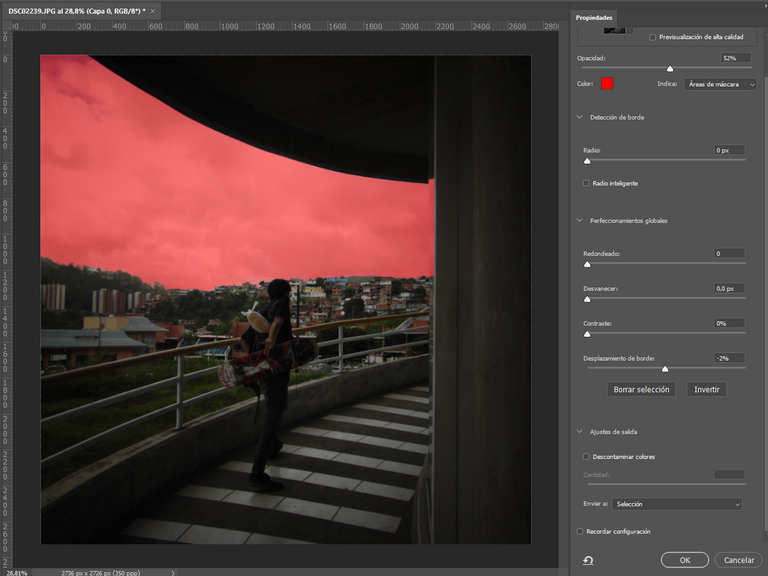
The first thing to do is to open the photograph in a new workbench in Photoshop and make a precise selection of the sky with the Select and Apply Mask tool to have the whole environment free with the sky literally empty and with a mask to be able to fix any detail with the brush without having to redo the selection.
Lo primero abrir la fotografía en una mesa de trabajo nueva en Photoshop y realizar una selección precisa del cielo con la herramienta Seleccionar y Aplicar Mascara para tener todo el entorno libre con el cielo literalmente vacío y con una máscara para poder arreglar cualquier detalle con el pincel sin tener que volver a hacer la selección.
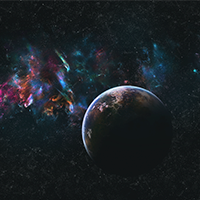
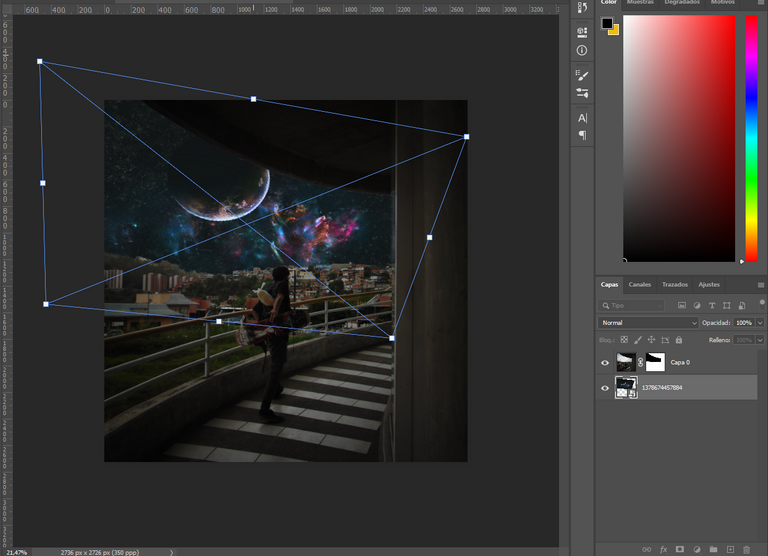
Then add the first resource, the image of the planet in space and with Ctrl + T scale and change the perspective of this to be as similar to the sky of the photograph, all this kept the layer of the image in Smart Object to avoid offsetting the pixels of the same, place the image under the layer of the environment and fix some details in the background of the same, with the black and white brush tool in its mask.
Después agregue el primer recurso, la imagen del planeta en el espacio y con Ctrl + T escale y cambie la perspectiva de este para que fuera lo más similar al cielo de la fotografía, todo esto mantenido la capa de la imagen en Objeto inteligente para evitar que se desfasen los pixeles de la misma, coloque la imagen de bajo de la capa del entorno y arregle algunos detalles en el fondo de esta misma, con la herramienta de pincel blanco y negro en su máscara.
The next thing I did was to make another precise selection, but this time of the subject or me then create a new layer with mask to give better presence to the particles and lighting, also to correct any errors that are easily present.
Lo siguiente que realice fue hacer otra selección precisa, pero esta vez del sujeto o de mi luego cree una nueva capa con mascara para darle mejor presencia a las partículas y la iluminación, también para corregir cualquier error que se presente con facilidad.

I then proceeded to match the colors of the environment along with those of the space and for this I used a new curves and color balance layer adjusting the midtones, shadows and highlights. The two layers with clipping mask (Alt + Click) so that it only affects the environment layer.
Luego procedí a igualar los colores del entorno junto con los del espacio y para esto utilicé una nueva capa de curvas y de equilibrio de color ajustando los medios tonos, las sombras e iluminaciones. Las dos capas con mascara de recortes (Alt + Clic) para que solo
afecte a la capa del entorno.
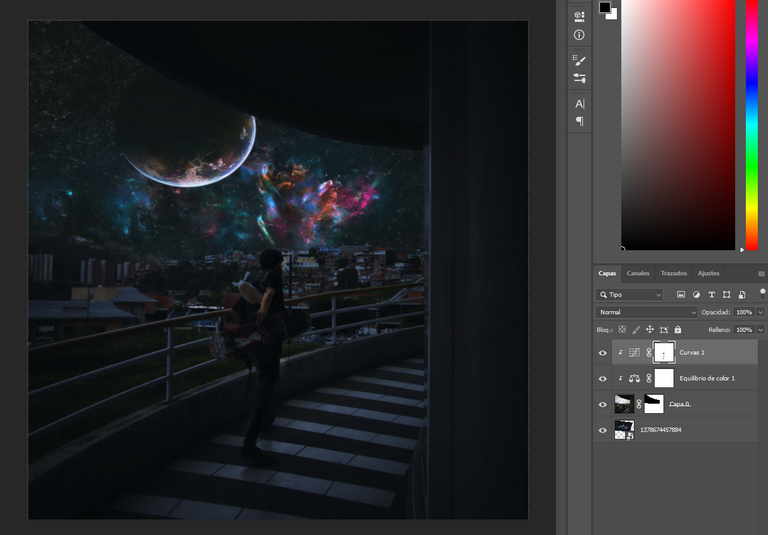
In one of my post I explain how to match the colors of two photographs with these two layers you can go by clicking Here
En uno de mis post explico cómo igualar los colores de dos fotografías con estas dos capas puedes ir haciendo clic Aqui
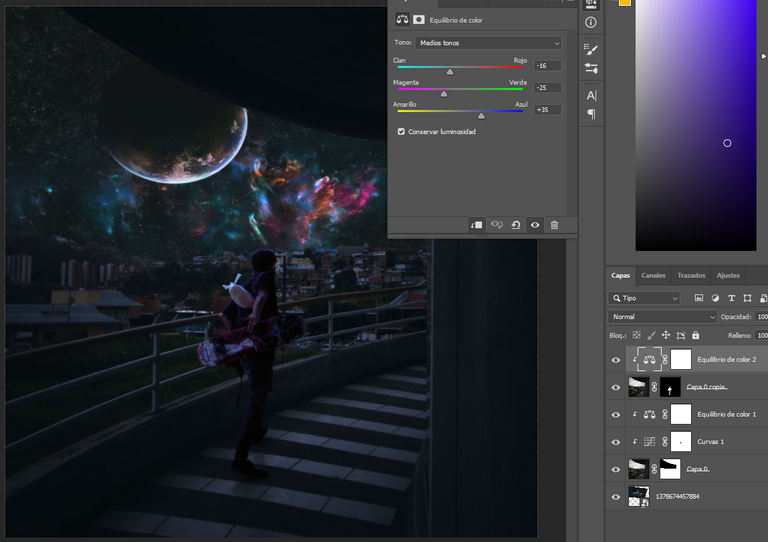
I also did the same with the second clipping, but this time with different color tones and without the curves layer since it will have a different type of lighting than the background.
También hice lo mismo con el segundo recorte, pero esta vez con unos tonos de color distintos y sin capa de curvas ya que esta tendrá un tipo de iluminación distinta a la del fondo.
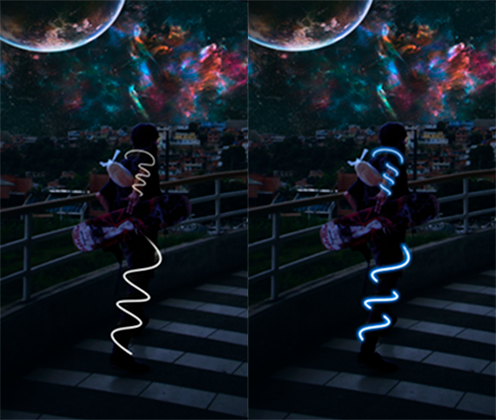
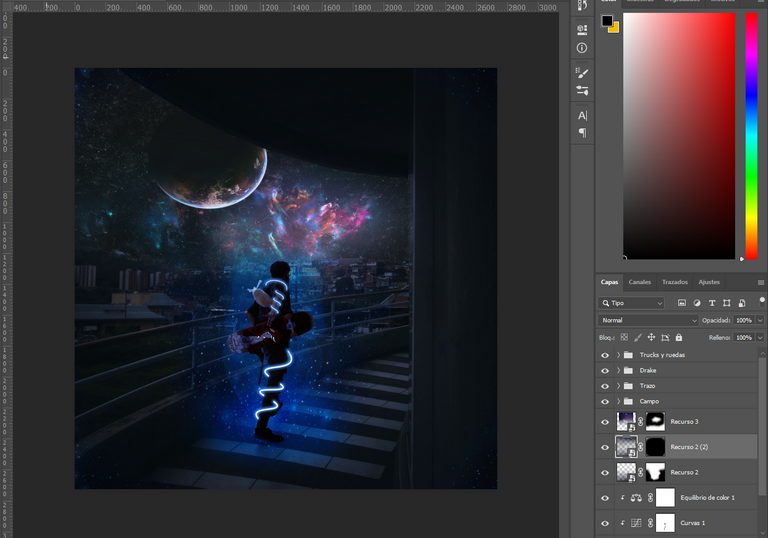
Then I added the strokes around my leg and arm with masks to give it the effect of it passing around me and added in the diffusion settings of the layers a light blue glow, in another of my posts I explain how to do this effect you can go by clicking here. 😃
Luego agregue los trazos alrededor de mi pierna y brazo con máscaras para darle el efecto de que pasa alrededor de mí y agregue en la configuración de difusión de las capas un resplandor celeste, en otra de mis publicaciones explico cómo realizar este efecto puedes ir dando clic aquí. 😃
Then I wanted to give a little more presence to the dragon of my skateboard so I made several layers and with red and white brushes I marked the places where I wanted to highlight, then I changed the diffusion mode to of the layers to give it more color and it looked like this.
Después quise darle un poco más de presencia al dragón de mi skate así que hice varias capas y con pinceles rojos y blancos marqué los lugares donde quería resaltar, luego cambié el modo de difusión a de las capas para darle más color y quedo de esta manera.

The next thing I did was to add the second resource the spectral wave, I duplicated it with Ctrl + J and transformed it into a smart object then with Ctrl + T I adjusted it around me so it looked like this.
Lo siguiente que realice fue agregar el segundo recurso la onda espectral, la duplique con Ctrl + J y transforme en objeto inteligente luego con Ctrl +T la ajuste alrededor de mi para que quedara de esta manera.
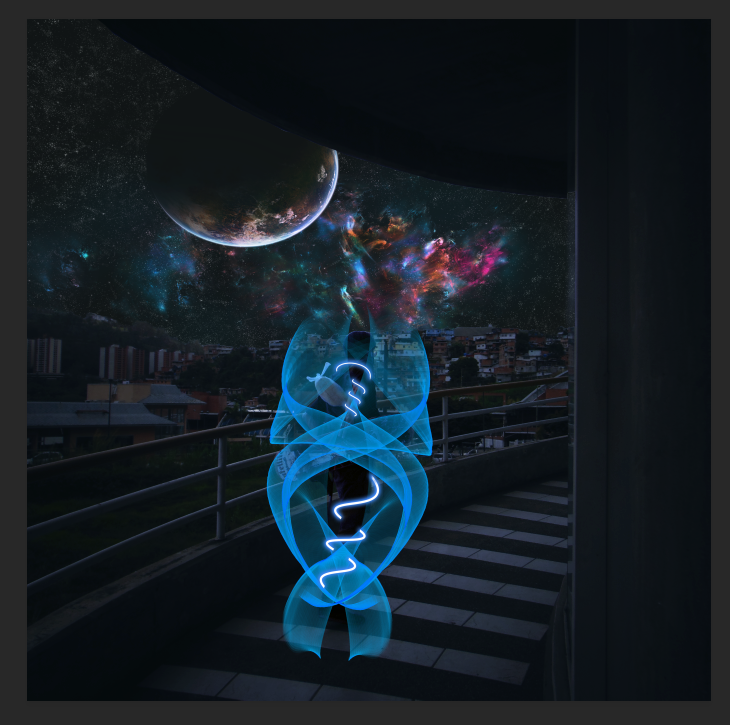
Then I changed the diffusion mode of the wave to Strong Light and lowered the opacity of its layer to 14%, I added a layer mask and with the black brush I erased part of it to give the effect that the wave comes from around me and not from above, finally with a light blue brush I added two new layers and with the diffusion mode in Soft Light I added what would be the glow or the light of the energy field.
Luego cambie el modo de difusión de la onda a Luz Fuerte y baje la opacidad de su capa al 14%, agregue una máscara de capa y con el pincel negro borre parte de esta para que diera el efecto de que la onda proviene de mi alrededor y no de encima, por ultimo con un pincel celeste agregue dos capas nuevas y con el modo de difusión en Luz Suave añadí lo que vendría siendo el resplandor o la luz del campo de energía.
Then I added the last two PNG assets, which are the particles, I transformed their size around me with Ctrl + T and again with another layer mask on each one, I deleted certain places and lowered the opacity of these to 47% and 84%, I also changed the diffusion mode of one of them to Linear Overexposure so it would look like this.
Luego añadí los últimos dos recursos PNG, los cuales son las partículas, transforme su tamaño alrededor de mí con Ctrl + T y de nuevo con otra mascara de capa en cada una, borre ciertos lugares y baje la opacidad de estas a un 47% y 84%, también cambie el modo de difusión de una de ellas a Sobreexposición Lineal para que quedara de la siguiente manera.
Finally before moving the photo to Lightroom, add the last lighting details with a new layer in soft light diffusion mode and an opacity of 52%, a light blue brush a little lighter.
Por ultimo antes de pasar la fotografía a Lightroom, agregue los últimos detalles de iluminación con una nueva capa en modo de difusión de luz suave y una opacidad de 52%, un pincel celeste un poco más claro.
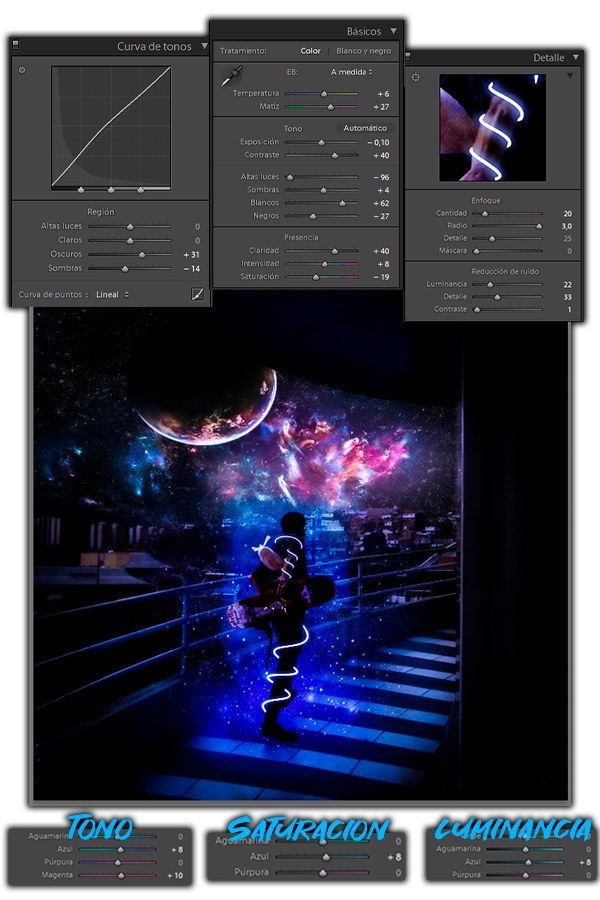
To finish modify the photograph with Lightroom to give it a new, more dramatic and spatial color filter, adjusting shadows, contrast, hue, tone, colors, luminance, saturation, highlights, whites, clarity, etc. With the following parameters.
Para finalizar modifique la fotografía con Lightroom para darle un nuevo filtro de color más, dramático y espacial, ajustando las sombras, contraste, tono, colores, luminancia, saturación, altas luces, blancos, claridad, etc. Con los siguientes parámetros.
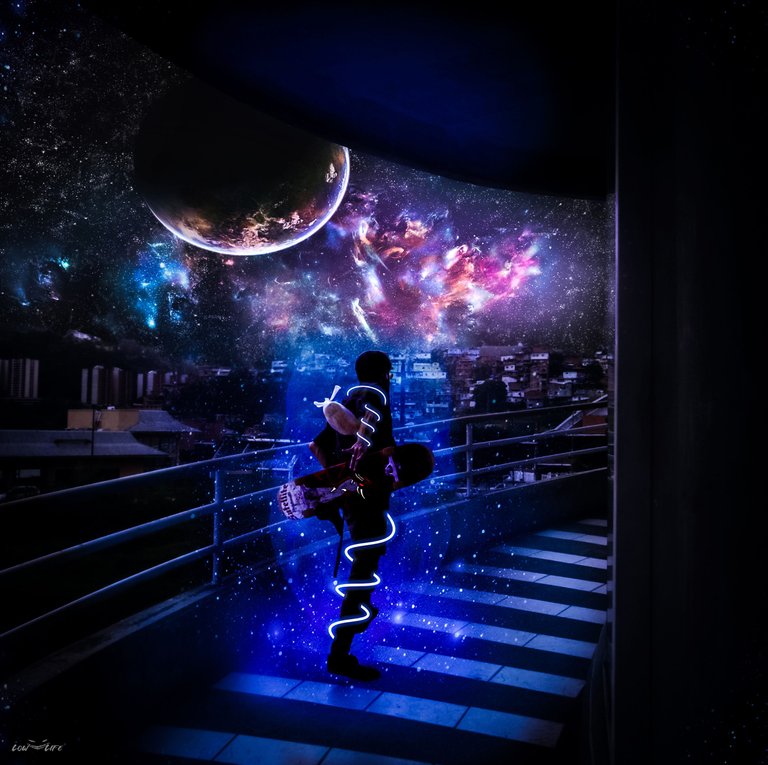
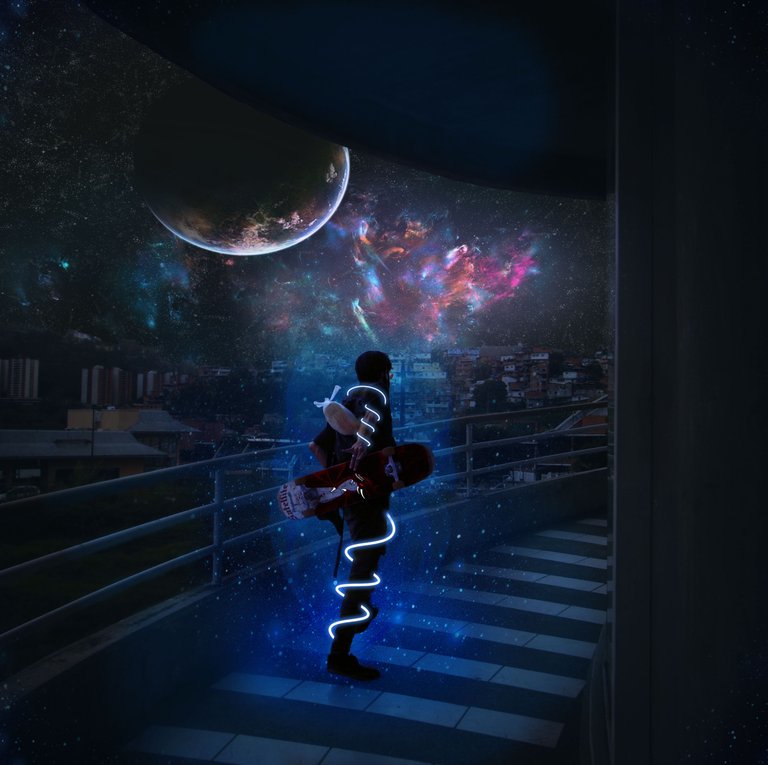
Y el resultado fue este…
And the result was this...
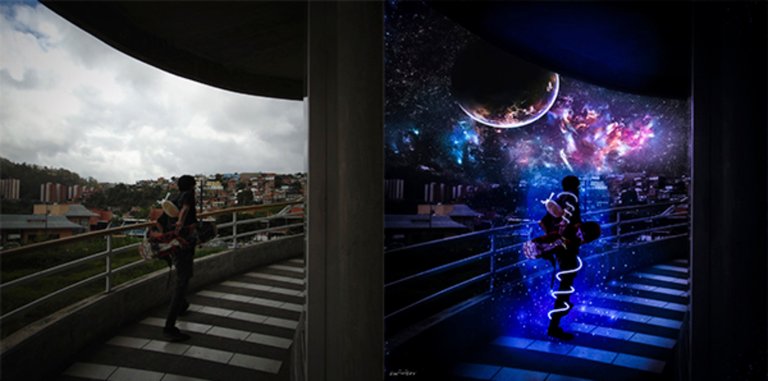
Fotografía: @angelsbravo Photography: @angelsbravo
¡Y bueno amigos espero que les haya gustado este fotomontaje y les haya servido de guía o de ayuda, si tienen algún consejo o recomendación es muy bien recibida y agradecida, sin más que comentarles espero que tengan un muy bonito fin de semana y hasta el próximo post!
And well friends I hope you liked this photomontage and has served as a guide or help, if you have any advice or recommendation is very welcome and appreciated, without further comment I hope you have a very nice weekend and until the next post!

wow esto es una de las cosas mas bellas que he visto, me encantó todo sobretodo el fondo, no hay problema si lo descargo para fondo de pantalla verdad? :D
Me alegra muchísimo que te haya gustado amigo, adelante, para mi seria un honor. c:
Sick edit! Bad ass post!
This is exactly the type of blog that I was hoping would be posted to the Graphic Design community. Thanks for another great contribution.
I am more grateful for the support, it motivates me to publish more of my work, soon I will upload more and I hope that more people will join the community !! 😁😁