I present the making of a swing. The supporting structure is made of very hard acacia wood. The bench is made of light coniferous wood (spruce or pine).
Prezentuję wykonanie huśtawki. Konstrukcja nośna jest z bardzo twardego drzewa akacjowego. Ławka została wykonana z lekkiego drewna iglastego (świerk lub sosna).
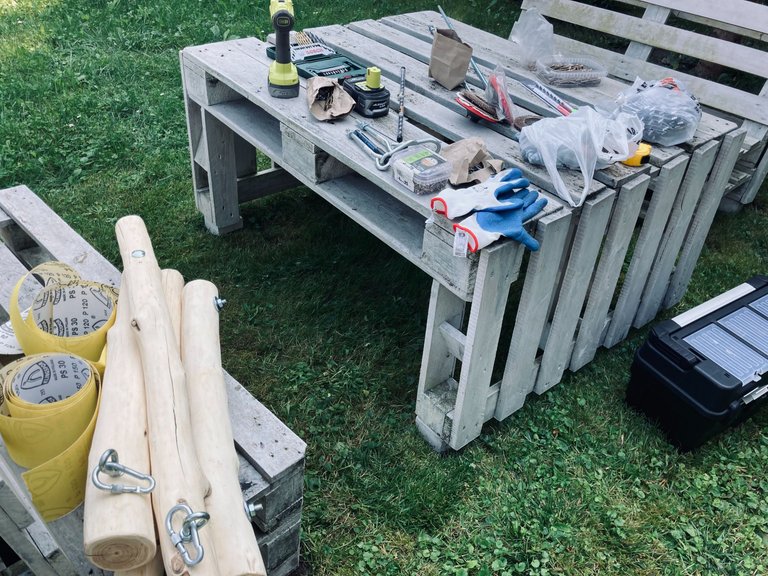
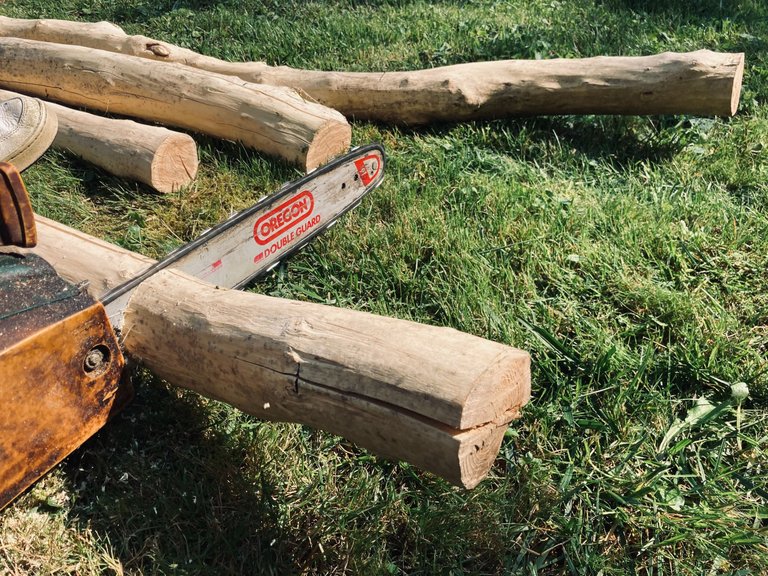
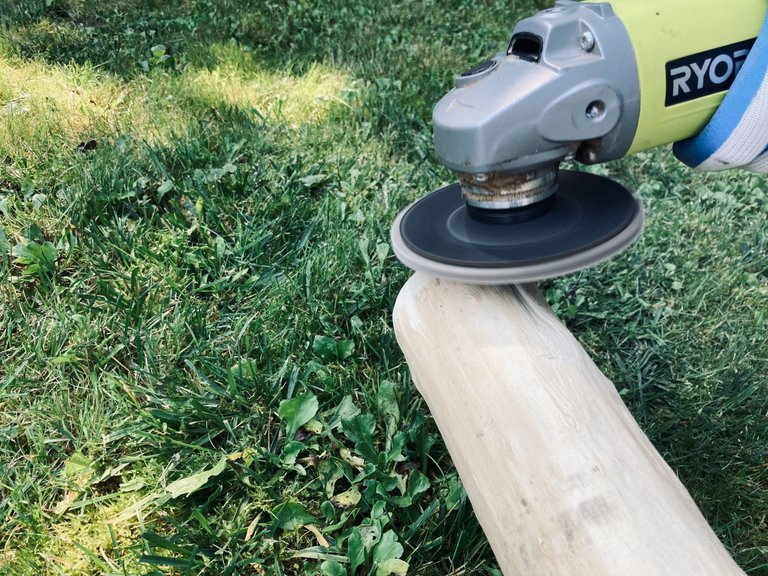
We will need various workshop tools for the job. If you are going to do this kind of work, I think you know what you will need and I assume you have it :) You will need a saw, screwdriver, sander, screws, bolts, etc. and the most important material - wood.
Do pracy będziemy potrzebować różne narzędzia warsztatowe. Jeżeli zabierasz się za taką pracę to myślę, że wiesz czego Ci będzie potrzeba i zakładam że to masz :) Przyda się piła, wkrętarka, szlifierka, wkręty, śruby itp. oraz materiał, to co najważniejsze - drewno.
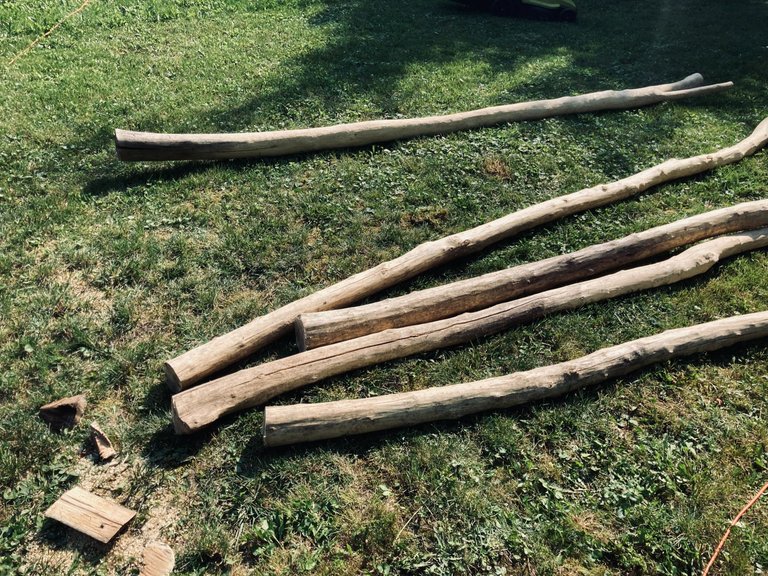
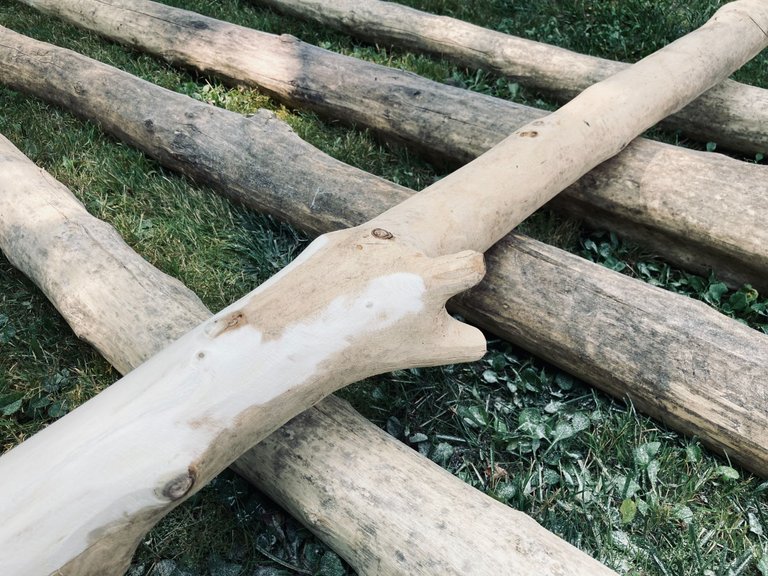
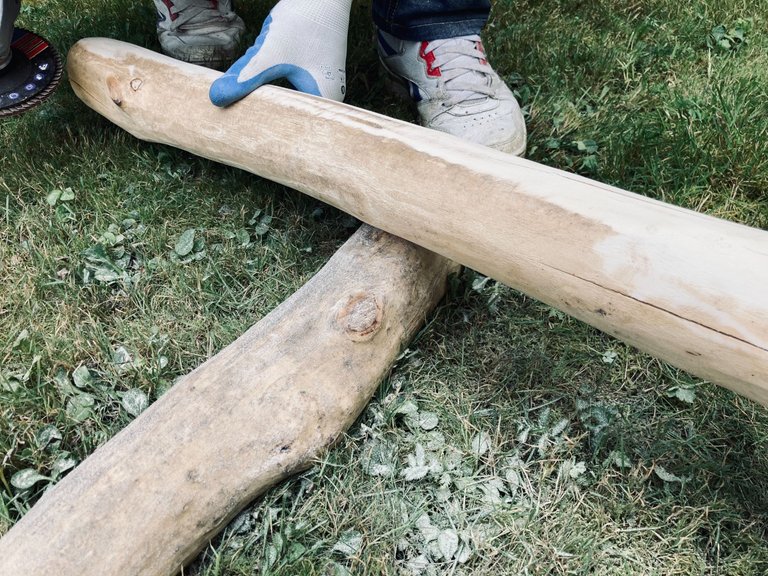
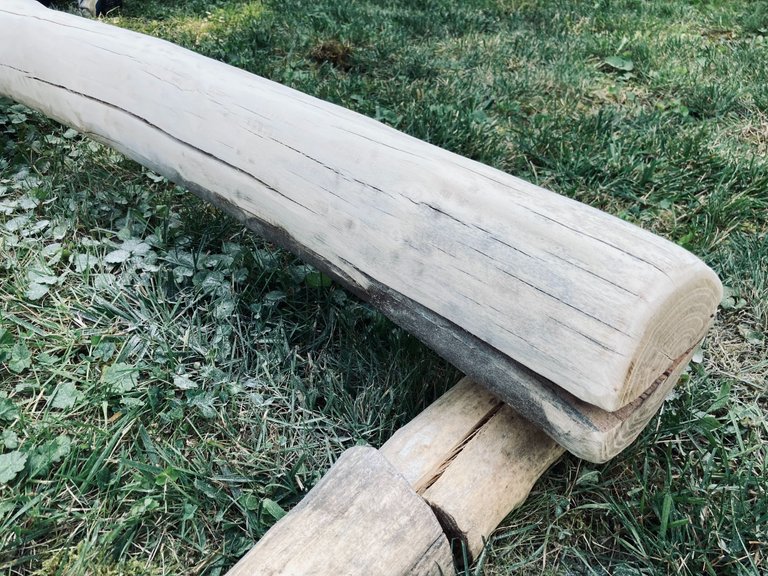
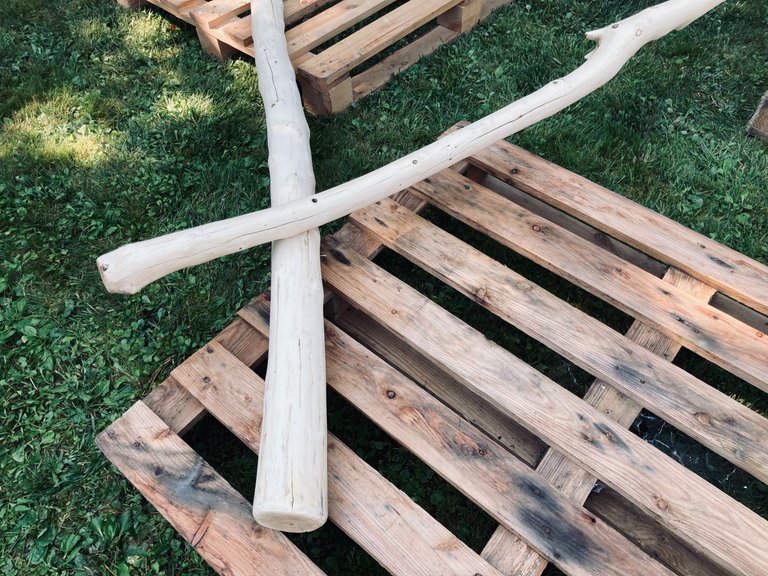
The bark must be removed from the wood, it is best to do this on fresh wood (then it comes off easily). I used wood that had been skinned over two years ago, it had a black coating on it so I had to clean it again.
Z drewna trzeba usunąć korę, najlepiej to zrobić na świeżym drewnie (wtedy łatwo odchodzi). Ja użyłem drewno które było oskórowane ponad dwa lata wcześniej, zrobił się na nim czarny nalot dlatego musiał je czyścić od nowa.
 |  |
|---|
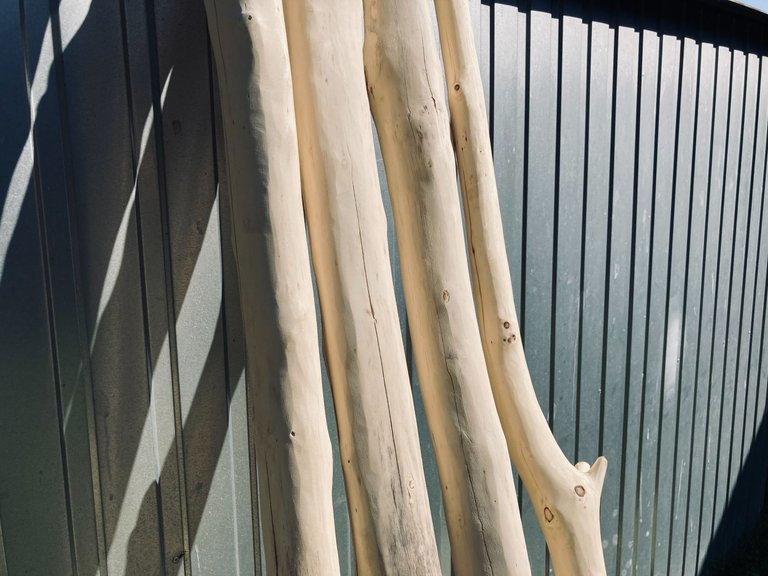
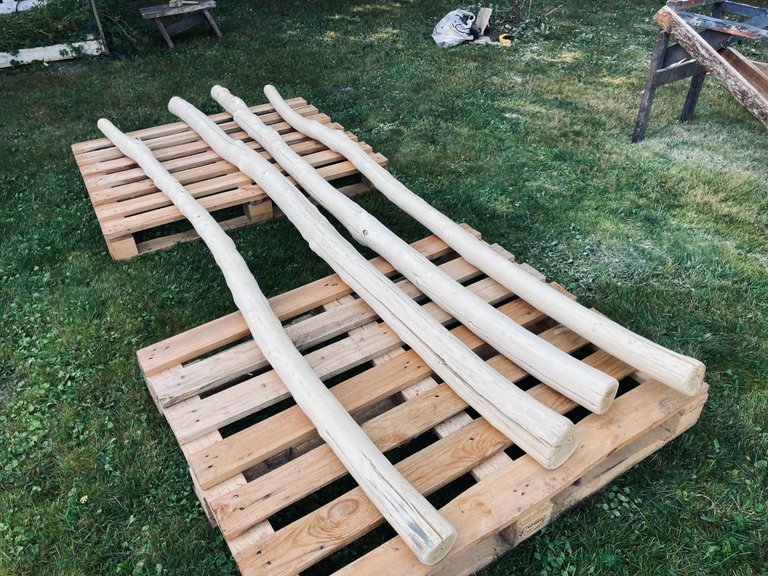
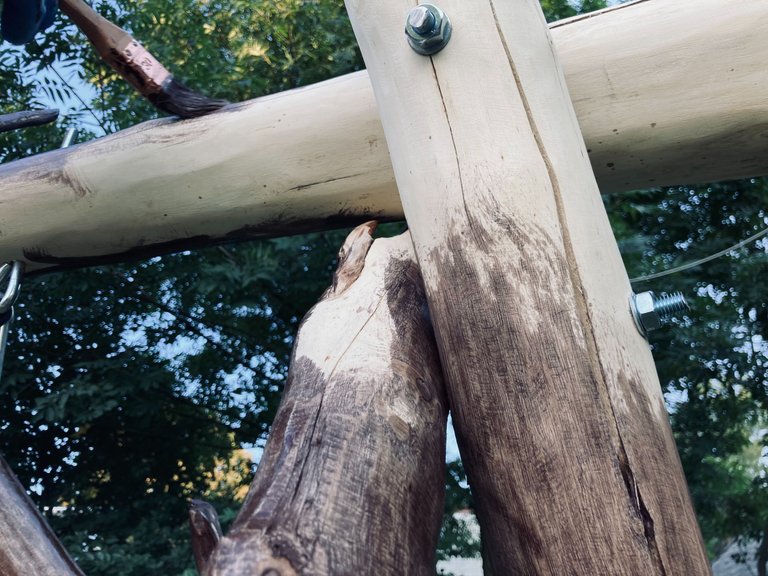
I paint the cleaned (sanded bark) wooden elements with a transparent primer and leave them to dry in the sun.
Wyczyszczone (wyszlifowane z kory) drewniane elementy maluję przeźroczystą farbą podkładową i odstawiam do schnięcia na słońcu.
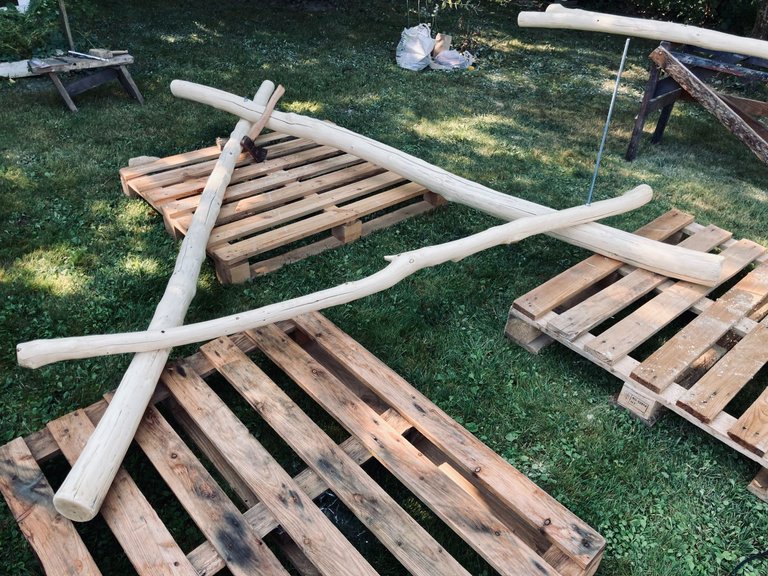
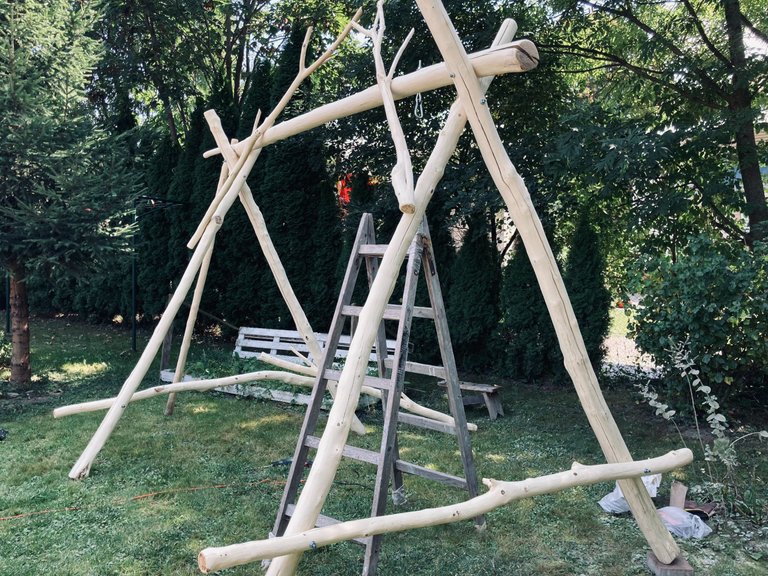
Now I'm planning a structure that will be based on two triangles. So we start measuring and cutting the elements. We make two triangles, preferably symmetrical, of similar sizes. The whole thing is screwed together, I do it with threaded rods that I cut to size.
Teraz planuję konstrukcję która będzie się opierać na dwóch trójkątach. Czyli zabieramy się za odmierzanie i docinanie elementów. Robimy dwa trójkąty, najlepiej, żeby były symetryczne, o podobnych wielkościach. Całość skręcany, ja to robię prętami gwintowanymi które docinam na wymiar.
 |  |
|---|
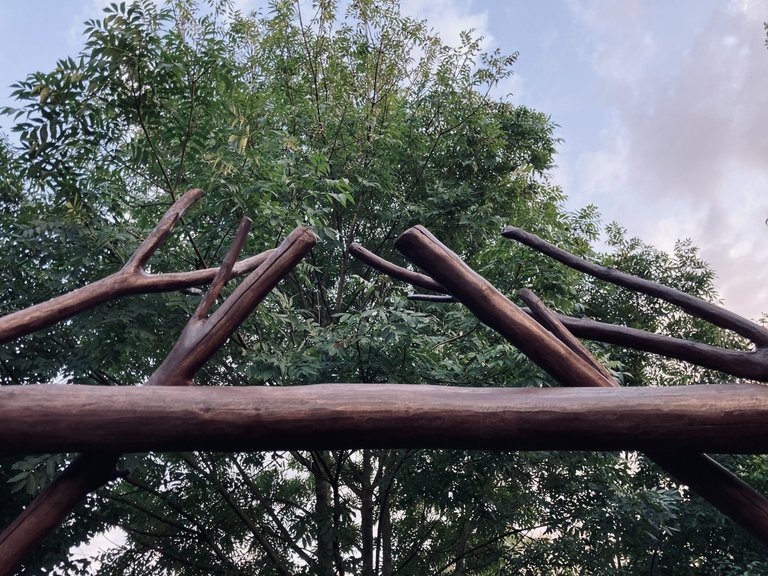
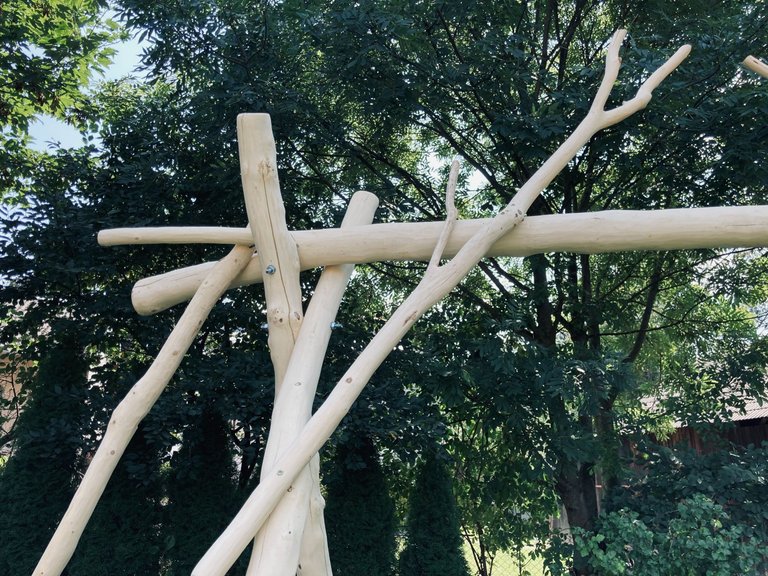
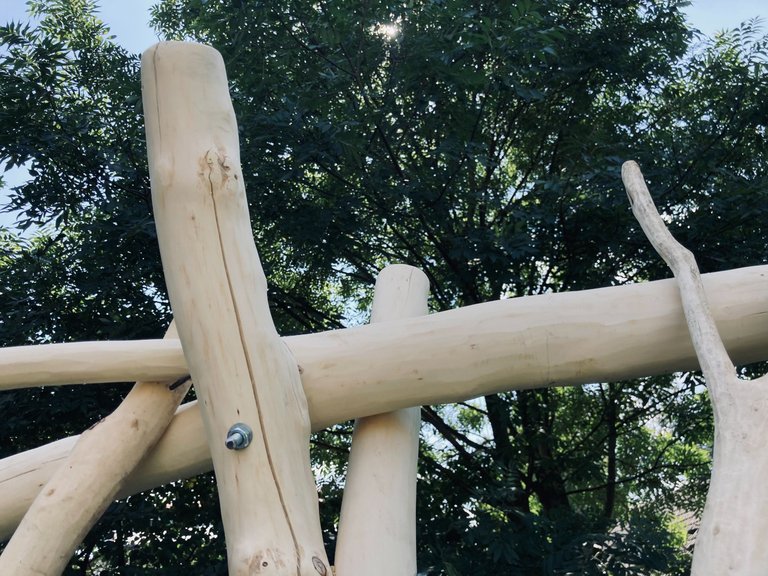
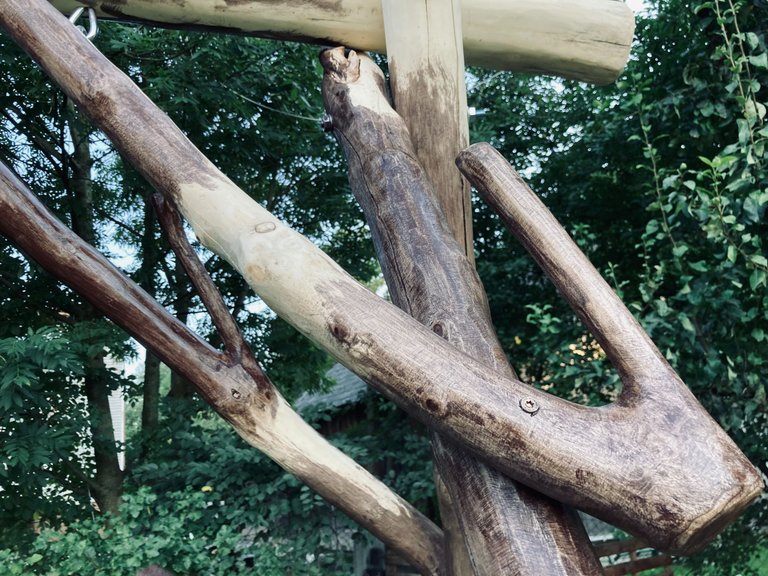
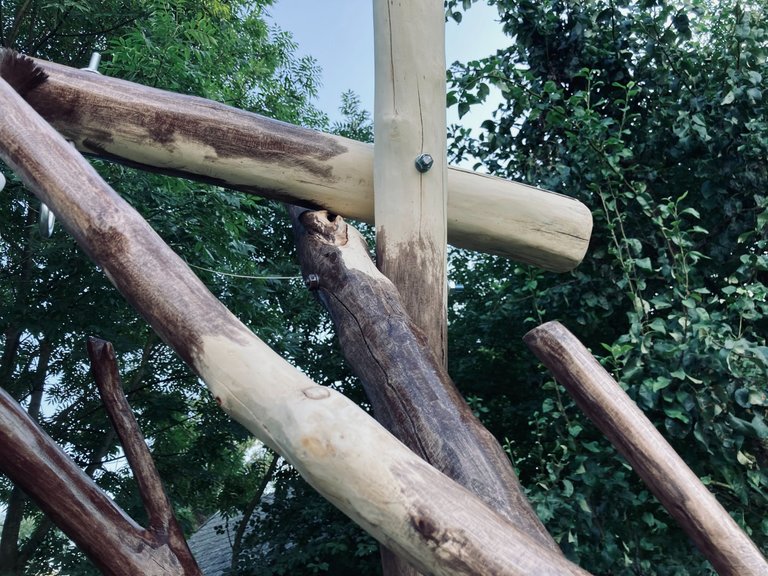
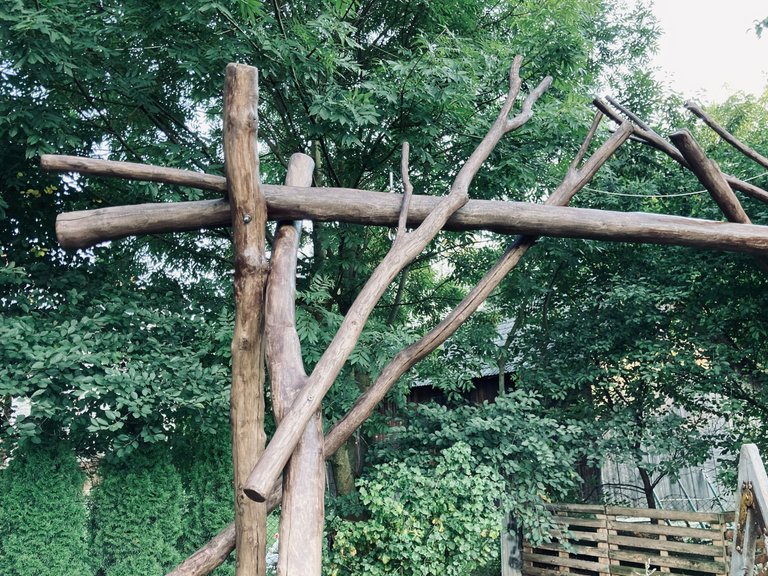
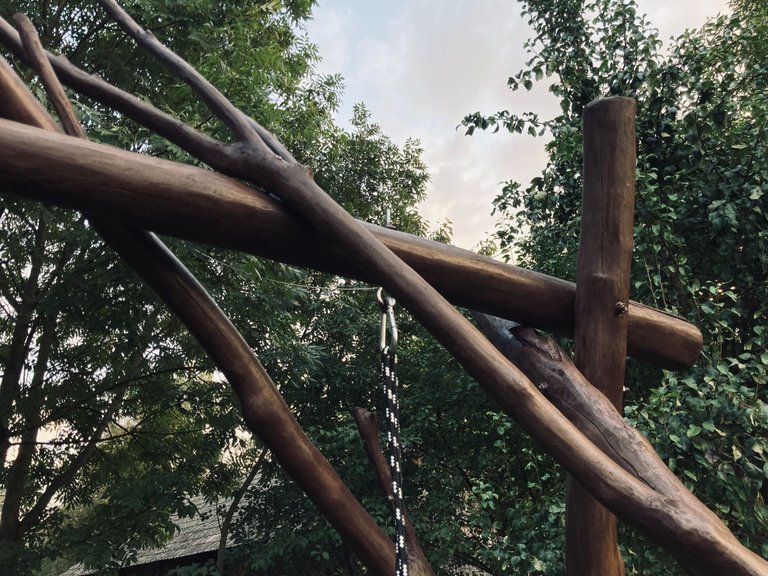
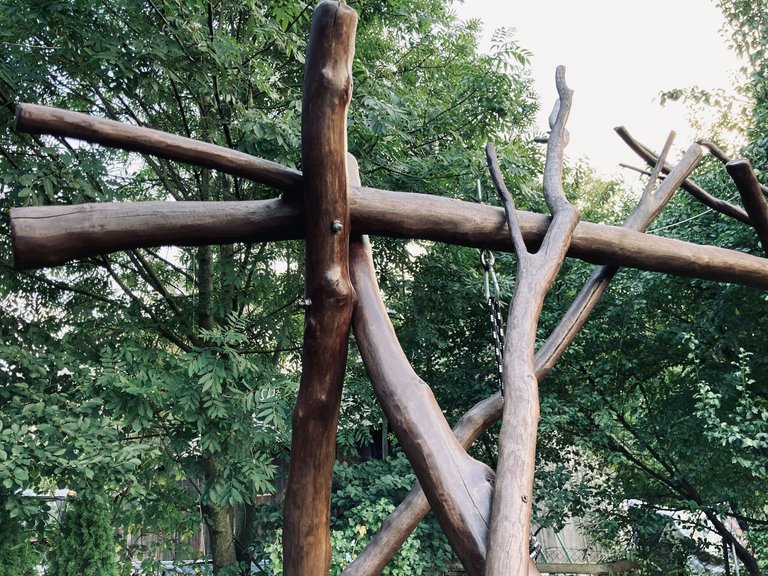
Now it's time to put up two triangles and place a support beam at the top, to which we will attach the swing bench. This task is quite difficult, it is best to do it with at least three people :) To the whole we add braces, crossbars that will add stability, they are necessary.
Teraz przyszła kolej na postawienie dwóch trójkątów oraz umieszczeniu u góry belki podporowej, do której przyczepimy ławkę huśtawki. To zadanie jest dość trudne, najlepiej wykonać go w co najmniej trzy osoby :) Do całości dodajemy zastrzały, poprzeczki które dodadzą stabilności, są niezbędne.
 |  |
|---|
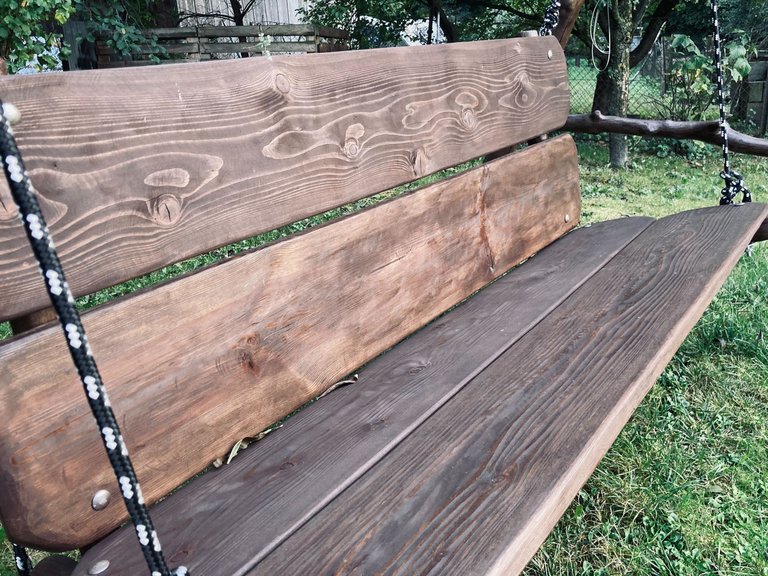
Unfortunately I didn't take any pictures of how I made the bench. It is made of coniferous boards which are very light. The boards were very dry, about 15 years old, so there was no sticky resin on them :D The last step is painting, I did it twice.
Niestety nie zrobiłem zdjęć jak robię ławkę. Składa się ona z desek drzewa iglastego które jest bardzo lekkie. Deski były bardzo wyschnięte, około 15 letnie, dlatego nie było już na nich klejącej się żywicy :D Ostatnim etapem jest malowanie, ja robiłem to dwukrotnie.
 |  |
|---|
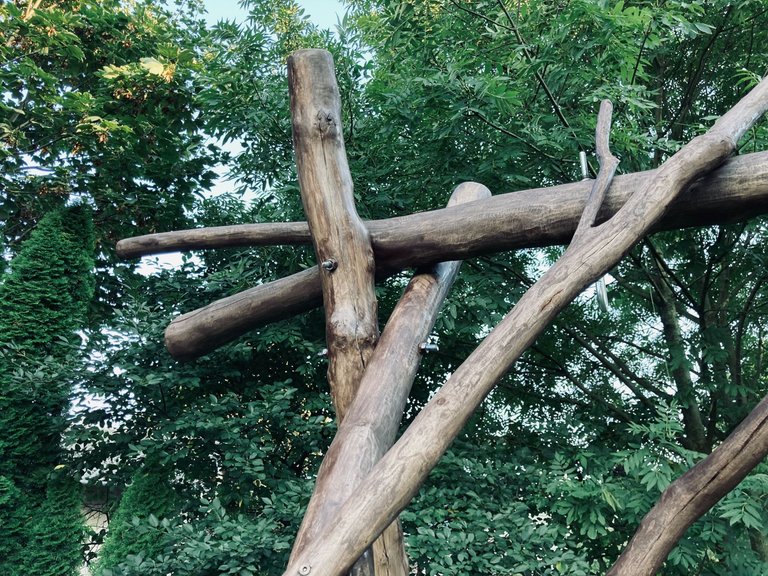
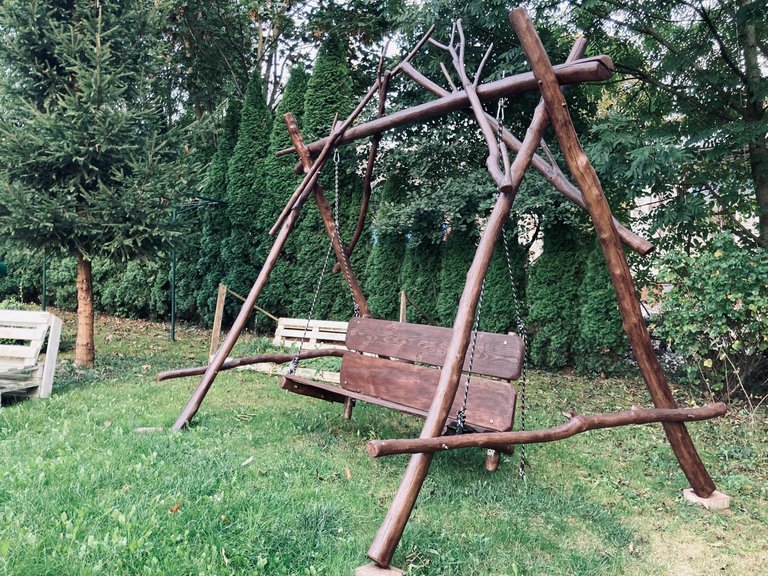
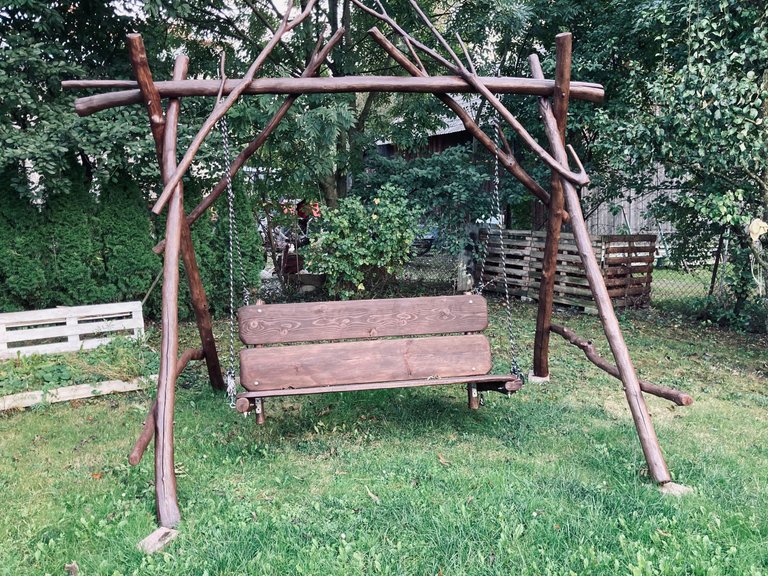
This is what the final effect looks like. It seemed to me that making a swing would be easy. It took about 20 hours, we did it together with my dad. In one day sanding and painting with primer. On the next day assembling the structure and the first coat of colored paint, after about a week I painted it a second time. The whole thing looks like this below :)
Tak prezentuje się efekt końcowy. Wydawało mi się, że zrobienie huśtawki to łatwa rzecz. Trwało to wszystko około 20 godzin, robiliśmy to razem z tatą. W jeden dzień szlifowanie i malowanie podkładem. W drugi dzień składanie konstrukcji i pierwsze malowanie kolorową farbą, po około tygodniu malowałem ją drugi raz. Całość prezentuje się jak poniżej :)

This is actually superb and amazing. I never I thought I would see someone create this kind of thing on the platform. I am actually surprised and shocked by it. Well done you are definitely getting more recognition because this is just off the roof.
Great result, is also looks like a super fun process to make. I would love as a digital native to be able to make something in real life one day.
Enjoy the Swing!
Oh my God
This is really great.
I have seen a lot of efforts here and it more amazing how it came out so well.
For a normal human being like me this is just awesome hahaha. I'm glad I agreed with your post and appreciate the step by step of a work like this. I usually see spaces like this ready made, but seeing your talent through the pictures is motivating. Thank you so much for sharing it in our DIYHub community, I hope to appreciate more of your content here in the future ✌️
You have made a wonderful swing using only wood and rope. Seeing your swing reminded me of my childhood memories. You have demonstrated excellent creativity. Many thanks for your hard work.
This swing looks fantastic. I love how it blends into the trees, it looks like it should be there not like some plastic thing
Bravo! What a joy it gives us to witness important work like this in our community. It is very pleasing to enjoy the step by step through the photographs and your description and the final result is simply inspiring. Thank you very much for sharing it on DIYHub.
Wao Its really very creative swing. The most i liked the wood structure of swing is also stylish and beautiful.Good job.I really impressed.👏
Congratulations @szejq! You have completed the following achievement on the Hive blockchain And have been rewarded with New badge(s)
Your next target is to reach 50000 upvotes.
You can view your badges on your board and compare yourself to others in the Ranking
If you no longer want to receive notifications, reply to this comment with the word
STOPCheck out our last posts:
The swing you created is great. It looks strong and safe. The best thing is that it doesn't pollute.
@szejq, I paid out 0.945 HIVE and 0.180 HBD to reward 6 comments in this discussion thread.
Very good work, very important the selection of the species of wood since they prolong its useful life, you share with us that you had the wood parked, I have been taught that the cuts are made in mengunate moon so that the wood is parked very well apart from other steps to follow, greetings!!!!