ENGLISH CONTENT
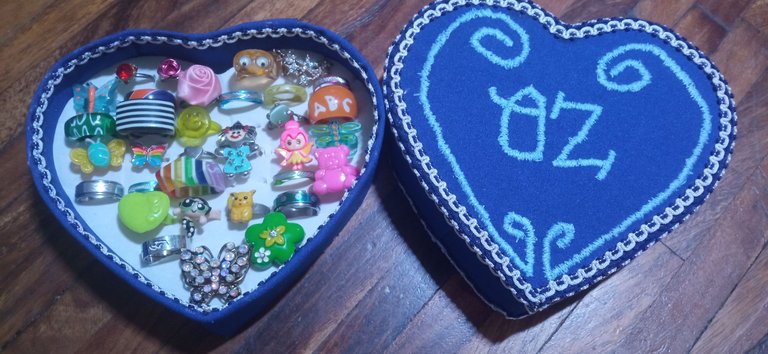
Hello to all the members of this community and lovers of crafts! For those who don't know, I love rings. They are one of my favorite accessories! And for a while, every time I went out, I couldn't go out without wearing a ring on each finger (no joke, I went out with a total of ten rings 😆) and, even though it was as uncomfortable as you can imagine, it made me feel quite flirtatious. So, over time, I came to collect various rings of different shapes. Now that I'm getting back into using them, I thought about making a kind of jewelry box or chest to keep them in, but something that looked cute.
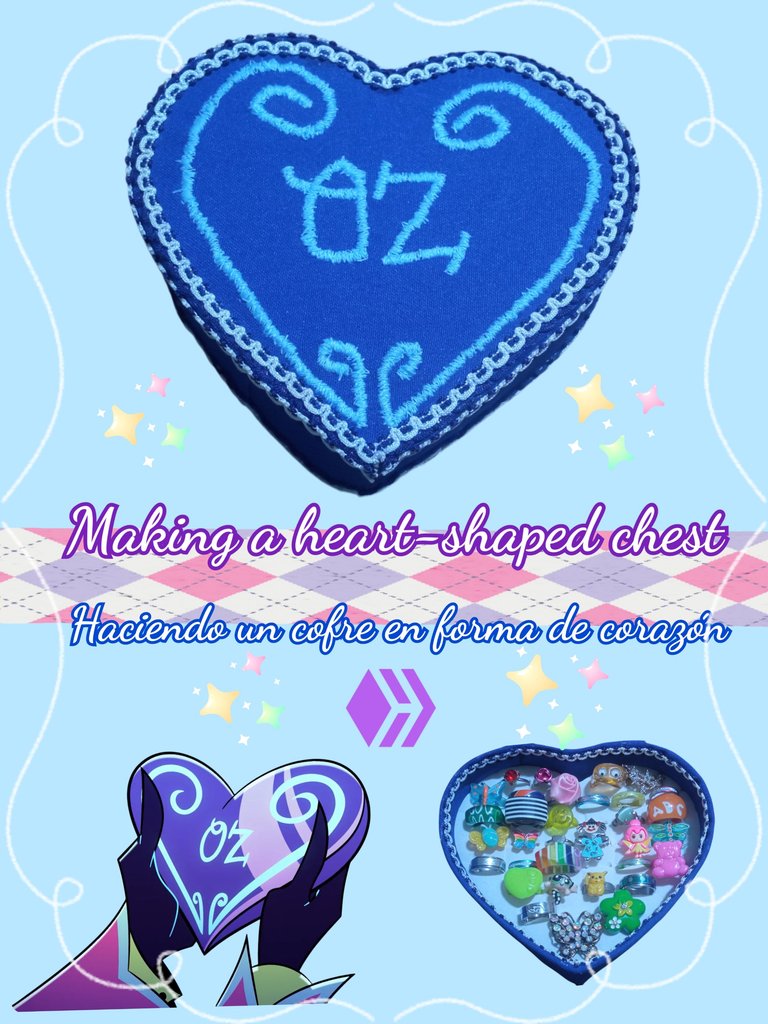
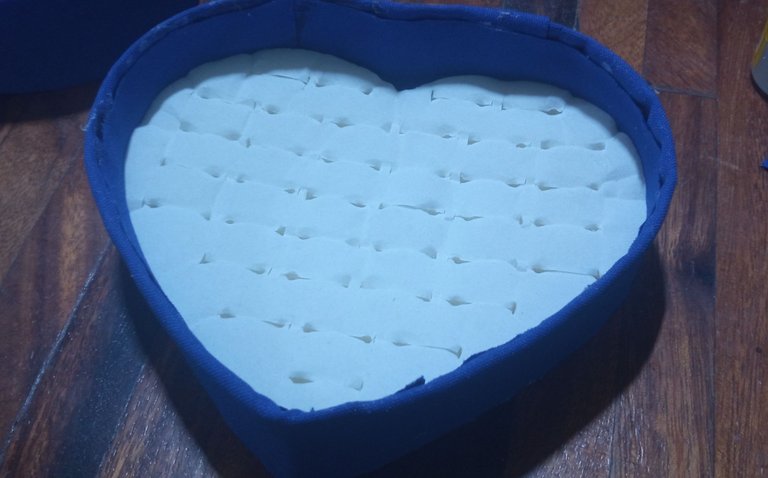
Well... the idea came when my sister brought home from work a small heart-shaped case, which originally had rings in it and when they were all sold, the case was going to be thrown away. She kept the case and gave me the heart-shaped foam pad with slots to insert the rings 😆 I didn't complain, because I immediately thought I could use it.
It was then that I remembered a scene from the series Helluva Boss (a series that I've been addicted to for the last few years), where one of my favorite characters showed a heart-shaped mirror, which I loved and had thought about replicating as soon as I could have a mirror cut in that shape.

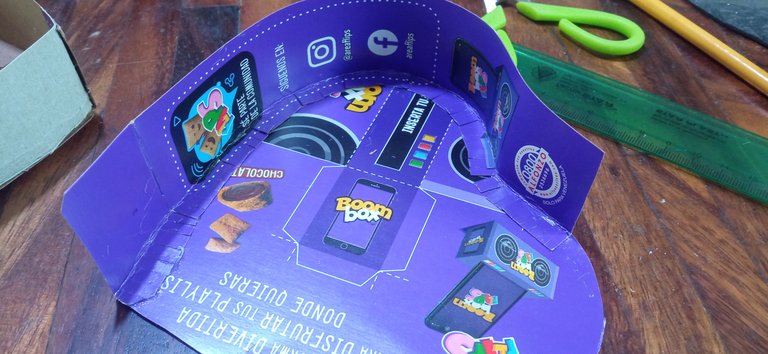
I hadn't done this type of crafts for a while, but I decided to try it because I had some materials that could be useful. I thought about using cardboard from some cereal boxes to make the box (I usually save most of the boxes from the products I consume for when I feel like doing this type of project). In this case, I used two boxes.
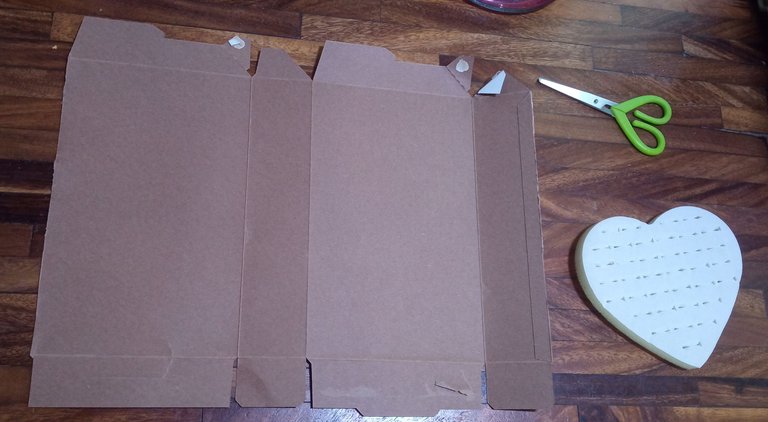
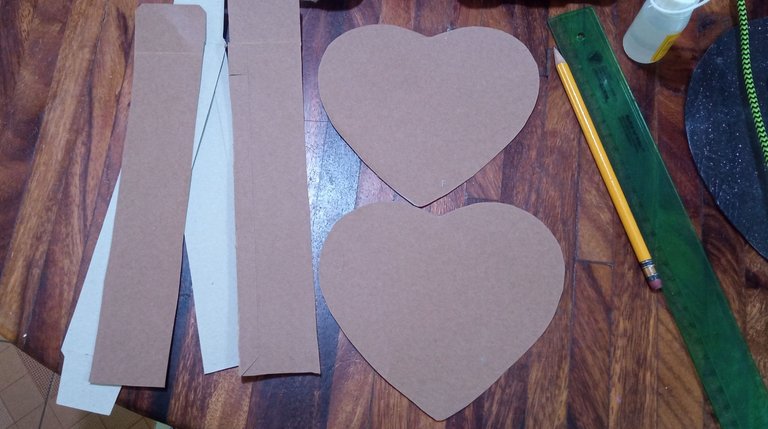
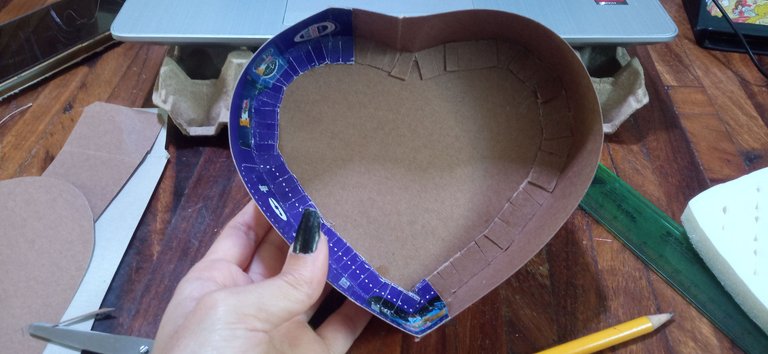
For the measurements, I used my sister's chest as a reference, which was made up of two hearts, one of them with a difference of a few millimeters compared to the other; I also cut some strips of cardboard for the outline of the chest. I chose the height according to my preference.
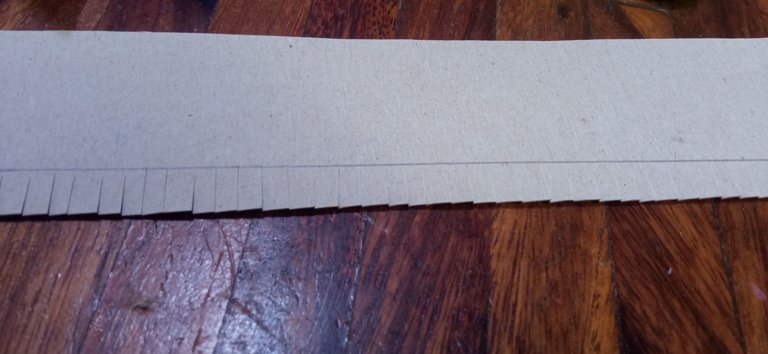
To make the cardboard give more room, I made some small cuts at the bottom of the strips, bending them upwards. This allowed me to mould the piece to the other heart-shaped piece, gluing it with liquid silicone.
 |  |
|---|
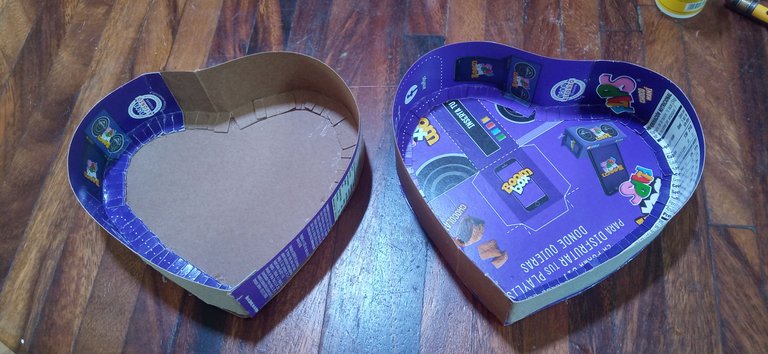
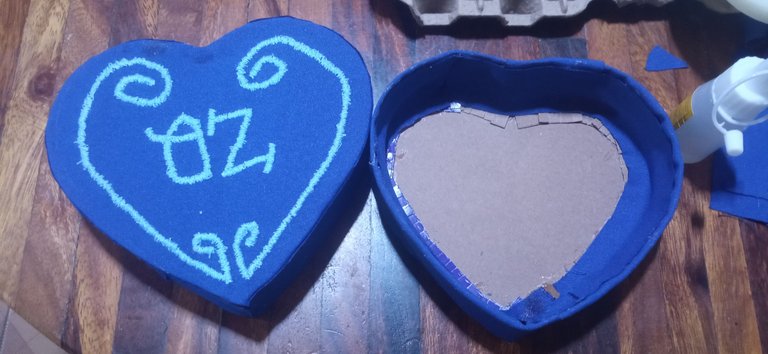
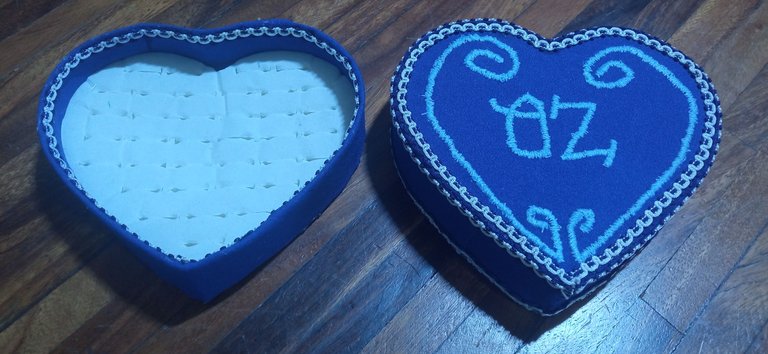
I did the same thing with both heart-shaped pieces, making sure it didn't lift up while the glue was working. Once it was dry, it closed perfectly like a chest, since the heart, which is a little bigger, worked as the lid.
 |  |
|---|
Then, my favorite part came: The decoration. At first, I had thought about simply painting the chest with blue paint and doing the details with the paint itself. But since that would require a few extra layers of white paint for better coverage, I thought about looking for a better option.
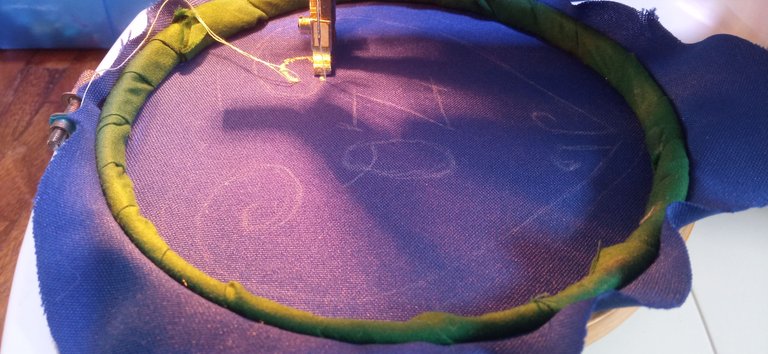
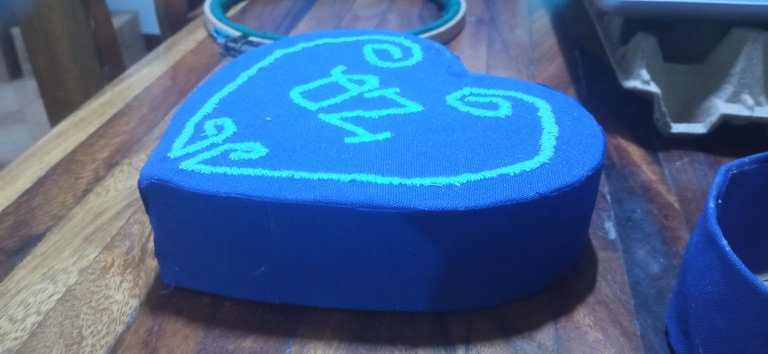
That's when I thought about the fabric. I didn't have any fabric in the same shade and in fact, I had very little fabric in that similar color, but luckily, it was enough. Now, the best part for me was doing the detail of the ornaments and the letters, because I wanted to venture into using my sewing machine for embroidery, something I had never done until that moment.
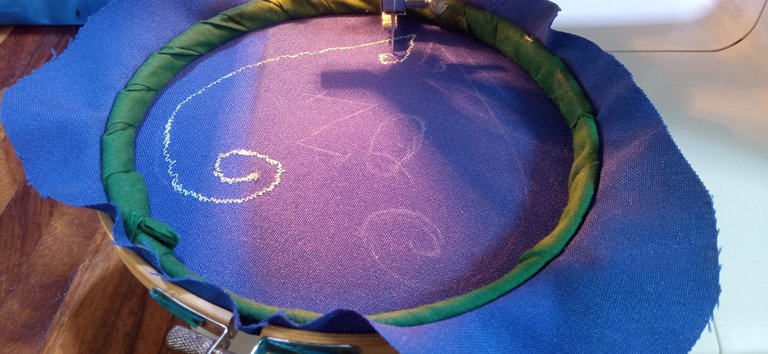
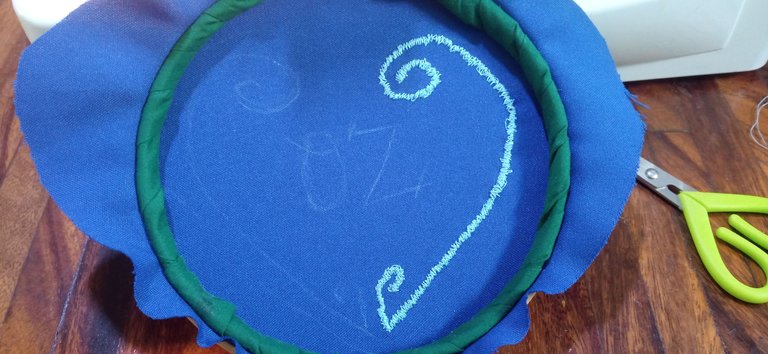
I watched a few videos on Youtube on how to embroider with the hoop and the sewing machine and I was delighted, because it looked easy. I drew the design on the piece of fabric with a little piece of soap (I don't have tailor's chalk haha) and after adjusting my machine, I started embroidering following the instructions I had seen in the tutorials.
 |  |
|---|
 |  |
|---|
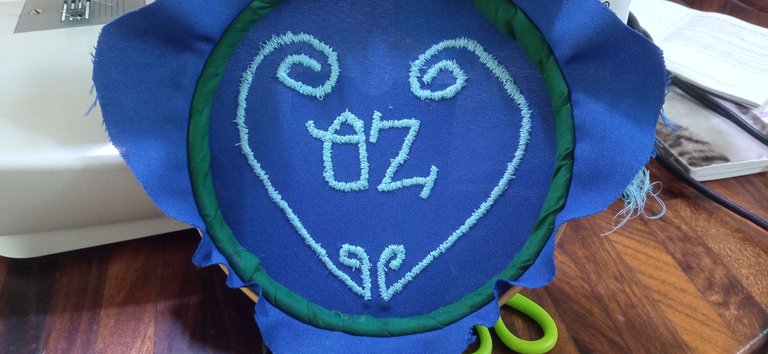
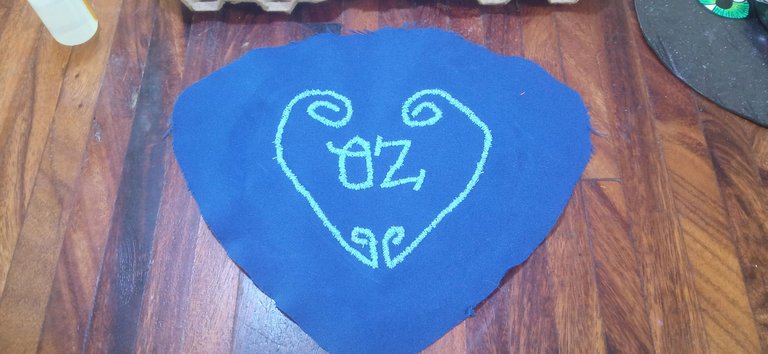
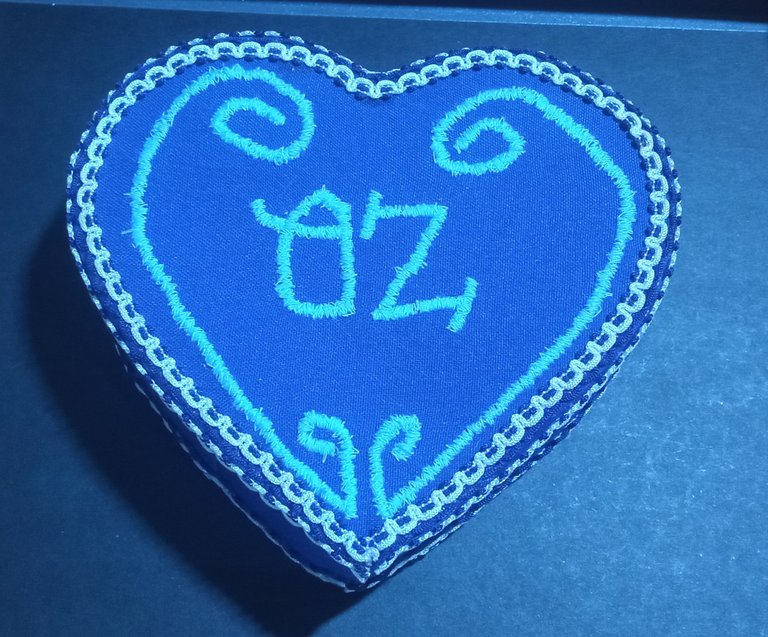
I admit it... I thought I was going to die, I was even sweating cold while embroidering 😩 hahaha It's amazing how difficult it is to embroider with the machine, the women I saw embroidering did it in such a natural way that it looked easy, but ultimately, it's not. Still, I did my best and embroidered the figure, even though I was afraid of damaging my machine in the process (I always have an exaggerated fear with new things 😆). It came out crooked and the stitching looks horrible haha but I'm glad that for my first embroidery, it didn't turn out so bad. This encouraged me to keep practicing so I can make prettier things in the future ✨
 |  |
|---|
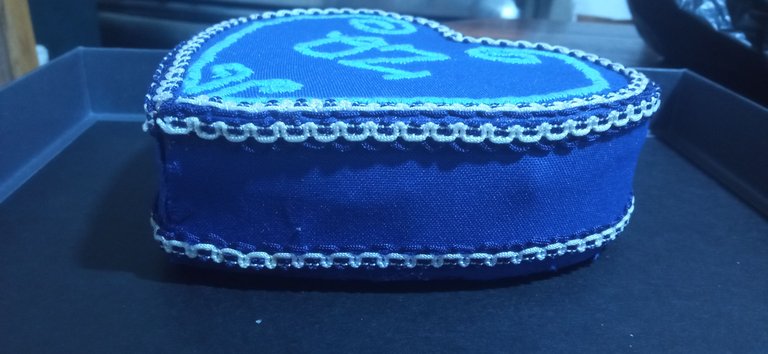
Next, I proceeded to glue the fabric onto the cardboard chest. Since I only had scraps of fabric, I had to make a couple of ties hehe, but luckily, I was able to cover what was needed. Once I placed the pad, I was ready.
 |  |
|---|
 |  |
|---|
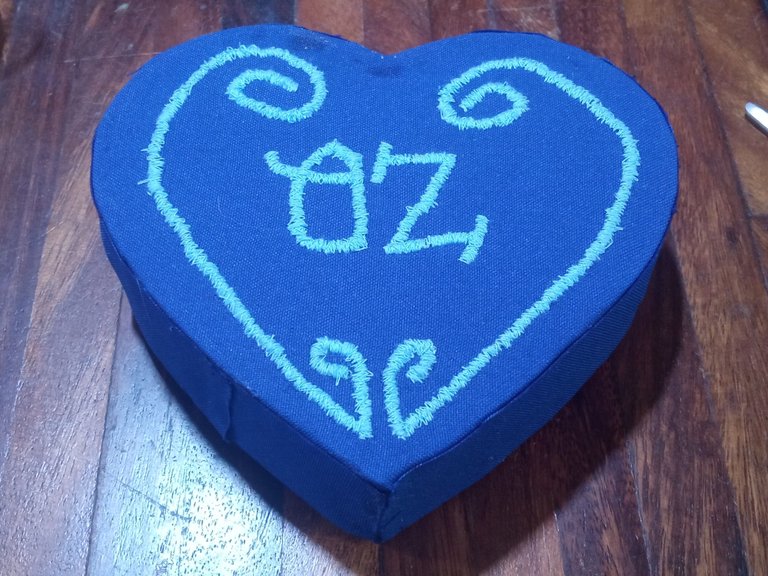
...Or I thought I was. I wasn't convinced by the visible fabric ties and the slight stains that the liquid silicone had left on the fabric, so I searched through my materials and found a lovely embroidered ribbon that a friend gave me years ago and that I thought was perfect to put on as a detail and as a unique touch. I glued it with liquid silicone and, yes, it was ready.
 |  |  |
|---|
Now, every time I go out and check my box, I can select my rings in a more charming way than mixed up among the rest of my accessories hehe It was nice to give myself this gift, because I liked the design of the mirror since I saw it and I even think that my heart case is prettier than the one I used as a model hehe But what do you think? As you can see, with recycled materials, you can get nice things, I hope you are encouraged to make your own crafts after this 😇
Thank you very much for visiting my post. I hope you found it interesting.
Until next time!

CONTENIDO EN ESPAÑOL
¡Hola a todos los integrantes de ésta comunidad y amantes de las manualidades! Para el que no lo sepa, yo adoro los anillos ¡Son de mis accesorios favoritos! Y durante un tiempo, cada vez que salía a la calle, no podía salir si no llevaba un anillo en cada dedo (no es broma, salía con un total de diez anillos 😆) y, a pesar de que era tan incómodo como se lo imaginan, me hacía sentir bastante coqueta. Así que, con el tiempo, llegué a coleccionar variados anillos de diferentes formas. Ahora que estoy recuperando el uso de los mismos, pensé en elaborar una especie de joyero o cofre en dónde guardarlos, pero algo que se viera lindo.
Bien... la idea surgió cuando mi hermana trajo de su trabajo, un pequeño estuche en forma de corazón, que originalmente traía anillos y al venderse todos, el estuche iba a ser desechado. Ella se quedó con el estuche y me regaló a mí, la almohadilla de goma espuma en forma de corazón, con ranuras para incrustar los anillos 😆 No me quejé, porque inmediatamente pensé que podría darle algún uso.
Fue entonces cuando recordé una escena de la serie Helluva Boss (serie que me tiene viciosa desde los últimos años), en donde uno de mis personajes favoritos, mostraba un espejo en forma de corazón , el cual me encantó y que había pensado en replicar en cuánto pudiera mandar a cortar un espejo con esa forma.
Tenía bastante tiempo sin hacer manualidades de éste tipo, pero me animé al tener algunos materiales que podrían servirme. Pensé en utilizar para armar el cofre, cartulina que obtuve de unas cajas de cereales (suelo guardar la mayoría de las cajas de los productos que consumo para cuando me antojo a hacer éste tipo de proyectos). En éste caso, utilicé dos cajas.
Para las medidas, utilicé el cofre de mi hermana como referencia, el cual estaba compuesto por dos corazones, uno de ellos, con una diferencia de unos milímetros en comparación del otro; así como corté unas tiras de cartulina para el contorno del cofre. El alto, lo escogí a mi preferencia.
Para que la cartulina cediera, realicé unos pequeños cortes en la parte inferior de las tiras, doblándolas hacía arriba. Esto me permitió amoldar la pieza a la otra en forma de corazón, pegándola con silicón líquido.
| |
|---|
Hice esto mismo en ambas piezas con forma de corazón, procurando estar pendiente de que no se levantara mientras el pegamento, hacía su efecto. Una vez que estuvo seco, cerraba perfectamente como un cofre, ya que el corazón que es un poquito más grande, funcionaba como la tapa.
| |
|---|
Luego, llegó mi momento favorito: La decoración. Al principio, había pensado sencillamente en pintar el cofre con pintura azul y hacerle los detalles con la propia pintura. Pero dado que eso requeriría unas capas extras de pintura blanca para un mayor cubrimiento, pensé en si podía buscar una posibilidad mejor.
Fue entonces cuando pensé en la tela. No tenía tela de la misma tonalidad y de hecho, tenía muy poca tela de ese color parecido, pero por suerte, era la suficiente. Ahora, la mejor parte para mí, fue la de realizar el detalle de los adornos y de las letras, porque quise aventurarme a utilizar mi máquina de coser para bordados, algo que jamás había hecho hasta ese momento.
Vi unos cuantos videos en Youtube de cómo bordar con el aro y la máquina de coser y quedé encantada, pues se veía fácil. Dibujé el diseño en el pedazo de tela con un pedacito de jabón (no tengo tiza sastre jaja) y luego de ajustar mi máquina, comencé a bordar siguiendo las indicaciones que había visto en los tutoriales.
| |
|---|
| |
|---|
Lo admito... pensé que me iba a morir, hasta estaba sudando frío mientras bordaba 😩 jajaja Es increíble lo difícil que es bordar con la máquina, las mujeres que vi bordando lo hacían de una forma tan natural que se veía fácil, pero en definitiva, no lo es. Aún así, hice mi mejor esfuerzo y bordé la figura, a pesar de que temía dañar mi máquina en el proceso (siempre tengo un miedo exagerado con las cosas nuevas 😆). Quedó torcida y la costura se ve fatal jaja pero me alegra de que para ser mi primer bordado, no quedase tan mal. Esto me animó a seguir practicando para poder hacer cosas más lindas en el futuro ✨
| |
|---|
Seguidamente, procedí a pegar la tela sobre el cofre de cartulina. Como tenía sólo trozos de tela, tuve que hacer un par de empates jeje, pero por suerte, pude cubrir lo necesario. Una vez que le coloqué la almohadilla, estaba listo.
| |
|---|
| |
|---|
...O pensé que lo estaba. No me convencían los empates de tela que se veían y unas ligeras manchas que el silicón líquido, había dejado en la tela, así que busqué entre mis materiales y me hallé con una encantadora cinta bordada que me regaló un amigo hace años y que pensé, era perfecto para colocarle a modo de detalle y como un toque único. Lo pegué con silicón líquido y así, sí estuvo listo.
| | |
|---|
Ahora, cada vez que voy a salir y reviso mi cofre, puedo seleccionar mis anillos de una forma más encantadora que revueltos entre el resto de mis accesorios jeje Fue agradable hacerme éste regalo, porque me gustó el diseño del espejo desde que lo vi y hasta creo que mi estuche de corazón está más bonito que el que usé de modelo jeje Pero ustedes ¿Qué opinan? Como pueden ver, con materiales de reciclaje, se pueden obtener cosas lindas, ojalá que se animen a hacer sus propias manualidades luego de esto 😇
Muchas gracias por haber visitado mi publicación. Espero que les haya parecido interesante.
¡Hasta una próxima oportunidad!
Que hermosa caja amiga, el bordado en tonos azules me encanta,un lindo cofre para guardar tus prendas, además es una excelente idea para darle uso a los cartones que regularmente tenemos en casa.
Saludos!
!DIY
¡Me encanta reciclar! El momento en que te das cuenta de lo que lograste con algo que ibas a desechar, es mágico para mí jaja Sin mencionar que pude hacerme algo de mi serie favorita y pude aventurarme a bordar por fin, eso es un logro para mí 😌 ¡Muchas gracias por haber visitado mi publicación y por comentar! 😇💚
Beautiful craft idea. I love the heart-shaped Thanks for sharing.
I'm very glad you liked it 😊 Thank you very much for visiting my post and for commenting 🤗💚
You're welcome 🥰
Wow, how nice it turned out, thank you so much for sharing your genius on DIYHub, everything is admirable here, even reading the story that inspired you to make this heart box, congratulations for a great job.
It was nice to work on it and I really enjoy writing about the process of making it, beyond the steps, because I feel that this way I convey to the reader a little of the excitement I had while making the project (yes, I was anxious to see the result, because there was a chance it would be a disaster hehe). Thank you very much for visiting the post, for the support and for the lovely comment 😌💚
You can query your personal balance by
!DIYSTATS