Hello dear creative friends!!! I hope everyone is very well. Over here trying to spend the summer in the best possible way 😁
Today I am going to teach you how to make a cute dinosaur ideal for a little boy's birthday.
Hola queridos amigos creativos!!! Espero estén todos muy bien. Por acá tratando de pasar el verano de la mejor manera posible 😁
Hoy les voy a enseñar a hacer un tierno dinosaurio ideal para un cumple de algún niño pequeño.
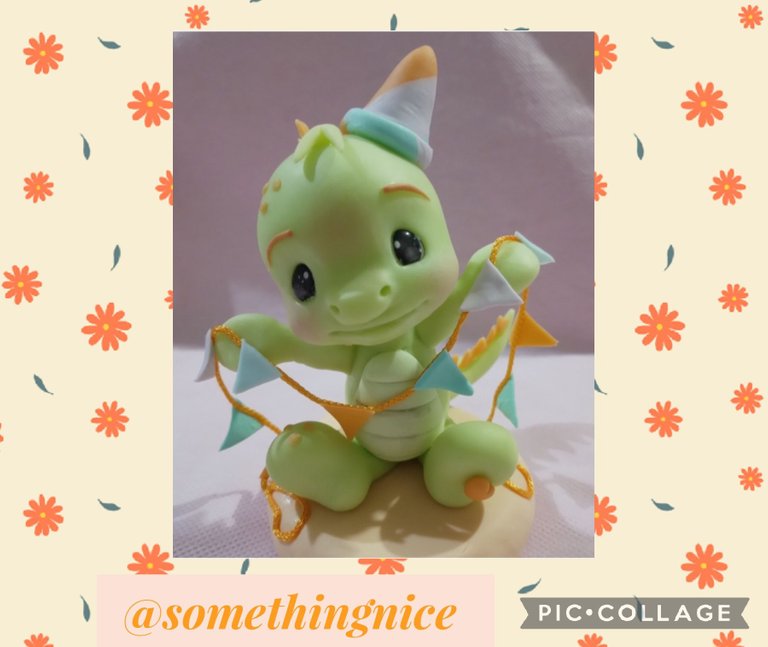
I made this beauty with an image from Pinterest.
Esta belleza la realicé con una imagen de Pinterest.
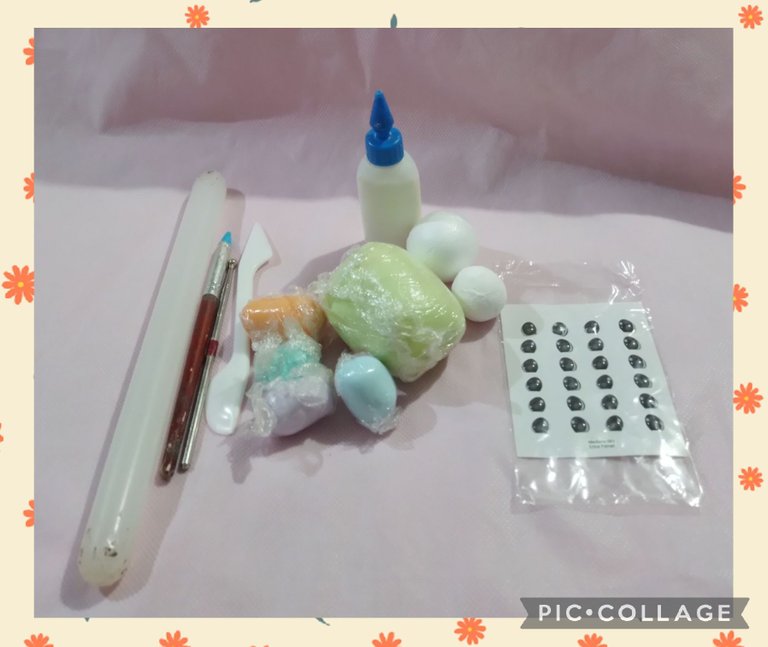
Materials
🦖 cold porcelain
🦖 vinyl glue
🦖 steks
🦖 rolling pin
🦖 styrofoam spheres
🦖 self-adhesive eyes
🦖 styrofoam cover
Materiales
🦖 porcelana fria
🦖 cola vinilica
🦖 estecas
🦖 palo de amasar
🦖 esferas de telgopor
🦖 ojos autoadhesivos
🦖 tapa de telgopor
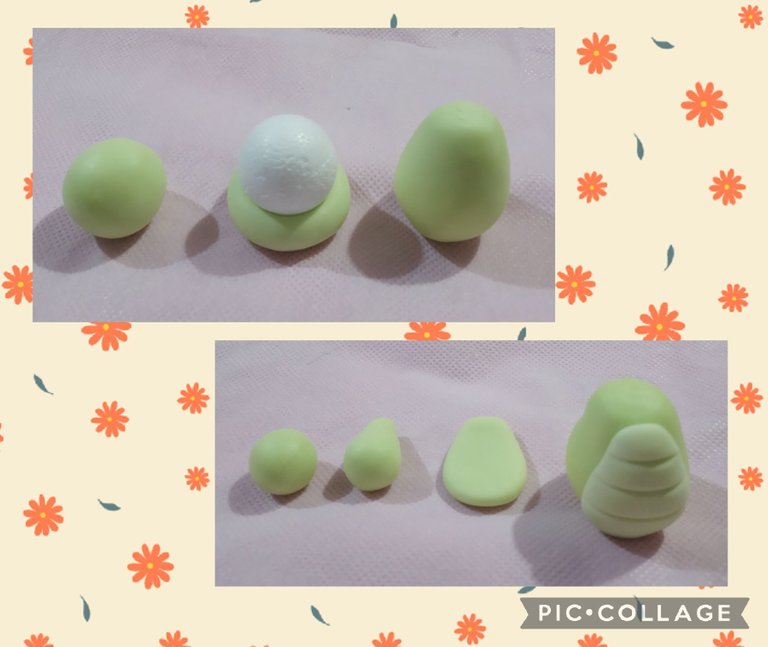
We are going to use two sizes of styrofoam spheres.
For the body, make a ball the same size as the smaller sphere, insert it, bring the dough upwards and close, giving it a pear shape.
With lighter colored dough, make a ball, shape it into a teardrop shape and flatten it. Paste on the chest and mark straight lines.
Vamos a utilizar dos tamaños de esferas de telgopor.
Para el cuerpo hacer un bolita del mismo tamaño de la esfera más pequeña, introducir la misma, ir llevando la masa hacia arriba y cerrar dando forma de pera.
Con masa de color más clara hacer una bolita, dar forma de lágrima y aplanar. Pegar en el pecho y marcar líneas rectas.
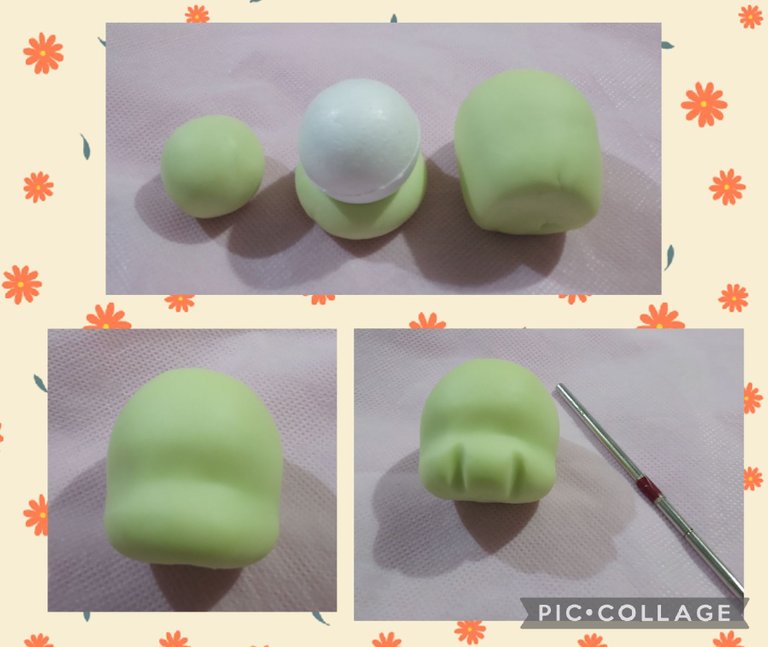
For the head, make a small ball with the same volume as the sphere, insert it, bring the dough upwards until it covers the entire surface and close.
Mark the separation of the face and forehead and round the muzzle with the palm of the hand.
With a round stem divide the nose into three parts.
Para la cabeza hacer una bolita del mismo volumen de la esfera, introducir la misma,llevar la masa hacia arriba hasta cubrir toda la superficie y cerrar.
Marcar la separación de la cara y la frente y redondear el morro con la palma de la mano.
Con una esteca redonda dividir el morro en tres partes.
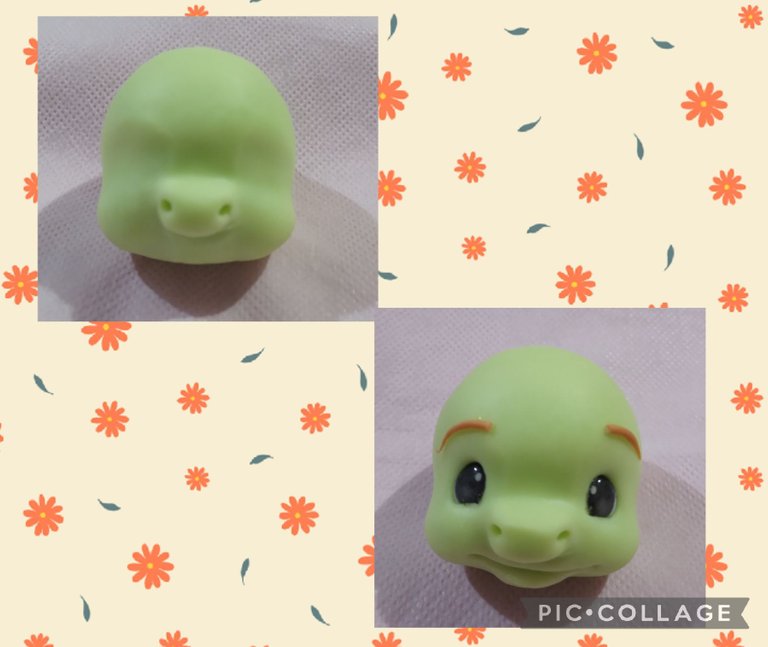
In the central part we form the nose and two holes. Mark the eye sockets.
Just below the nose, mark two very soft holes (more or less on the same line as the tear ducts) and make a cut that joins both holes, forming the lower lip. Glue the self-adhesive eyes (of course if you don't have them, you can paint them with markers or acrylics) and make the eyebrows with another color.
En la parte central formamos la nariz y hacer dos orificios. Marcar las cuencas de los ojos.
Apenas abajo de la nariz marcar dos orifios muy suaves (más o menos en la misma línea de los lagrimales) y hacer un corte que una ambos orificios, formar el labio inferior. Pegar los ojos autoadhesivos (por supuesto si no tienen lo pueden pintar con marcadores o acrílicos) y con masa de otro color hacer las cejas.
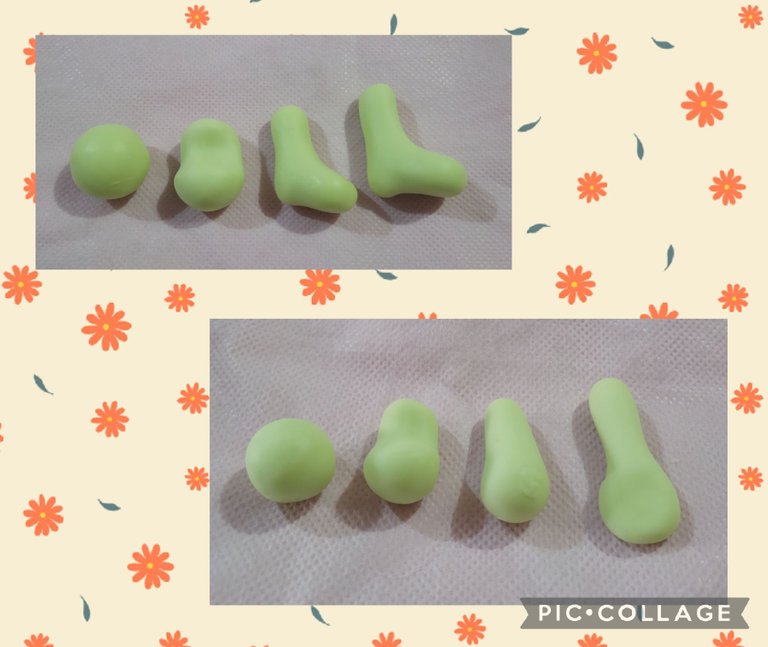
For the hind legs make two equal balls, with your finger mark more or less in the middle at the top stretch to form the leg and at the bottom stretch and flatten a little to form the foot, mark the heel.
For the front legs, make two equal but smaller balls, stretch a little and mark in the center, stretch the upper part again to form the arm and flatten the lower part to make the mitten-like hand.
Para las patas traseras hacer dos bolitas iguales, con el dedo marcar más o menos en el medio en la parte superior estirar para formar la pierna y en la parte inferior estirar y aplanar un poco para formar el pie, marcar el talón.
Para las patas delanteras hacer dos bolitas iguales pero más pequeñas, estirar un poco y marcar en el centro, volver a estirar la parte superior para formar el brazo y con la parte inferior aplanar para hacer la mano tipo manopla.
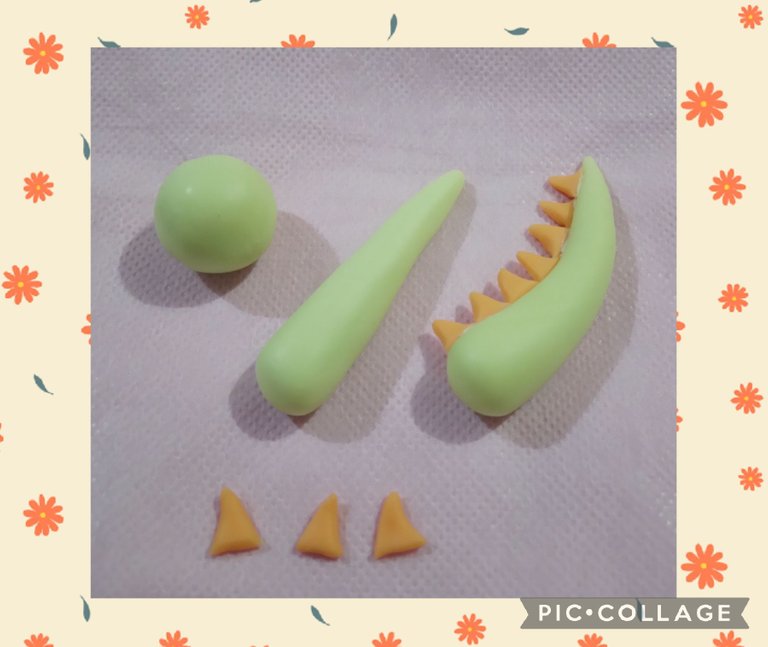
For the tail, make a ball, stretch it into a teardrop shape, curve a little.
With another color stretch to cut small triangles.
Glue along the entire length of the tail.
Para la cola hacer una bolita, estirar dando forma de lágrima, curvar un poco.
Con otro color estirar para cortar pequeños triángulos.
Pegar en todo el largo de la cola.
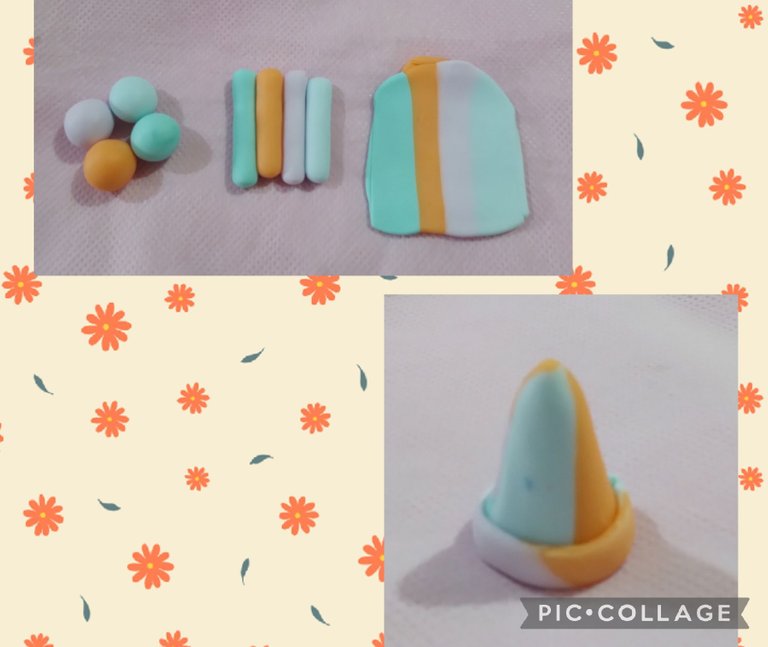
To the bonnet, make four balls of different colors, stretch them to the same length, join and pass the rolling pin until the colors are slightly integrated.
Cut a triangle and join the edges to form the cone, cut a strip and glue at the bottom.
Para el bonete hacer cuatro bolitas de diferentes colores, estirar del mismo largo, unir y pasar el palo de amasar hasta que se integren un poco los colores.
Cortar un triángulo y unir por los bordes para formar el cono, cortar una tira y pegar en la parte inferior.
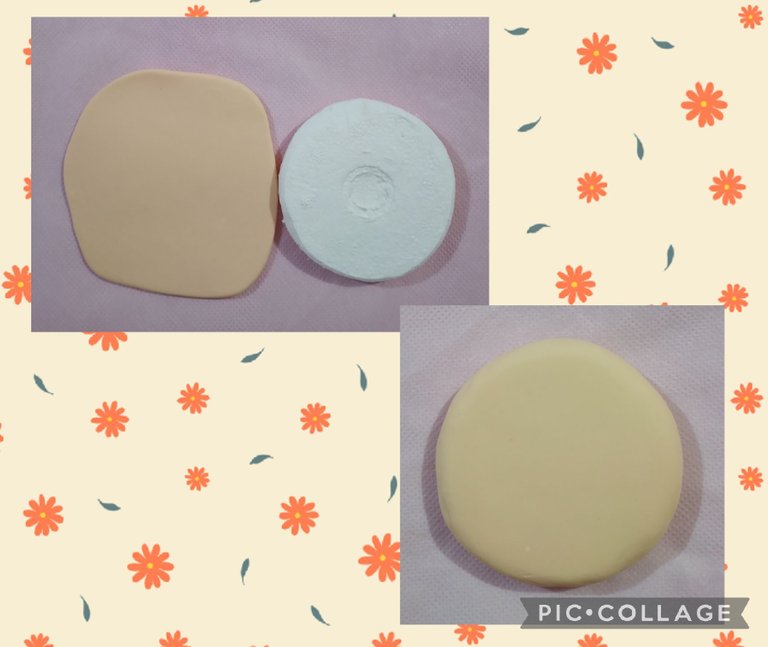
For the base, stretch the dough, put vinyl glue on one side of the lid and stick to the dough, remove the excess. Repeat the process to cover the other side. We erase the joint by rubbing a little water.
Para la base estirar masa, poner cola vinilica de un lado de la tapa y pegar a la masa, quitar el excedente. Repetir el proceso para cubrir del otro lado. Borramos la unión frotando un poco de agua.
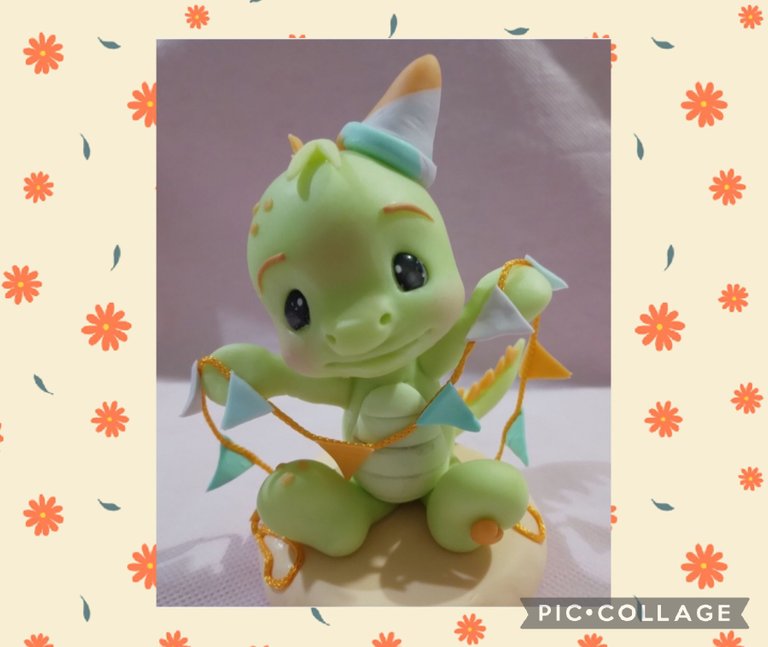
To finish, add some spots making very small balls that we later flatten.
For the bangs, make two little balls and shape them into a teardrop.
For the pennants, roll out dough of different colors, cut small triangles and glue a piece of thread on the top.
Do not forget to glue triangles not only on the tail but also along the back to the head.
Finally make up.
I hope you liked this cute Dino.
For this post I took photos with my Samsung A03 cell phone, I used the PicCollage application and Google translator. Regards. Andrea💜💜💜
Para finalizar agregar algunas manchas haciendo bolitas muy pequeñas que luego aplanamos.
Para el flequillo hacer dos bolitas y dar forma de lágrima.
Para los banderines estirar masa de diferentes colores, cortar pequeños triángulos y en la parte superior pegar un trozo de hilo.
No olvidar pegar triángulos no solo en la cola sino también a lo largo de la espalda hasta la cabeza.
Finalmente maquillar.
Espero que les haya gustado este Dino tan tierno.
Para este post tomé fotos con mi teléfono celular Samsung A03,utilicé la aplicación PicCollage y el traductor de Google. Saludos. Andrea💜💜💜

~~~ embed:1618308395102265344 twitter metadata:MTQ4NDI4MTAxMzQxMzAyMzc1Nnx8aHR0cHM6Ly90d2l0dGVyLmNvbS8xNDg0MjgxMDEzNDEzMDIzNzU2L3N0YXR1cy8xNjE4MzA4Mzk1MTAyMjY1MzQ0fA== ~~~
The rewards earned on this comment will go directly to the people( @tere.alv, @dayadam ) sharing the post on Twitter as long as they are registered with @poshtoken. Sign up at https://hiveposh.com.
Pero que Dino más bello. Haces un trabajo muy lindo y te quedan perfectas las figuras.
Gracias por compartir.
Hola @tere.alv 👋 muchas gracias por tus palabras 💜😊
Tierno. Me encanta tu trabajo. El dino te quedó lindísimo. Espero pronto tener los materiales para recrear cada uno de los que haz mostrado. Son preciosos.
Hola @creacioneslelys 👋 muchas gracias 💜😊 ya quiero ver lo que puedes crear...🥰
Thank you for sharing this post in the DIYHUB Community!
Your content got selected by our fellow curator ashikstd & you just received a little thank you upvote from us for your great work! Your post will be featured in one of our recurring compilations which are aiming to offer you a stage to widen your audience within the DIY scene of Hive. Stay creative & HIVE ON!
Please vote for our hive witness <3
Thank you @diyhub 😊
What a beauty, this is simply wonderful and delicate. God bless those hands. The sculptures look beautiful on you. Best wishes @somethingnice 💕
!DIY
Hola @dayadam 👋 muchas gracias por el apoyo💜😊
Bravo! Bellísimo trabajo!
!discovery 30
Muchas gracias @gaboamc2393 😊
This post was shared and voted inside the discord by the curators team of discovery-it
Join our community! hive-193212
Discovery-it is also a Witness, vote for us here
Delegate to us for passive income. Check our 80% fee-back Program
Yay! 🤗
Your content has been boosted with Ecency Points, by @desro.
Use Ecency daily to boost your growth on platform!
Support Ecency
Vote for new Proposal
Delegate HP and earn more
Te quedó precioso, es muy tierno. Me encanta. 🤩
Hola @palomap3 👋 muchas gracias💜😊