My Dear Hiveians,
I am @rjraju001 from Bangladesh
Today is Wednesday , January 22/2025
I am a new member of the @DIYHub community. Welcome to my blog. Hope you all are well. Today I am going to share with you how to make a beautiful pen holder with colored paper. Let's get started.


Necessary materials for making pen holder |
|---|
| Serial number | Name of the material |
|---|---|
| 1 | A4 colored paper |
| 2 | Puthi and Chumki |
| 3 | Gum |
| 4 | Kaichi |
Steps to make a pen stand |
|---|
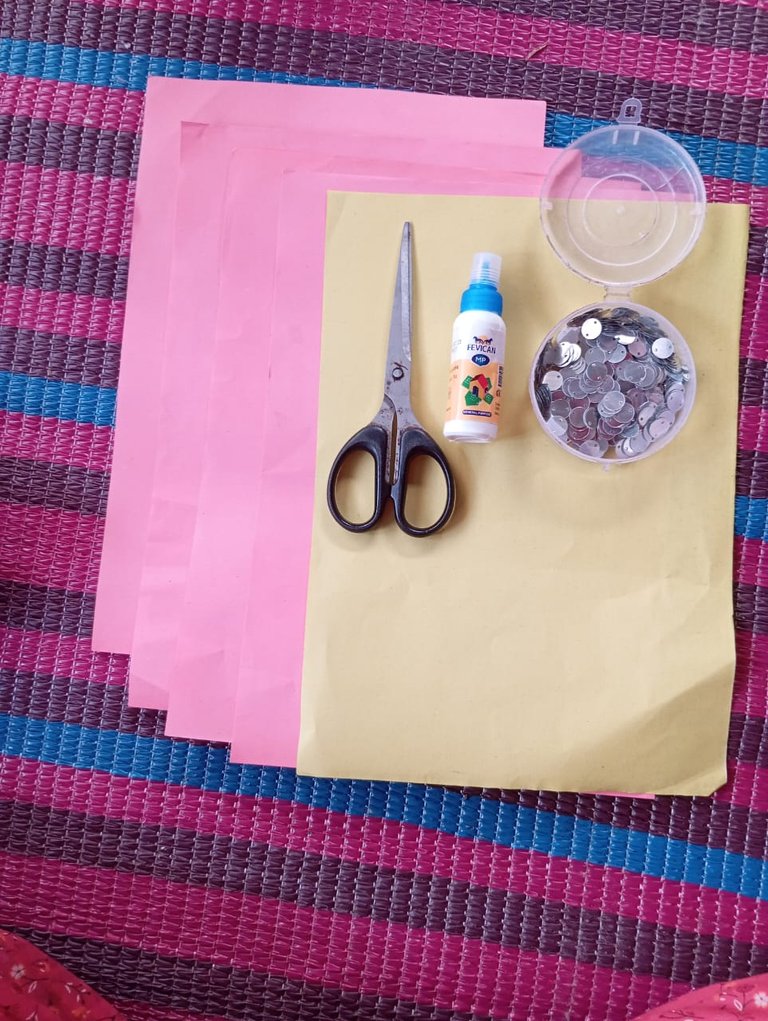
- In the first step I collected all the materials to make the pen holder.
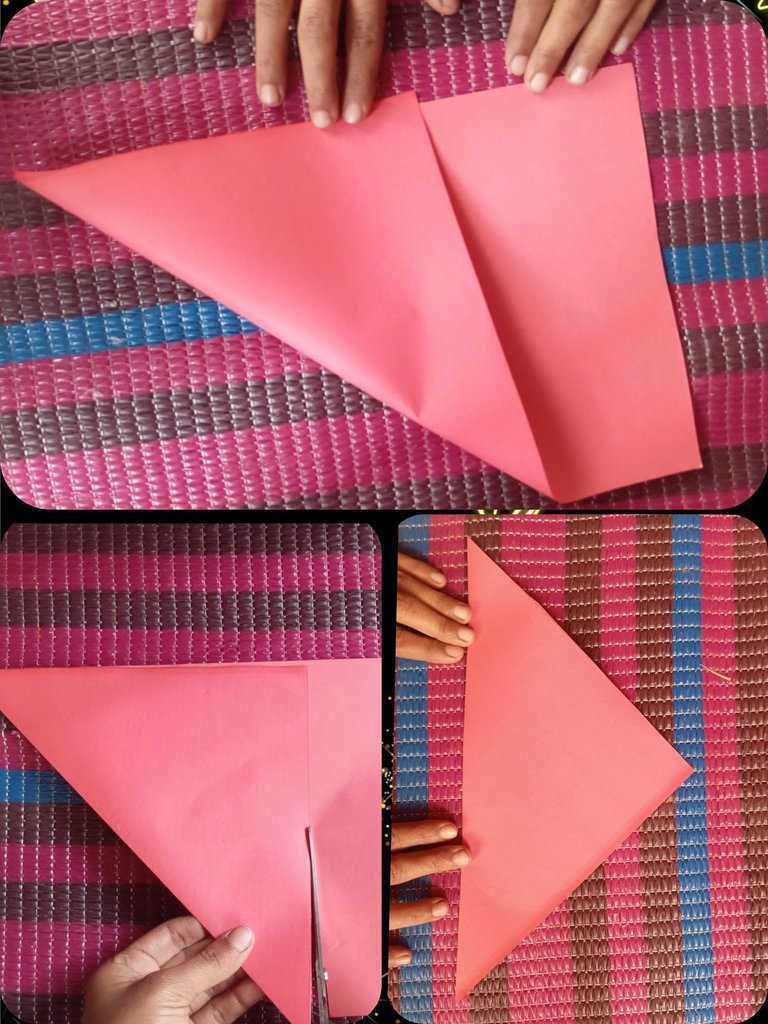
- In the second step I measured the colored paper 20 * 20 cm. Then I cut the paper by drawing the corners with scissors. As you can see my paper is cut.
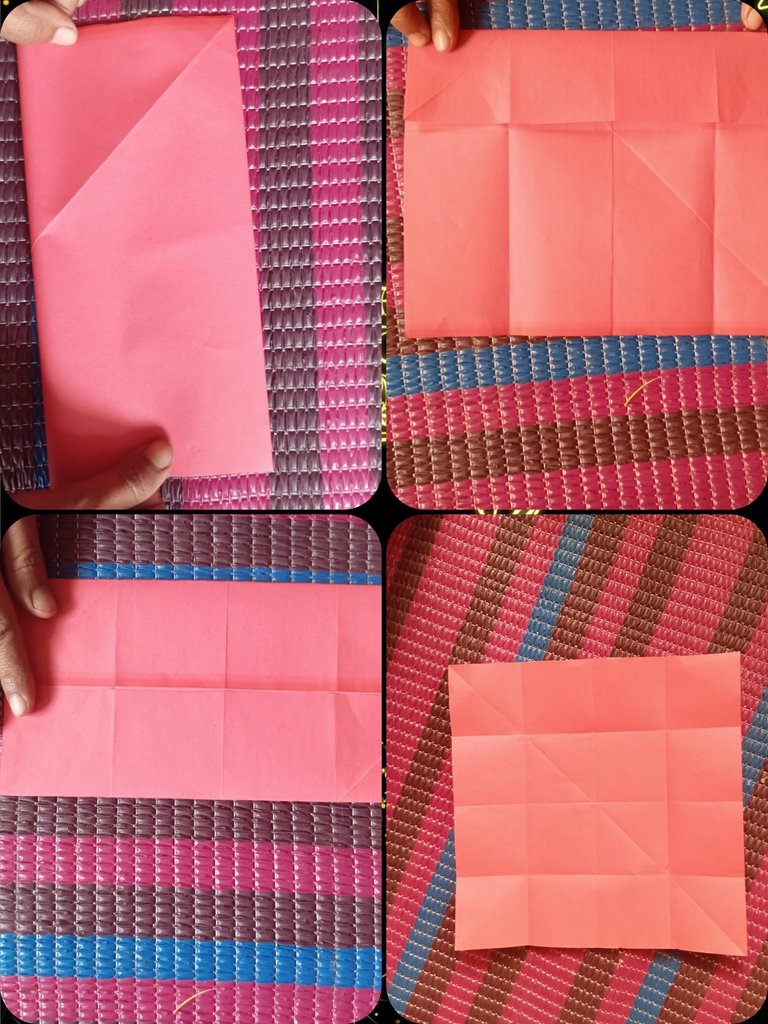
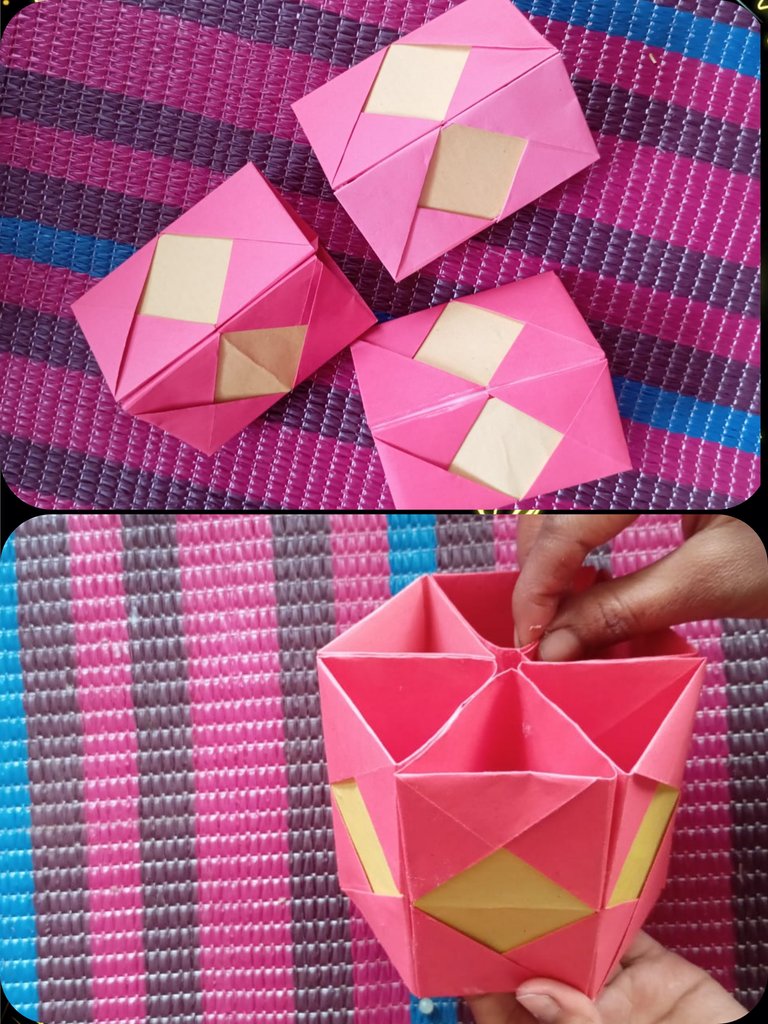
- In the third step I start folding the paper one by one from the middle position on each side. I then folded it again to give me a 16 square kilometer structure.
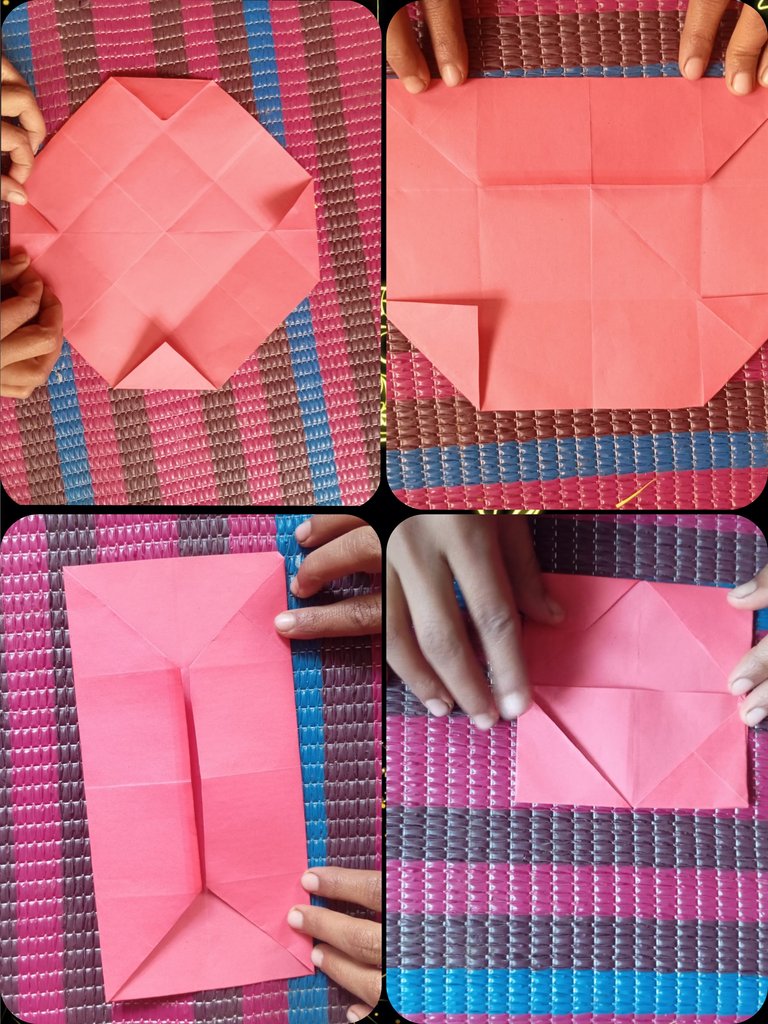
- Then I start folding the four edges of the big square colored paper one by one. Then I start folding it from the middle position one by one from each side. Then I flipped the paper over and folded the other two equal parts of the paper in the middle position. Several rectangular shapes are now formed. These folds are overlapped with tertiary folds. As you can see I am trying to explain you very nicely.
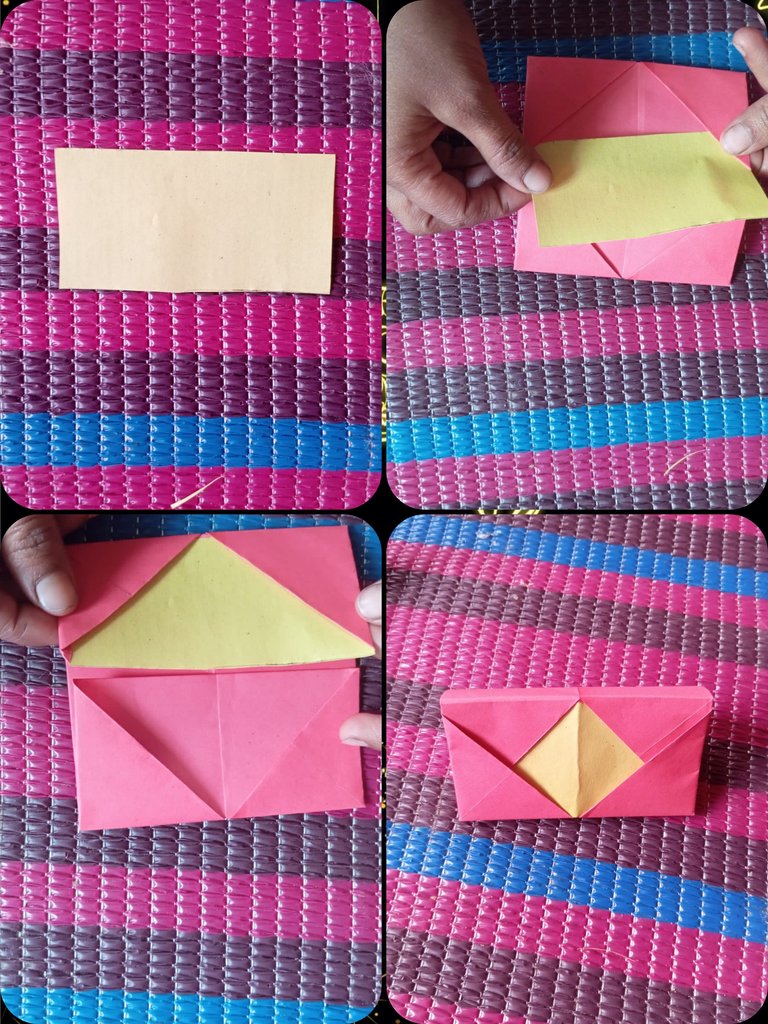
- Notice a little better in the fifth step, I cut a yellow paper according to the measurements of the folded rectangular paper. Now I insert the yellow paper inside a rectangular shaped fried part. Then inside another rectangular folded section I inserted this yellow lined rectangular paper inside that section. As you can see my yellow paper has already been inserted into the two rectangular pieces of paper.
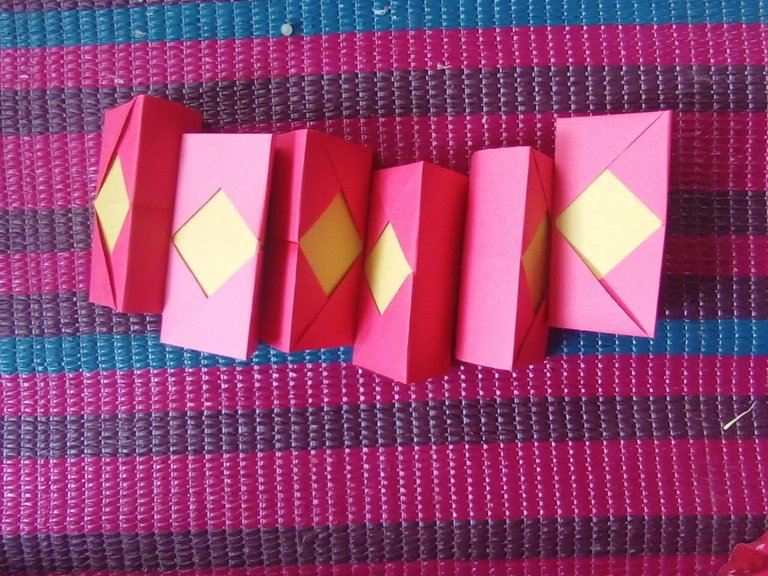
- In the sixth step you can see that my six structures have been expanded one by one.
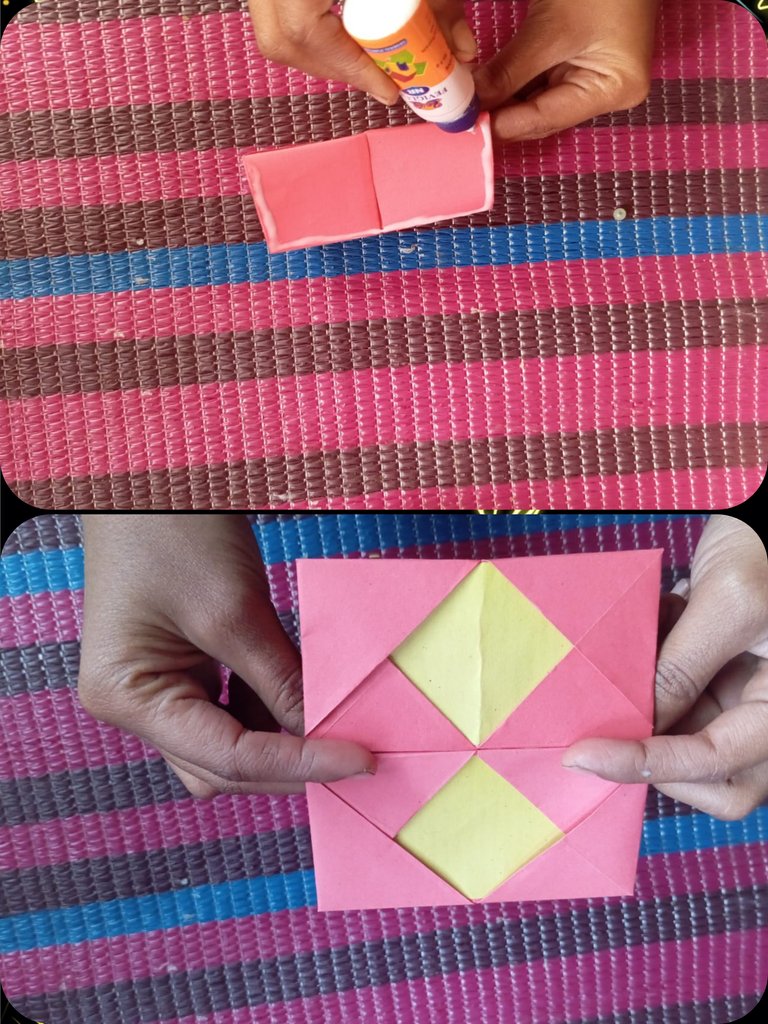
- Notice well in the seventh step that I have attached one structure to another structure with gum. I am trying to explain you very well. Stay tuned with me.
- You can see that there are three structures here. Because I connected the previous six structures with gum to make three structures.
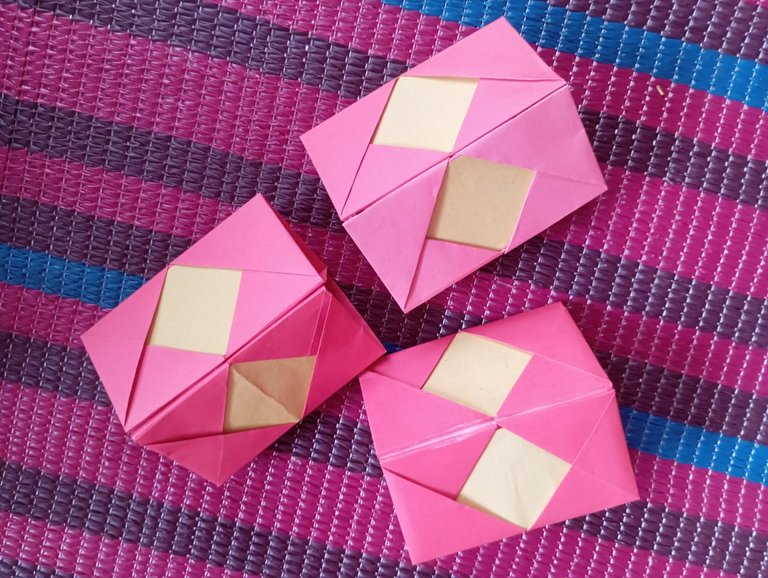
- Ninth step It is very important those three structures I put together by gum. As you can see the pen holder I am going to make is almost starting to take shape.
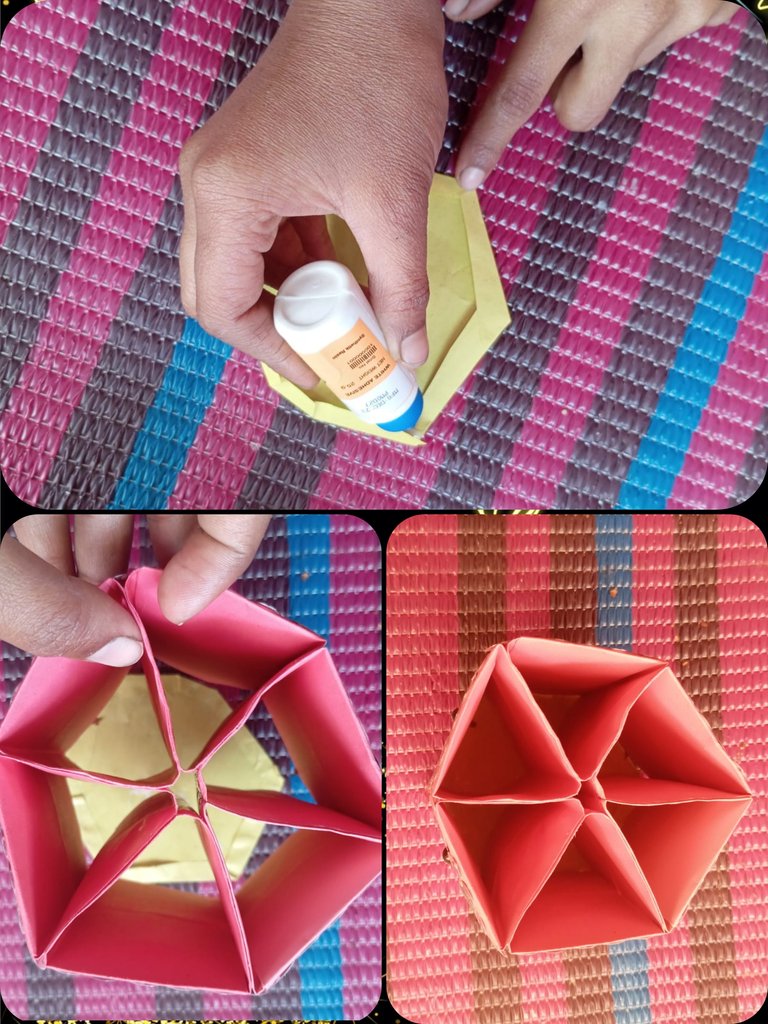
- Now I cut a yellow colored paper with scissors to measure the pen stand. Now I will glue the yellow colored tissue paper to the bottom of the pen holder. You can see the glue is attached. But the pen holder is made. But I still have some work to do to enhance its beauty. Keep watching.
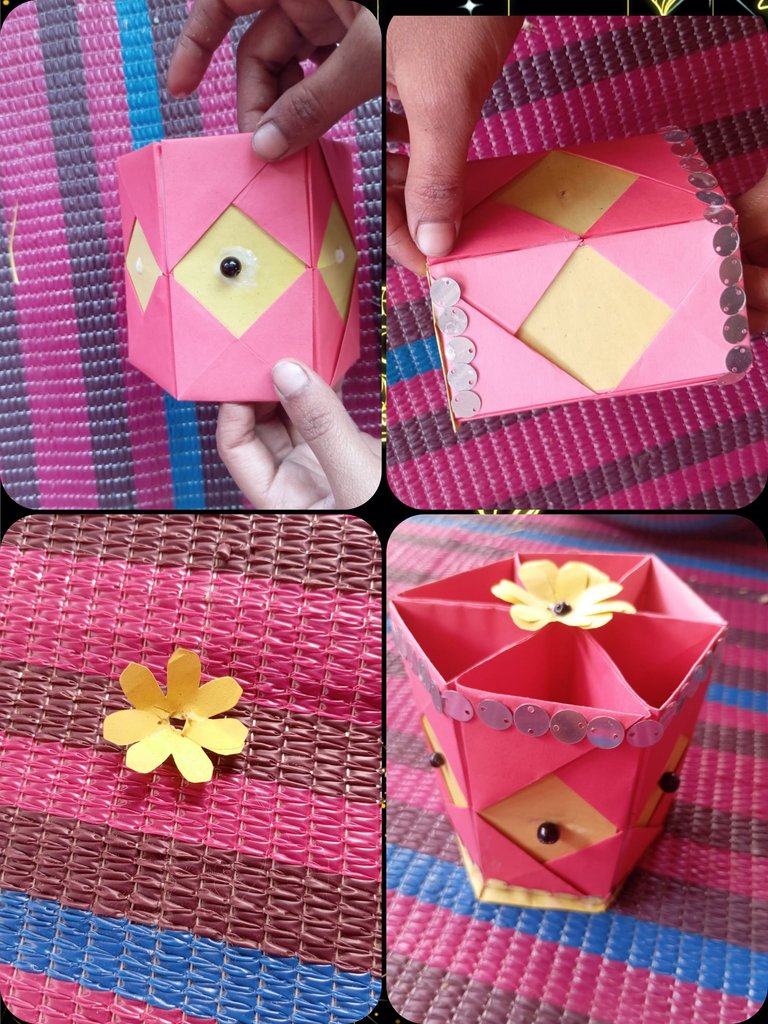
- In the eleventh step you can see that here I have used poonti and chumki to enhance the beauty of the pen holder. Then when my puthi and chumki are planted, my daughter says to me dad give me a flower here. Hearing my daughter's words filled my heart with joy. Because there is a little space above the pen holder, a flower will look great on the day. I enhanced the beauty of the pen holder by using puthi and chumki but my daughter enhanced the beauty of the pen holder with flowers. My daughter is five years old. I never thought so much wisdom in his head. Everyone pray for my daughter. Pen holder puthi, chumki and flower are attached.

Finally, my handmade colored paper pen holder fosters creativity and organization. I hope you like my handmade pen holder. If you follow the steps I show you can make a very nice pen holder. Please comment how you like my handmade pen holder. All the best to all members of the DIYHub community and my deepest love to them. This is the end of today. Allah Hafez.
Thanks for reading my post.

Follow Our Social Media
I am Md. Roknuzzaman Raju. I am a Muslim. I live in Gangni Police Station, Meherpur District, Khulna Division, Bangladesh. I feel proud as a Bangladeshi citizen. I love my native Bangladesh very much. Currently I am expatriate in Saudi Arabia 🇸🇦. You can say, I am a Bangladeshi Remittance warrior.I love to do photography and I love to hang out with my friends.I love to serve the poor and needy people. You all pray for me.May I reach my destination inshallah.
Making a pen holder is a unique task in a great work. Which I like very much. All necessary color pencils and pens can be kept here. Thank you so much for sharing great art.
Thank you very much.
You are always most welcome my pleasure
Congratulations @rjraju001! You have completed the following achievement on the Hive blockchain And have been rewarded with New badge(s)
Your next payout target is 250 HP.
The unit is Hive Power equivalent because post and comment rewards can be split into HP and HBD
You can view your badges on your board and compare yourself to others in the Ranking
If you no longer want to receive notifications, reply to this comment with the word
STOPHow interesting what can be achieved with folds and patterns. It looks great.
Qué interesante lo que se puede lograr con pliegues y patrones. Te quedó genial.
Thank you..
Sending you an Ecency curation vote!
Thank you..
It's always a Pleasure !
!INDEED
Hello dear friend @rjraju001 welcome to our beautiful community, we are happy to see you here and we love your pen holder, it looks great and we can't wait to see more of your works. Well done and thanks for sharing.
If I get your love, I will present many more good works to you. Thank you for curating my post.