
✨🌹✨🌹✨🌹✨🌹✨🌹✨🌹✨🌹✨🌹✨
Hola querida comunidad de artesanos y amantes de las manualidades ,como recibieron este nuevo año? Listos con los proyectos de enero ?, yo empecé con uno de los proyectos que tenía y es un arreglo de flores para una cumpleañera especial en la familia , que llega a sus 82 añitos , y le van a celebrar su cumpleaños como la Rosa🌹 que es , por lo que la celebración y la decoración serán de rosas fucsias como temática, así que tenía varias ideas para empezar estos proyectos para la fiesta ,pero entre algunas ideas queríamos hacerle un ramo de rosas para ella como un detalle, que se viera muy vistoso, y elegante y también aprovechando las fechas tan cercanas al día de los enamorados y la amistad ,este ramo está fenomenal para un detalle a obsequiar, así que me puse manos a la obra y el resultado fue muchísimo más de lo que esperaba , hermosísimo , les dejo las fotos y el paso a paso aquí abajito, (eso sí es bastante larguito por todos los pasos ,pero 🤌 ✨ este tutorial te va a resolver los arreglos para el 14 de febrero , así que no dejes de leer 😉).

🌹 Cinta raso n#9
🌹 Tijeras, Regla
🌹 Pistola de silicón y barritas de silicón
🌹 Yesquero
🌹 Palitos de altura
🌹 Retazos de cartulina y un bandeja de telgopor o lamina de anime
🌹 Retazos de tull
🌹 Papel de seda
🌹 Papel coreano
🌹 Cinta n#0 de raso beige con dorado
🌹 Perlitas pequeñas para decorar
🌹 Mariposa de cartulina o foami para decorar
Manos a la obra
English
Version
✨🌹✨🌹✨🌹✨🌹✨🌹✨🌹✨🌹✨🌹✨🌹✨
Hello dear community of artisans and craft lovers, how did you welcome this new year? Ready with the January projects? I started with one of the projects I had and it is a flower arrangement for a special birthday girl in the family, who is turning 82 years old, and they are going to celebrate her birthday like the Rose🌹 that she is, so the celebration and decoration will be fuchsia roses as a theme, so I had several ideas to start these projects for the party, but among some ideas we wanted to make a bouquet of roses for her as a detail, that looked very showy, and elegant and also taking advantage of the dates so close to Valentine's Day and Friendship, this bouquet is phenomenal for a detail to give as a gift, so I got to work and the result was much more than I expected, beautiful, I leave the photos and the step by step here below, (that is quite long because of all the steps, but 🤌 ✨ this tutorial will solve the arrangements for the February 14th, so don't stop reading 😉).

🌹 Satin ribbon #9
🌹 Scissors, ruler
🌹 Glue gun and glue sticks
🌹 Tinderbox
🌹 Tall sticks
🌹 Cardboard scraps and a styrofoam tray or anime sheet
🌹 Scraps of tulle
🌹 Tissue paper
🌹 Korean paper
🌹 Beige satin ribbon #0 with gold
🌹 Small pearls to decorate
🌹 Cardboard or foam butterfly to decorate
Let's get to work

 |  |  |
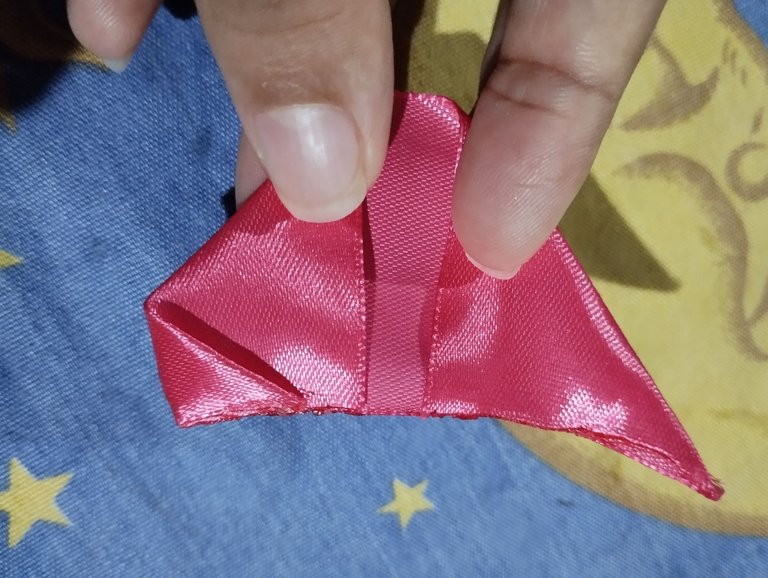 | 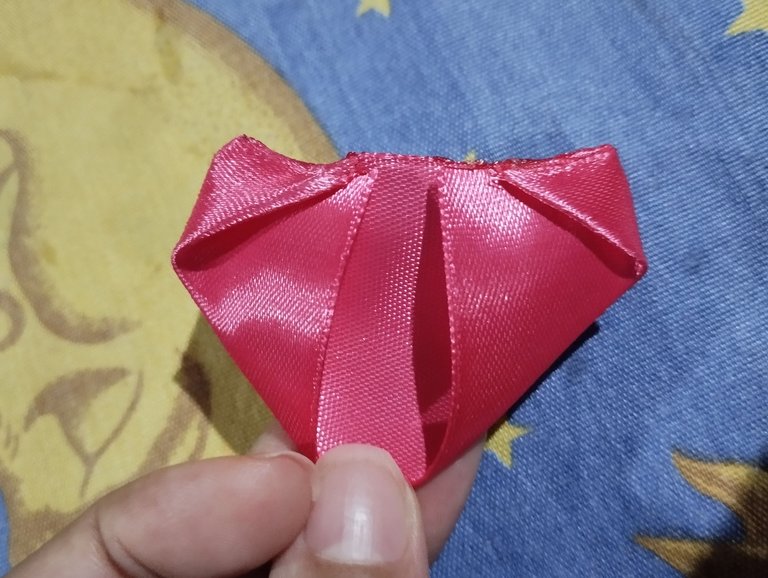 | 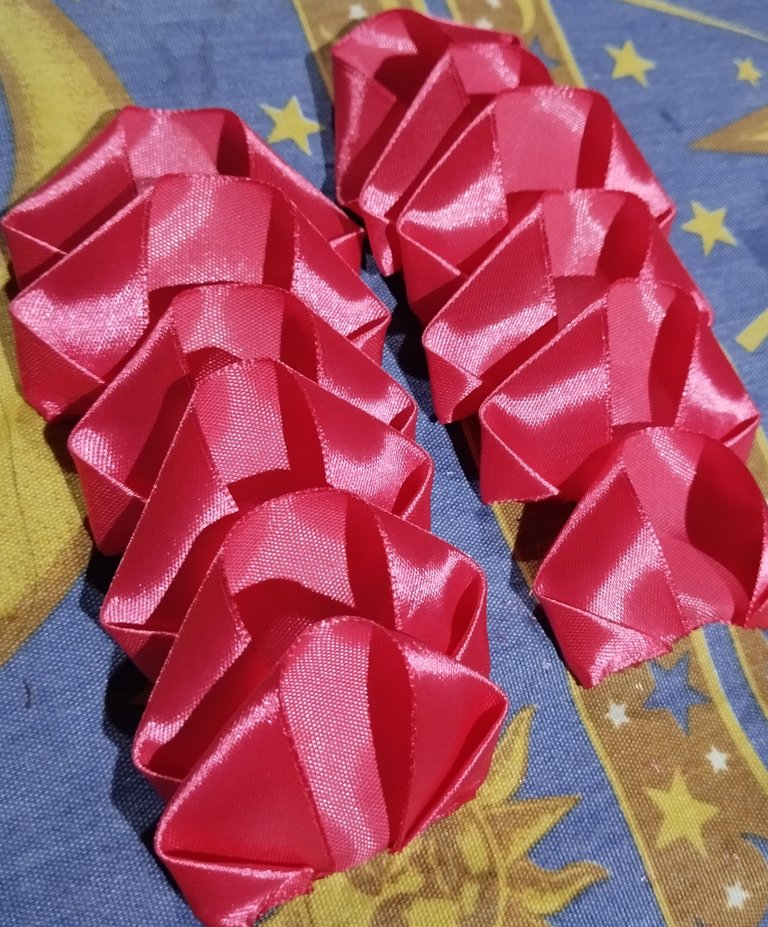 |
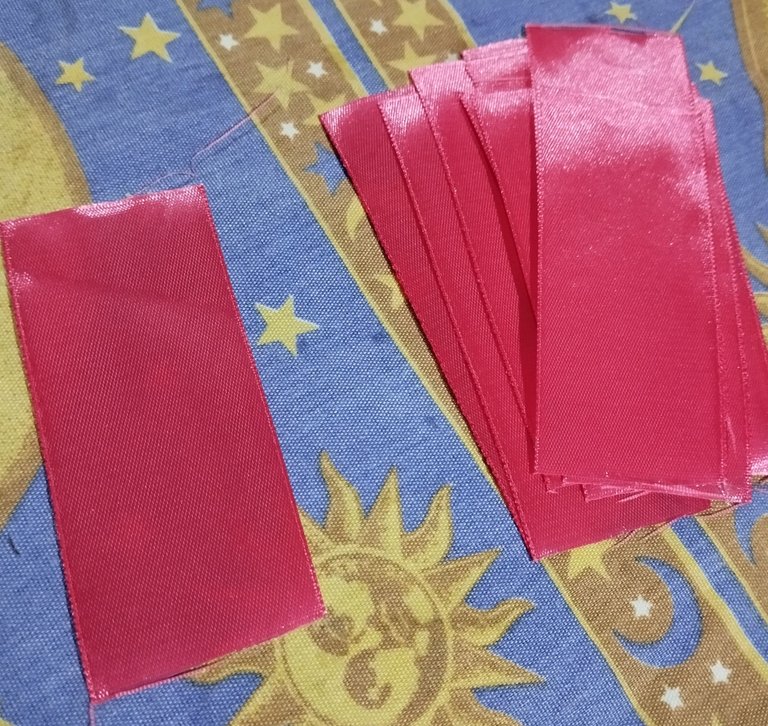
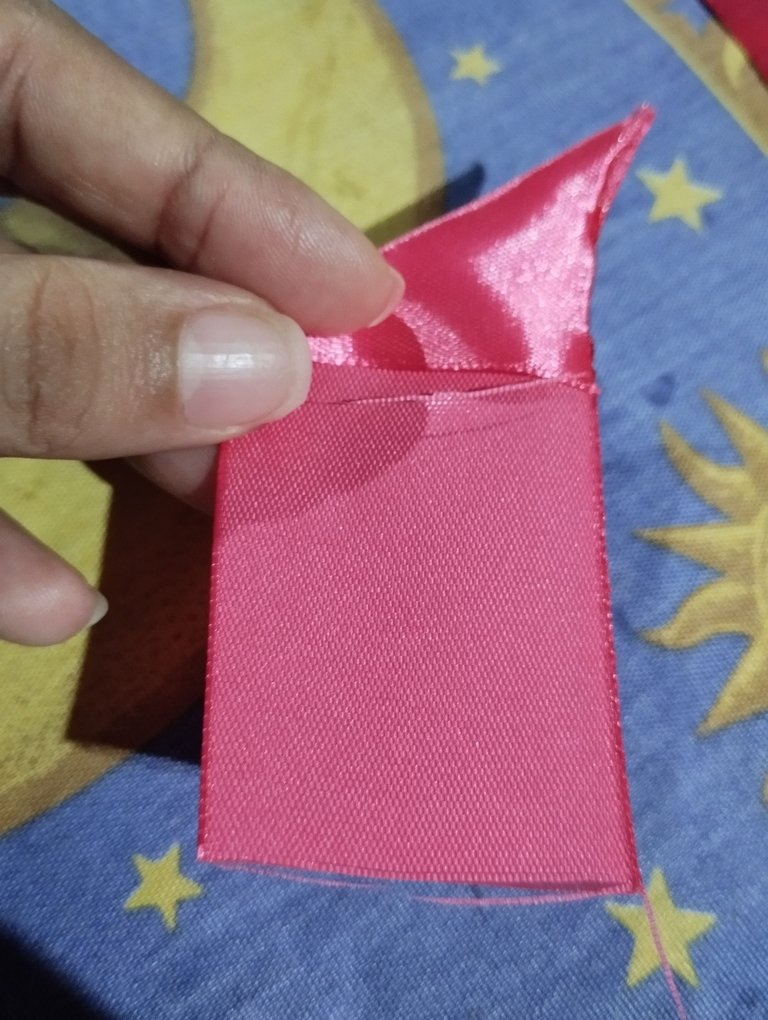
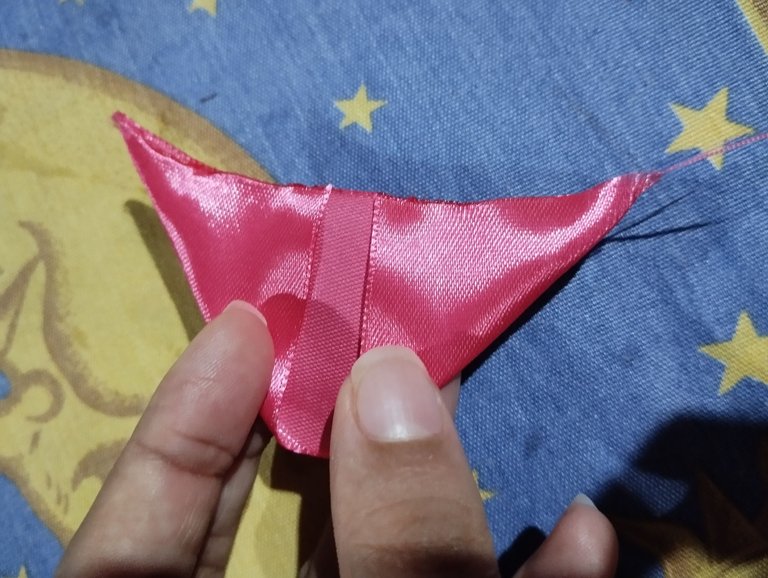
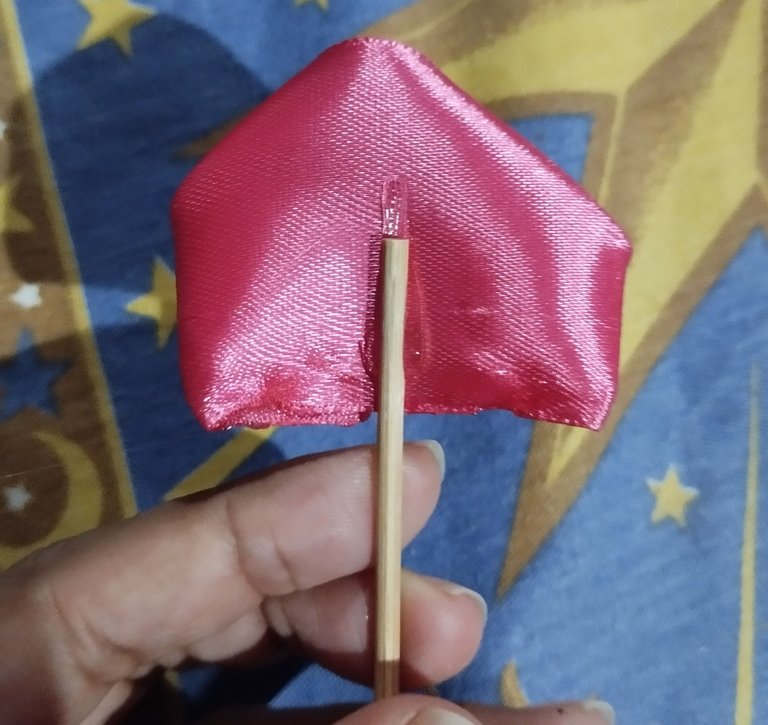
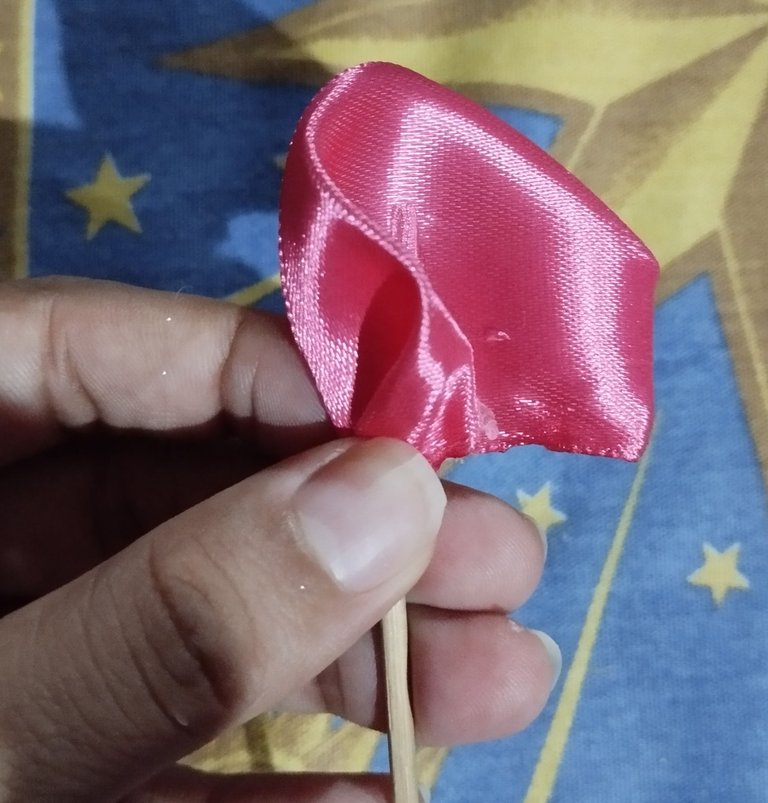
#1 Primeramente necesitamos para hacer cada rosa , yo usé una cinta de raso n#9 y marqué 10 cm de listón, esto nos serviría para hacer el pétalo de la rosa, con este rectángulo , doblé una esquina hacia adentro para hacer una especie de triángulo, y quemé el borde inferior con un yesquero para sellarlo, luego doblé la otra esquina y la volví a doblarla hacia adentro y sellé nuevamente con un yesquero, de forma que quedará como un triángulo, una vez tengamos esta figura ,a la esquina izquierda la volvemos a doblar hacia adentro , y luego hacemos lo mismos con la otra esquina , doblando nuevamente hacia adentro y dejandolo como una especie de forma de casita 🏡, esto formará una especie de pétalo, para cada rosa usaremos 12 pétalos.
English Version
#1 First we need to make each rose, I used a satin ribbon n#9 and marked 10 cm of ribbon, this would help us to make the rose petal, with this rectangle, I folded one corner inwards to make a kind of triangle, and burned the bottom edge with a tinderbox to seal it, then I folded the other corner and folded it inwards again and sealed again with a tinderbox, so that it will look like a triangle, once we have this figure, we fold the left corner inwards again, and then we do the same with the other corner, folding inwards again and leaving it like a kind of house shape 🏡, this will form a kind of petal, for each rose we will use 12 petals.
 |  |  |
 |  |  |
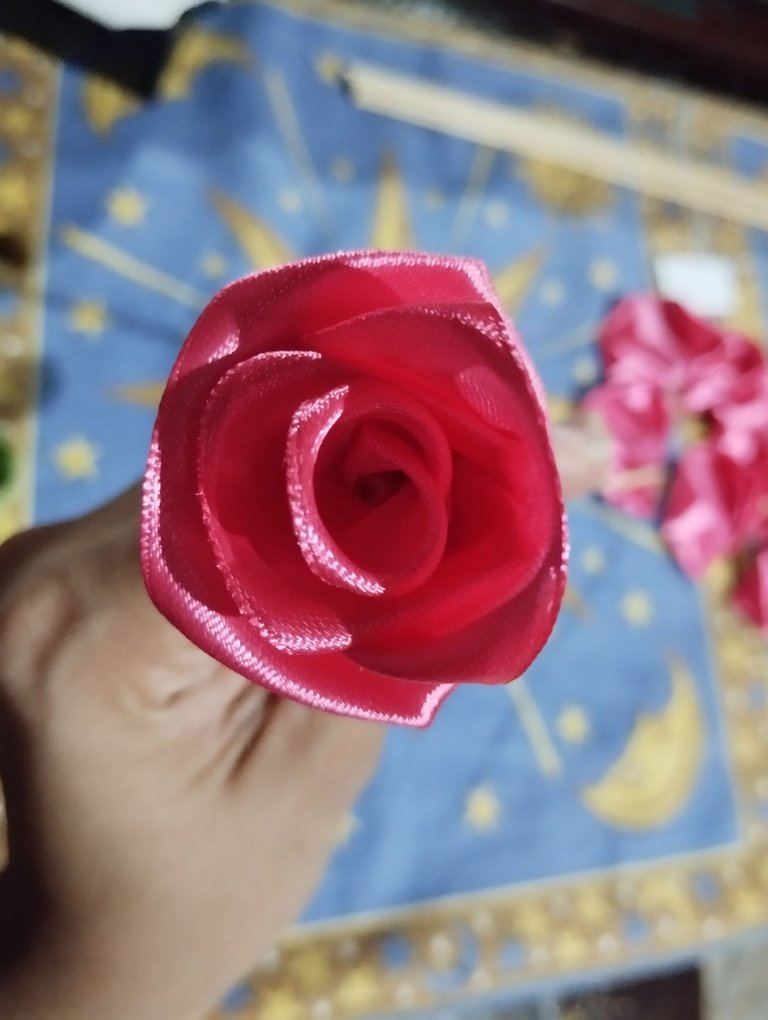 | 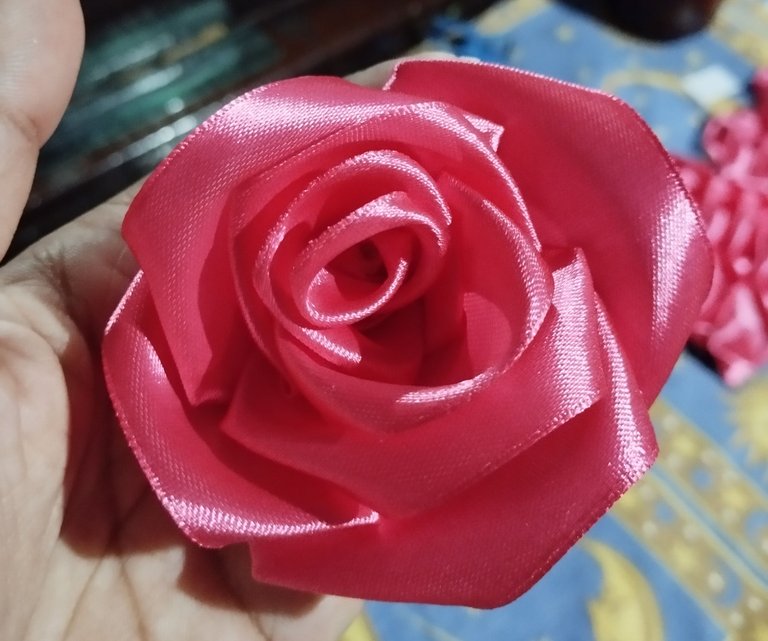 | 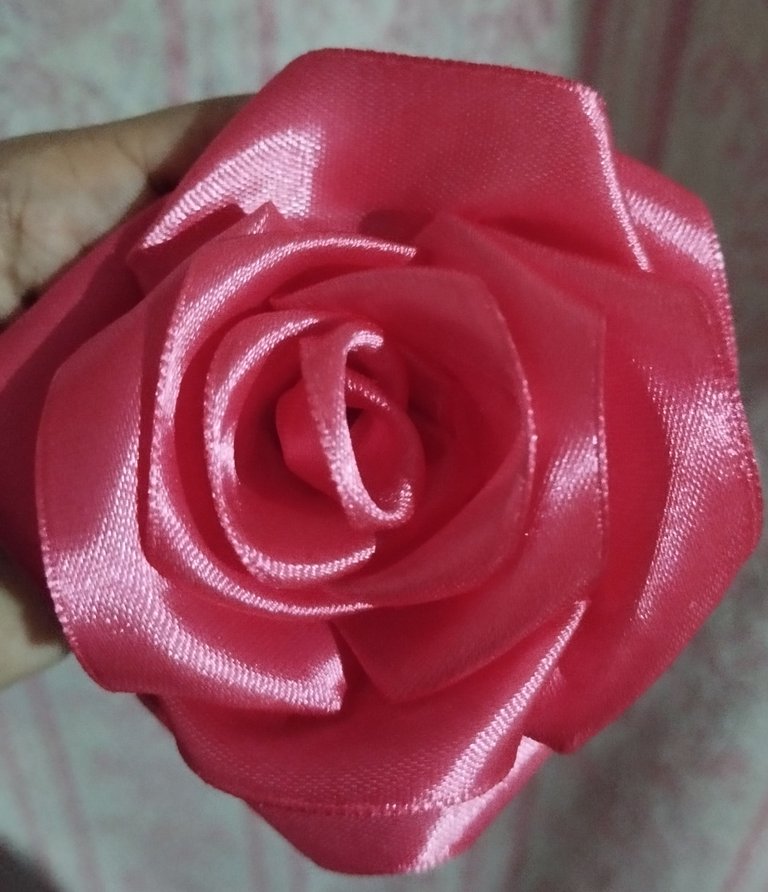 |
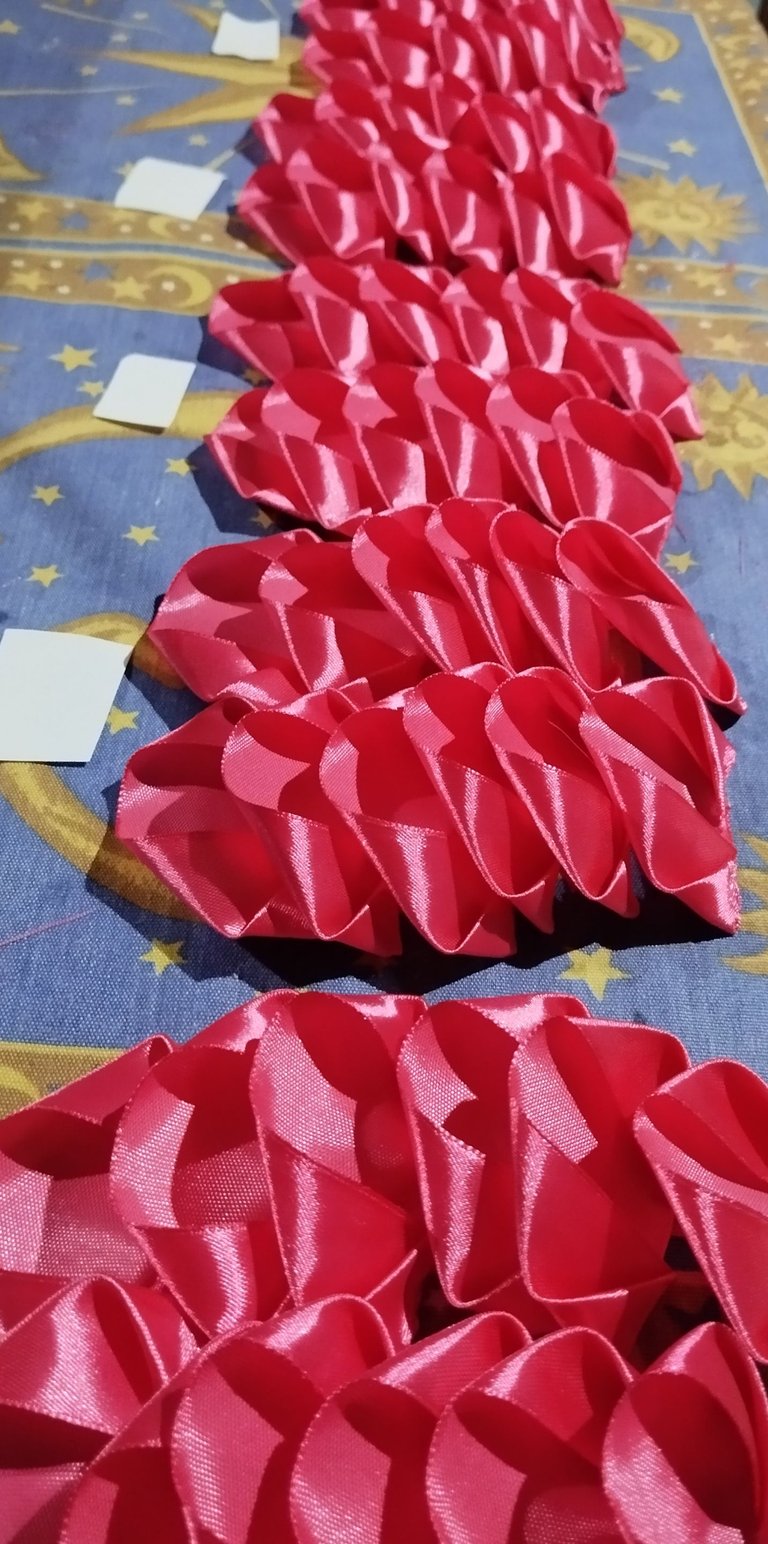
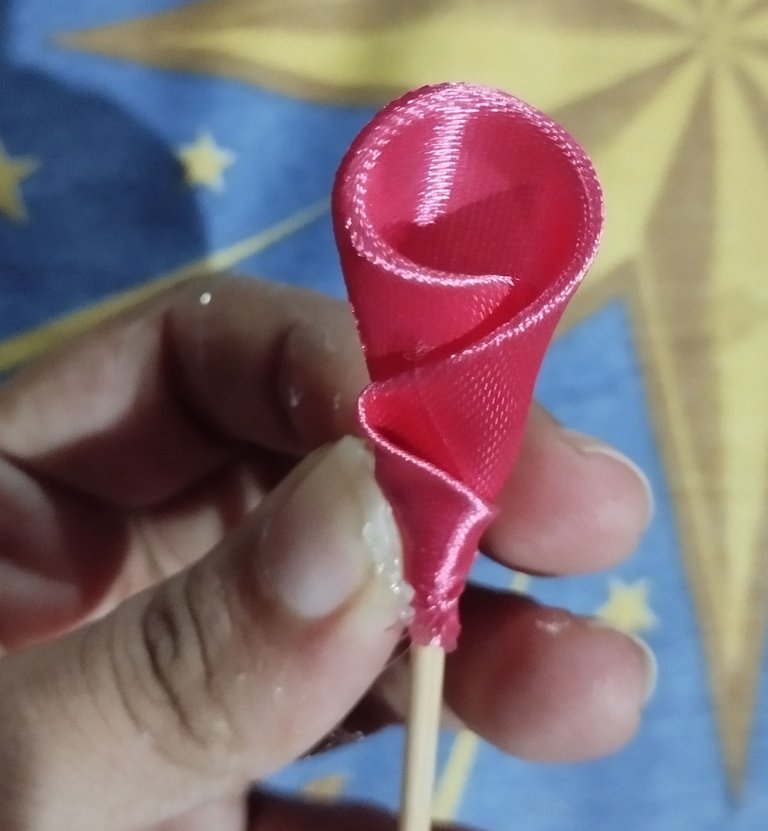
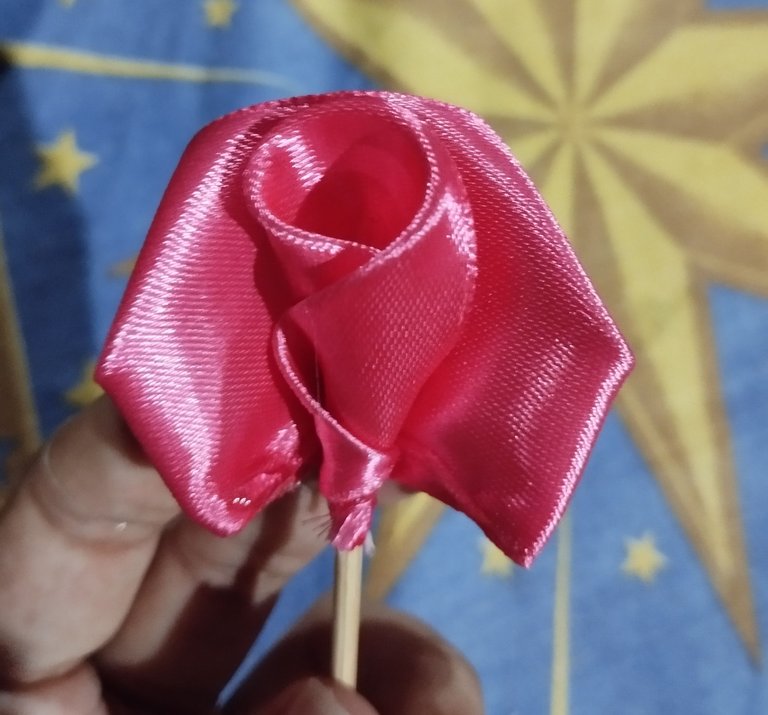
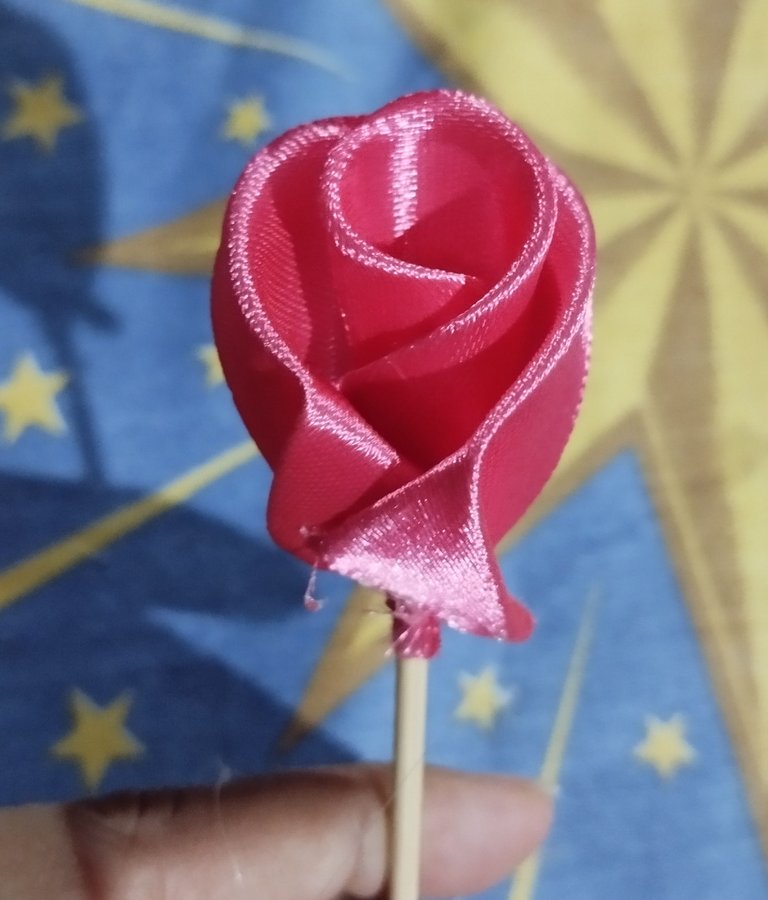
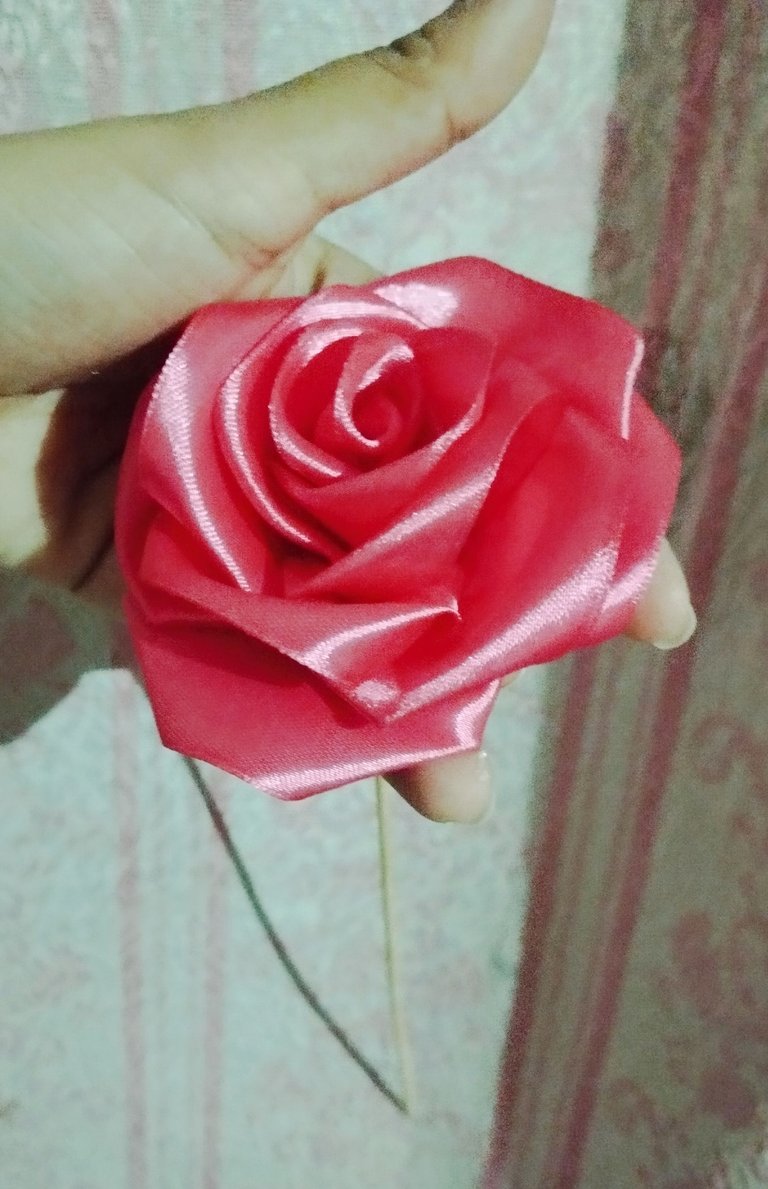
#2 Hice los pétalos para todas las flores ,y luego ordené los petalitos para que sí alguno me hubiera quedado mas pequeño dejarlo para el primer pétalo de las flores y que formará el capullo, y los más grandes para los pétalos de afuera, y luego ordené en grupos para cada rosa que haría, con un palito de altura pegué el pétalo en el medio de esté, y fui aplicando silicón y pegando el petalito de forma que este envuelva hacia el centro, esto de manera que quedará un capullito que será el centro , luego el segundo pétalo pegarlo por la orilla inferior a manera que envuelva el centro de la flor. Al pegar el pétalo quedara un espacio en dónde no se tocara los extremos del pétalo, y al pegar el tercer pétalo lo ubicaremos en este espacio de manera que se enfrente al pétalo ya pegado, de forma que quedarán enfrentados los dos pétalos, y el cuarto pétalo se pagará de forma que tapen el siguiente espacio que quedara a los otros lados de los dos pétalos centrales , la idea es hacer un esquema como de cruz con pétalos en cada extremo ➕, e ir así colocando el sexto hasta el noveno, y los últimos tres en los espacios entre los espacios que quedarán en la flor ,hasta ir armando la rosa ,y llegar al decimo segundo pétalo.
English Version
**#2 I made the petals for all the flowers, and then I arranged the petals so that if any had been too small I would leave it for the first petal of the flowers and that will form the bud, and the largest ones for the outer petals, and then I arranged them in groups for each rose that I would make, with a tall stick I glued the petal in the middle of it, and I applied silicone and glued the petal so that it wraps towards the center, this in such a way that there will be a bud that will be the center, then glue the second petal along the bottom edge so that it wraps around the center of the flower. When gluing the petal there will be a space where the ends of the petal will not touch, and when gluing the third petal we will place it in this space so that it faces the petal already glued, so that the two petals will face each other , and the fourth petal will be placed in such a way that they cover the next space that will remain on the other sides of the two central petals, the idea is to make a cross-like scheme with petals at each end ➕, and thus place the sixth to the ninth, and the last three in the spaces between the spaces that will remain in the flower, until assembling the rose, and reaching the twelfth petal. **
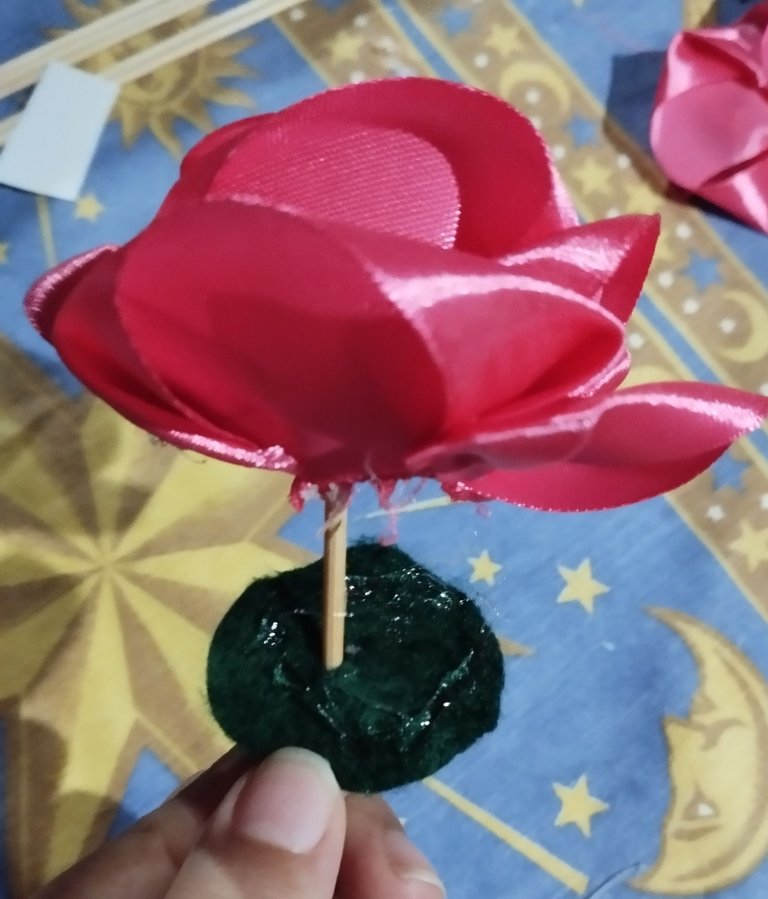 | 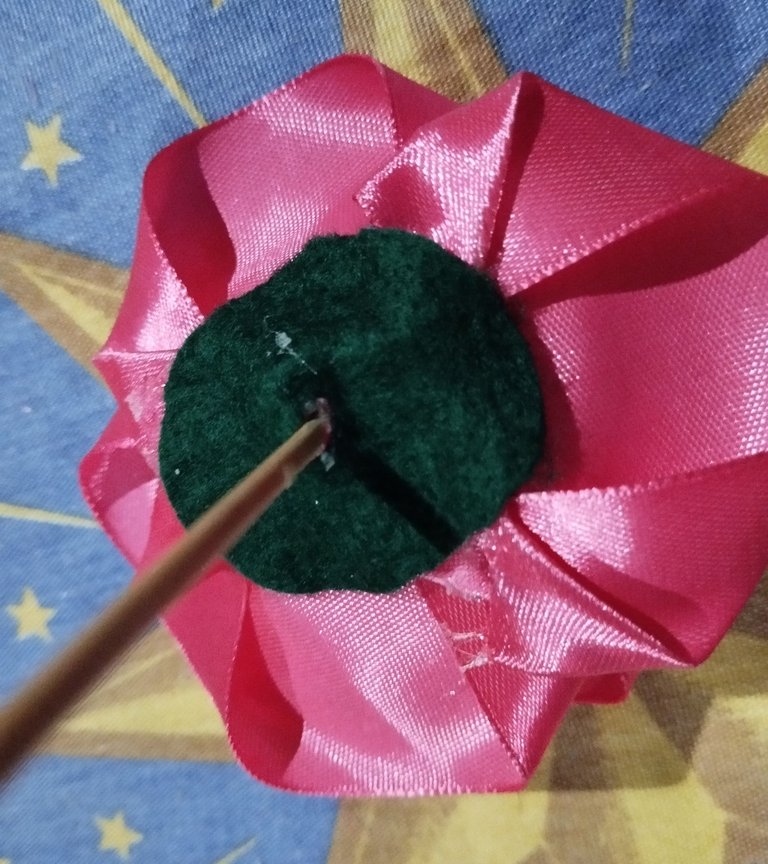 |  |
#3 Para sellar bien la parte trasera de la flor , recorté un círculo de fieltro verde y le hice una ranura en el medio ,e introducí el palito de altura y pegué con silicón caliente el círculo de fieltro.
English Version
#3 To seal the back of the flower well, I cut out a circle of green felt and made a slot in the middle, then inserted the tall stick and glued the felt circle with hot silicone.

 |  |  |
 |  |  |
#4 para hacer la base del ramo , usé
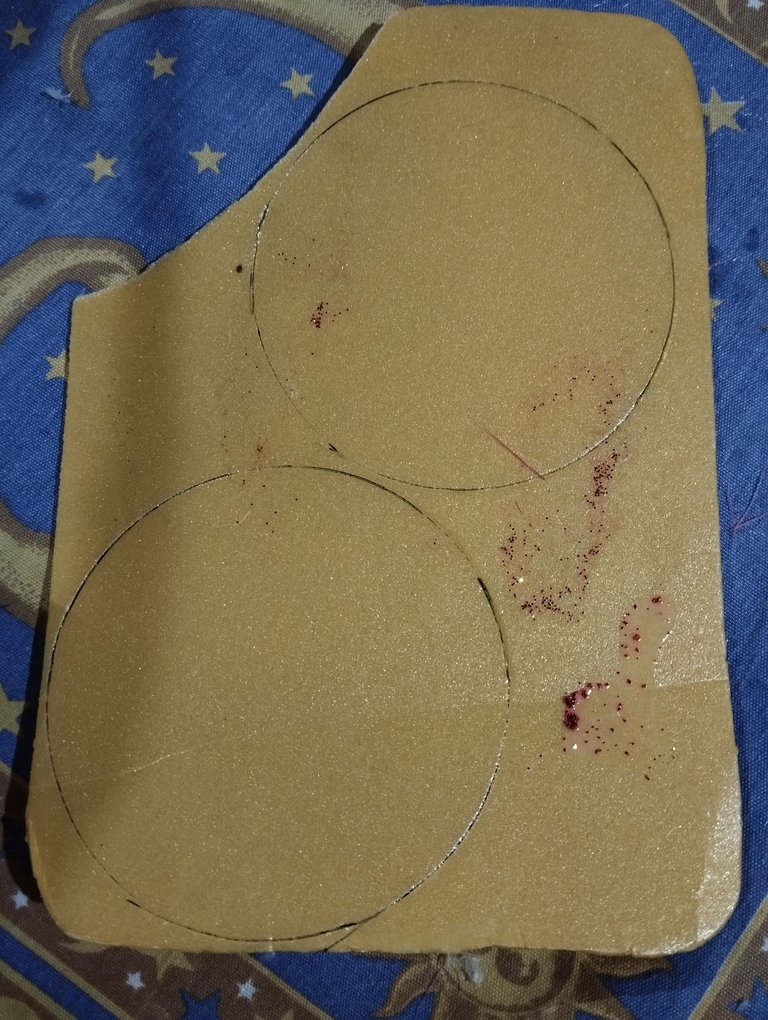
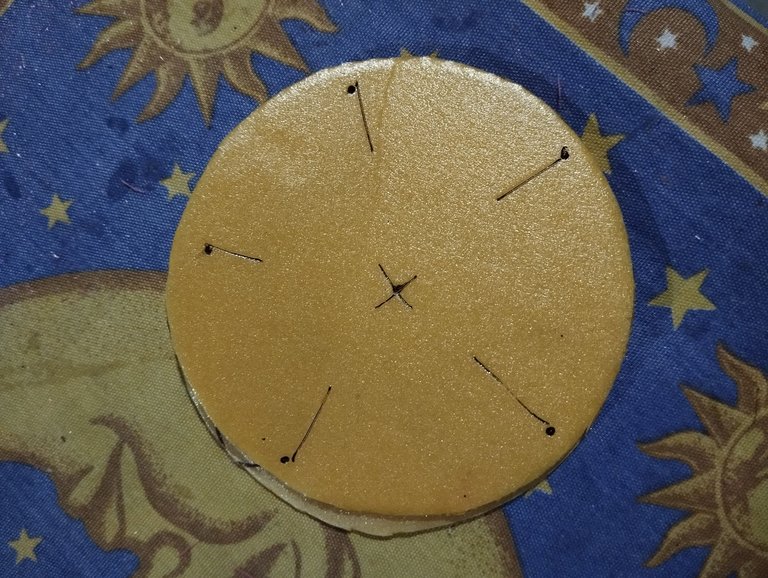
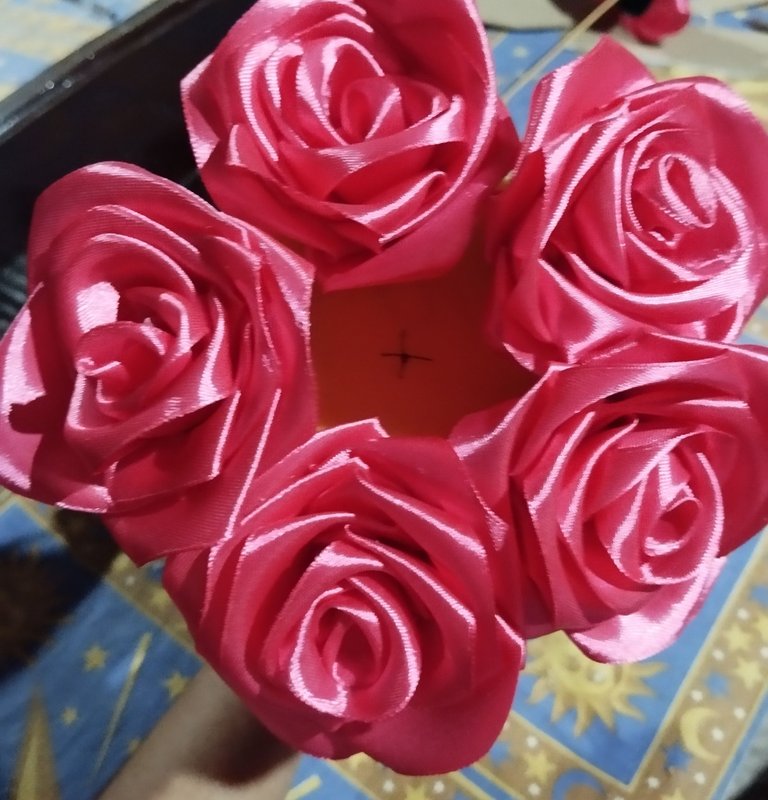
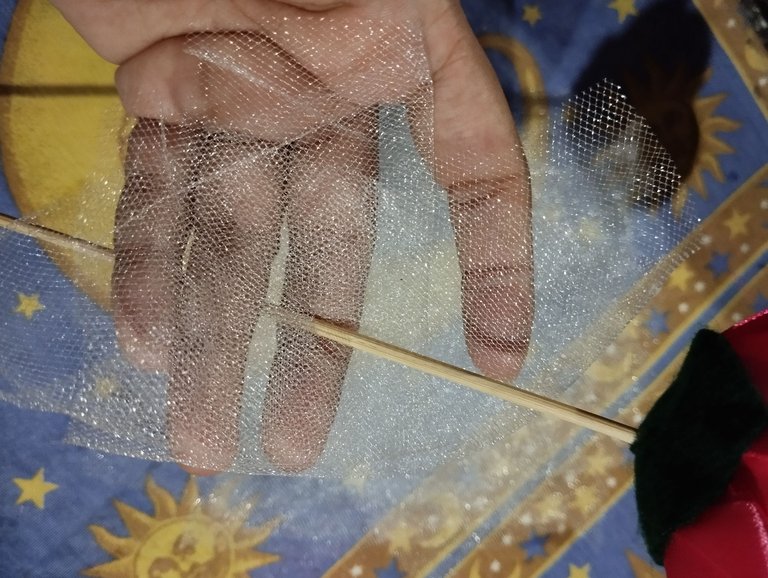
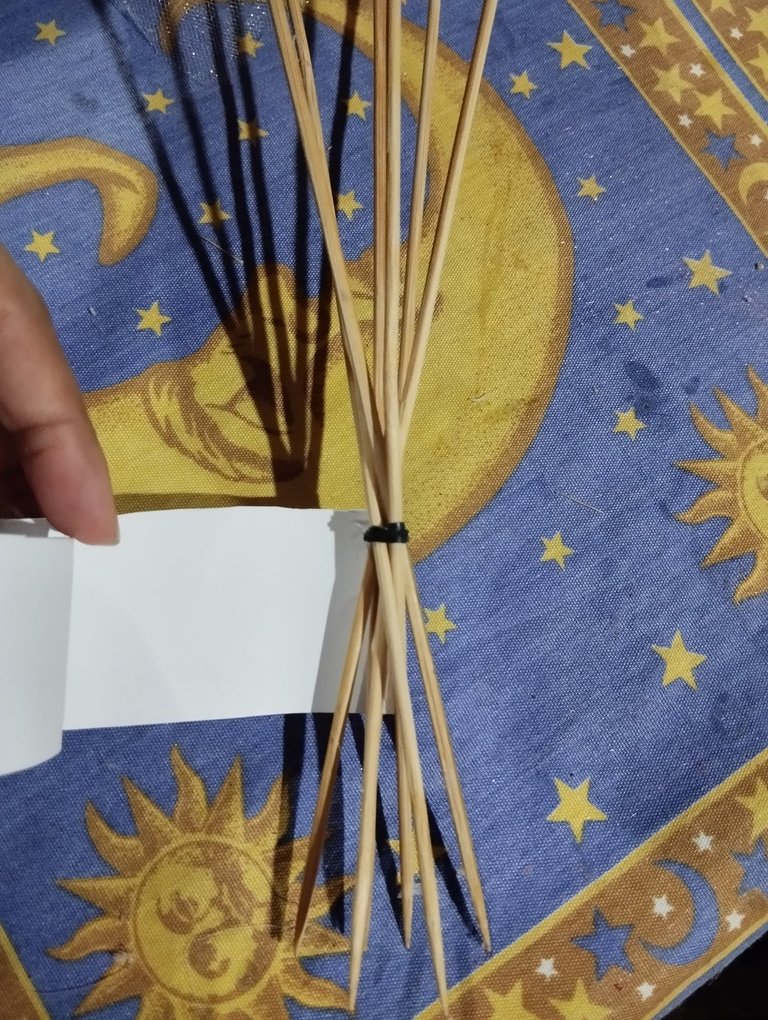
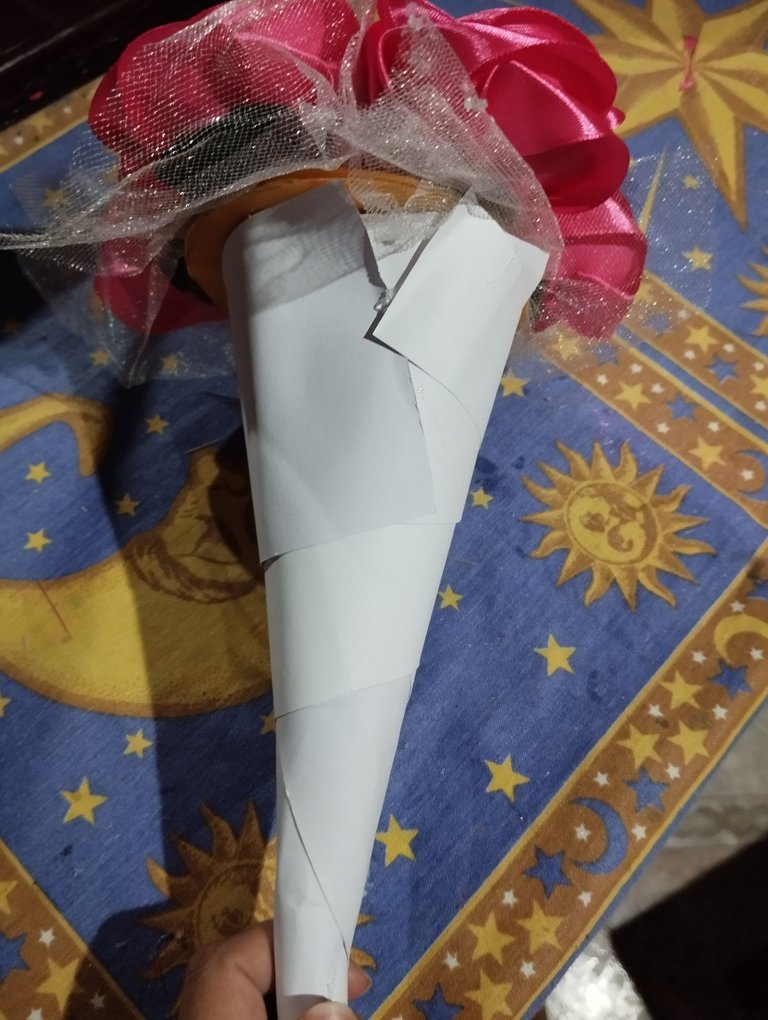
una bandejita de telgopor de estás que son de lonches ? Vianditas desechables , e hice dos círculos, y los recorté y pegué uno encima de otro, y marqué cinco puntos en los extremos para ubicar las rosas allí . Probé introduciendo la rosas para hacerle los huequitos, y luego los saqué , aquí se me ocurrió recortar unos cuadritos de tull blanco y corté una ranura en el centro e introduje por allí cada palito de cada Rosa 🌹, de forma que se sobresalga un poco de tull, y luego introducí nuevamente las flores en la base para organizarlas .Al extremo inferior para que quede bien junto todos los palitos les puse una liga (listón) y luego con retazos de cartulina blanca fui formando la estructura de los palitos de manera que me quedara una especie de cono.
English Version
#4 To make the base of the bouquet, I used
a styrofoam tray like the ones from lunch boxes? Disposable lunch boxes, and I made two circles, and I cut them out and glued one on top of the other, and I marked five points on the ends to place the roses there. I tried inserting the roses to make the little holes, and then I took them out, here it occurred to me to cut out some squares of white tulle and I cut a slot in the center and inserted each stick of each Rose 🌹 there, so that a little bit of tulle sticks out, and then I inserted the flowers back into the base to organize them. At the bottom end so that all the sticks fit together I put a rubber band (ribbon) and then with scraps of white cardboard I formed the structure of the sticks so that I had a kind of cone.
 |  |  |
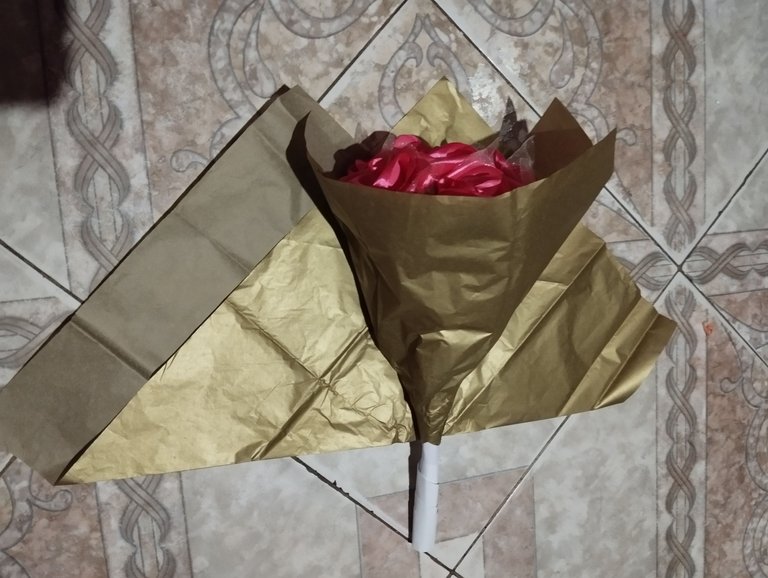 | 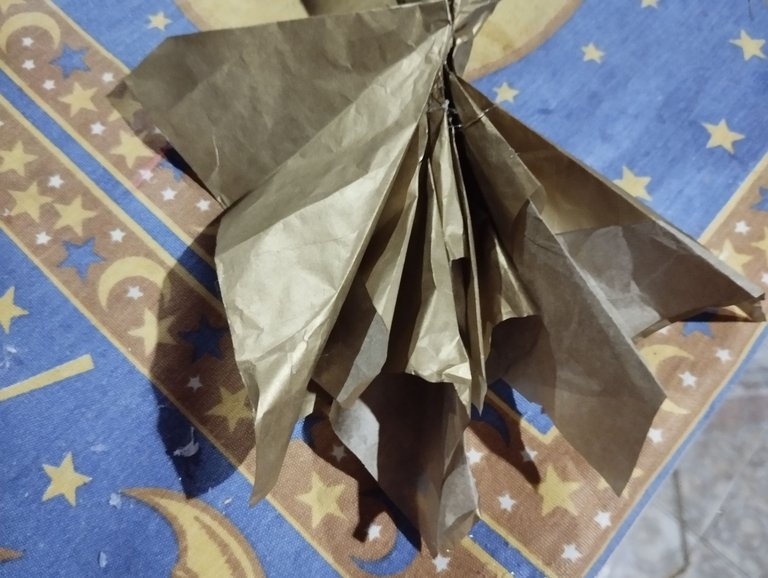 |  |
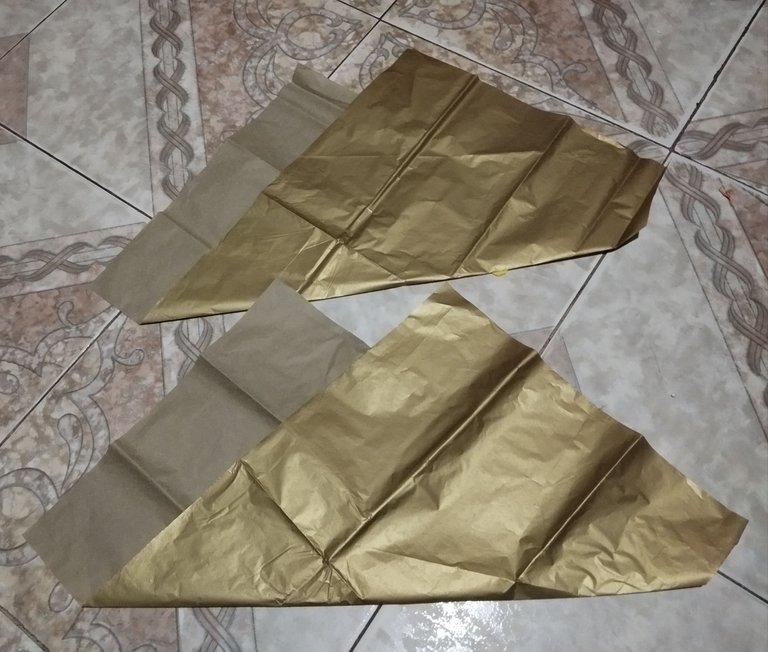
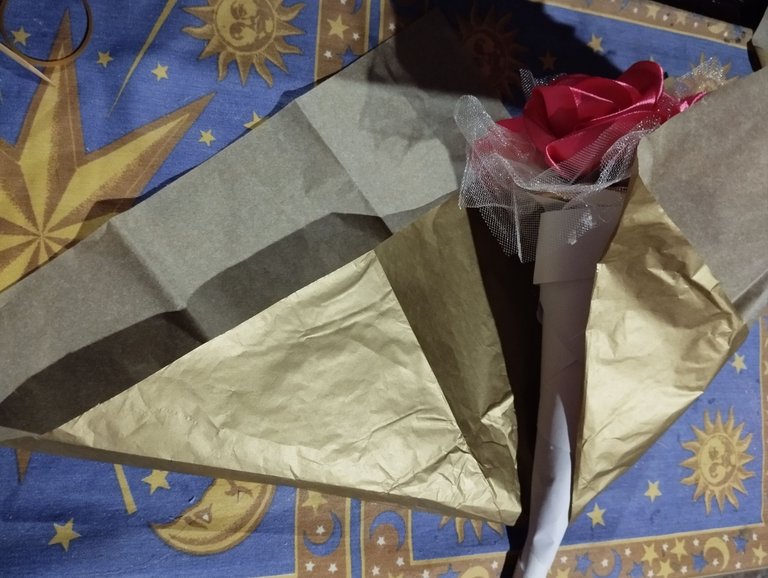
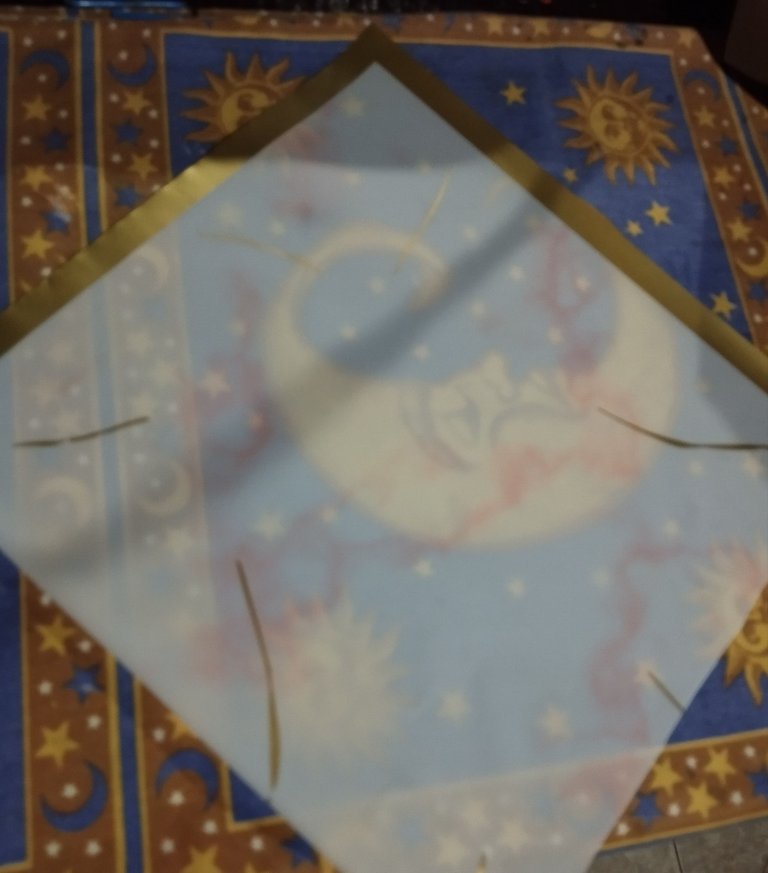
#5 Ya con la estructura lista solo falta envolver el ramo, usé un pliego de papel de seda dorado que corte en dos partes y doble como se ve en la imagen ,la idea es crear picos ,que puedan ver una vez envuelvas el ramo, envolví el primero pegando con silicón caliente el papel de seda a la estructura de cartulina , y luego envolví la segunda parte del papel de seda acomodando los picos de manera que estos quedarán a la misma altura que el primero ,y que coincidieron los picos en entre los espacios del primero ,esto para que se vea todo uniforme. Para la parte de abajo del ramo quedaba lo que sería el mango sin tapar con el papel así que tome un retazo del mismo papel de seda y le hice como pequeños pliegues para que se vieran en la parte de abajo.
English
Version
#5 With the structure ready all that remains is to wrap the bouquet, I used a sheet of gold tissue paper that I cut in two parts and folded as seen in the image, the idea is to create peaks that you can see once you wrap the bouquet, I wrapped the first one by gluing the tissue paper to the cardboard structure with hot silicone, and then I wrapped the second part of the tissue paper arranging the peaks so that they would be at the same height as the first, and that the peaks coincided between the spaces of the first, this so that everything looks uniform. For the bottom of the bouquet, what would be the handle was left uncovered with the paper, so I took a scrap of the same tissue paper and made small folds so that they could be seen at the bottom.
 |  |  |
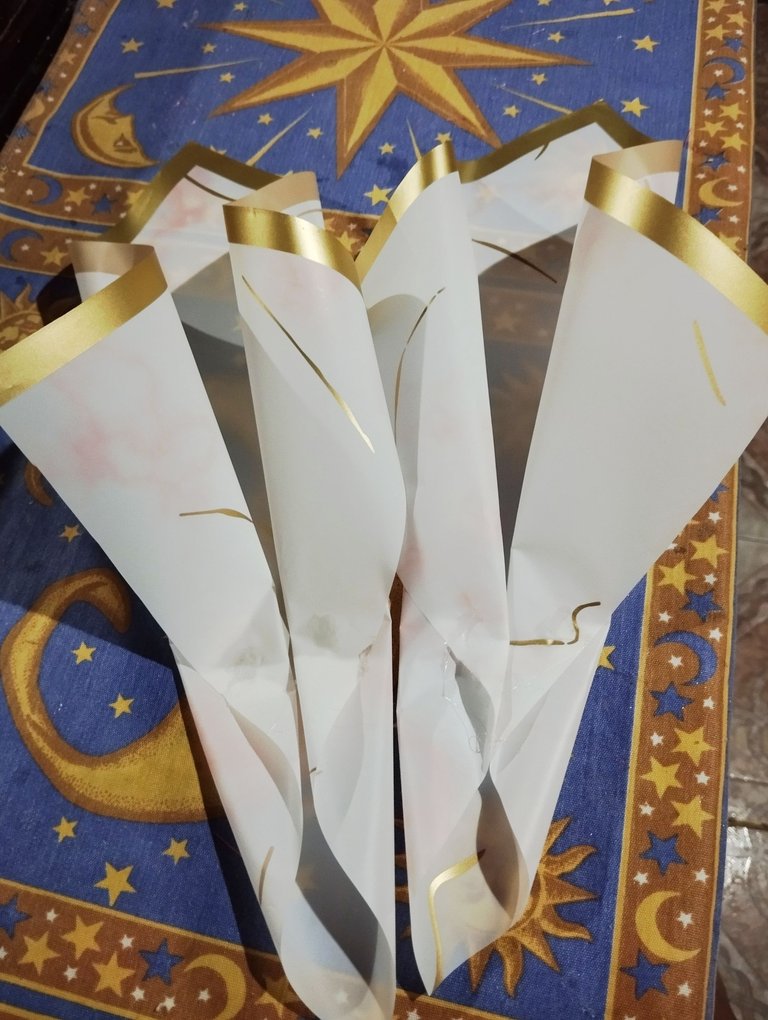 | 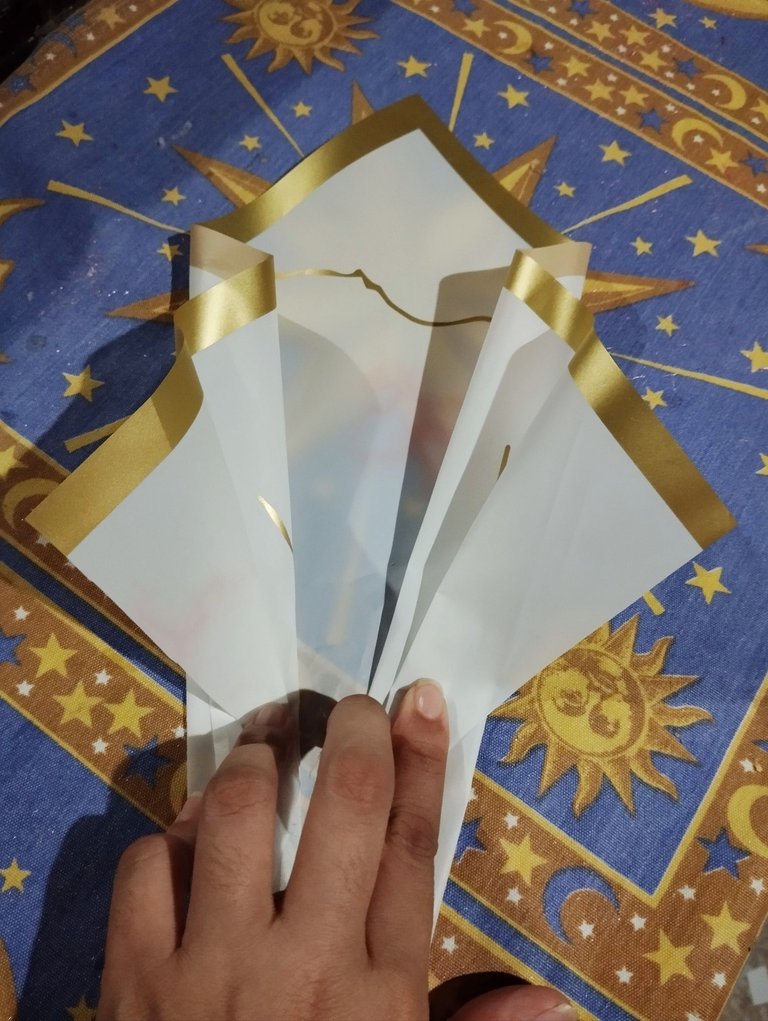 | 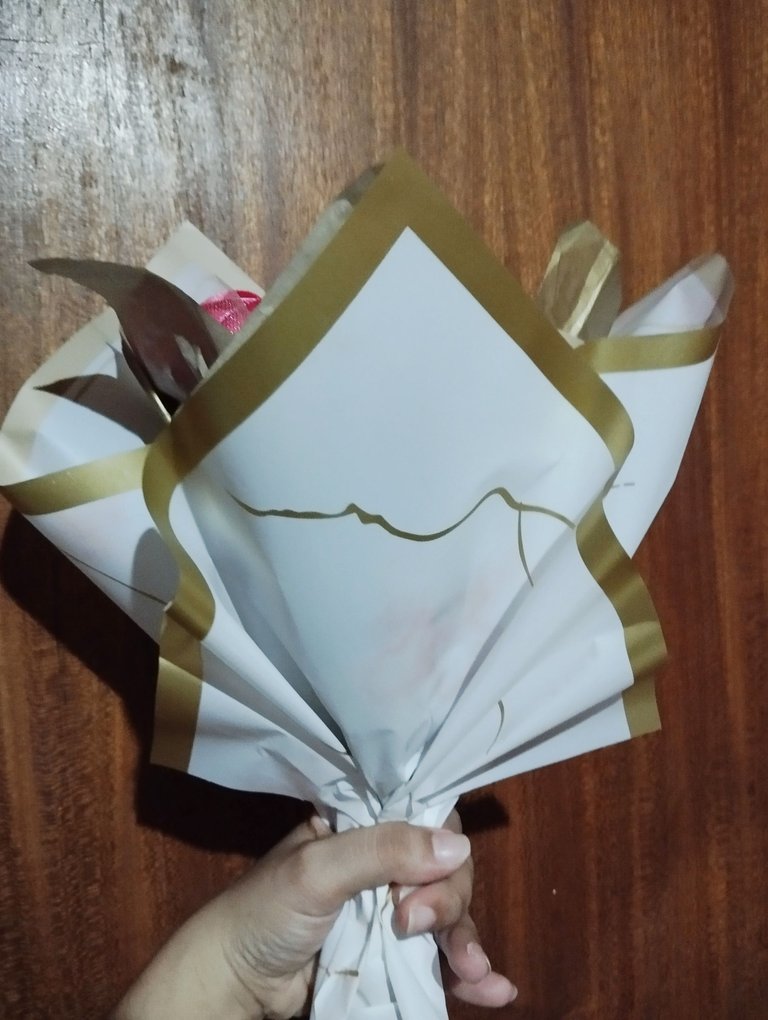 |
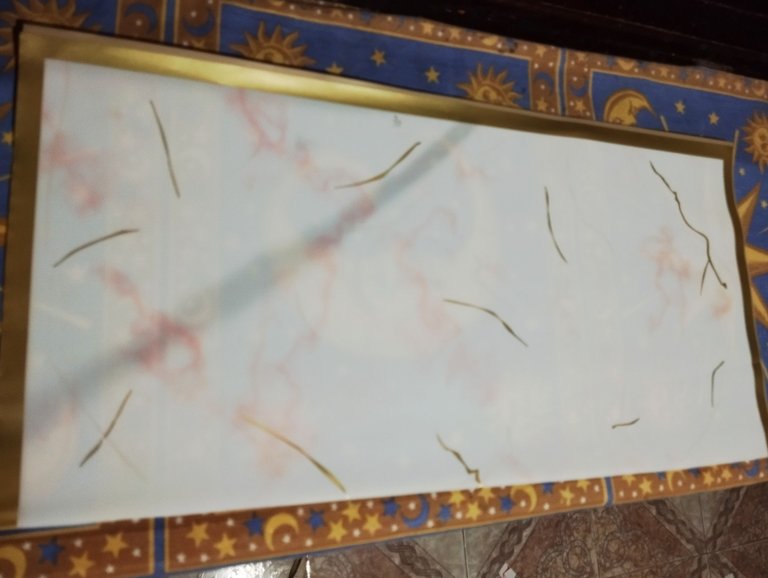
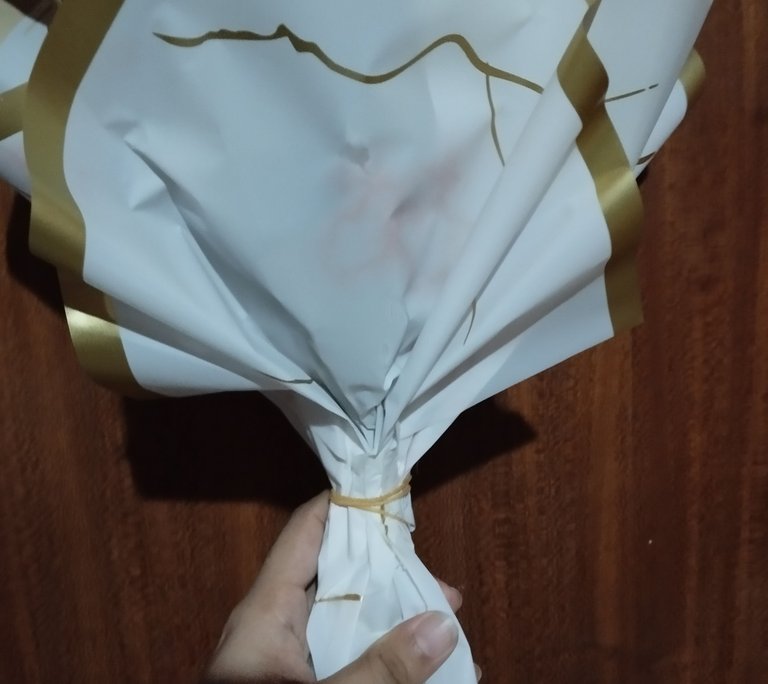
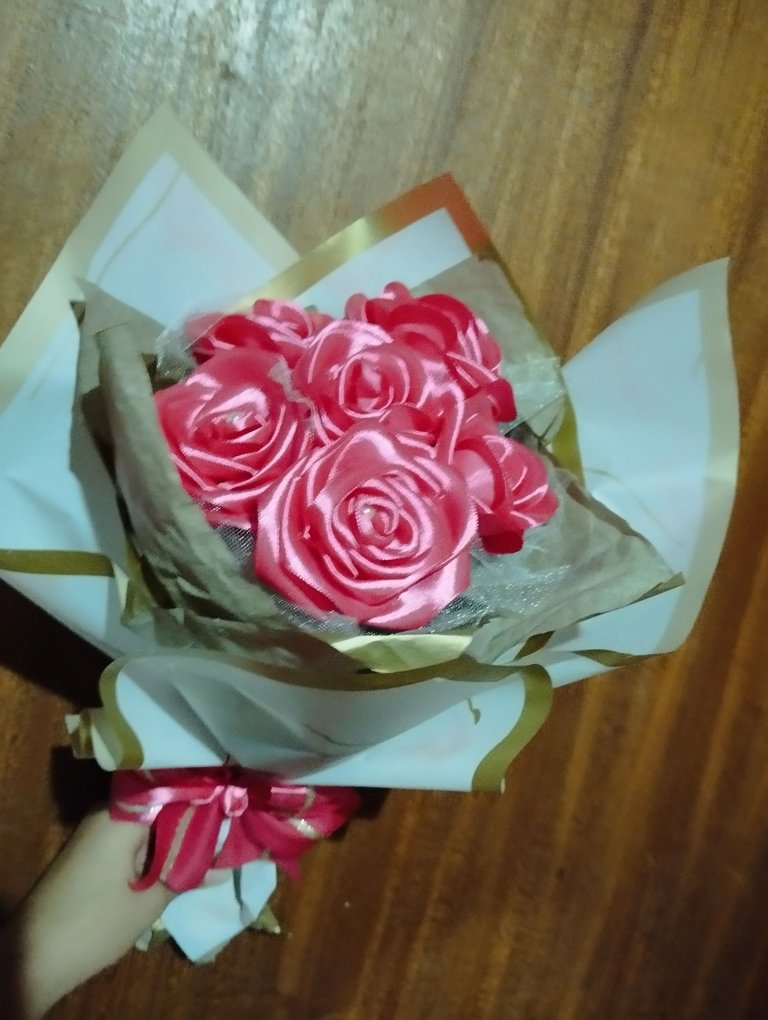
#6 Para hacer este tipo de ramos se usa papel coreano que está muy de moda y está es la primera vez que lo iba a usar , así que compré un solo pliego y luego me dí cuenta que necesitaría como 3 pliegos 🙃, así que tuve que improvisar, lo corté a la mitad y de esa mitad corté otra vez a la mitad , la idea es que queden cuatro partes cuadradas, la primera la puse con el borde viendo hacia el frente y cuadrando la altura que quería . Para tapar los extremos tomé los otros dos cuadrados y los doble de forma que quedará con unos pliegos y se viera con mucho más movimiento, estos los pegué a cada costado con el silicón caliente, aquí hay que pegar y aplicar presión porque la superficie del papel coreano hace que no se adhiera bien el silicón , y por último con el cuadro restante lo doblé ubicandoló en forma de diamante y haciéndole dos pliegues a cada lado , y lo pegué bien al ramo tapando el espacio del centro del ramo que faltaba , y apreté bien la parte inferior del el mango para que quedara bien pegado.
English Version
**#6 To make this type of bouquets, Korean paper is used, which is very fashionable and this is the first time I was going to use it, so I bought a single sheet and then I realized that I would need like 3 sheets 🙃, so I had to improvise, I cut it in half and from that half I cut it in half again, the idea is to have four square parts, I put the first one with the edge facing forward and squaring the height I wanted. To cover the ends I took the other two squares and folded them so that they would be folded and look much more mobile. I glued these to each side with hot silicone. Here you have to glue and apply pressure because the surface of the Korean paper prevents the silicone from adhering well. Finally, with the remaining square I folded it into a diamond shape and making two folds on each side, and I glued it well to the bouquet, covering the space in the center of the bouquet that was missing, and I pressed the bottom of the handle well so that it would stick well. **
 |  |  |
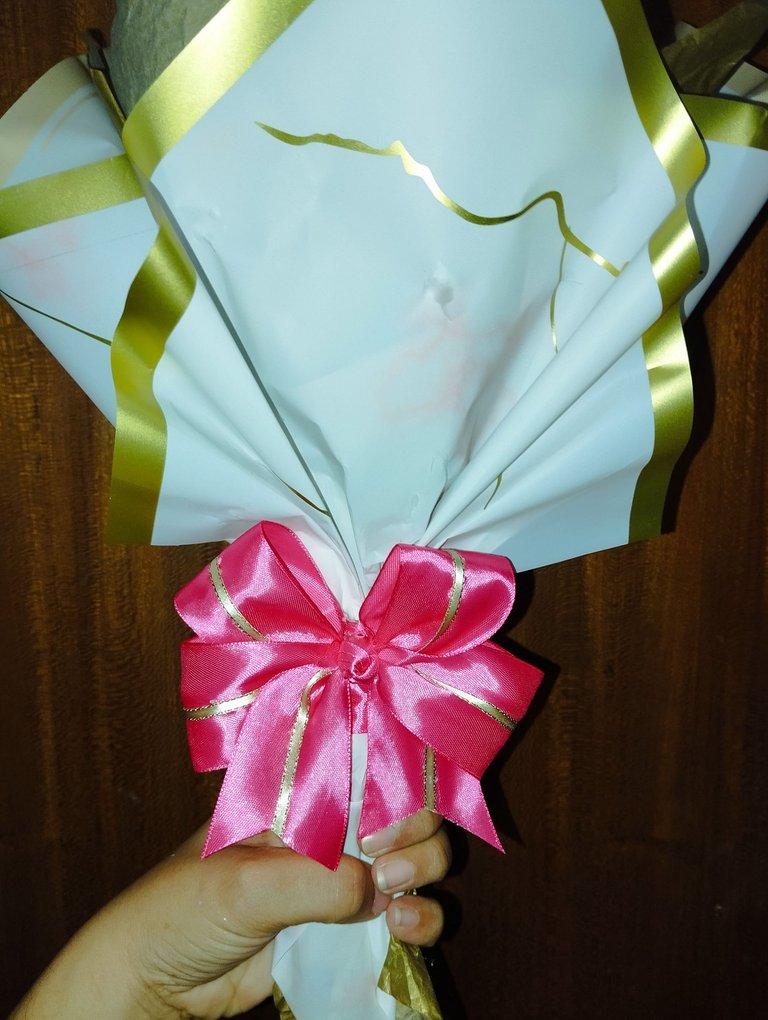 | 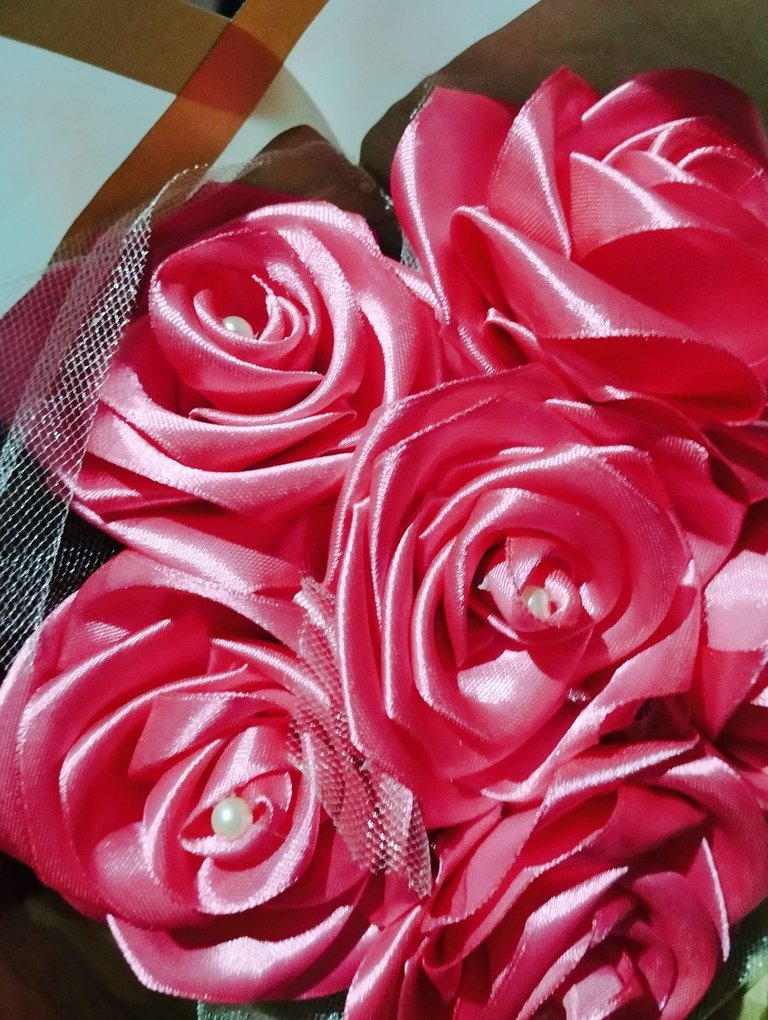 |  |
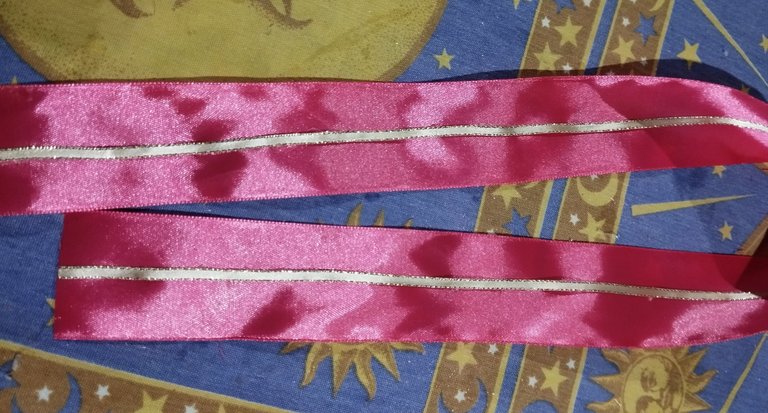
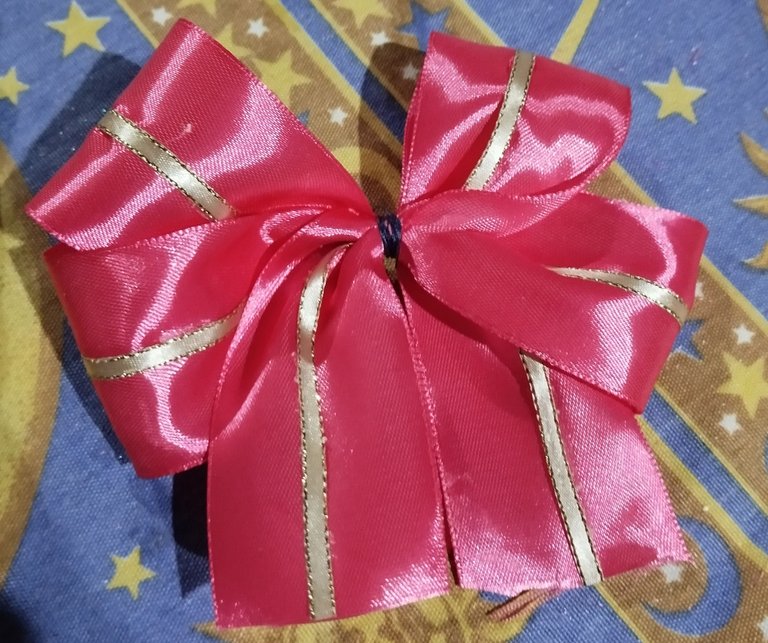
#7 para que quedara mejor sujeto la parte del mango puse otra liga bien apretada , con la misma cinta de Raso fucsia, pegué un listón de cinta raso n#0 con dorado y beige para pegarla en el medio de la cinta fucsia y darle un detalle más bonito, luego con esta cinta hice un lazo doble ,recorté un pedacito de cinta de raso fucsia y tapé la liga que había puesto, y allí pegué el lazo que había hecho para decorar el ramo , por último le agregué unas perlitas blancas al centro de las rosas para mas detalles.
English Version
#7 To better secure the handle part, I put another tight elastic band with the same fuchsia satin ribbon, I glued a strip of satin ribbon #0 with gold and beige to stick it in the middle of the fuchsia ribbon and give it a nicer detail, then with this ribbon I made a double bow, I cut a small piece of fuchsia satin ribbon and covered the elastic band that I had put, and there I glued the bow that I had made to decorate the bouquet, finally I added some white pearls to the center of the roses for more details.
 |  |
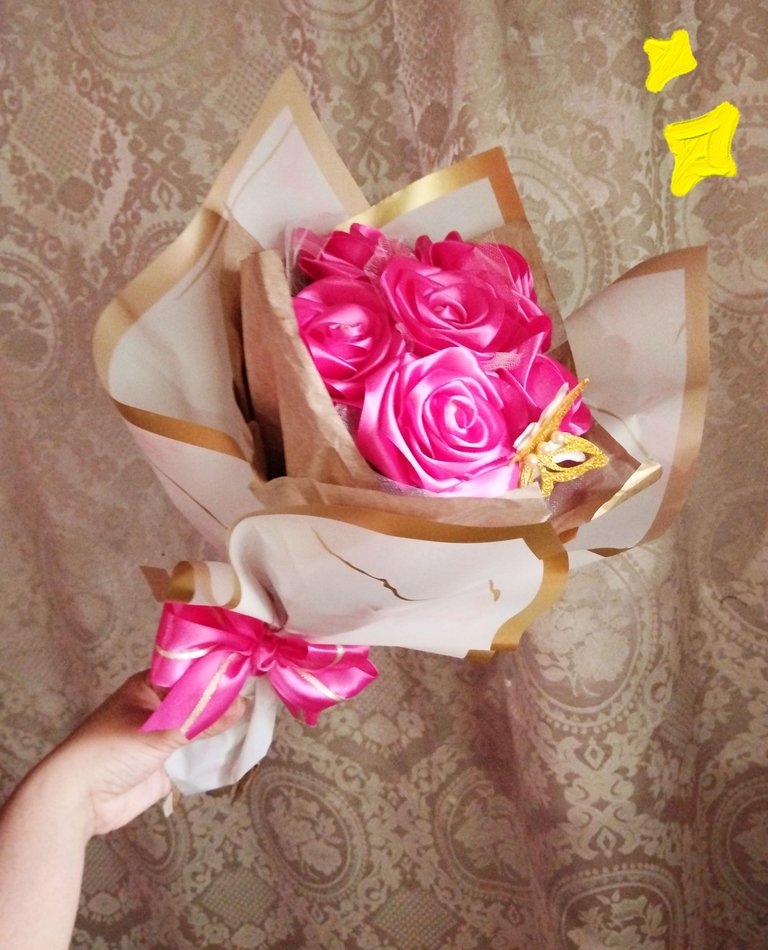 | 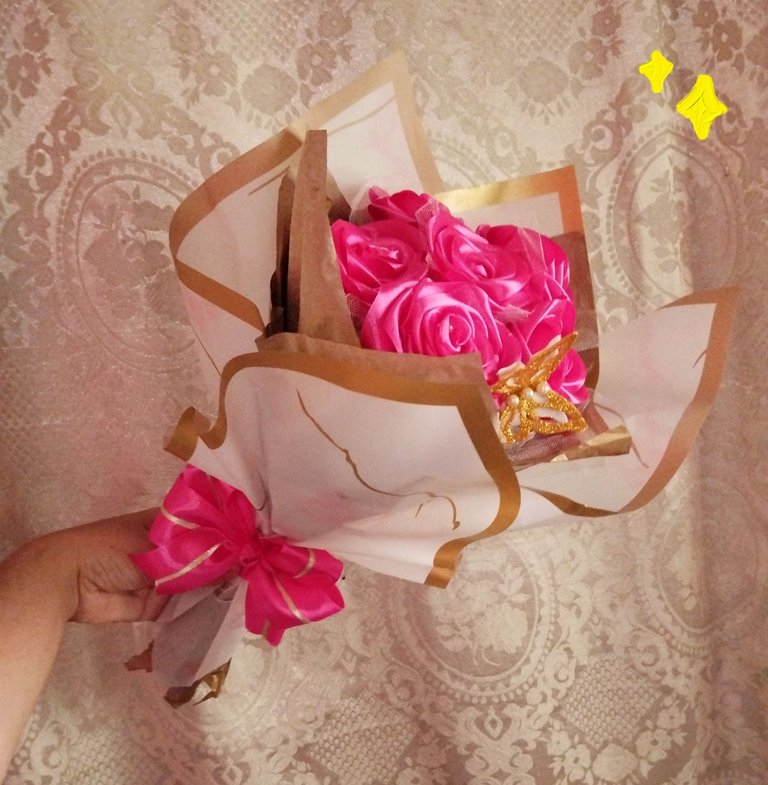 |
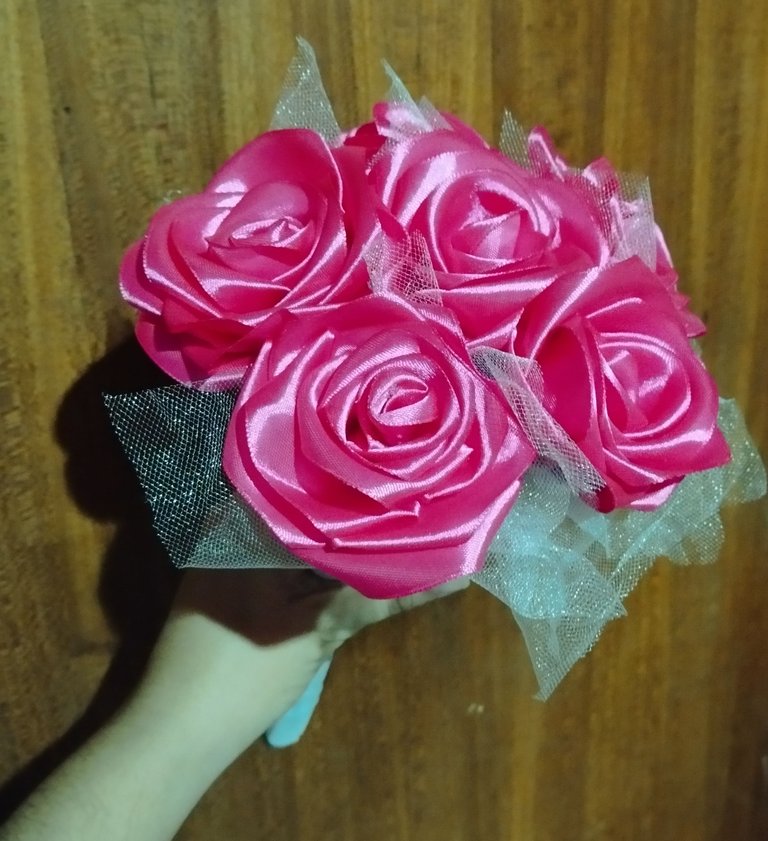
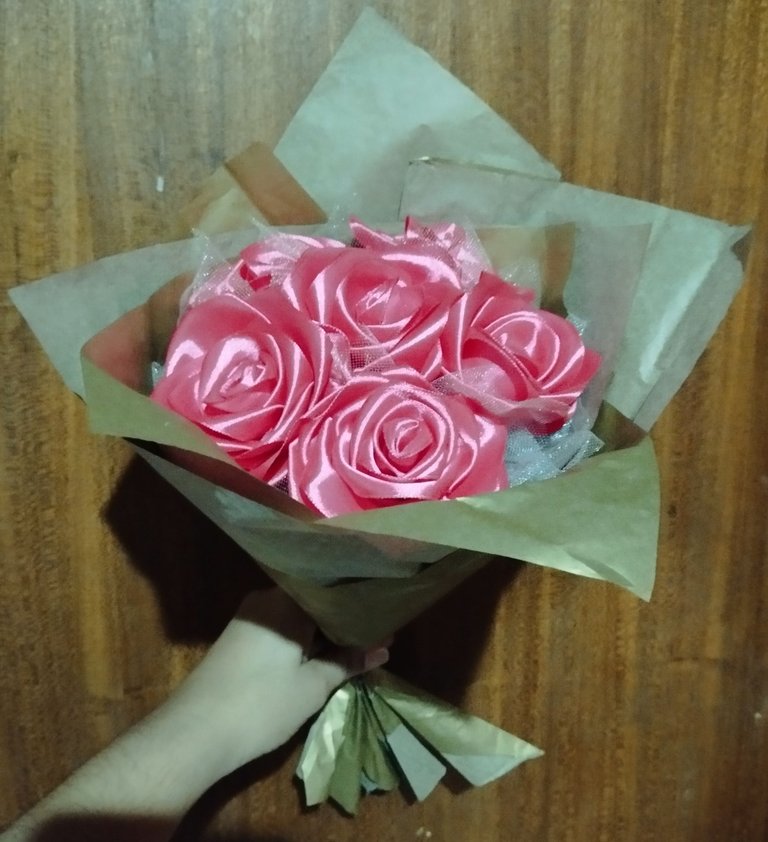
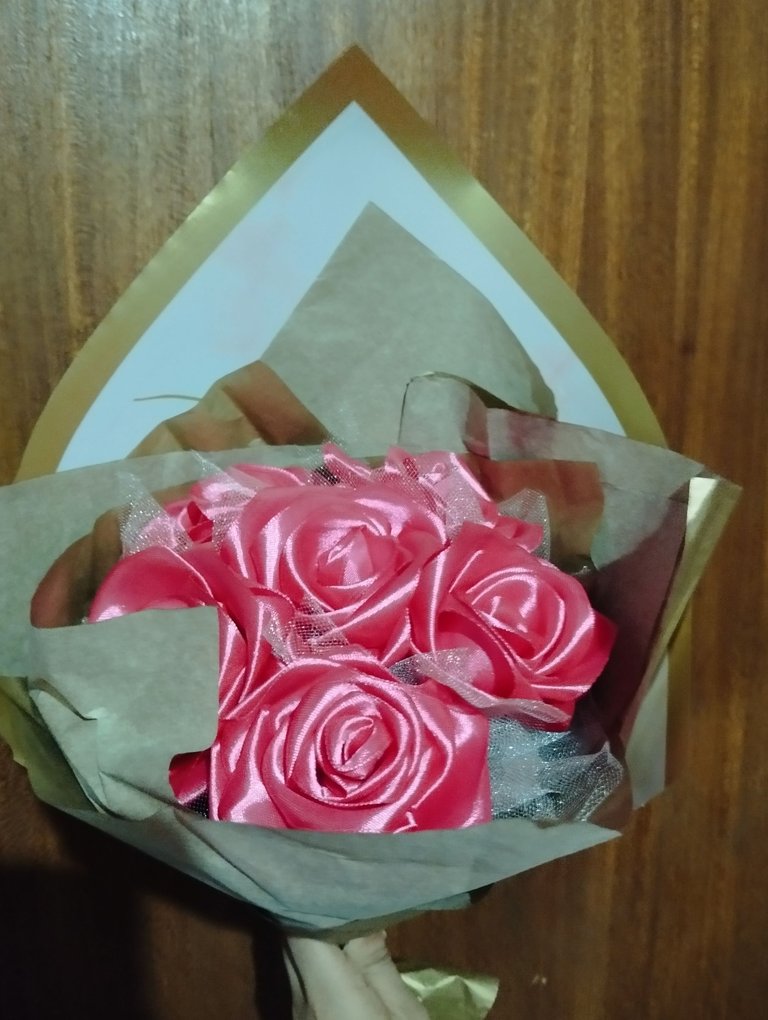
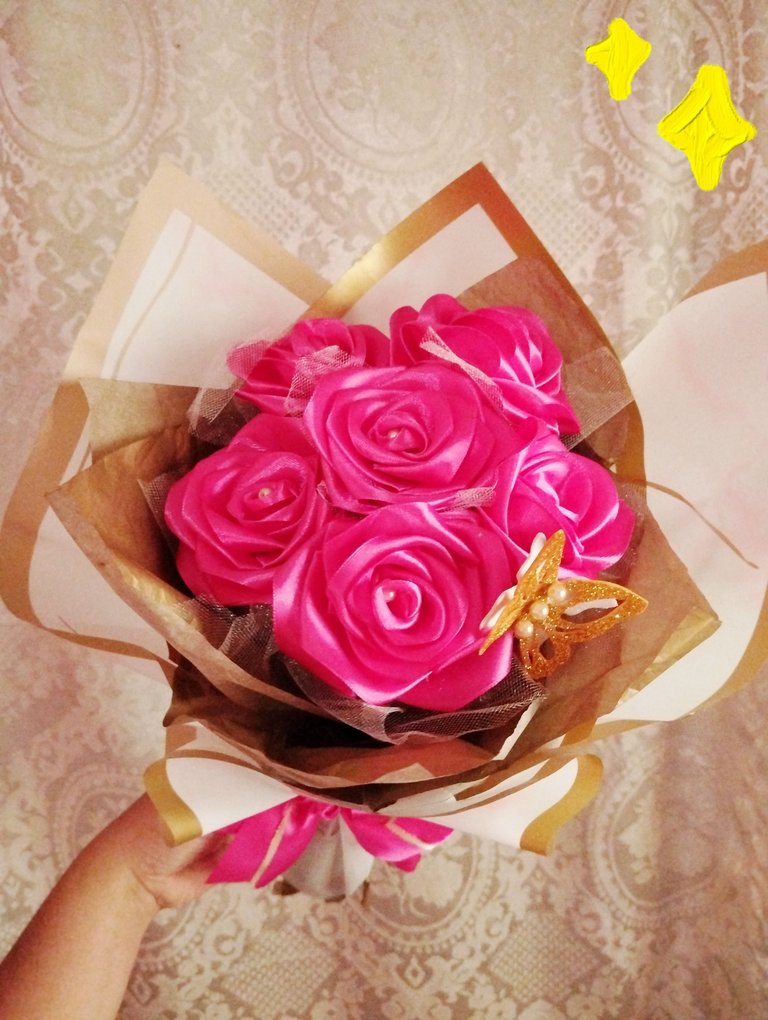
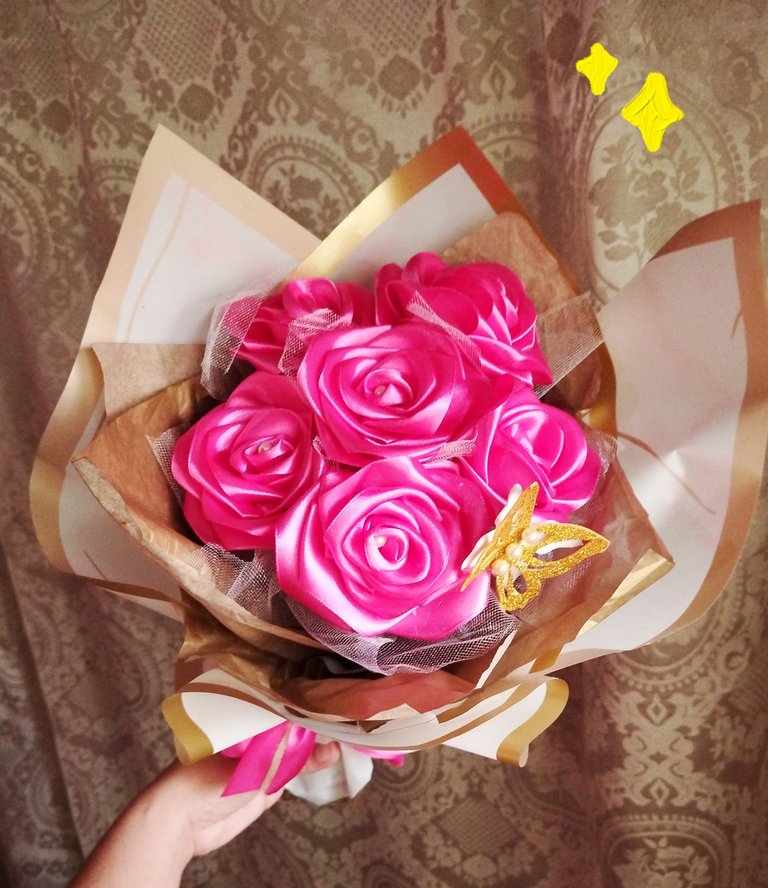
Y este sería el resultado, decidí agregarle una mariposa de foami con unas perlitas para que se viera más bonito y darle un toque doradito , como pueden ver el resultado está hermosooooooo ! Yo lo amé , de verdad que no sabía sí con un solo pliego de papel coreano iba a quedar el efecto que quería , ya que la idea era que se viera con mucho papeles ,y muy elegante como vemos en los ramos fancys que vemos en pinterest 💖, cuénteme que les pareció ,lo intentarían?.
Muchas gracias por leerme ! 🤭💜✨ Espero que les haya gustado el post!
Fotos tomadas por mí en mi equipo Redmi note 12 editadas en Pics art y gif realizado en app creador de GIFs texto traducido en Google traductor.
English Version
**And this would be the result, I decided to add a foam butterfly with some pearls to make it look prettier and give it a golden touch, as you can see the result is beautiful! I loved it, I really didn't know if with just one sheet of Korean paper it would have the effect I wanted, since the idea was to make it look with a lot of paper, and very elegant as we see in the fancy bouquets we see on Pinterest 💖, tell me what you thought, would you try it? **
Thank you very much for reading me! 🤭💜✨ I hope you liked the post!
Photos taken by me on my Redmi note 12 device edited in Pics art and gif made in the GIF creator app, text translated in Google translator.


Tu post me animó a intentar hacer las mías, ¡te quedaron preciosas! Aparte explicas súper bien los pasos a seguir. Me encantó 💖
Muchas gracias amiga 💜✨ me alegra saber que te gustarán , clase r que sí , anímate a hacerte las tuyas , seguro te quedarán hermosas
Pero qué bellas te quedaron! parecen de verdad! y se ve que requirió de mucha paciencia. Me encantó cómo explicaste el proceso, lo hiciste ver super sencillo. Gracias por compartir! 🧡
Gracias por el lindo comentario amiga ✨💖 , ufff si llevan su tiempito por qué llevan bastante detalles ,pero el resultado es hermoso ☺️🤌
Es un ramo preciosisimo. Estoy aprendiendo a hacer este tipod de arreglos y tu trabajo me ha hecho brillar los ojos 😍
Awwww que linda muchas gracias ! Espero que te sirvan los tips para tus proyectos ✨💖
Eternal roses are in trend this year, I think since last year, and they will not be missing on the next Valentine's Day. Now with your tutorial it will be very easy to make them.
Las rosas eternas están en tendencia este año, creo que desde el año pasado, y no faltaran en el próximo Día de los Enamorados. Ahora con tu Tutorial será muy fácil lograrlas.
Muchas gracias amiga 💖 , este 14 de febrero seguro estarán muy presentes las rositas eternas , muchas gracias por el comentario ✨💖
Wow! with the way you folded the ribbon, one may think that it is an actual rose. Nicee Content.
Thank you very much for supporting my work! 🌹 The idea was that they would look similar to the natural ones, I'm glad they looked like that
Thank you so much for the healing of my post!☺️✨💖
Que hermoso trabajo ❤️
Muchas gracias amiga 💖☺️✨
Muchas gracias por el apoyo Thank you very much for the support!
This is a truly beautiful piece of work, worthy of being given as a gift to a special person. Every detail of the bouquet, including the beautiful flowers, was spectacular. Thank you for giving us your good work, your step by step and creative process, success ❤️✨
Thank you very much for the support! ✨☺️, I loved doing this project, with eternal roses, they take quite a while to make each one but the result is totally worth it! Thank you very much for the support
Un trabajo precioso, lo amé.
Qué cosa tan hermosa para regalar en una ocasión especial, y muchísimo más hecho de nuestra propia mano.
!discovery 35
Así es amiga ! 🌹 Un detalle que uno puede darle a alguien especial , ideal para estás fechas cercanas al 14 de febrero, y porque no ahorrarse un poco de dinero o darle una mayor personalización
Precioso, parece un ramo para una princesa. ✨
Gracias amiguita 🌹 , jejej sí es una especialmente para una señora princesa ✨☺️
This post was shared and voted inside the discord by the curators team of discovery-it
Join our Community and follow our Curation Trail
Discovery-it is also a Witness, vote for us here
Delegate to us for passive income. Check our 80% fee-back Program
Congratulations @mily23m! You have completed the following achievement on the Hive blockchain And have been rewarded with New badge(s)
Your next target is to reach 100 posts.
You can view your badges on your board and compare yourself to others in the Ranking
If you no longer want to receive notifications, reply to this comment with the word
STOP