Español
Saludos amigos creadores.🙋🎄🌊
El equilibrio de los elementos agua, fuego, aire, tierra, es vital para nuestra existencia y la de los demás seres vivientes.
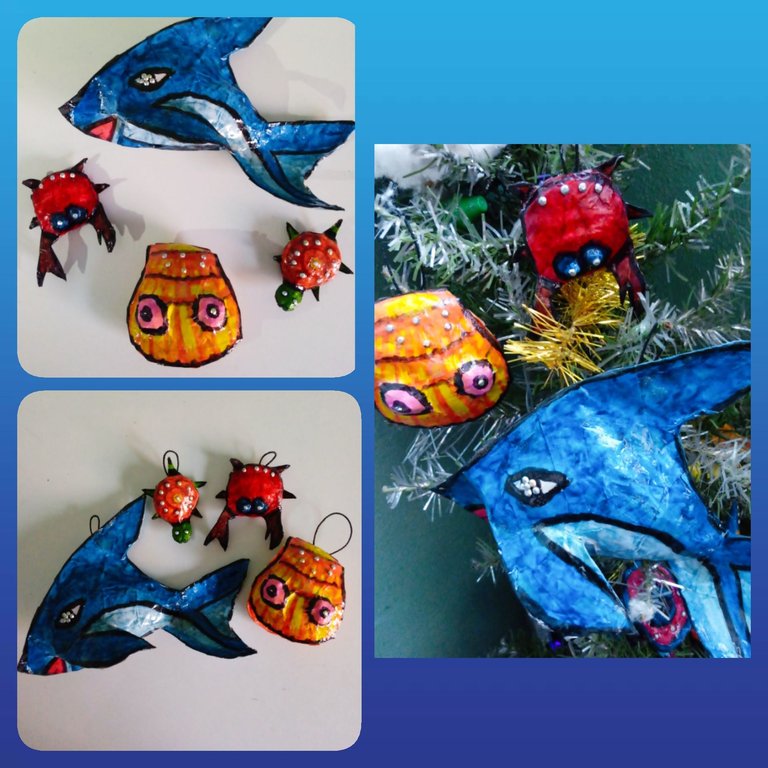
Hoy, inspirada en el elemento agua🌊, les traigo como tutorial la confección de los colgantes marinos que adornarán mi arbolito navideño este año, él que se encuentra lleno de vida y color, gracias a las temáticas abordadas por la comunidad y a las bellas creaciones inspiradoras compartidas por ustedes.
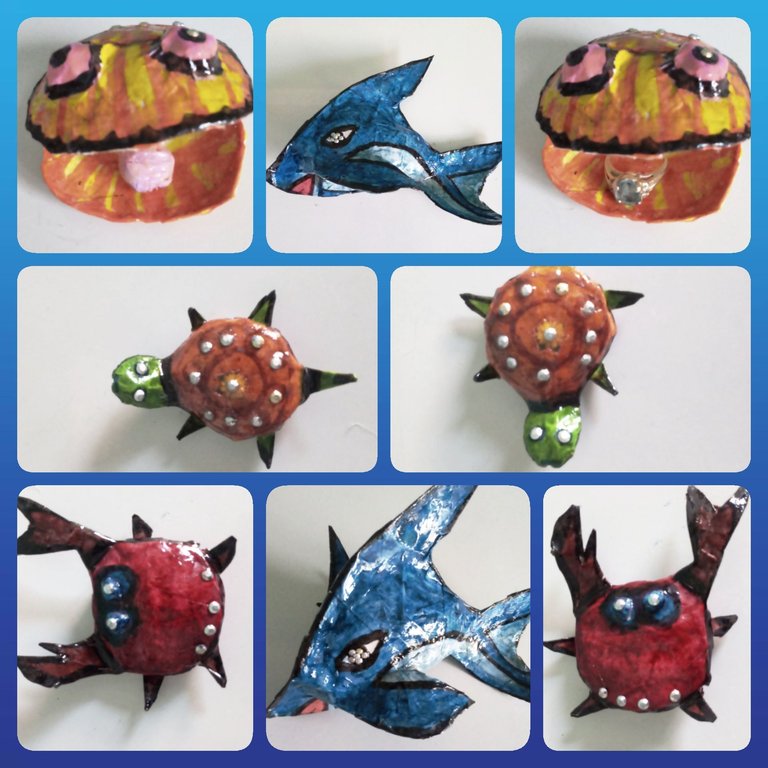
Estos colgantes se asemejan a la estructura de: un delfín, concha, una tortuga y un pequeño cangrejo, los que representan a las diversas especies a quienes le sirve de hogar este vital elemento.
Materiales
.Molde:Objeto redondo
.Papel
.Tiras de papel blanco
.Pega elaborada de harina
.Pegamento
.Tijera
.Cables finos
.Temperas
.Pincel
.Barniz
.Piedras pequeñas brillosas.
Modo de confección.
Para realizar mis cuatro confecciones, tuve que realizar primeramente tres capas de empapelado a el molde redondo, con tiras de papel blanco y la pega elaborada de harina. Lo dejé secar por doce horas y luego ayudándome de una tijera lo desmoté obteniendo dos mitades de igual diámetro.
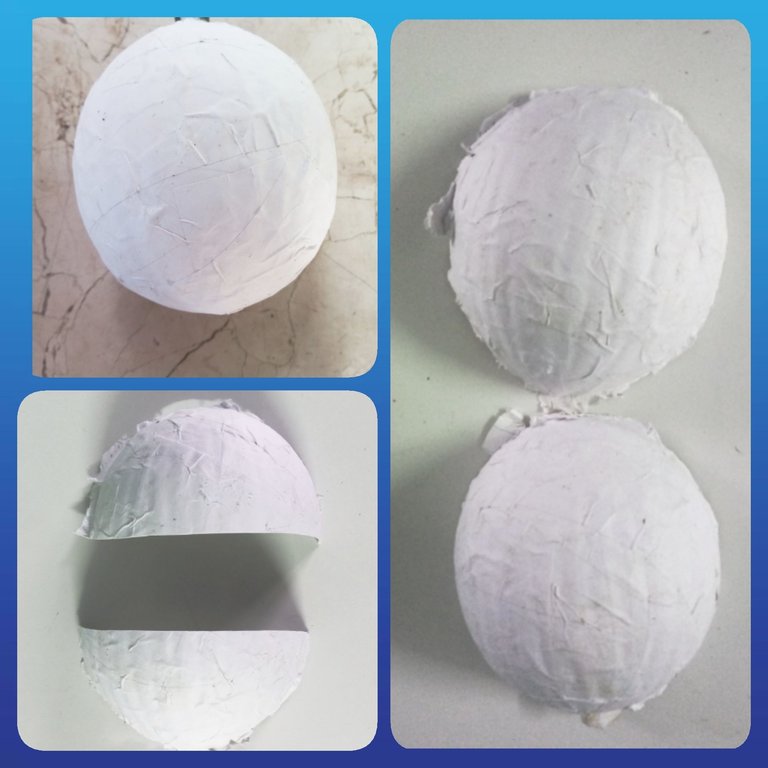
Se preguntarán amigos,¿ porqué realicé esta confección primeramente?. Pues este método lo realizo cuando carezco de cartón y cartulina, pues me permite obtener un material con el grosor similar a ambos. Le recomiendo este método, para cuando necesiten un material más grueso que el papel y no tengan a la mano cartulina y cartón. Pueden utilizar cualquier otro molde, yo seleccioné este redondo, porque me favorecerá para los decorativos que compartiré a continuación. Para referirme al material obtenido lo haré por: cartulina.
Tortuguitas.
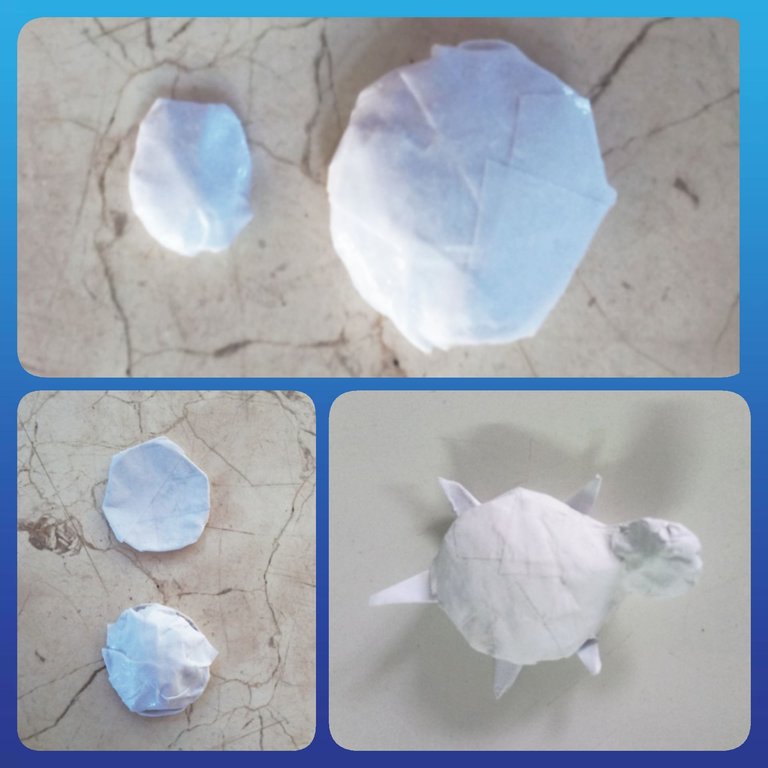
Para el caparazón
1-Cortar en la cartulina dos círculos pequeños de igual diámetro.
2-Estrujar papel e introducirlo entre ambos círculos.
3-Empapelar con tiras de papel blanco y la pega elaborada de harina la estructura completa. Dejar secar por ocho horas.
Cabeza
1-Estrujar papel conformando una pequeña bolita.
2-Adherirla con pegamento a la parte delantera del caparazón.
Patas y cola
1-Recortar cinco triángulos pequeños de la cartulina.
2-Adherir al caparazón .
Concha
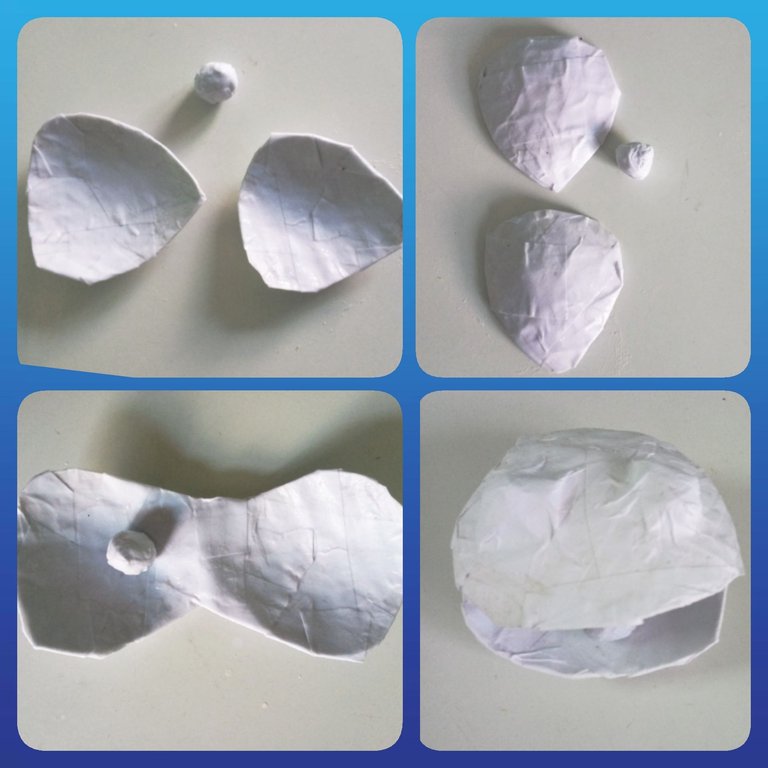
1-Cortar en la cartulina dos círculos medianos asemejándolos a conchas marinas.
2-Darle una capa de empapelado a ambas estructuras.
3- Unir por unos de sus vértices utilizando tiras de papel blanco y pega elaborada de harina .
Perla
1-Estrujar papel conformando una pequeña bolita.
2- Darle una capa de empapelado con tiras de papel blanco y pega elaborada de harina.
Cangrejo
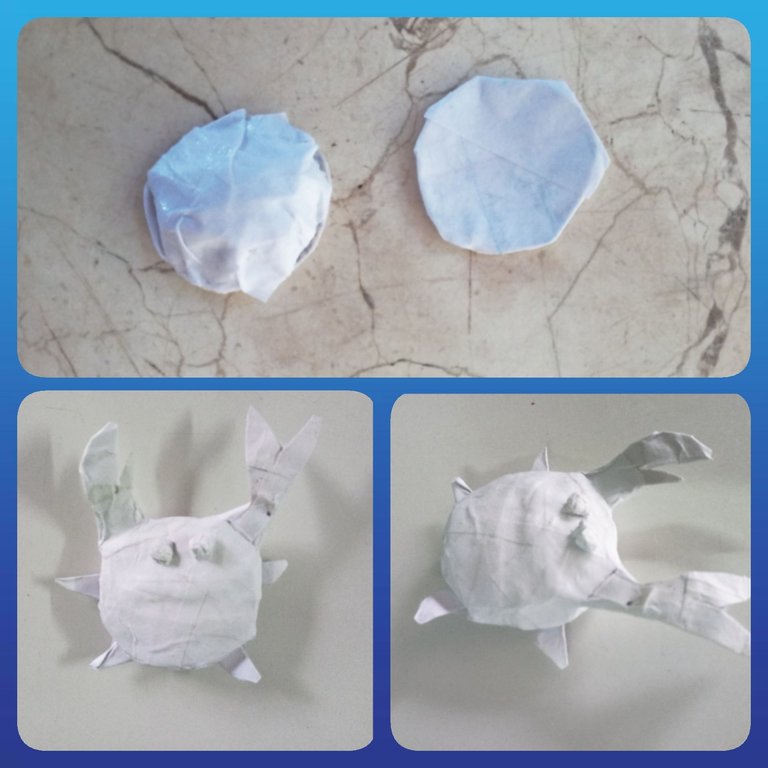
Caparazón
1-Cortar de la cartulina, dos círculos pequeños de igual diámetro.
2-Introducir papel previamente estrujado entre ambos círculos.
3-Darle una capa de empapelado a la estructura completa.
Patas
1-Recortar en la cartulina, pequeños triángulos conformando las paticas, para las paticas delanteras, realizarle cortes para generarle el aspecto de la terminación en enormes pinzas.
2-Adherirlas con pegamento, al caparazón.
Ojos
1-Estrujar papel conformando dos pequeñas bolitas.
2-Adherir con pegamento en la parte superior del caparazón.
Delfín
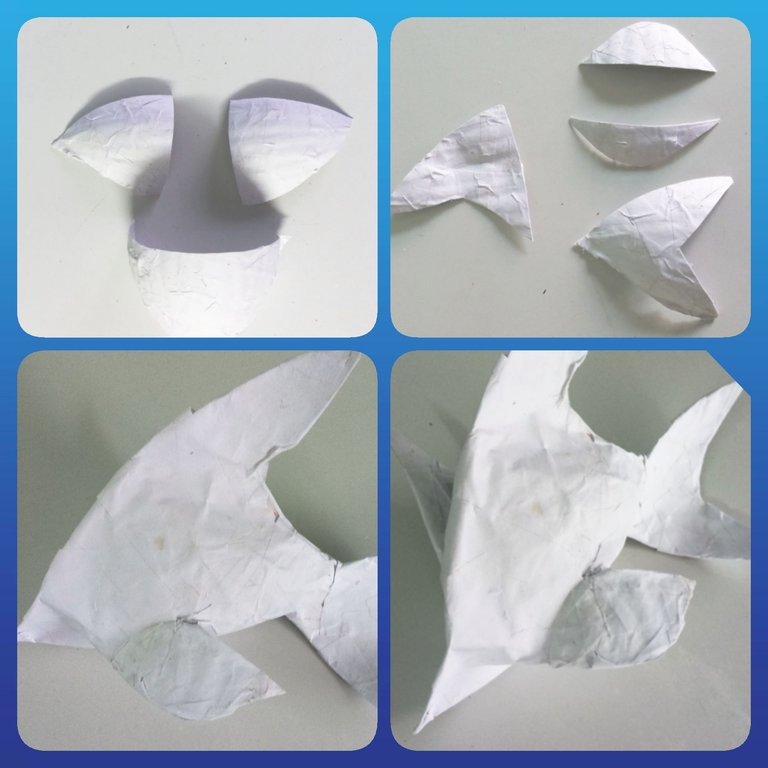
Cabeza y Cuerpo
1-Recortar dos triángulos medianos de cartulina.
2-Colocar entre ambos, papel previamente estrujado, para generarle más volúmen.
3-Darle una capa de empapelado a la estructura completa.
4-Tomar un lápiz y dibujar en la cartulina la forma de aletas y cola deseada.
5-Recortar utilizando la tijera por la guía trazada.
6-Adherir con pegamento las aletas y colas al cuerpo.
7- Darle una capa de empapelado completamente al delfín, para generarle firmeza.
Ya teniendo nuestra concha marina, tortuga, cangrejo, delfín, pasamos a decorar con pinceles y temperas a nuestro gusto.
El azul, naranja, verde, rojo , amarillo , fueron algunos de los colores que escogí para darle vida a mis colgantes marinos.
Además, le adherí pequeñas piedresitas brillantes con pegamento, para que relucieran al compás de los bombillitos luminosos que posee el arbolito.
Para colgarlos, realizamos pequeños aritos de la siguiente forma: Cortamos dos centímetros de cable y lo adherimos con pegamento a la estructura.
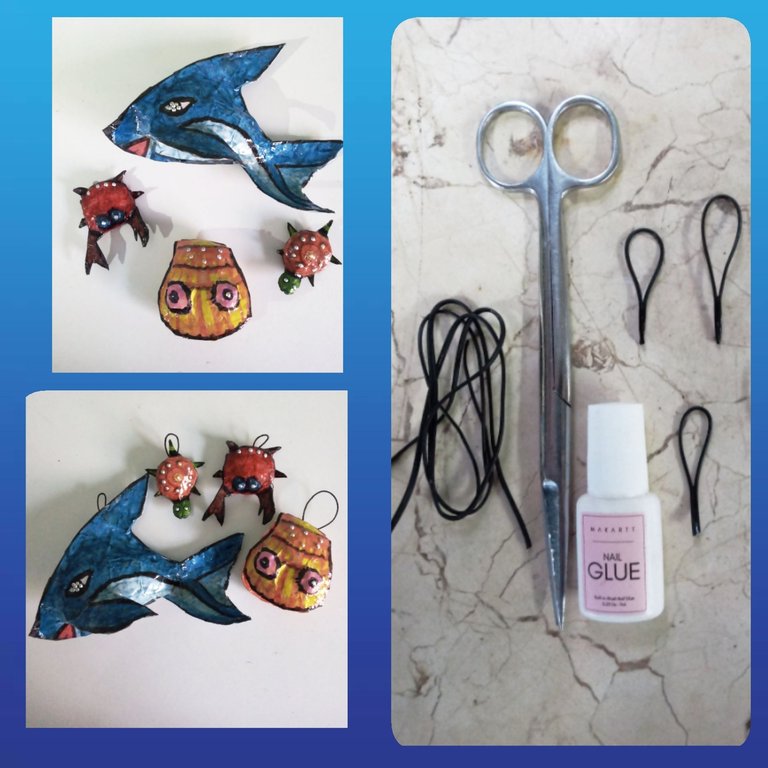
Amigos espero que les hayan gustado la confección de estos colgantes marinos, también utilizados, para decorar llaveros, cadenas y collares.
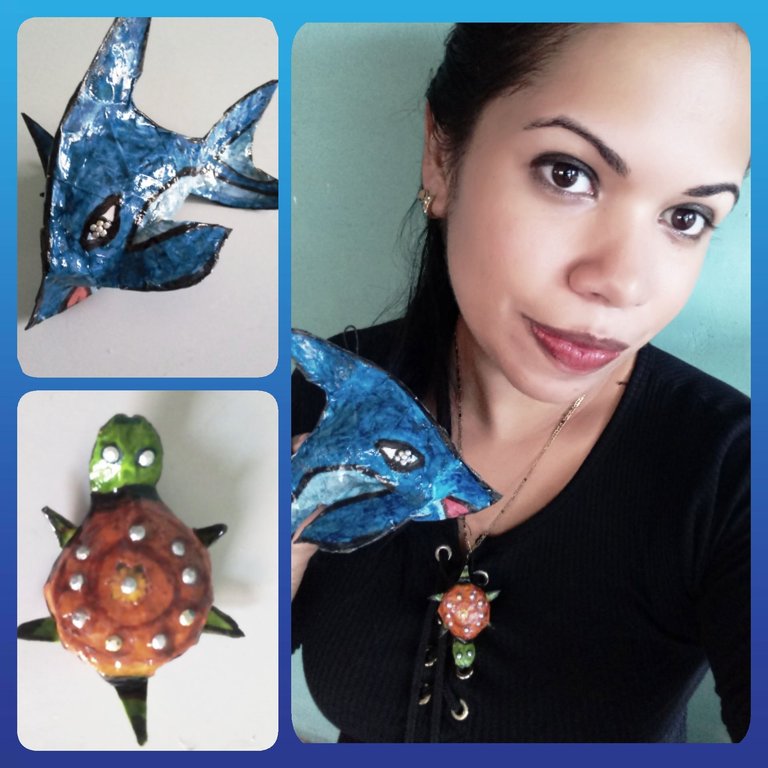
Los invito a que se animen y disfruten reecreándolos. Les aseguro que serán los colgantes marinos, un gran atractivo en sus hogares y arbolitos navideños.
Bendiciones y excelentes días a todos🙋🎄🐬🐢
English
Greetings fellow creators.🙋🎄🌊
The balance of the elements water, fire, air, earth, is vital for our existence and that of other living beings.
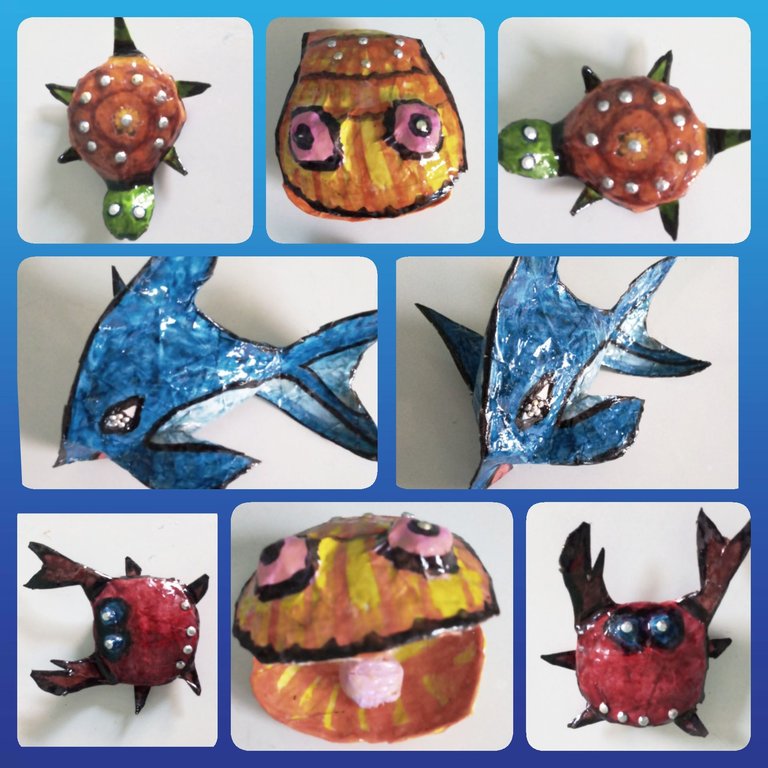
Today, inspired by the water element🌊, I bring you as a tutorial the making of the marine pendants that will adorn my Christmas tree this year, which is full of life and color, thanks to the themes addressed by the community and the beautiful inspiring creations shared by you.
These pendants resemble the structure of: a dolphin, a shell, a turtle and a small crab, which represent the various species to whom this vital element serves as a home.
Materials
.Mould:Round object
.Paper
.White paper strips
.Paste made of flour
.Glue
.Scissor
.Thin wires
.Temperas
.Brush
.Varnish
.Small shiny stones.
Mode of preparation.
To make my four confections, I had to first make three layers of wallpaper to the round mold, with strips of white paper and the glue made of flour. I let it dry for twelve hours and then using a scissors I ginned it obtaining two halves of equal diameter.

You may be wondering, friends, why did I make this garment in the first place?. Well, I do this method when I lack cardboard and cardboard, because it allows me to obtain a material with the thickness similar to both. I recommend this method, for when you need a thicker material than paper and do not have cardboard and cardboard at hand. You can use any other mold, I selected this round, because it will favor me for the decorations that I will share below. To refer to the material obtained I will do it by: cardboard.
Little turtles.

For the shell
1-Cut two small circles of equal diameter on the cardstock.
2-Squeeze paper and insert it between both circles.
3-Wallpaper with strips of white paper and glue the whole structure made of flour. Leave to dry for eight hours.
Head
1-Squeeze paper into a small ball.
2-Attach it with glue to the front of the shell.
Legs and tail
1-Cut out five small triangles from the cardstock.
2-Adhere to the shell.
Concha

1-Cut on the cardboard two medium circles resembling them to seashells.
2-Give a layer of wallpaper to both structures.
3- Join at one of its vertices using strips of white paper and glue made of flour.
Pearl
1-Squeeze paper into a small ball.
2- Give a layer of wallpaper with strips of white paper and paste made of flour.
Crab

Carapace
1-Cut from the cardboard, two small circles of equal diameter.
2-Insert previously squeezed paper between both circles.
3-Give a layer of wallpaper to the complete structure.
Paws
1-Cut out on the cardboard, small triangles forming the legs, for the front legs, make cuts to generate the appearance of the finish in huge tweezers.
2-Adhere them with glue, to the shell.
Eyes
1-Squeeze paper into two small balls.
2-Adhere with glue on the top of the shell.
Dolphin

Head and Body
1-Cut out two medium triangles from cardboard.
2-Place between both, previously squeezed paper, to generate more volume.
3-Give a layer of wallpaper to the complete structure.
4-Take a pencil and draw on the cardboard the desired shape of fins and tail.
5-Cut using the scissors by the traced guide.
6-Glue the fins and tails to the body.
7- Give a layer of wallpaper completely to the dolphin, to generate firmness.
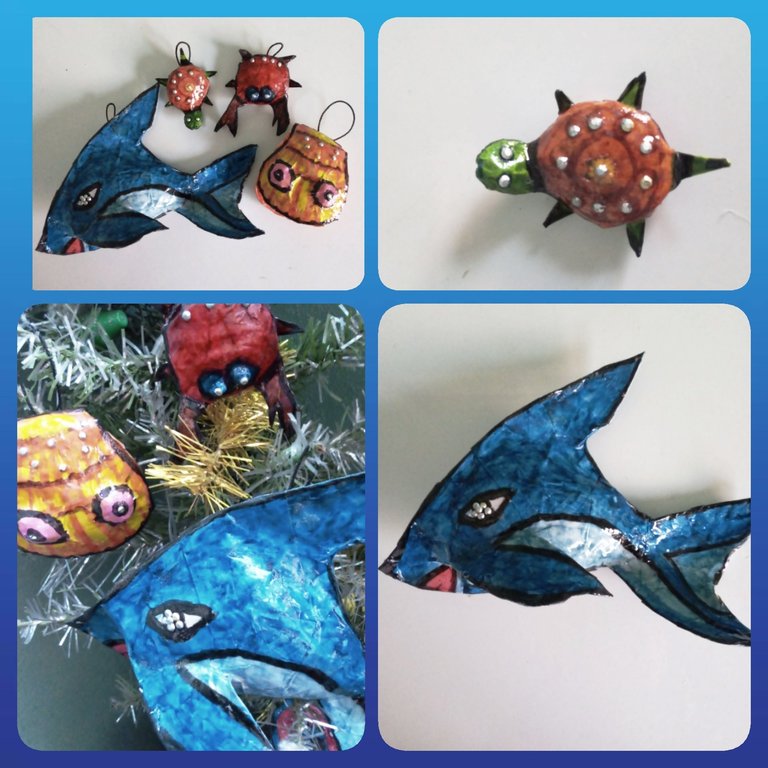
Already having our seashell, turtle, crab, dolphin, we went on to decorate with brushes and tempera to our liking.
Blue, orange, green, red, yellow, were some of the colors I chose to give life to my marine pendants.
In addition, I attached small shiny pebbles with glue, so that they shone to the rhythm of the luminous bulbs that the little tree has.
To hang them, we make small rings as follows: We cut two centimeters of cable and adhere it with glue to the structure.

Friends I hope you liked the making of these marine pendants, also used, to decorate key chains, chains and necklaces.

I invite you to cheer up and enjoy re-creating them. I assure you that they will be the marine pendants, a great attraction in your homes and Christmas trees.
Blessings and great days to all🙋🎄🐬🐢
muy creativos, están geniales!
very creative, they look great!
Muchas gracias.Bendecidos días🙋🎄🌈.
Thank you very much. Blessed days🙋🌈🎄
Your work is very interesting, a good way to reuse waste materials and make decorative pendants. Thank you for sharing your creative process in our community.
Thank you very much. The topics discussed in the community are very inspiring. Blessings and great days🙋🌈.