Hello dear Diyhub crafters community, I hope you are full of love and lots of health.
Today I'm joining this wonderful #DIYHALLOWEEN contest that makes me super excited, thinking of how many things I can come up with, from now until the end of this spooky creative moment.
I come to share with you a tutorial to make a pumpkin chandelier decorated with a creepy huge hairy spider that can be terrifying, get it near our house, or in some clothes drawer, walking along the walls, it really would be a moment to give screams of terror.
The pictures you will see below were taken with my TECNO SPARK GO 2024 model phone.
Hola querida comunidad de artesanos Diyhub, espero estén llenos de amor y mucha salud.
Hoy me uno a este maravilloso concurso #DIYHALLOWEEN que me pone superentusiasmada, pensado en cuantas cosas se me puede ocurrir, desde ahora hasta que culmine este momento creativo espeluznante.
Les vengo a compartir un tutorial para hacer un candelabro de calabaza decorado con una escalofriante araña peluda enorme que puede ser aterradora, conseguirla cerca de nuestra casa, o en algún cajón de ropa, caminando por las paredes, realmente sería un momento para dar gritos de terror.
Las fotografías que verán a continuación, fueron tomadas con mi teléfono modelo TECNO SPARK GO 2024.

Materials and tools / Materiales y herramientas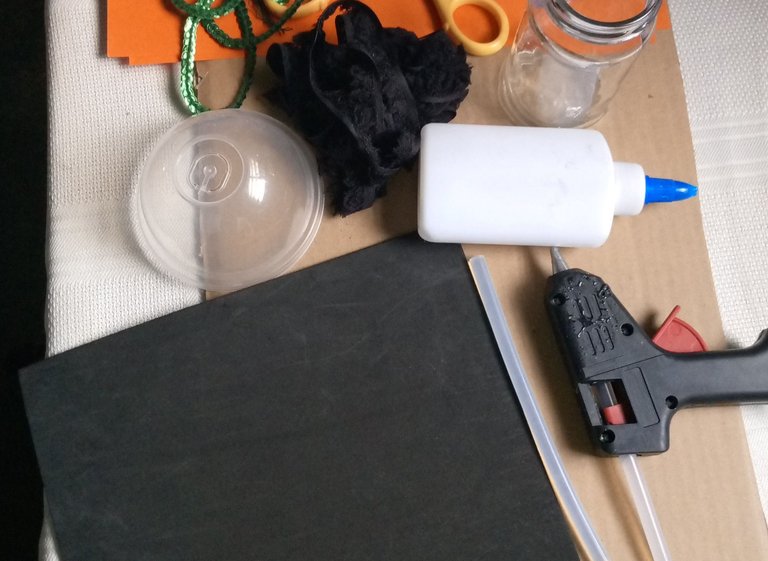 | Step 1 / Paso 1 |
|---|
I love being in this contest atmosphere, where creativity has no limits, to make from a simple paper, fabric or other material something really creepy.
I will begin by mentioning the materials I used and how I started to create each detail to get to make the figures that I achieved.
The materials and tools I used:
2 sheets of paper, orange colored, letter size.
2 meters of black frayed ribbon.
2 green sequins
Black Foami.
3 black costume jewelry beads.
1 glass container.
1 plastic lid
1 Silicone rod
Scissors
White glue
Hot silicone gun
STEPS:
1- I started by joining the 2 sheets of orange colored paper, with white glue, I left to one side of the table, while waiting for the glue to dry.
Me encanta estar en esta atmósfera de concursos, donde la creatividad no tiene límites, para hacer de un simple papel, tela u otro material algo realmente escalofriante.
Comenzaré mencionando los materiales que utilice y como fue que empecé a crear cada detalle para llegar hacer las figuras que logre.
Los materiales y herramientas que utilice:
2 Hojas de papel, de color anaranjado, tamaño carta.
2 Metros de cinta negra deshilada.
2 Lentejuelas verdes
Foami color negro.
3 Cuentas de bisutería de color negro.
1 Envase de vidrio.
1 Tapa de plástico
1 Barra de silicona
Tijera
Pega blanca
Pistola para silicona caliente
PASOS:
1- Empecé uniendo las 2 hojas de papel de color anaranjado, con pega blanca, deje a un lado de la mesa, mientras esperaba el secado de la pega.
Step 2/ Paso 2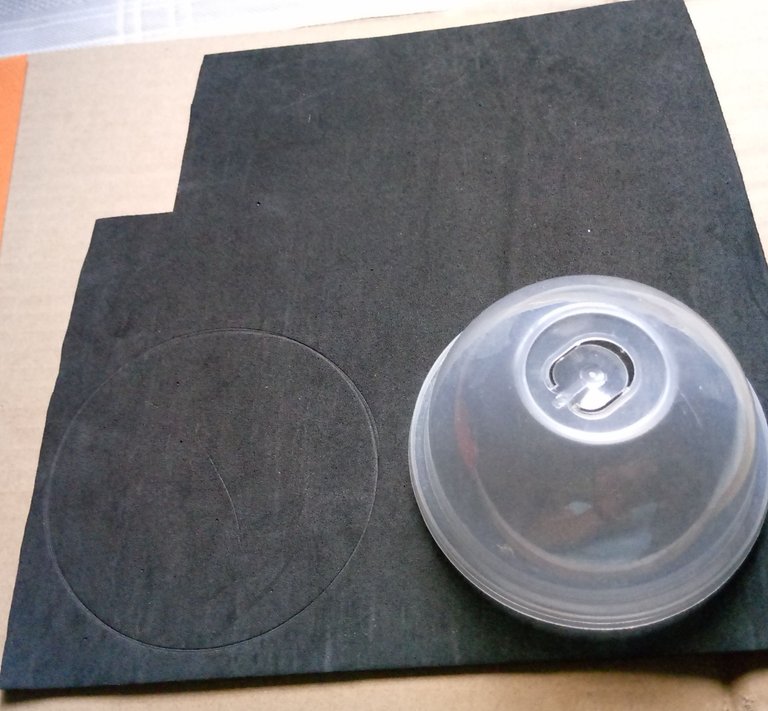 | Step 3 / Paso 3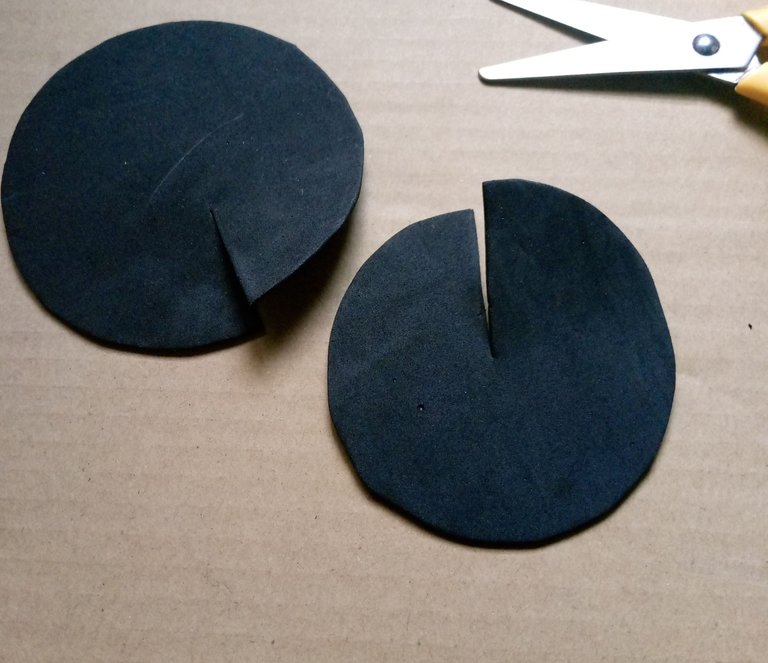 |
|---|
Step 4 / Paso 4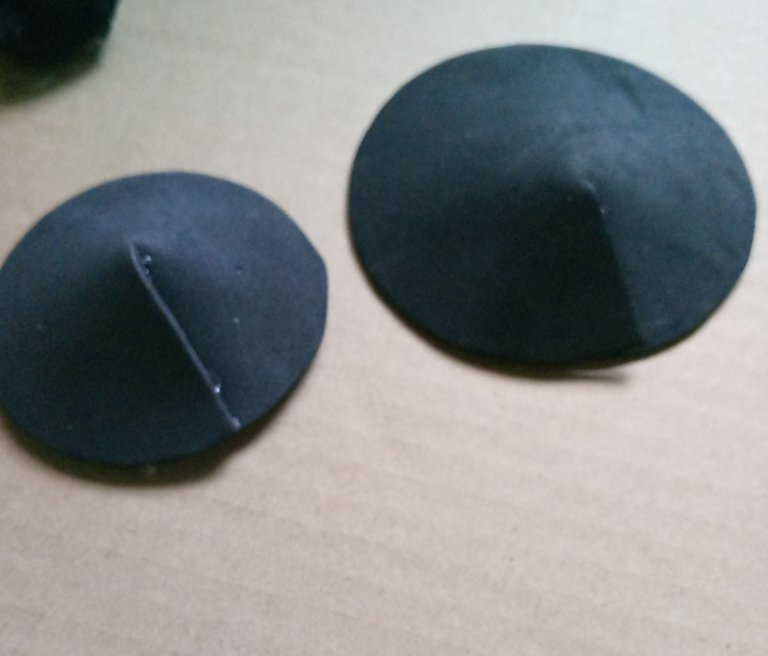
Taking advantage of the time while the glue was drying, I started making the spider's body.
Steps 2-3-4 Using the plastic lid and a piece of black foami, place the leg on the foami and press to mark the circular shape of the lid, then cut out the circles, and made a cut to the center of the circle, I closed them with hot silicone, making the shape of a Chinese hat.
The size of the spider's body should be 1 cm wider than the head, if you don't have 2 lids of different sizes, cut 1 cm less.
Aprovechando el tiempo mientras la pega secaba, comencé hacer el cuerpo de la araña.
Pasos 2-3-4 Utilizando la tapa de plástico y un trozo de foami de color negro, ubique la pata sobre el foami y presione para marcar la forma circular de la tapa, después recorte los círculos, y le hice un corte hasta el centro del círculo, los cerré con silicona caliente, haciendo la forma de un sombrero chino.
El tamaño del cuerpo de la araña, debe ser 1 cm más amplio que la cabeza, si no cuentas con 2 tapas de diferentes tamaños, recorta 1 cm, menos.
Step 5 / Paso 5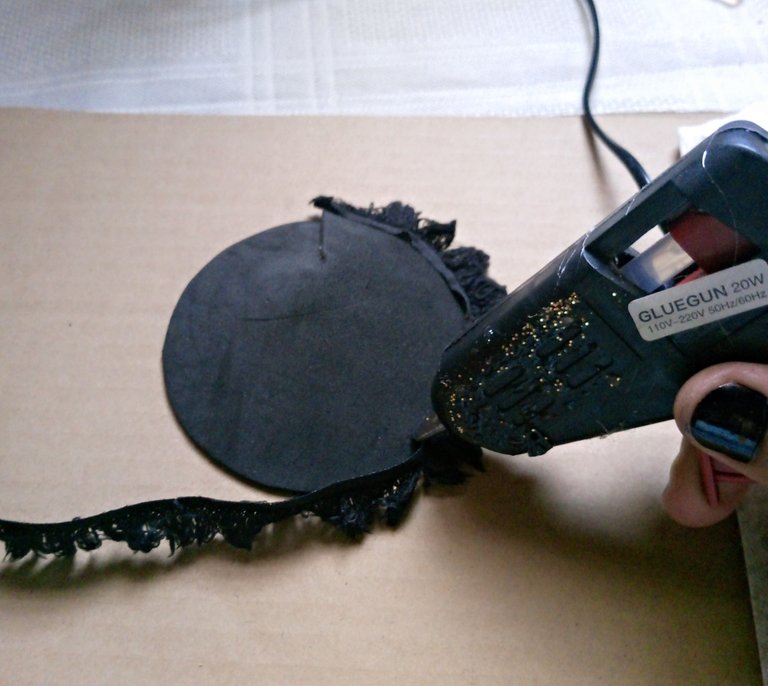 | Step 6 / Paso 6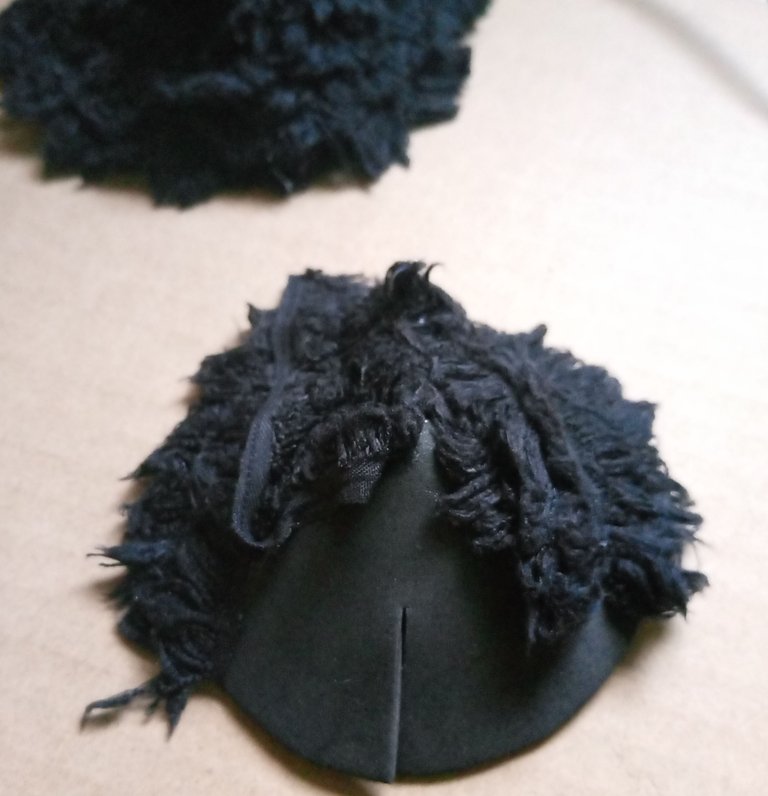 |
|---|
Step 7 / Paso 7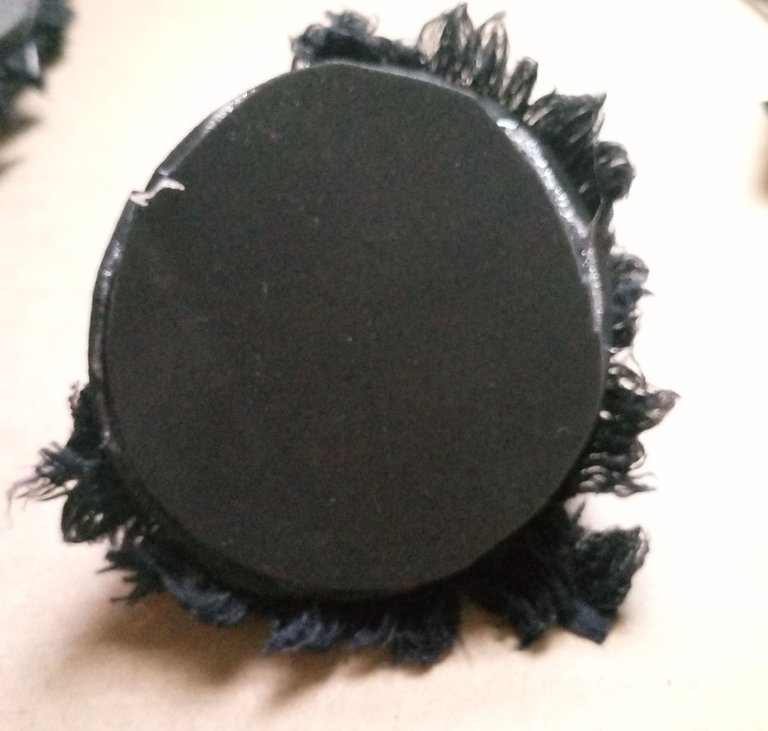
Steps 5-6-7
I started covering the body parts of the spider with the frayed tape, hot glue the tape in a circular fashion until I covered the center of the body.
For the head of the creepy spider, I left a quarter of a half uncovered with tape to make the face.
Then with another circle of foami of the same size as the previous ones, tape the spider's body and head underneath.
Pasos 5-6-7
Empecé a cubrir las partes del cuerpo de la araña, con la cinta deshilada, pegue con silicona caliente la cinta, de forma circular hasta llegar a cubrir el centro del cuerpo.
Para la cabeza de la espeluznante araña, deje un cuarto de mitad sin cubrir con cinta para hacer la cara.
Luego con otro círculo de foami de la misma medida que los anteriores tape por debajo el cuerpo y cabeza de la araña.
Step 8 / Paso 8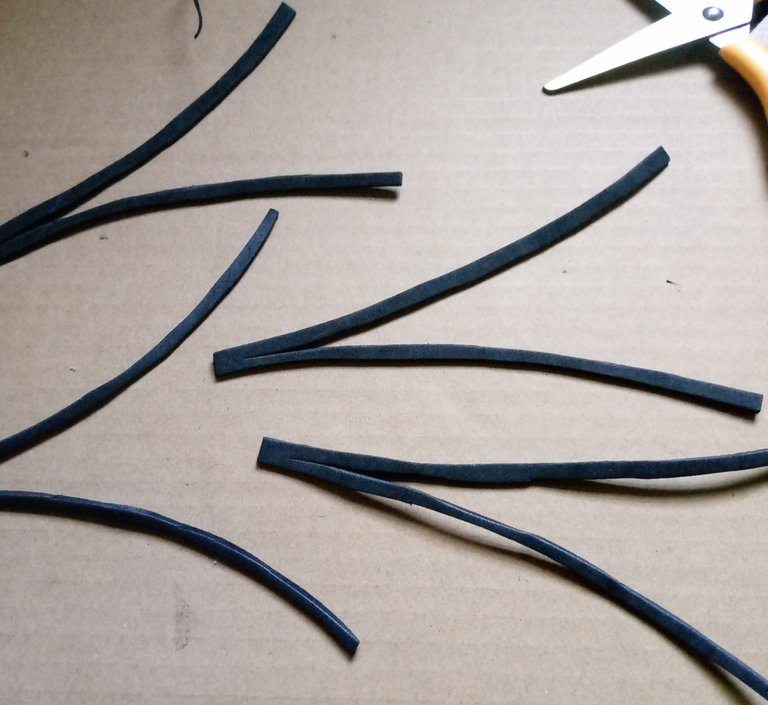 | Step 9 / Paso 9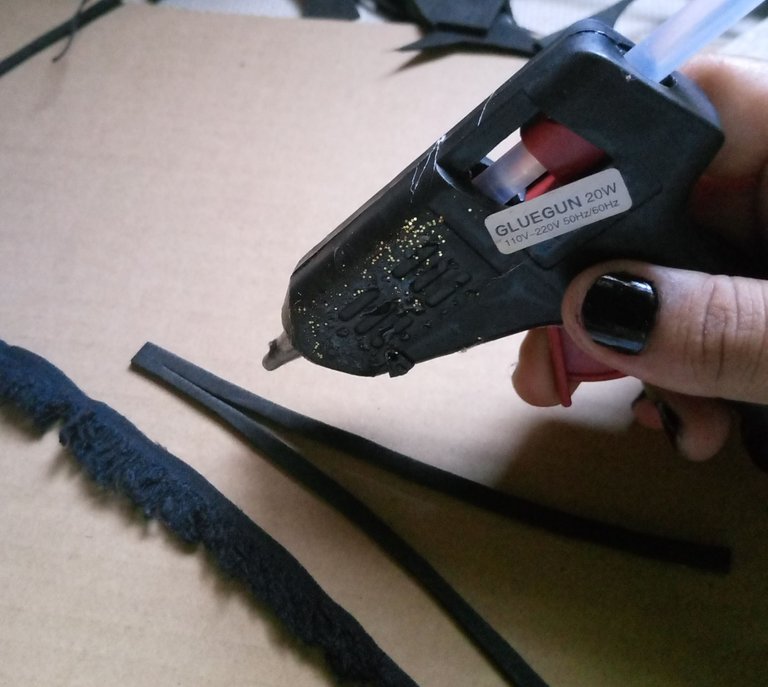 |
|---|
Step 10 / Paso 10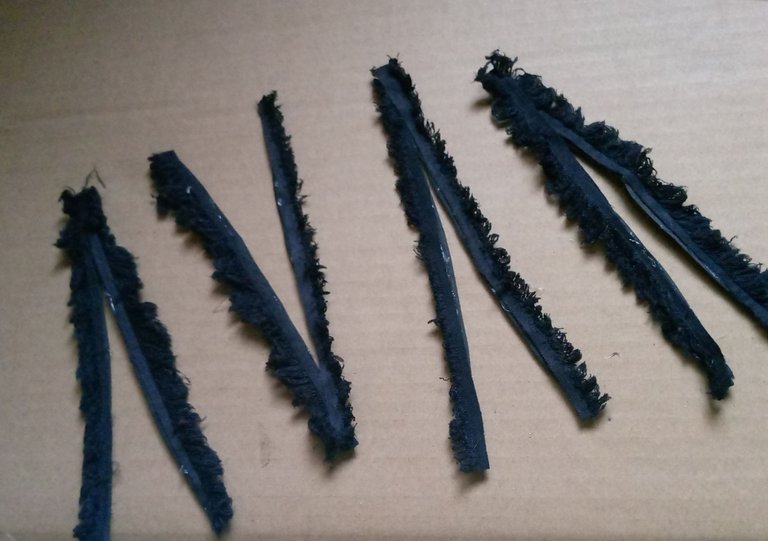
Steps 8-9-10
Using the leftover black foami, I made the legs from a foami ribbon that I cut 1 cm wide by 11 cm long, each 1, in total there are 4 rectangles to make 8 legs, these I cut in half to make the 8 legs.
I then lined the legs with the fuzzy black ribbon and glued them with hot silicone.
Pasos 8-9-10
Utilizando los sobrantes de foami negro, hice las patas que son de una cinta de foami que corte de 1 cm de ancho por 11 cm de largo, cada 1, en total son 4 rectángulos para hacer 8 patas, estos los corte por la mitad para hacer las 8 patas.
Seguido forre las patas con la cinta negra peluda pegando con silicona caliente.
Step 11 / Paso 11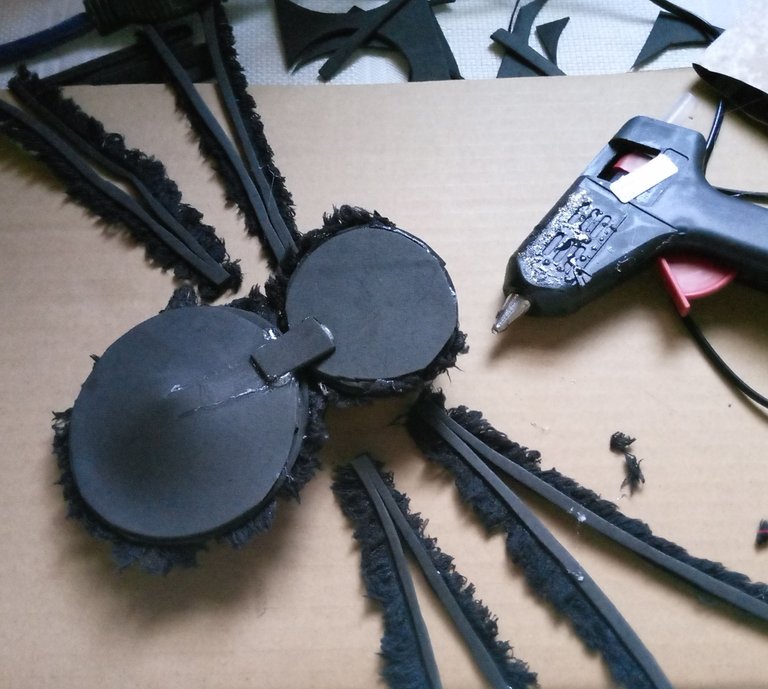 | Step 12 / Paso 12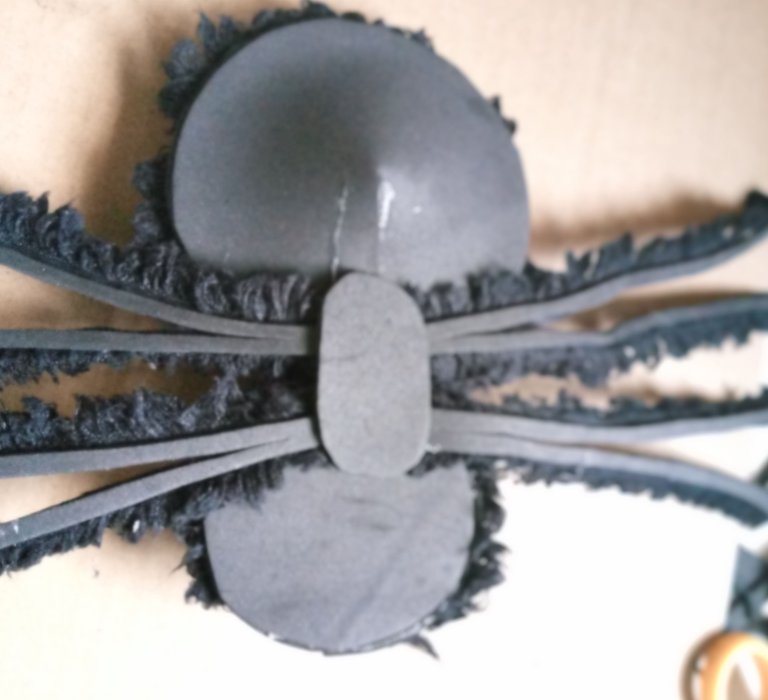 |
|---|
Step 13 / Paso 13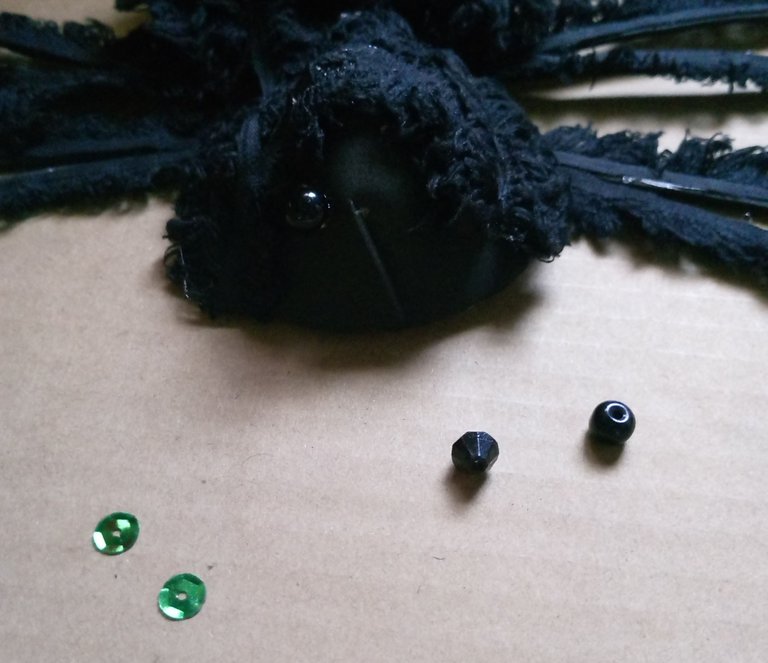
Steps 11-12-13
I positioned the spider body upside down, and with hot silicone I glued the legs, 4 legs on one side and 4 legs on the other side, on these I glued an oval to better fix the legs and cover aesthetic details.
After the legs were firmly in position, I turned the spider over and started gluing the eyes and mouth with black beads, sequins and hot silicone.
Pasos 11-12-13
Posicione el cuerpo de la araña volteado, y con silicona caliente pegue las patas, 4 patas de un lado y 4 patas del otro lado, sobre estas pegue un óvalo para fijar mejor las patas y cubrir detalles estéticos.
Después que las patas estaban firmes en su posición, le di la vuelta a la araña y empecé a pegarle los ojos y la boca con las cuentas negras, lentejuelas y silicona caliente.
Step 14 / Paso 14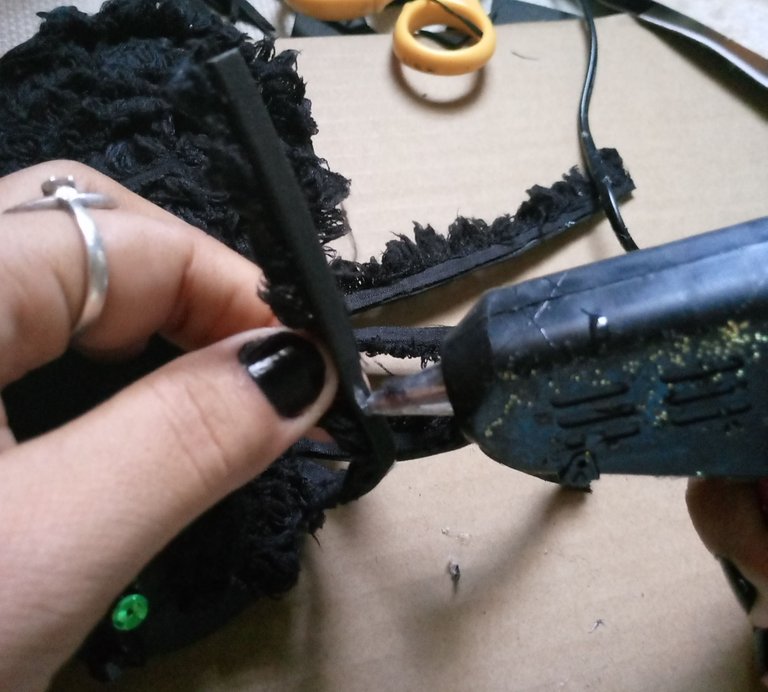 | Step 15 / Paso 15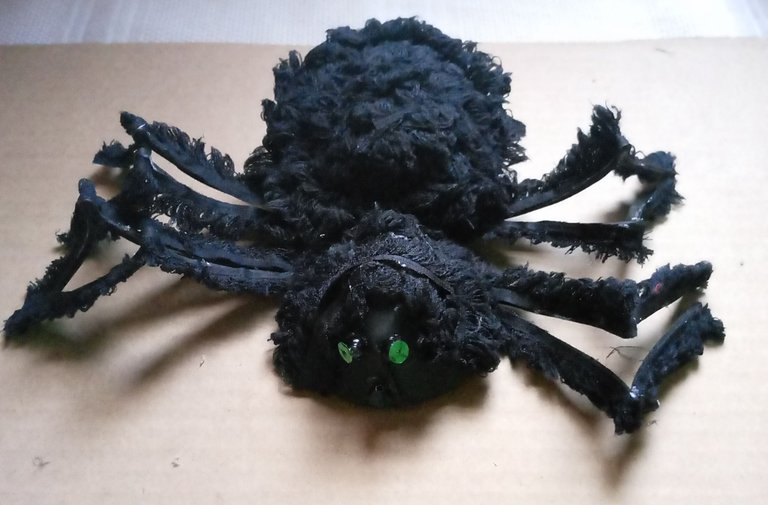 |
|---|
Steps 14-15
To give more realism to the legs of the spider, fold the leg in half, glue with silicone and put pressure with thumb and forefinger to shape and fix them.
We can see the creepy result of this cute spider creation.
Pasos 14-15
Para darle más realismo a las patas de la araña doble la pata por la mitad, pegue con silicona e hice presión con los dedos pulgares e índice para darle la forma y fijarlas.
Podemos ver el escalofriante resultado de esta creación de araña mona.
Step 16 / Paso 16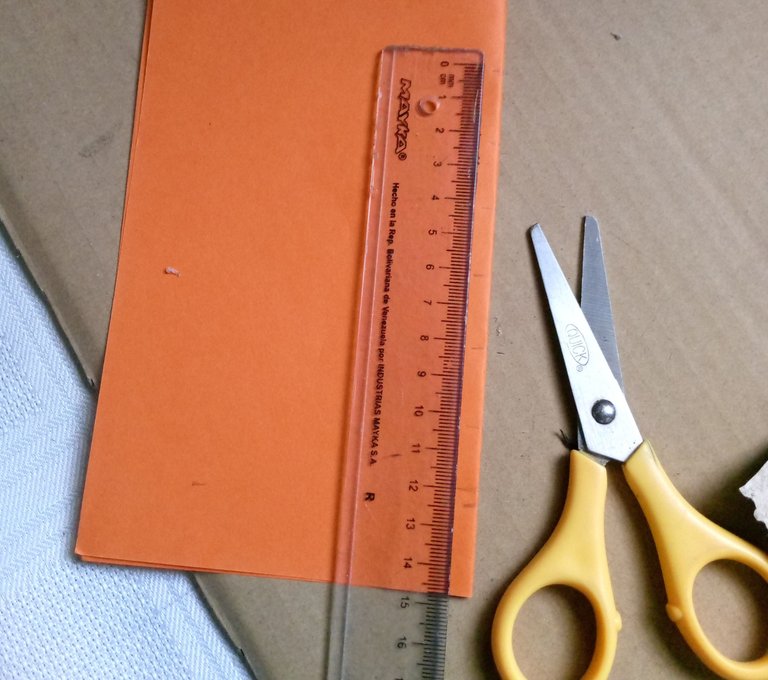 | Step 17 / Paso 17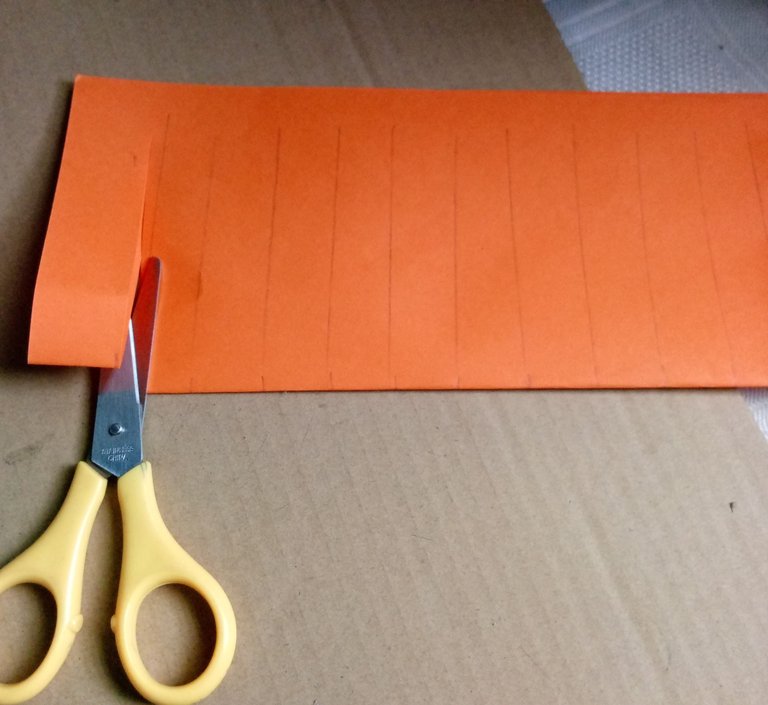 | Step 18 / Paso 18 |
|---|
Steps 16-17-18
In all this course of time that I took to make the chandelier the paper sheets were totally dry, I thought to make the chandelier first, but I got so excited making the chandelier, that I had forgotten the pumpkin chandelier, the same is simple to make so I went first for the most complex.
I took the orange sheets of paper, folded them horizontally and measured 2 cm marked with the ruler and pencil, and then cut and glued all around the contour of the glass container, both the top and the bottom side of the container.
Pasos 16-17-18
En todo este transcurso de tiempo que me tome para hacer la araña las hojas de papel estaban totalmente secas, pensé hacer el candelabro en primer lugar, pero me entusiasme haciendo la araña, que había olvidado el candelabro de calabaza, el mismo es sencillo de hacer por eso me fui primero por lo más complejo.
Tome las hojas de papel color anaranjado, las doble en forma horizontal y medí 2 cm marcados con la regla y el lápiz, para luego cortar, y pegar por todo el contorno del envase de vidrio, tanto del lado superior, como del lado inferior, del envase.
Step 19 / Paso 19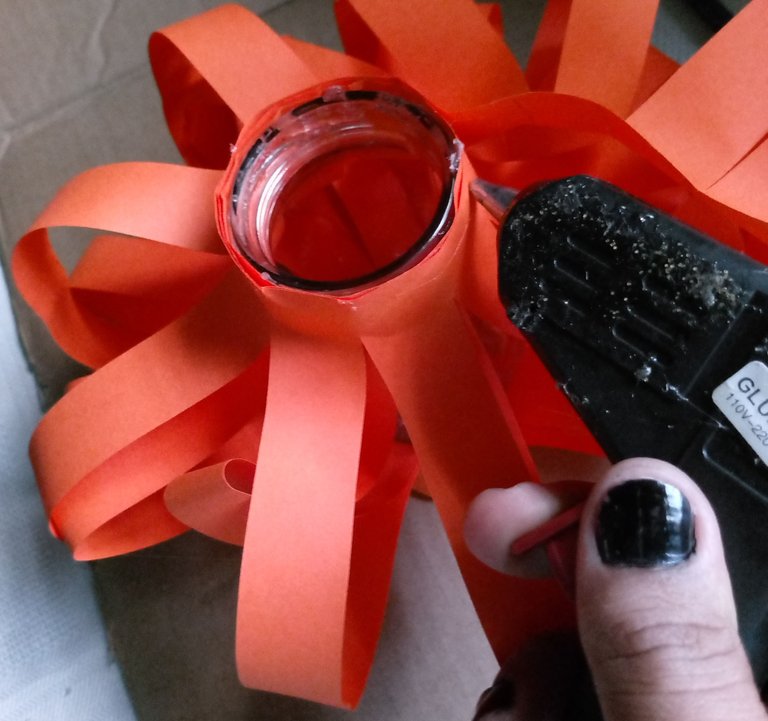 | Step 20 / Paso 20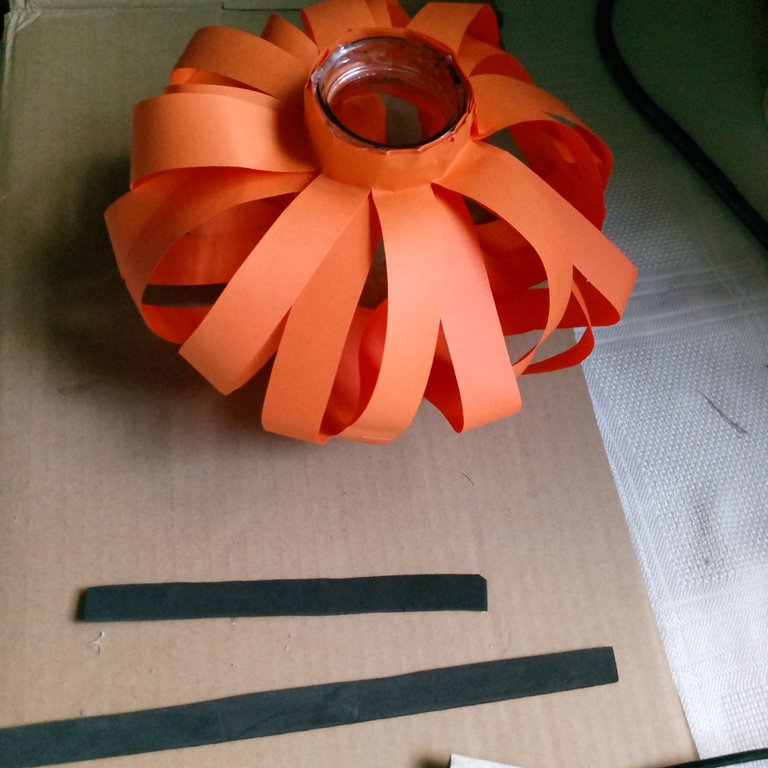 | Step 21 / Paso 21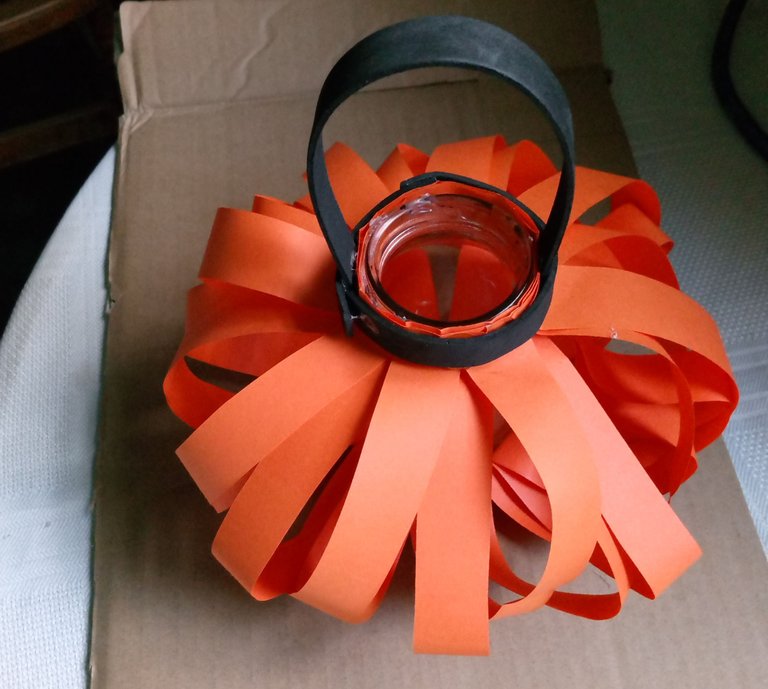 |
|---|
Final result / Resultado final 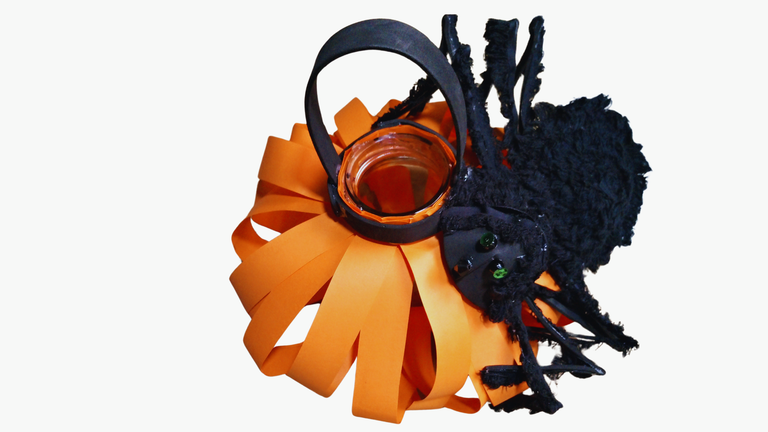
Steps 19-20-21
In the following steps, we can see how the candelabra looks like, after gluing the orange paper sheets, with the respective cuts, these sheets were glued making 2 laps around the contour of the container and gluing the top and bottom side to give as a result the shape of volume.
On the mouth of the glass container, on each side of the contour glue a black foami tape, 17 cm long by 2 cm wide, for the handle, then fix with another tape that goes over the handle, along the contour of the container, at this time I decorate the chandelier with the creepy and hairy black spider, ending my publication of the day with Halloween theme for this emotional contest that invites us this dear community DiyHub, I hope you like it and do not stop participating, it is fun and entertaining to be here with all of you, a big hug for everyone.
Thanks for visiting.🙂🤗💞
Pasos 19-20-21
En los siguientes paso, podemos observar como queda el candelabro, luego de pegar las hojas de papel anaranjado, con los respectivos cortes, estas hojas fueron pegadas haciendo 2 vueltas por el contorno del envase y pegando del lado superior e inferior para que de como resultado esa forma de volumen.
Sobre la boca del envase de vidrio, por cada lado del contorno pegue una cinta de foami negro, de 17 cm de largo por 2 cm de ancho, para el asa, luego fije con otra cinta que va encima del asa, por el contorno del envase, en este momento decoro el candelabro con la araña negra escalofriante y peluda, finalizando mi publicación del día con temática de Halloween para este emotivo concurso que nos invita esta querida comunidad DiyHub, espero que animen les guste y no dejen de participar, es divertido y entretenido estar aquí con todos ustedes, un gran abrazo para todos.
Gracias por la visita.🙂🤗💞
social networks / redes sociales
![]()
![]()
Traductor Deepl
Translated Deepl
Ediciones Canva
Editions Canva


Hey Laura, great post. Thanks so much for sharing this awesomeness in the community, it's very eye catching the final result and the step by step images are very detailed, happy to have your creativity on DIYHub...
I am very grateful with your support and comment, I am glad you liked the whole step by step, this is flattering.
This post has been manually curated by @bhattg from Indiaunited community. Join us on our Discord Server.
Do you know that you can earn a passive income by delegating to @indiaunited. We share more than 100 % of the curation rewards with the delegators in the form of IUC tokens. HP delegators and IUC token holders also get upto 20% additional vote weight.
Here are some handy links for delegations: 100HP, 250HP, 500HP, 1000HP.
100% of the rewards from this comment goes to the curator for their manual curation efforts. Please encourage the curator @bhattg by upvoting this comment and support the community by voting the posts made by @indiaunited.
Thank you for supporting my content, @indiaunited and @bhattg🤗💙
This candle holder is quite impressive. It does look spooky at first glance. The spider web is a nice touch too. Bravo
Thank you for always supporting me, and giving me your wonderful comments. @diyhub💞
🤝