(ENG)
Hello everyone, I am pleased to be with you today, wishing you are well, enjoying success and blessings, and in this community, lover of DIY @diyhub. Today I come to show you a beautiful and very nice project, "Amigurumi Dancing Bunny" is a beautiful and very delicate bunny, it is suitable for decorating any space in the room of the darlings of the house, it could even be one of their favorite stuffed animals or toys. . Without further ado, the invitation is to follow me. And I show you how it's done.
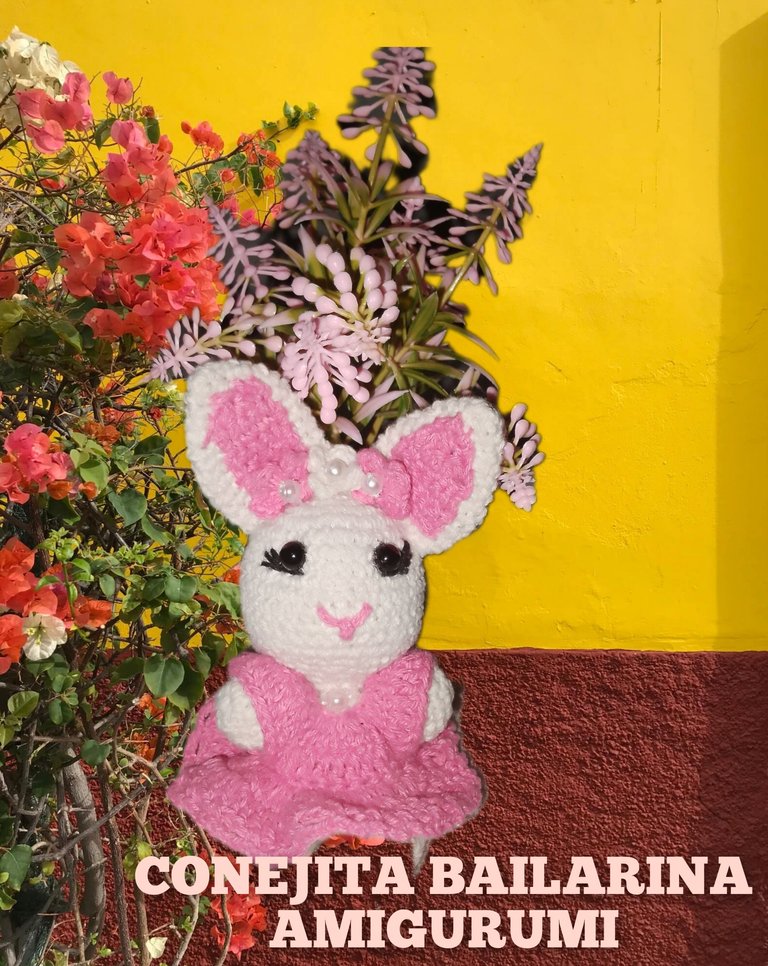
Materials:
. Wick yarn, for knitting, colors (white and pink, black)
. Knitting needle.
. Wool needle.
. Wadding or filling.
. Two flat beads n4.
. Glue.
. Scissors.
. White pearls.
STEPS:
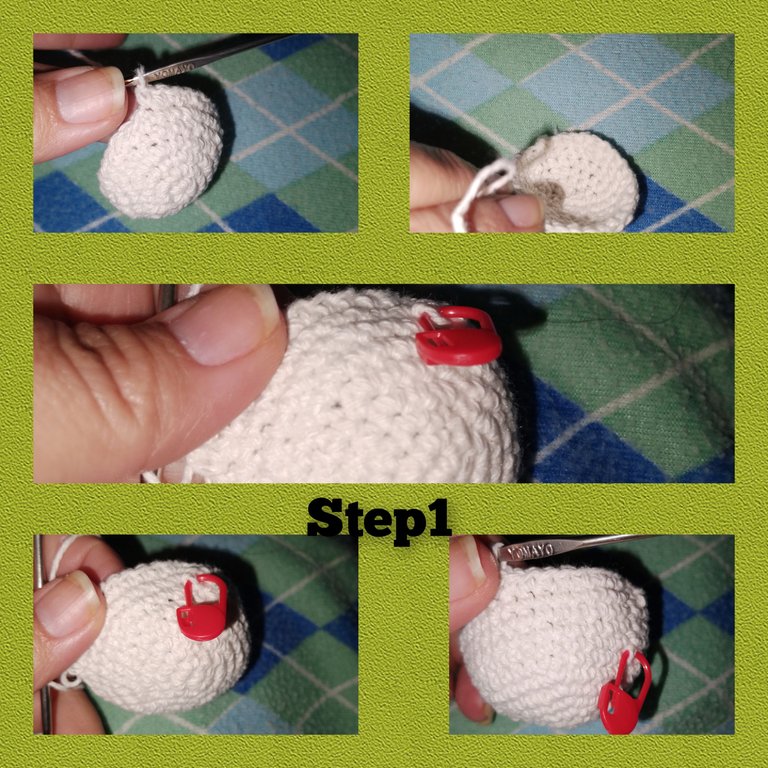
1.) In a magic ring, I knit six single crochets, I close the ring and join the ends, with a slip stitch, the next round I will knit an increase in each single crochet, for (12p), for the third pass, I will knit: 1 sc , and an increase for (18p). For row four: 2 sc, for 24p). And for the fifth, 3pb, plus an increase, to obtain (30p). Knitting 8 rows of (30p).
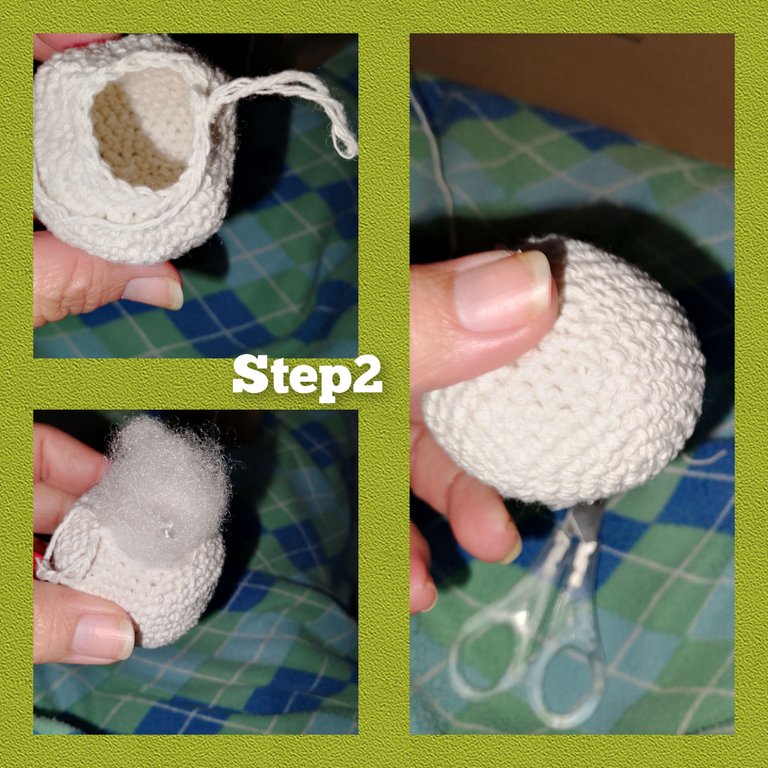
2.) I continue knitting the head of the bunny, and from round n13, I begin to make decreases, to do this, I start knitting, from round n5, but instead of increasing I make decreases, in the same way, row four, three and two, simple attention to decrease, reaching row 17, I place the filling and knit six decreases in row 18. The head of the bunny is now formed.
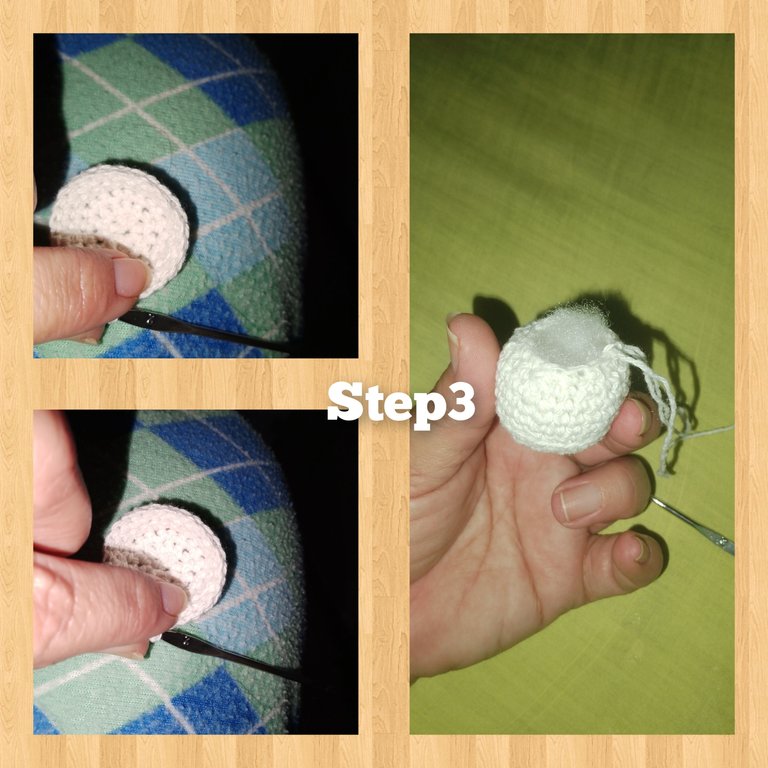
3.) Continue, weaving to form the body this time. That's a better size than the previous one, but in the same way, I knit in a magic ring, 6sc. And I close. I knit an increase in each stitch, for (12sc), for round n3, I knit sc, plus an increase for (18sc). The next one will be three bp. For (24sc), this way, I continue and knit three rounds of (24sc). From round number eight, I begin to decrease to form the small balloon, which will be the body of the bunny. So I fill and close with six decreases on the round. I take advantage and with the wool needle, I glue these two pieces together. You can glue them when you have all the pieces ready...but I am ambitious and I like to see how it turns out.
4.) In this step, I will knit the symbolic and large ears of the bunny. I knit a magic ring and six half stitches, I knit round two and three, of its half stitches, in round n4. I knit a sc plus an increase stitch, for row n5, 2 sc plus an increase, n6. Three sc, one increase, for n7, four sc and one increase. For rows 8/12, I will knit only half stitches. In this way I repeat, for the next ear. Beginning. Sew on the ears.
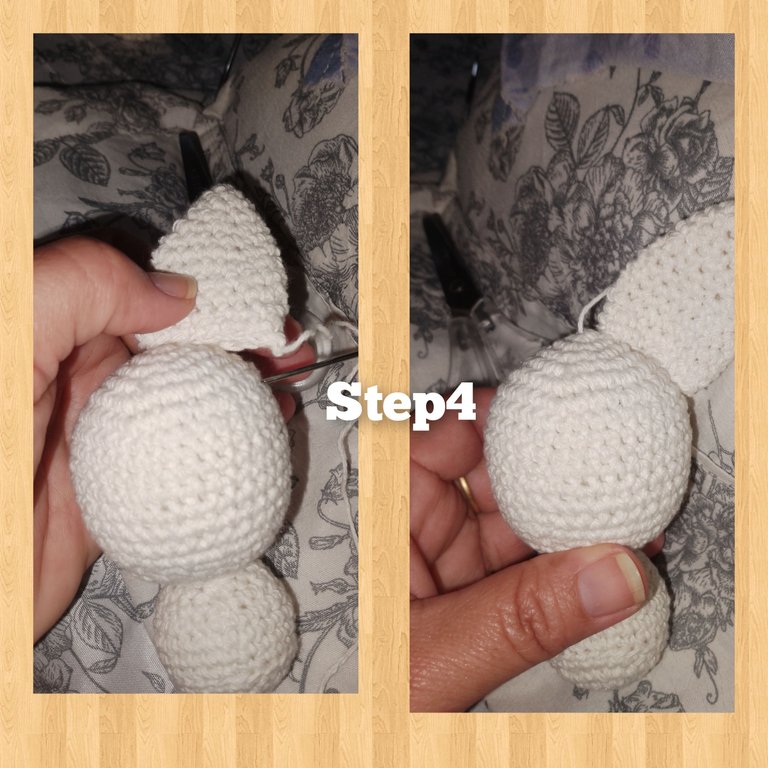
5.) after having glued the ears, I calculate the distance and height of the eyes, doing this to give some depth to the eyes, before gluing them, I pass the needle gently, and apply pressure, to sink the fabric a little and the filling, once this is done, I place a small stitch of glue and glue theeyes.
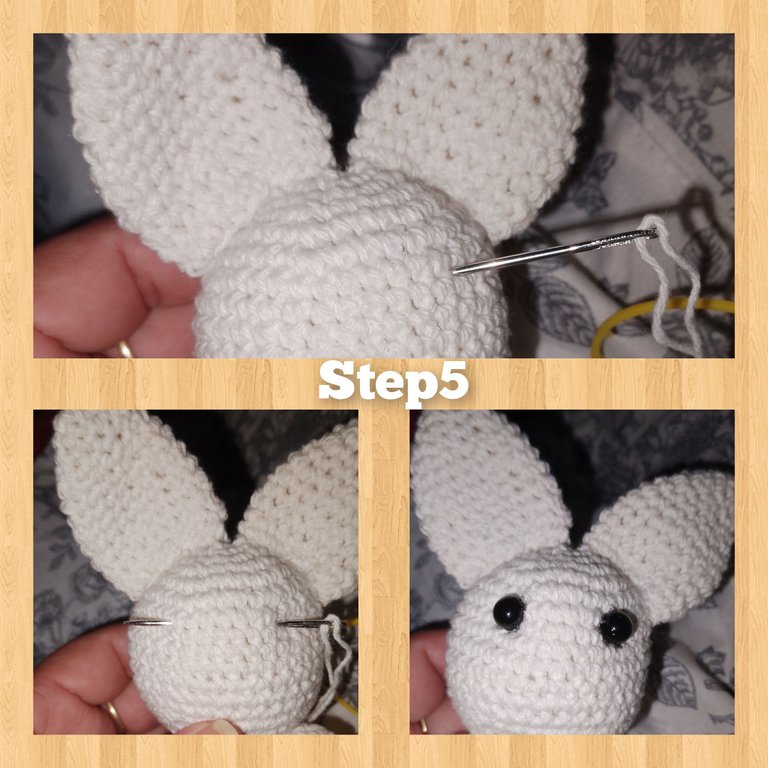
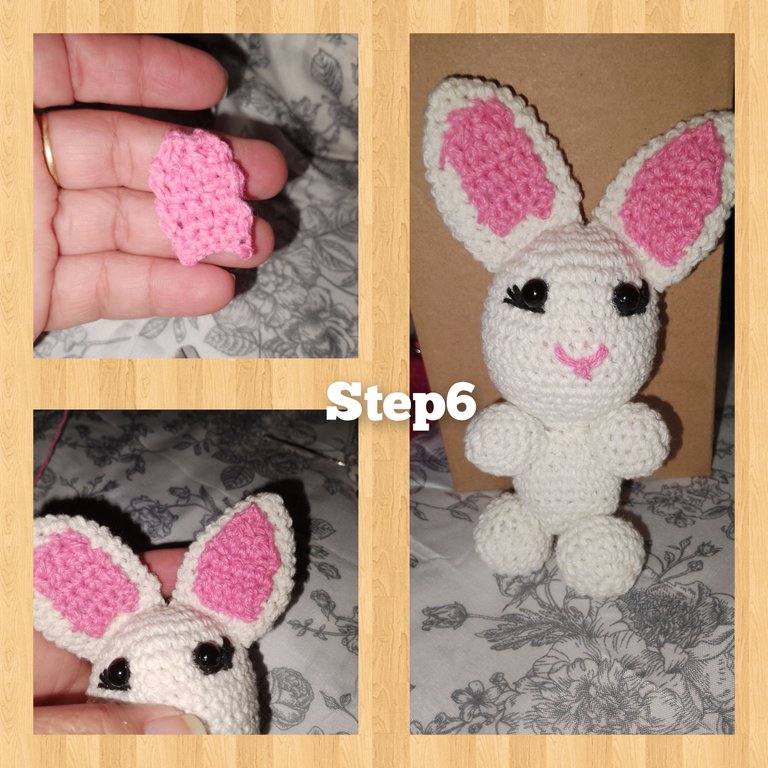
6.) I continue, and after knitting the little arms and legs, which are little balloons of similar size, filled with batting, I start gluing. The little body of the rabbit, whom I embroidered with black thread, delicate eyelashes and a very sweet and pretty smile. She also knit five rounds of half-knit, with the pink thread to stick over the large ear and make it more striking and colorful.
7.) With the pink thread, I knit fifty chain stitches. And inside each of the stitches, I knit three double crochets, I knit one more row, but I will knit a double crochet over each double crochet. I place it on the bunny's neck, and fix it with a slipped stitch. With slipped stitches, I go around to make a cut on both arms, and I knit three rows of double crochets, to give the length to the suit and a row of three chain stitches, leaving two spaces and a half stitches. In this way, the fabric of the suit was completed. I tie at the back, for more adjustment.
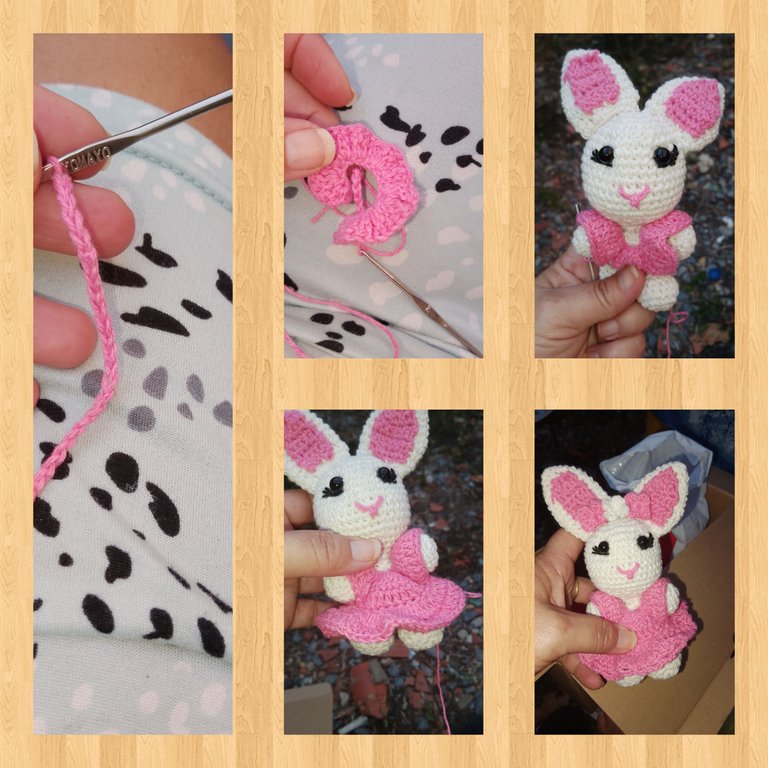
8.) To finish, I knit several small flowers, and with the wool needle, I glue them in the middle of the ears. And inside each flower I glue a small white pearl to add shine, I do the same on the neck of the delicate bunny.
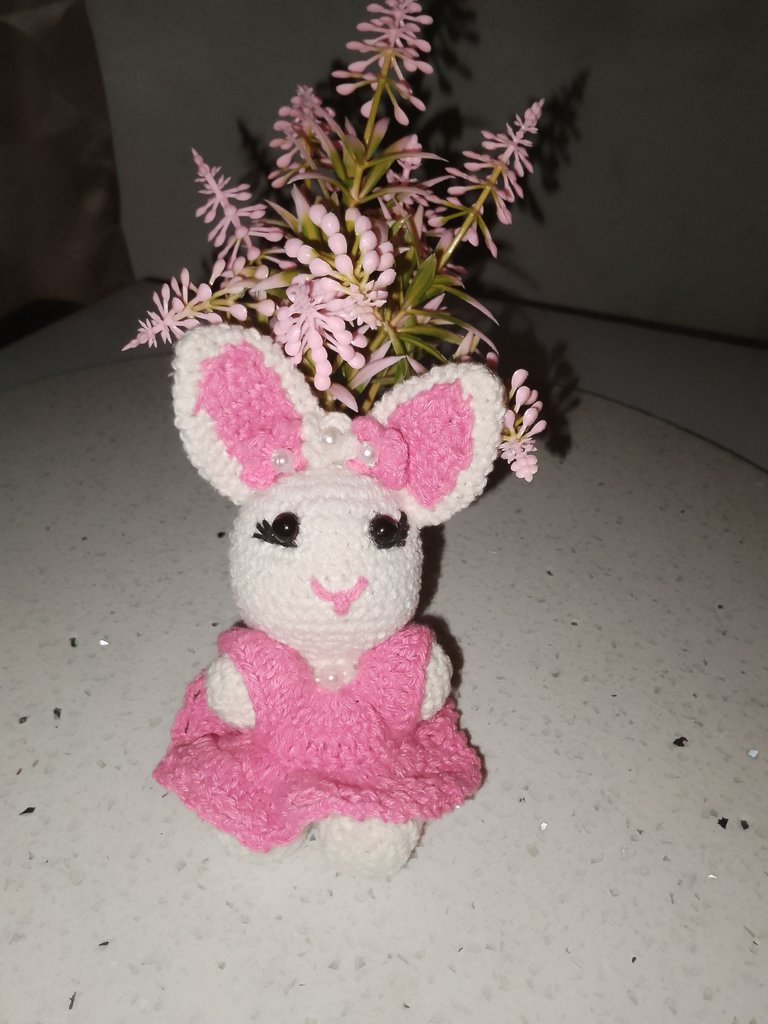
. All photos are my property, taken with my smartphone.
. Use incollage.
. Use language translator.
Grateful for following me to the end, it is always a pleasure to show the latest of my ideas made into a manual project. See you soon.
(ESP)
Hola a todos, me complace acompañarles el día de hoy, deseando se encuentren bien, disfrutando de éxitos y bendiciones, y n esta comunidad, amante de el bricolaje @diyhub. Hoy vengo a mostrar un bonito y muy simpático proyecto, " Conejita Bailarina en Amigurumi" está hermosa y muy delicada conejita, es propia para decorar cualquier espacio en la habitación de las consentidas de la casa, pudiera ser incluso uno de sus peluches o juguetes favoritos. Sin más la invitación es a seguirme. Y les muestro como se hace.

Materiales:
. Hilo pabilo, para tejer, colores (blanco y rosado, negro)
. Aguja para tejer.
. Aguja lanera.
. Guata o relleno.
. Dos perlas planas n4.
. Pegamento.
. Tijeras.
. Perlitas blanco.
PASOS:
1.) En un anillo mágico, tejo seis puntos bajos, cierro el anillo y uno los extremos, con punto deslizado, la siguiente vuelta tejere un aumento en cada punto bajo,para (12p), para la tercera pasada, tejere :1 pb, y un aumento para (18p). Para la pasada cuatro: 2 pb, para 24p). Y para la quinta, 3pb, más un aumento, para obtener (30p).
Tejiendo 8 pasadas de (30p).

2.) continúo tejiendo la cabeza de la conejita, y apartir de la vuelta n13, comienzo a hacer disminuciones, para ello, comienzo tejiendo, desde la vuelta n5, pero en lugar de aumentar hago disminuciones, de igual forma, la pasada cuatro, tres y dos, simple atenta de disminuir, llegado a la pasada 17, coloco el relleno y tejo seis disminuciones en la pasada o vuelta 18. Quedando sí formada la cabeza de la conejita.

3.) Continuo, tejiendo par formar está vez el cuerpo. Espe de mejor tamaño que lo anterior, pero de igual manera, tejo en un anillo mágico, 6pb. Y cierro. Tejo un aumento en cada punto, para (12pb), para la vuelta n3, tejo pb, más un aumento para (18pb). La siguiente será de tres pb. Para (24pb), de esta manera, continuo y tejo tres vueltas de (24pb). A partir de la vuelta número ocho, comienzo a disminuir par formar el pequeño globo, que será el cuerpo de la conejita. Así que relleno y cierro con seis disminuciones en la vuelta.
Aprovecho y con la aguja lanera, pego estas dos piezas. Puedes pegarlas al tener todas las piezas listas...pero yo soy amciosa y me gusta ir viendo como me va quedando.

4.) en este paso, tejere, las simbólicas y grandes orejas de la conejita. Tejo un anillo mágico y seis medios puntos, tejo la vuelta dos y tres, de sus medios puntos, en la vuelta n4. Tejo un pb más un punto de aumento, para la pasada n5, 2pb más un aumento, la n6. Tres pb, un aumento, para la n7, cuatro pb y un aumento. Para las vueltas 8/12, tejere solo medios puntos. De esta forma repito, para la siguiente oreja. Comienzo. Coser las orejas.

5.) luego de haber pegado las orejas, calculo la distancia y altura de los ojos, hecho esto para dar algo de profundidad a los ojitos, antes de pegarlos, paso la aguja con hijo, y hago presión, para hundir un poco el tejido y el relleno, hecho esto, coloco una pequeña puntada de pegamento y pego los ojos.

6.) continuo, y luego de tejer los bracitos y las patitas, que son globitos de similar tamaño, rellenos con guata, comienzo a pegar. El cuerpecito de la coneja, a quien demás bordo, con hilo negro, unas delicadas pestañas y un muy dulce y bonita sonrisa. Tejo además cinco vueltas de medio punto, con el hilo de color rosado para pegar, sobre la grande oreja y hacerla más llamativa y colorida.

7.) con el hilo de color rosado, tejo cincuenta puntos cadenas. Y dentro de cada uno de los puntos, tejo tres puntos altos, tejo una vuelta más, pero tejere un punto alto sobre cada, punto alto. Coloco en el cuello de la conejita, y fijo en el con un punto deslizado. Con puntos deslizado, recorro para hacer un corte en ambos brazos, y tejo tres vueltas de puntos altos, para dar el largo a el traje y un vuelta de tres puntos cadenas, dejo dos espacios y medio puntos. De est forma, culminó el tejido de el traje. Ato por la parte tracera, para dr más ajuste.

8.) para finalizar, tejo varias flores pequeñas, y con la aguja lanera, pego en medio de las orejitas. Y dentro de cada flor pego una pequeña perla de color blanca para dar brillo, así mismo lo hago en el cuello de la delicada conejita.

. Todas las fotos son de mí propiedad, tomadas con mí teléfono inteligente.
. Use incollage.
. Use traductor lenguaje.
Agradecida me hayas seguido hasta el final, siempre es un placer, mostrar lo último de mis ideas, hechas proyecto manual. Hasta pronto.
Más bella y muero.
Hola amiga @katiuskamata me encanta verte aún entusiasmada tejiendo amigurumis 👍 la conejita se ve muy linda con su vestido y esas delicadas pestañas.
Me encantó ver el proceso creativo. Felicidades 🎉 te quedan bonitos los amigurumis. 🙋
Yo emocionada, 🤩 me encanta tejer y conocí a una muy buena amiga que me mostró como hacer esto y no he podido parar... gracias @creacioneslelys
Ainssss niomiooo pero esta conejita si que quedo preciosa, delicadita y muy tierna, me encanto.
Gracias por regalarnos tu paso a paso. Éxitos corazón...
!DIY
Que bueno le haya gustado, @dayadam siempre me complace compartir. Abrazos
Beautiful amigurumi bunny a very tender and delicate work. Thanks for sharing in our community
You can query your personal balance by
!DIYSTATSa community encouraging first-hand content, and each individual living their best life.
Hola mi bella, como sugerencia te digo que no coloques etiquetas de ballenas como OCDB, ni de proyectos como cervantes (igual ya cervantes dejo de existir en hive como proyecto), solo si el proyecto te pide en las reglas hacerlo para mayor visibilidad puedes hacerlo, ya que colocar ese tipo de cosas en tus post no esta bien visto y las ballenas o sus curadores no votan de esa manera, mas bien obtienes mayor visualización colocando las etiquetas adecuadas...
Saluditos corazon...
Gracias cariño, así lo haré a la próxima...no tenía esa información. Agradecida por ello
From Venezuela, our witness drives decentralization and the adoption of Web3 technology, creating opportunities for the local community and contributing to the global ecosystem. // Desde Venezuela, nuestro testigo impulsa la descentralización y la adopción de la tecnología Web3, generando oportunidades para la comunidad local y contribuyendo al ecosistema global.
Sigue, contacta y se parte del testigo en: // Follow, contact and be part of the witness in:
Congratulations @katiuskamata! You have completed the following achievement on the Hive blockchain And have been rewarded with New badge(s)
Your next target is to reach 55000 upvotes.
You can view your badges on your board and compare yourself to others in the Ranking
If you no longer want to receive notifications, reply to this comment with the word
STOP